All Users
All User(s) Overview
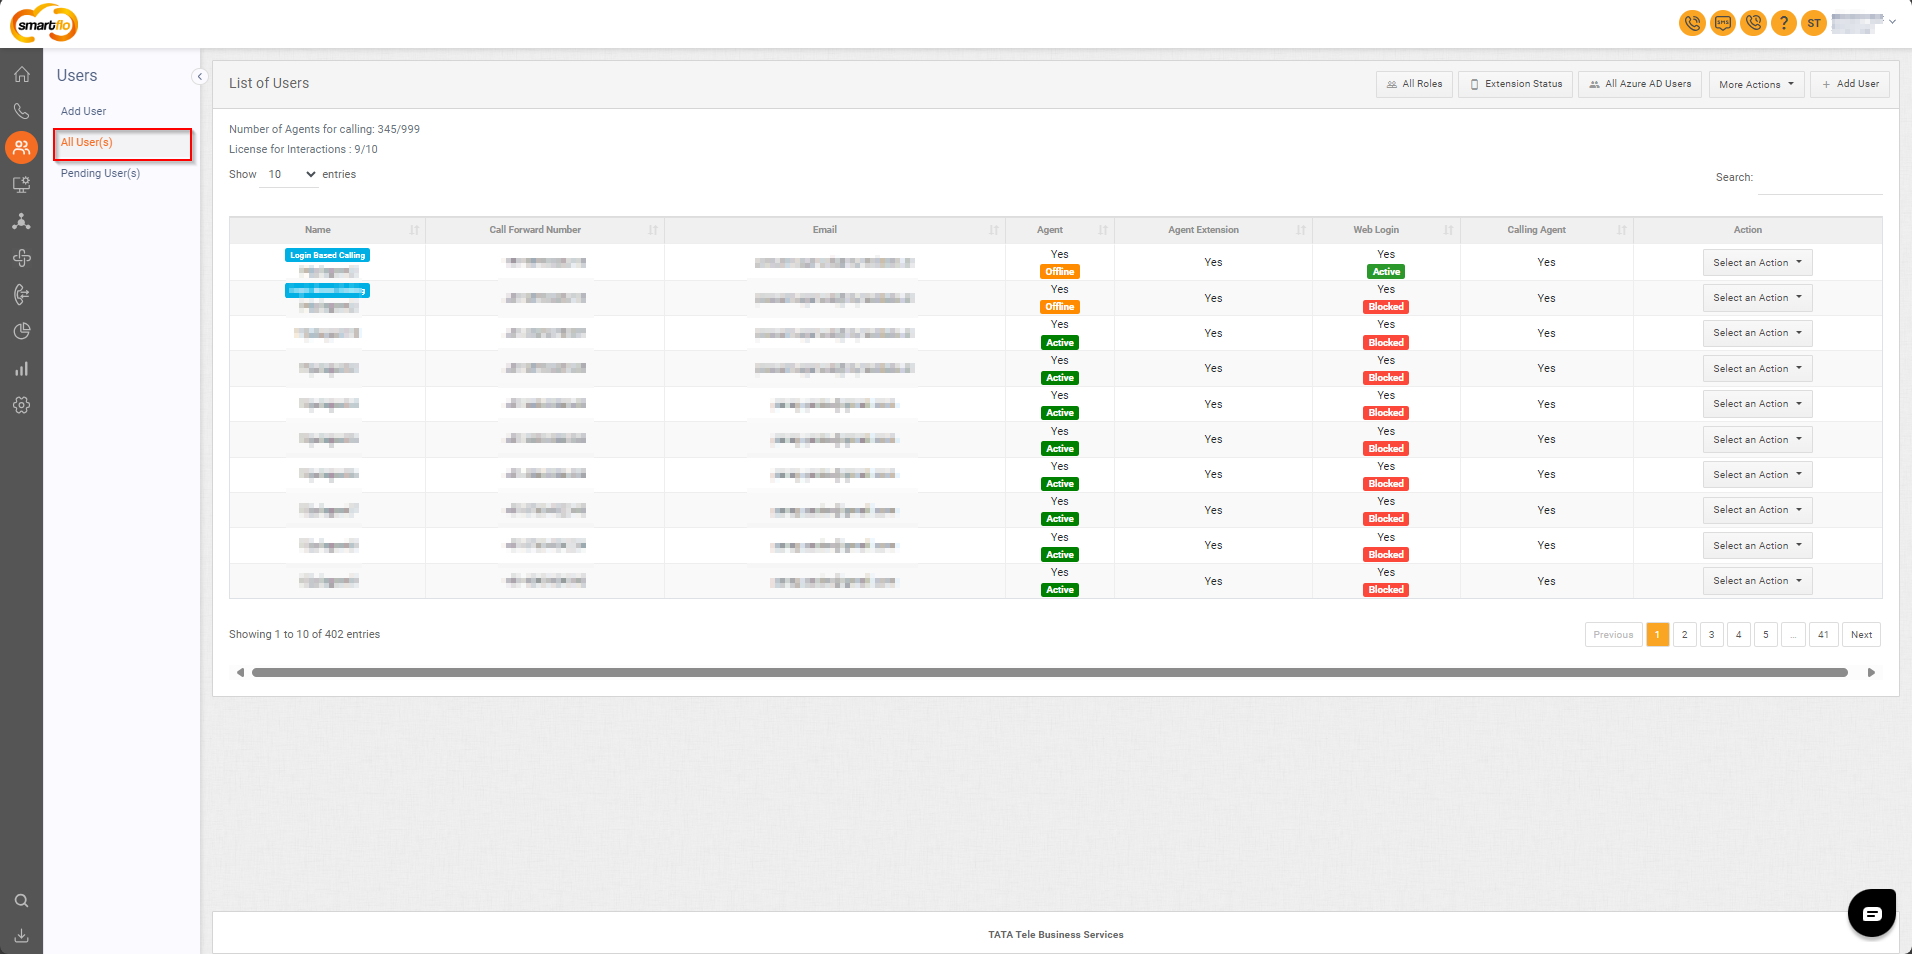
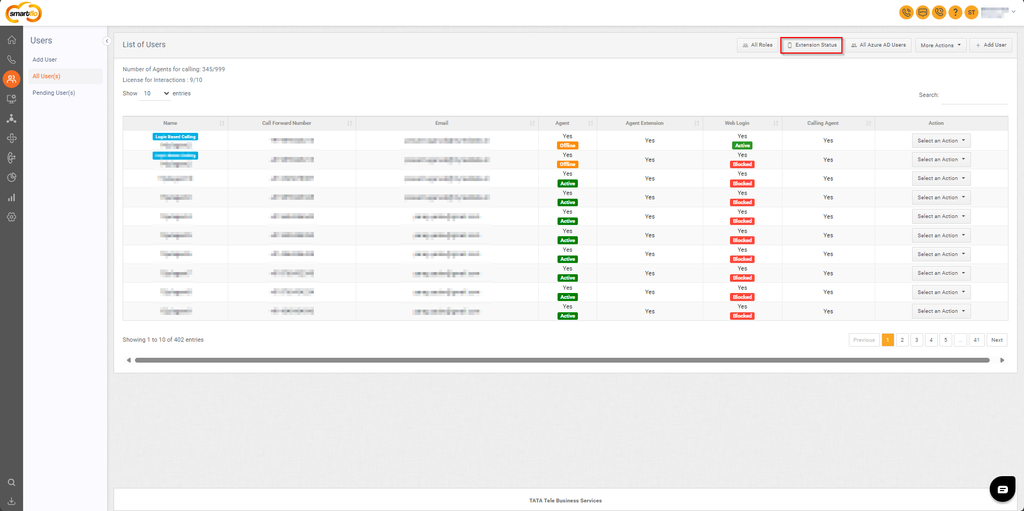
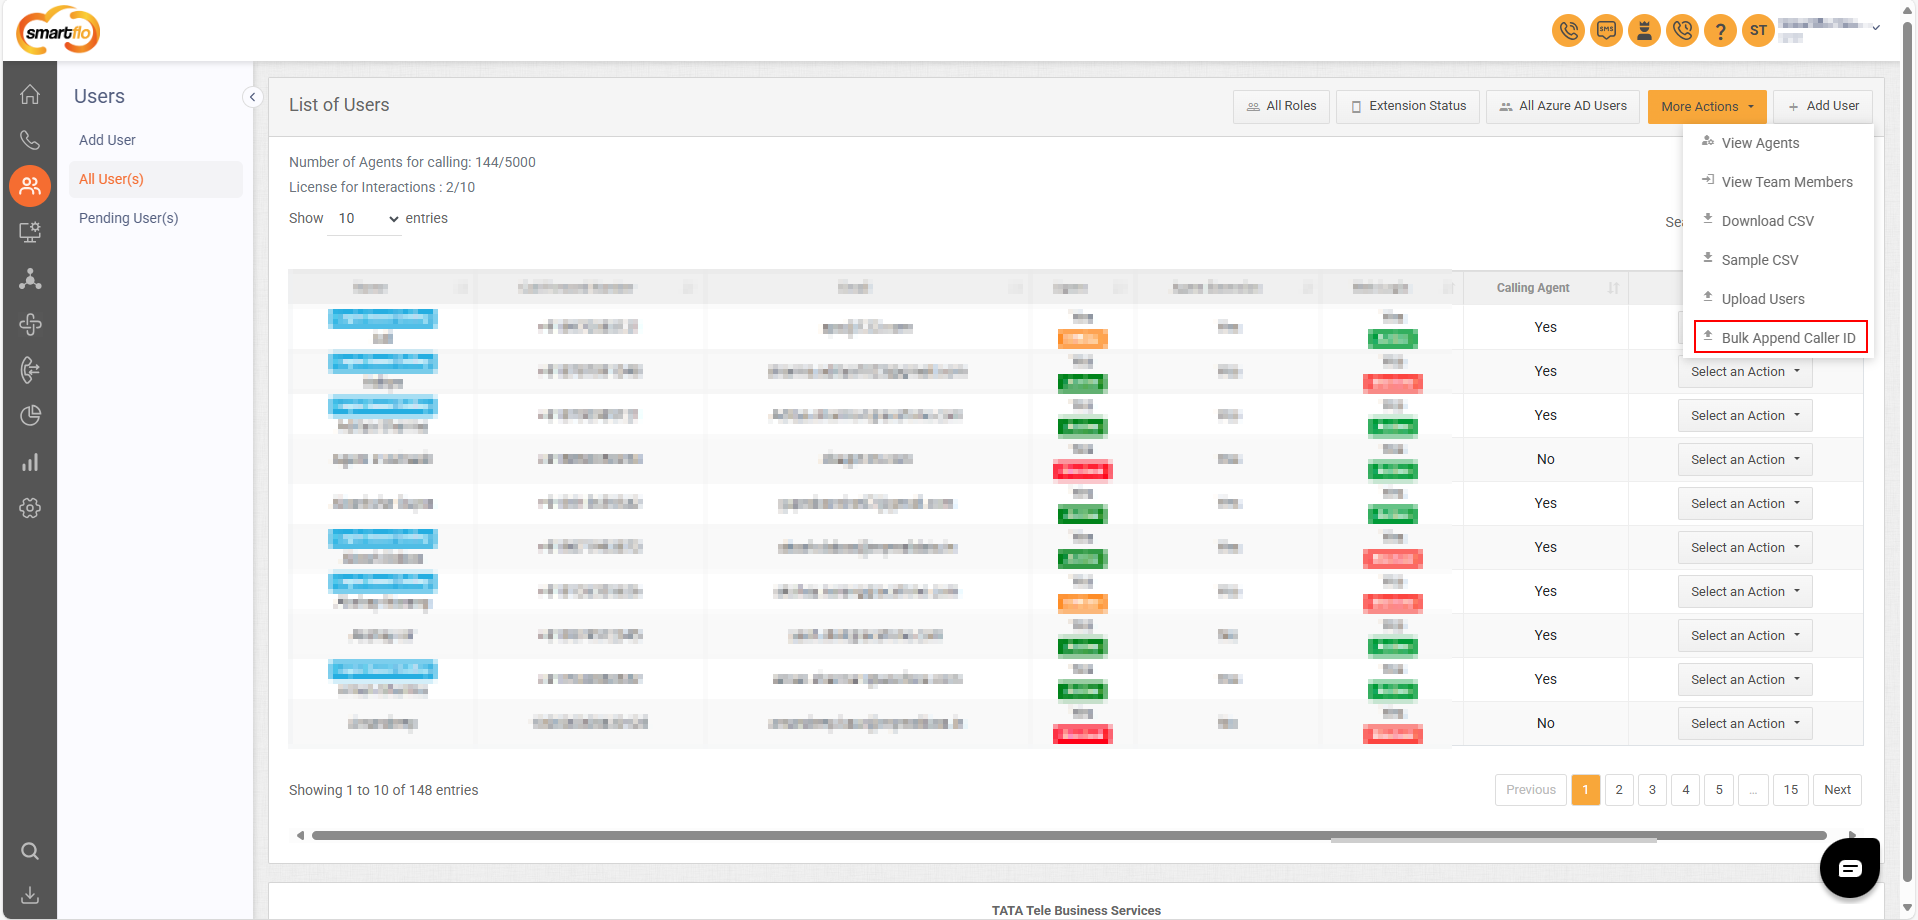
In the "All Users" section of Smartflo, you can view a comprehensive list of all users. This screen provides various details and functionalities such as the User List, which displays all users, there are Filters and Actions to streamline user management, the More Actions dropdown provides options to view agents, view team members, download or upload CSV files, and add new users via the "Add User" button. Additionally, you can edit user details, deleting the user, blocking or enabling the agent, deactivating the agent, or unblocking web login, providing full control over user management in Smartflo.
Getting Started with All User(s)
To go to All User(s) to your Smartflo account, first log in using your unique User ID and Password. Once logged in, you will be directed to the main dashboard. From there, locate the navigation menu on the left-hand side of the screen and click on "Users." A set of options opens up. One of these options is the "All User(s)".
- List of Users
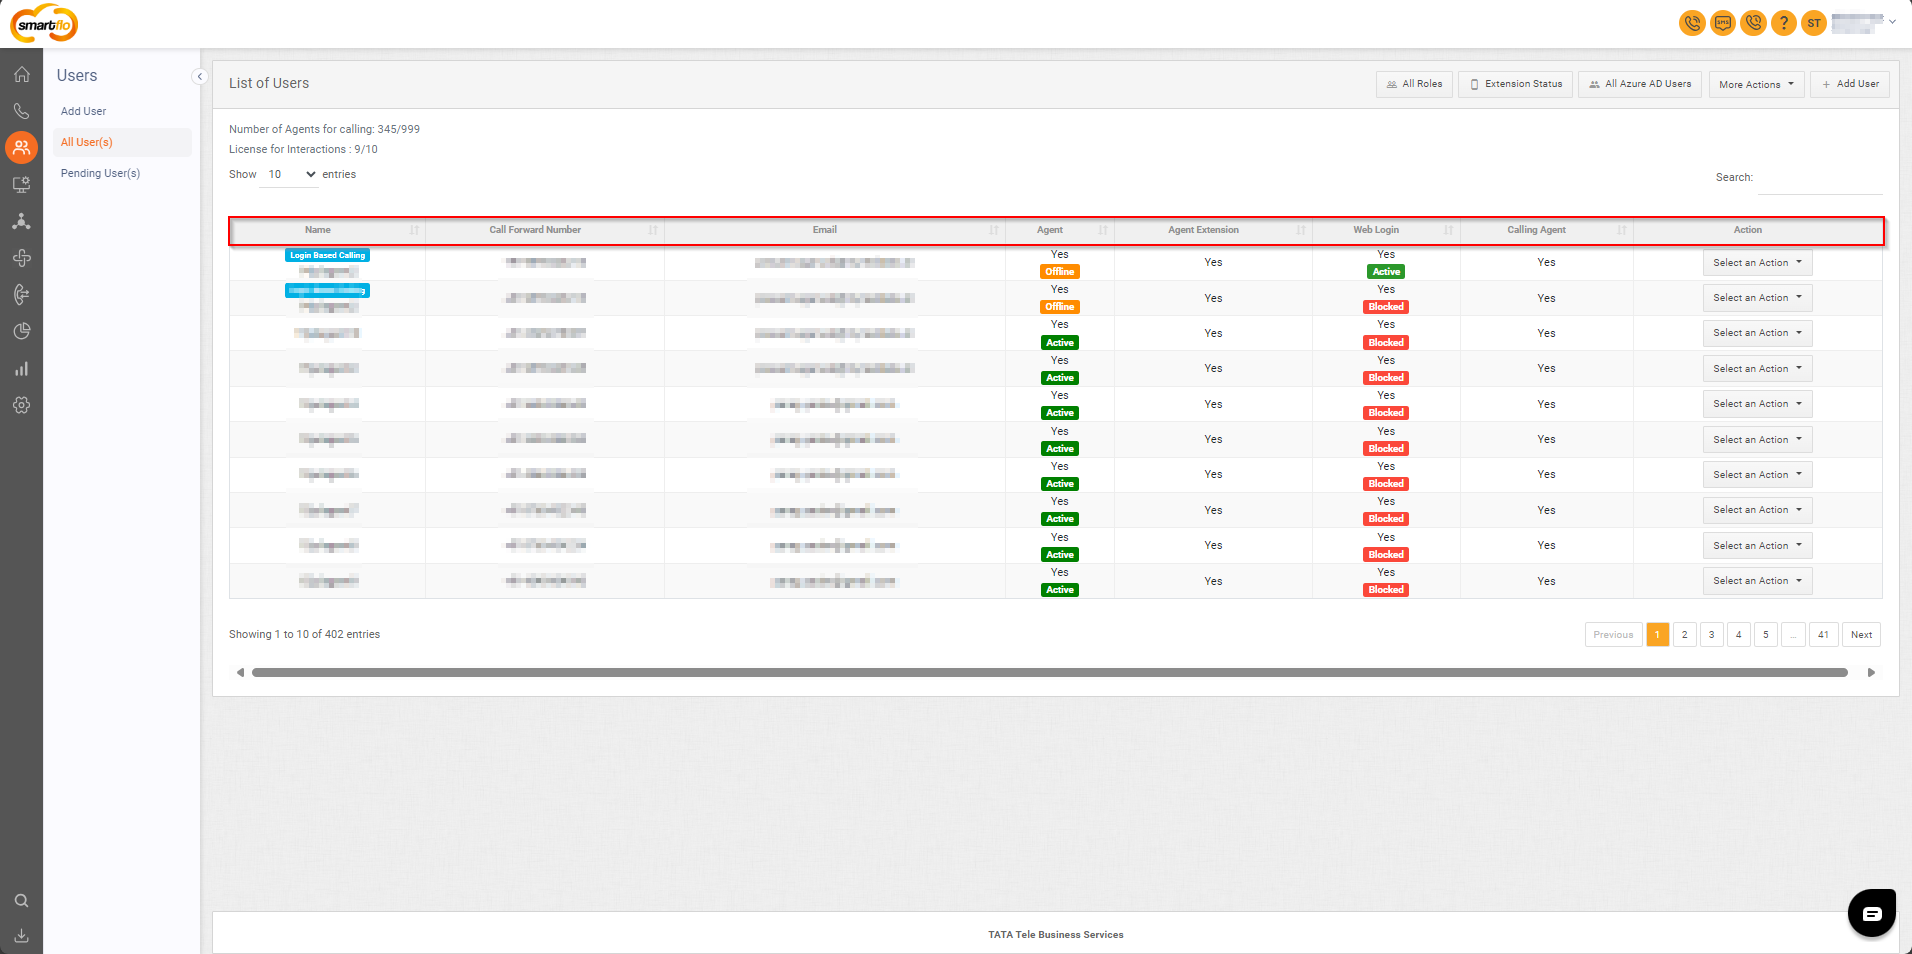
The table displays a list with the following information:
| Field | Description |
|---|---|
| Name | Displays the name of the user. |
| Call Forward Number | Displays the agent's registered number to which the calls are forwarded. |
| Displays the user's registered email address. | |
| Agent Status | Indicates whether the agent is Active or Offline. |
| Agent Extension | Shows whether the user has an extension (Yes/No). |
| Web Login Status | Displays the user's web login status (Blocked/Active). |
| Calling Agent | Specifies if the user is a calling agent (Yes/No). |
| Actions | Provides options to edit, delete, enable/disable the agent, and unblock web login. |
- All Roles

- When you click on All Roles, it navigates you to the All Roles screen in settings:
- More Actions:
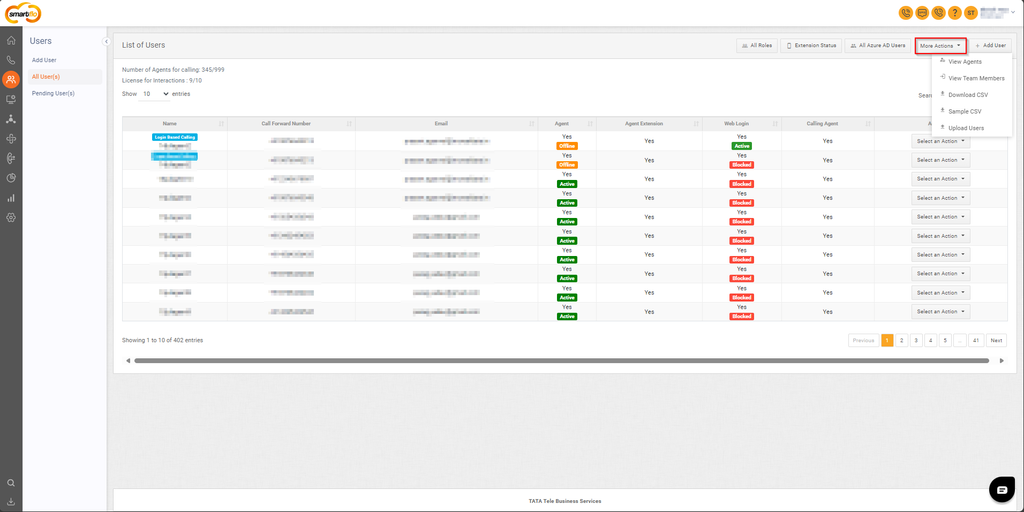
- Dropdown to view agents, view team members, download CSV, sample CSV, and upload users.
| Field | Description |
|---|---|
| View Agents | View Agents |
| View Team Members | Team Members |
| Download CSV | Option to download the list of users or agents in CSV format for offline viewing or editing. |
| Sample CSV | A reference CSV file template designed for bulk user uploads, ensuring proper formatting of user data. |
| Upload Users | Select the user role, upload the file in CSV format, and click "Save" to upload users. (Max. 500 Users) |
| Bulk Append Caller-ID | Bulk Append Caller ID is the process of adding new DIDs to the Allowed Caller ID list for multiple users at once. It helps avoid manual updates, saves time, and ensures all users have access to the latest numbers without losing existing ones. |
- Add User: Button to add a new user Add User.
3. Select an Action
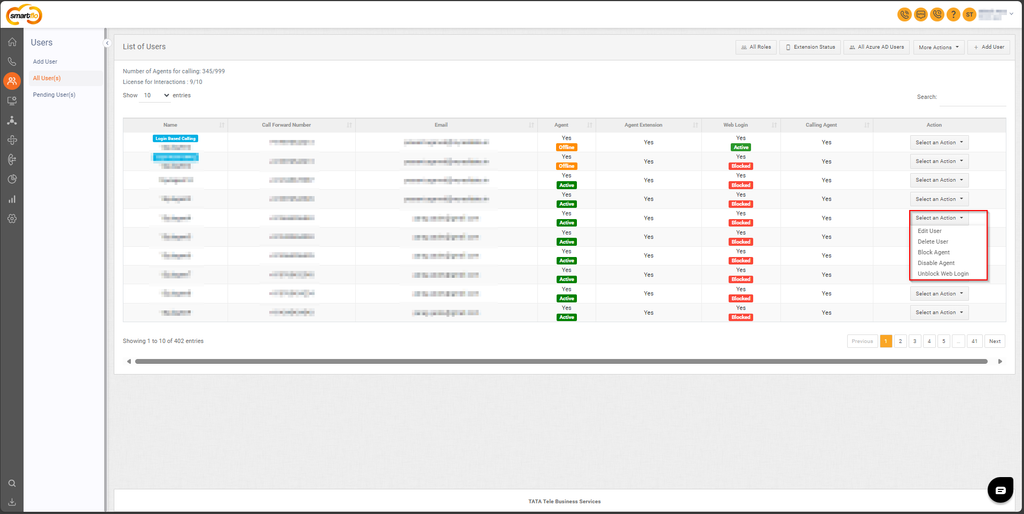
When you click on "Select an Action" for any user, you can perform the following actions:
| Field | Description |
|---|---|
| Edit User | Modify user details |
| Delete User | Remove the user from the portal |
| Block Agent | Block the agent |
| Enable Agent | Activate the agent |
| Disable Agent | Deactivate the agent |
| Unblock Web Login | Unblock the user’s web login. |
3. Extension Status
- When you click on Extension Status, it takes you to the following screen:
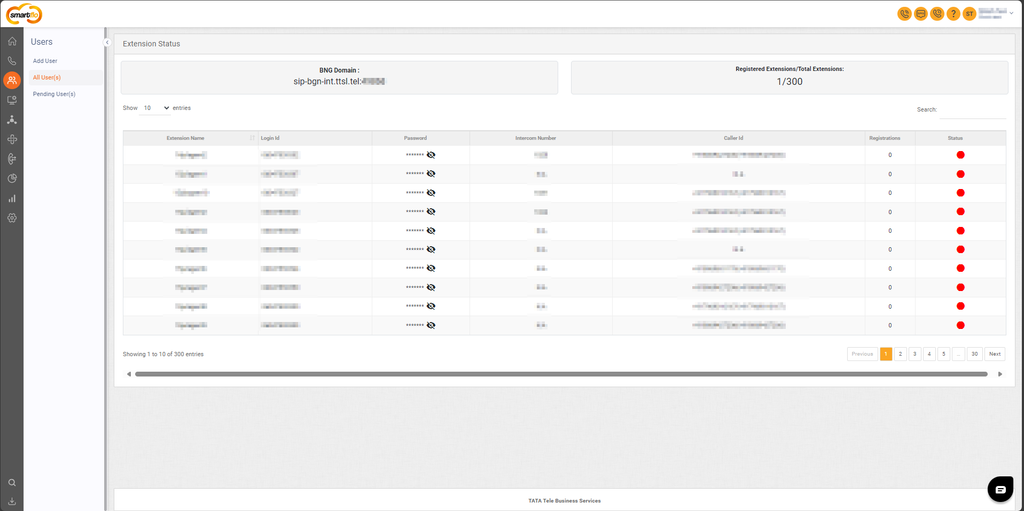
- The table displays a list with the following information:
| Field | Description |
|---|---|
| Extension Name | Displays the agent name associated with the enabled extension. |
| Login | Displays the extension login IDs. |
| Password | Shows passwords (masked). |
| Intercom Number | Displays intercom numbers. |
| Caller ID | Displays assigned caller id for the extension. |
| Registrations | Shows the number of registrations. |
| Status | Indicates the status ( active(Green) / inactive (Red) ) of the extensions. |
All Azure AD Users
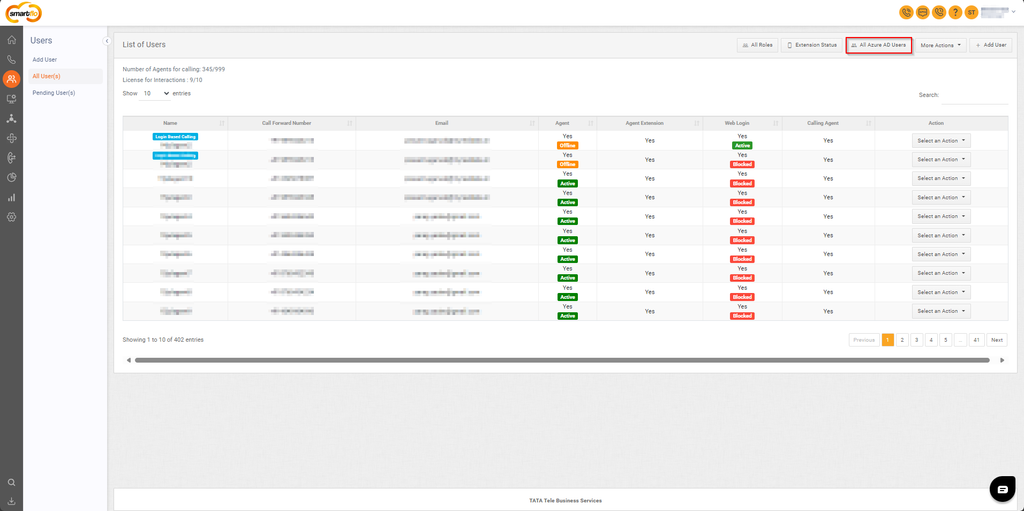
- When you click on All Azure AD Users, it takes you to the following screen:
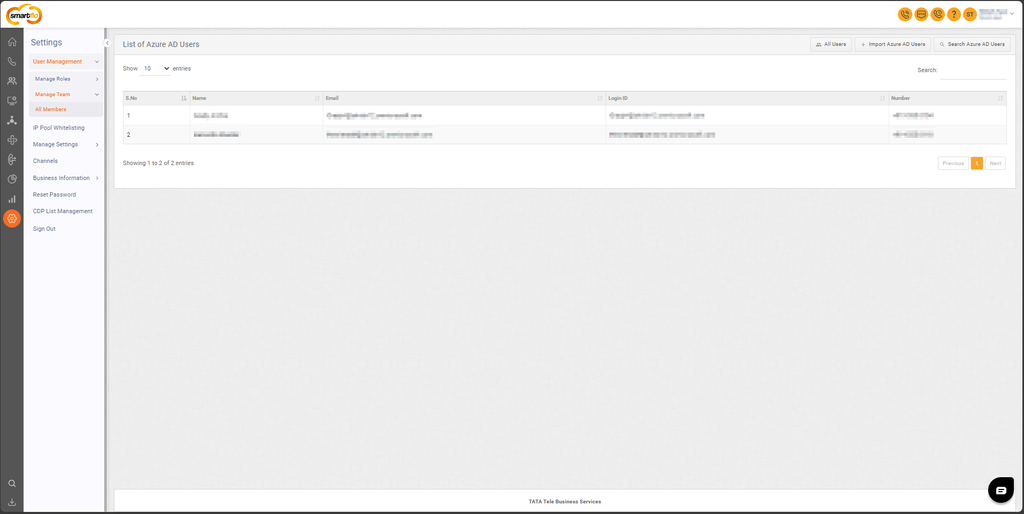
- List of Azure AD Users: Displays users synced from Azure Active Directory with their:
- Name: The agent's name.
- Email: The registered email of the agent.
- Login ID: The login ID of the agent.
- Phone Number: The registered phone number of the agent.
This section allows you to:
- Import Azure AD Users: Add new users from Azure AD.
- Search Azure AD Users: Search for specific users in Azure AD.
- All User: It redirects to the list of Smartflo users.
Note: To know the steps for adding an Azure AD user, kindly refer to this link. Azure AD User
Bulk Append Caller ID
Problem Statement
Customers often face a recurring issue where their DIDs (Caller ID numbers) are flagged as spam every 15–20 days. As a result:
- New DIDs are regularly added to the client account.
- These DIDs must be manually added to each user’s Allowed Caller ID list.
- This process is manual, time-consuming, and prone to errors, especially when there are many users.
Objective
- Provide a quick and efficient way to append new DIDs to multiple users’ Allowed Caller ID lists in bulk, without removing existing ones.
Steps to Bulk Append Caller-ID
- Click on More Actions.
- Select Bulk Append Caller ID.
- Click on Sample CSV to download a Sample CSV file.

- Open Sample CSV.
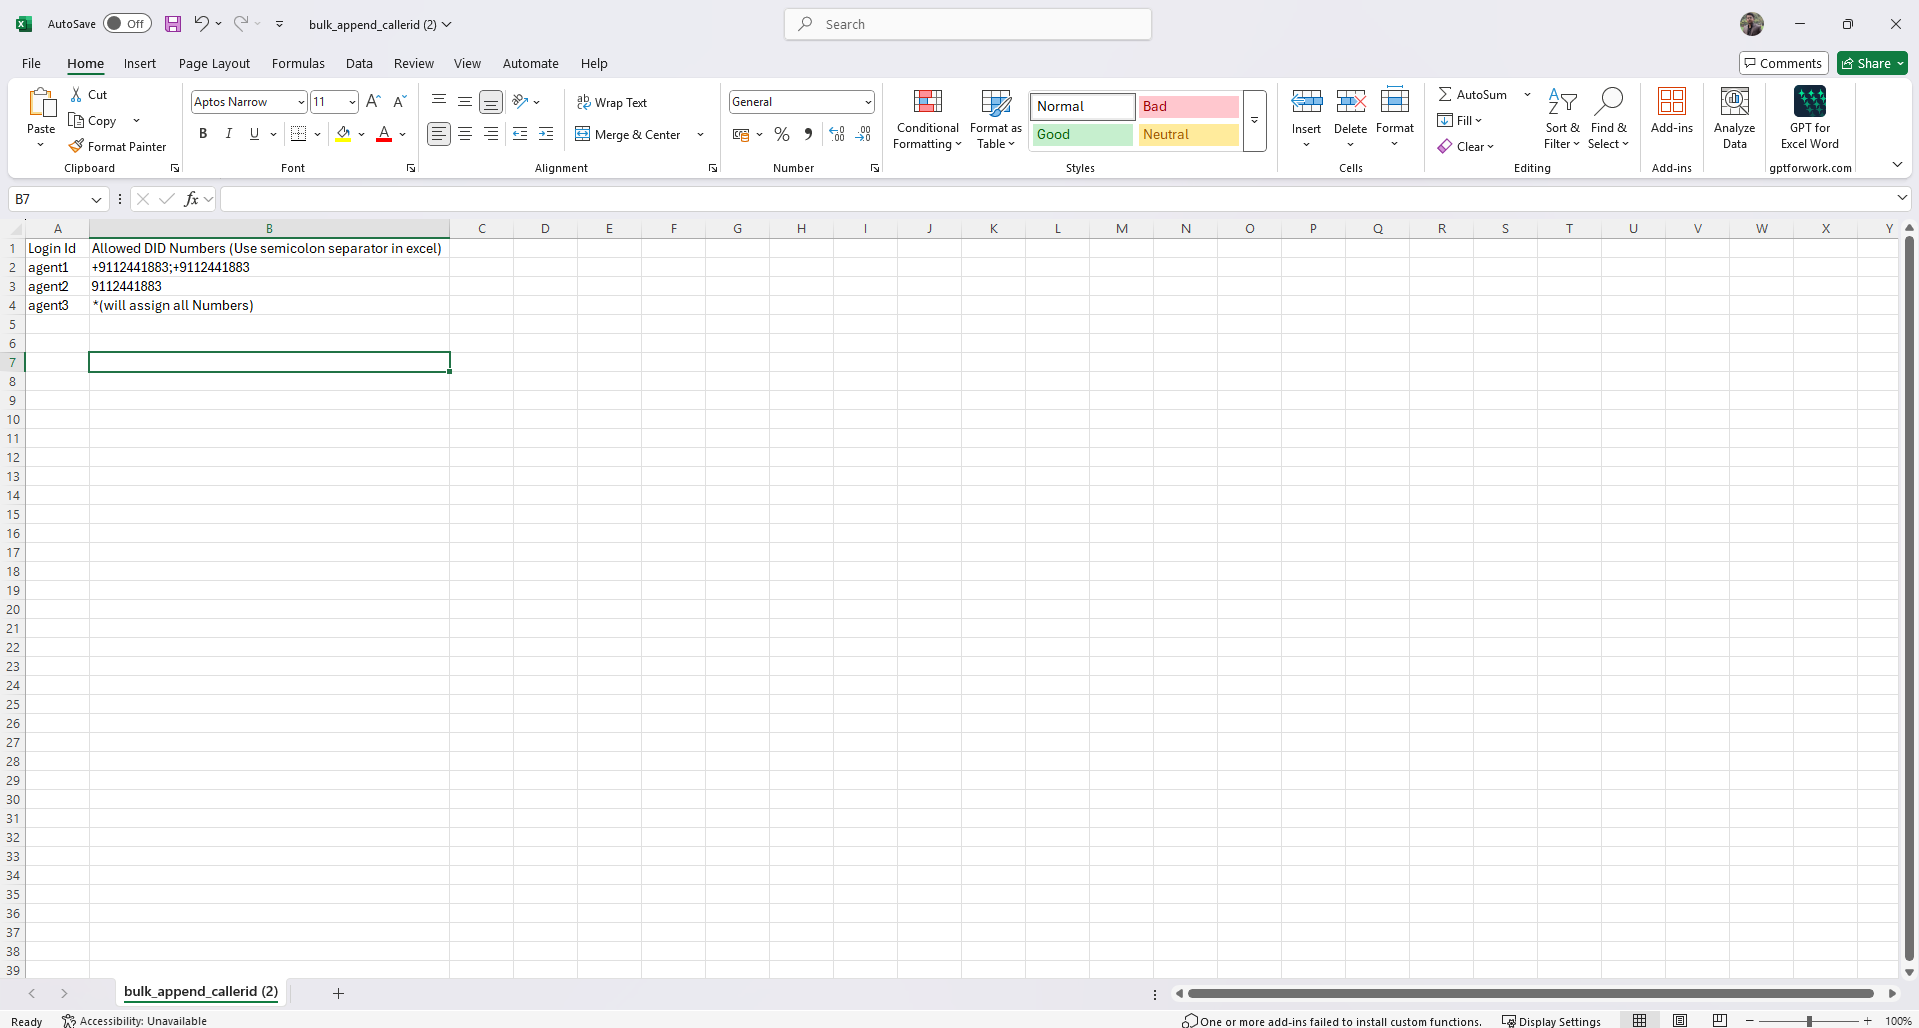
- Update the Caller IDs in the file.
- Upload the File.
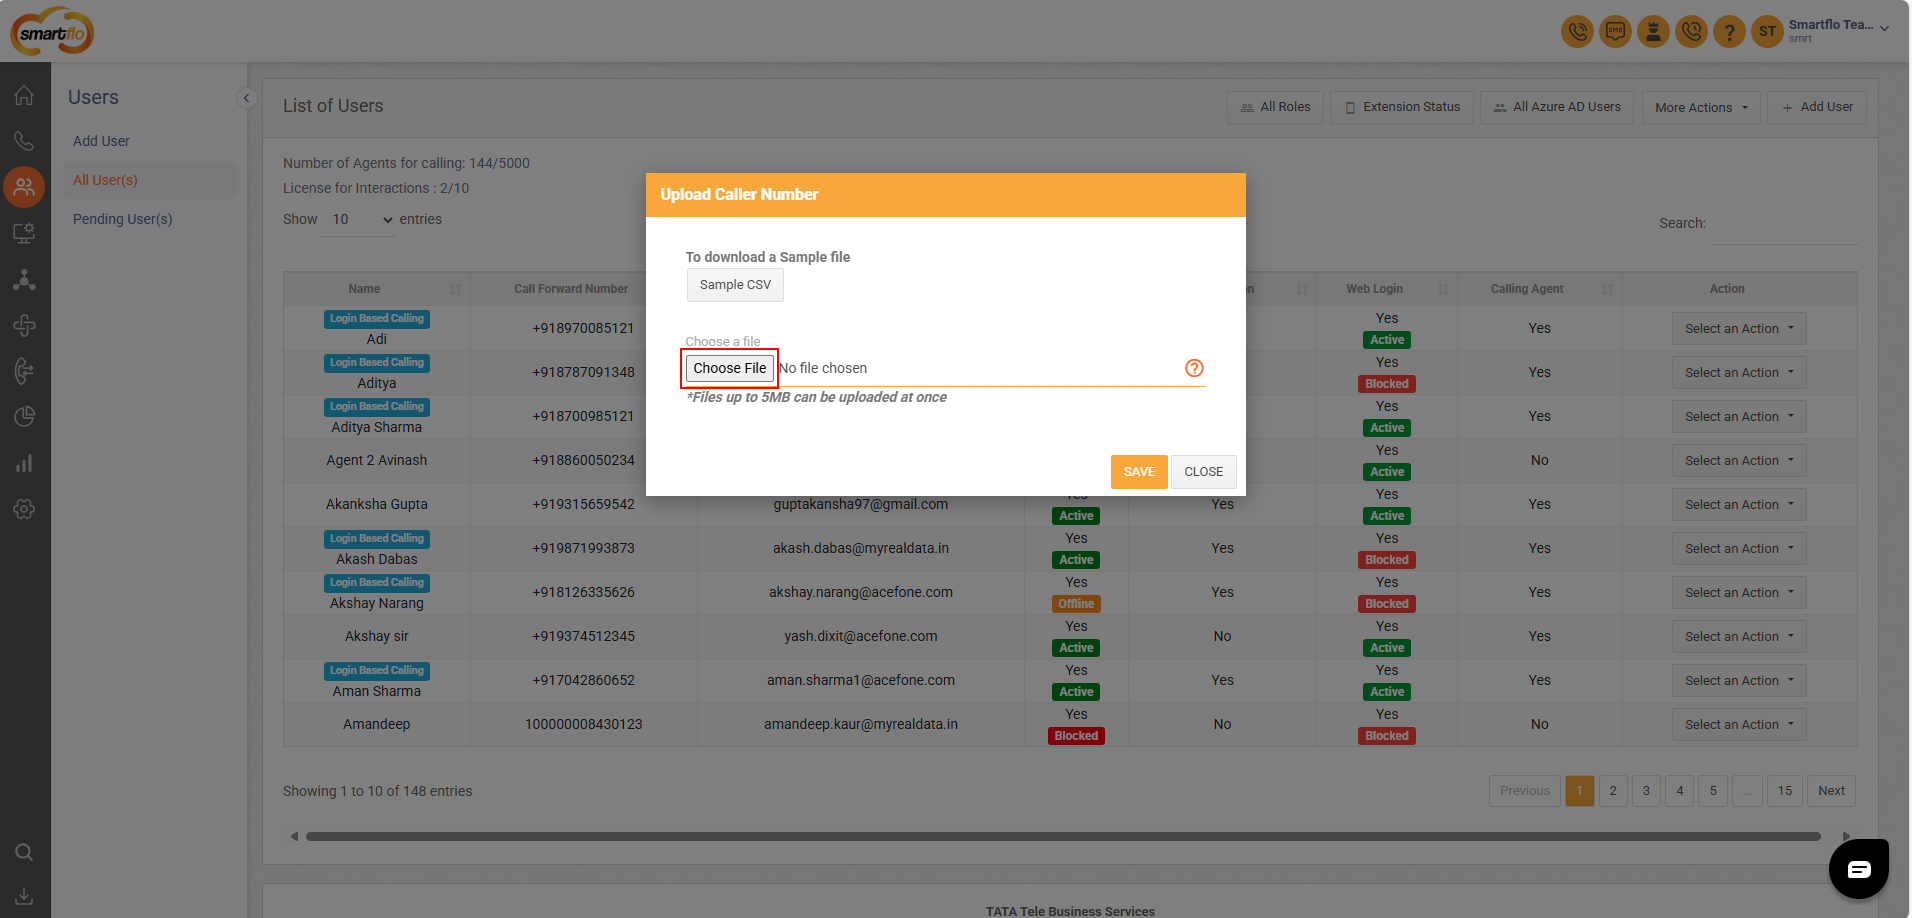
- Click on Save
Sample CSV
Provide an option to download the Sample CSV file.
The CSV file should have 2 columns:
Login IDAllowed Caller ID
Example Entries
| Login ID | Allowed DID Numbers (Use “;” separator in Excel) |
|---|---|
| user1 | 987654321 |
| user2 | 987654321; 987654320 |
Separate multiple caller IDs using a semicolon (;) when appending.
If any records fail during the upload, an email will be sent containing an error file with detailed error messages for each failed entry.
Updated about 1 year ago