Template Management (OMNICHANNEL)
This document is designed to streamline your template management process. Here, you'll find everything you need to master our WhatsApp Messaging Service templates.
Pre-Requisite
- User credentials for Smartflo Admin account.
- Access to Smartflo Omnichannel Platform.
- Completed Onboarding of Interactions by adding WhatsApp Number.
Template Management
The template management process is described in a stepwise manner below:
-
Log into the Smartflo Omnichannel portal using your user credentials.
-
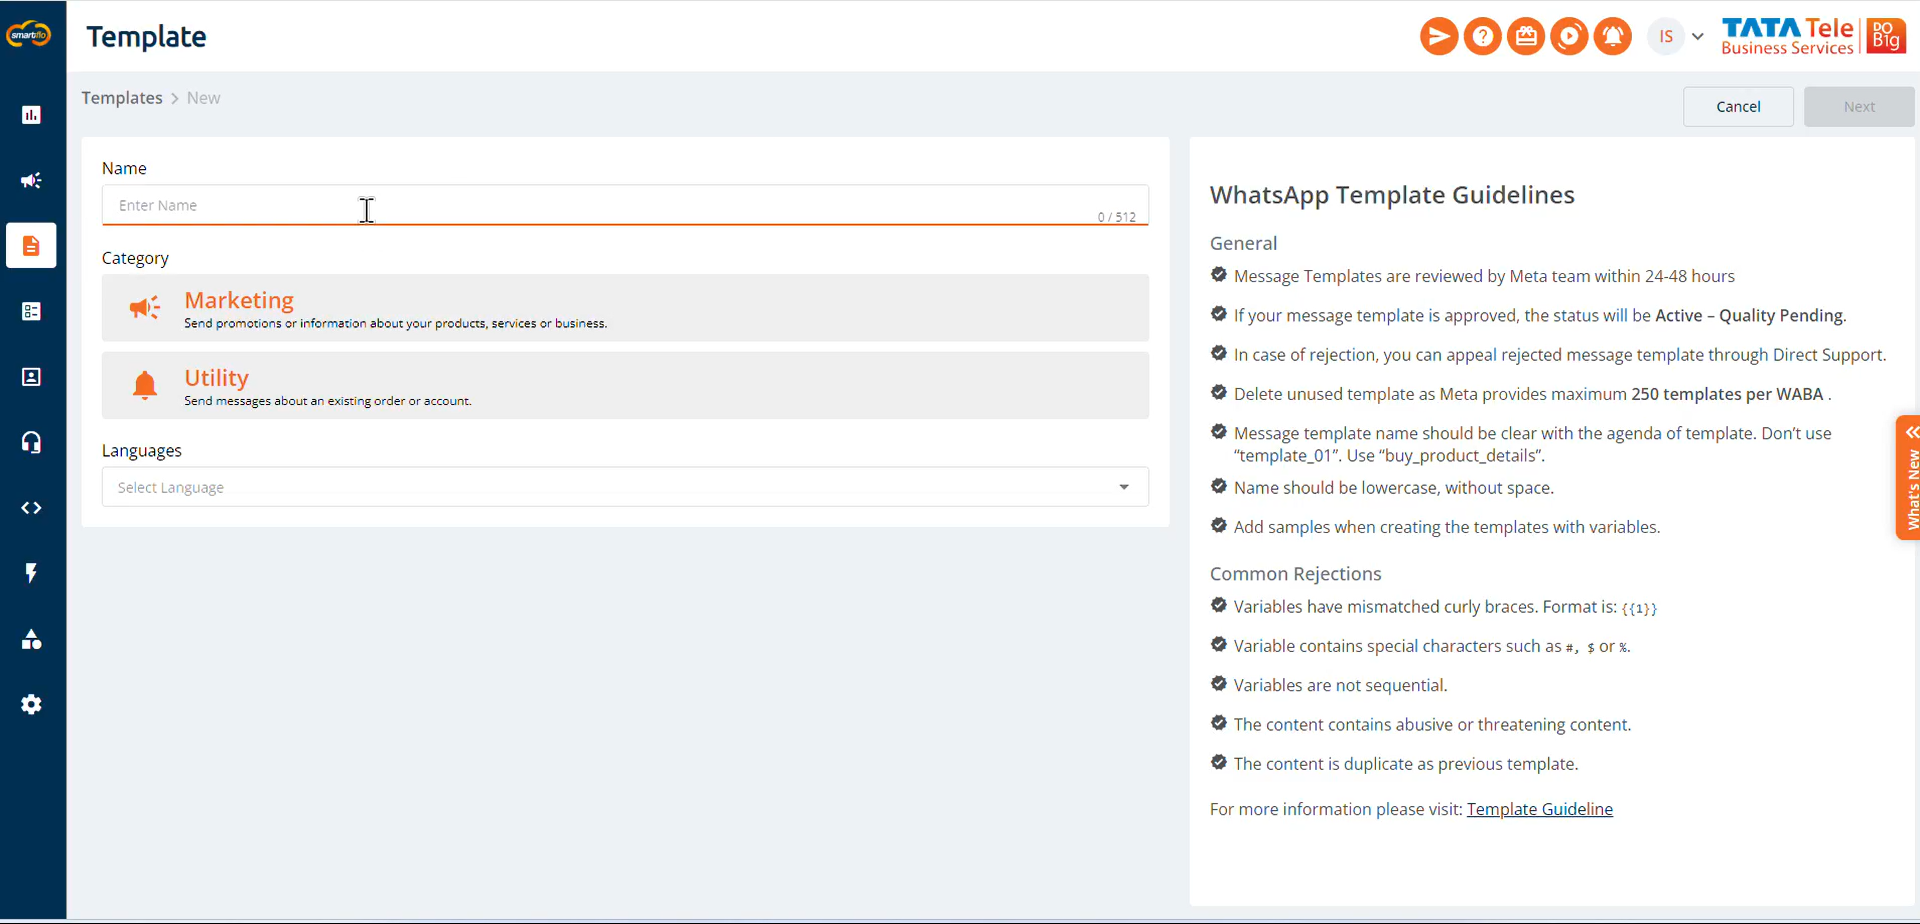
Navigate to Templates Section from the side navigation pane.
-
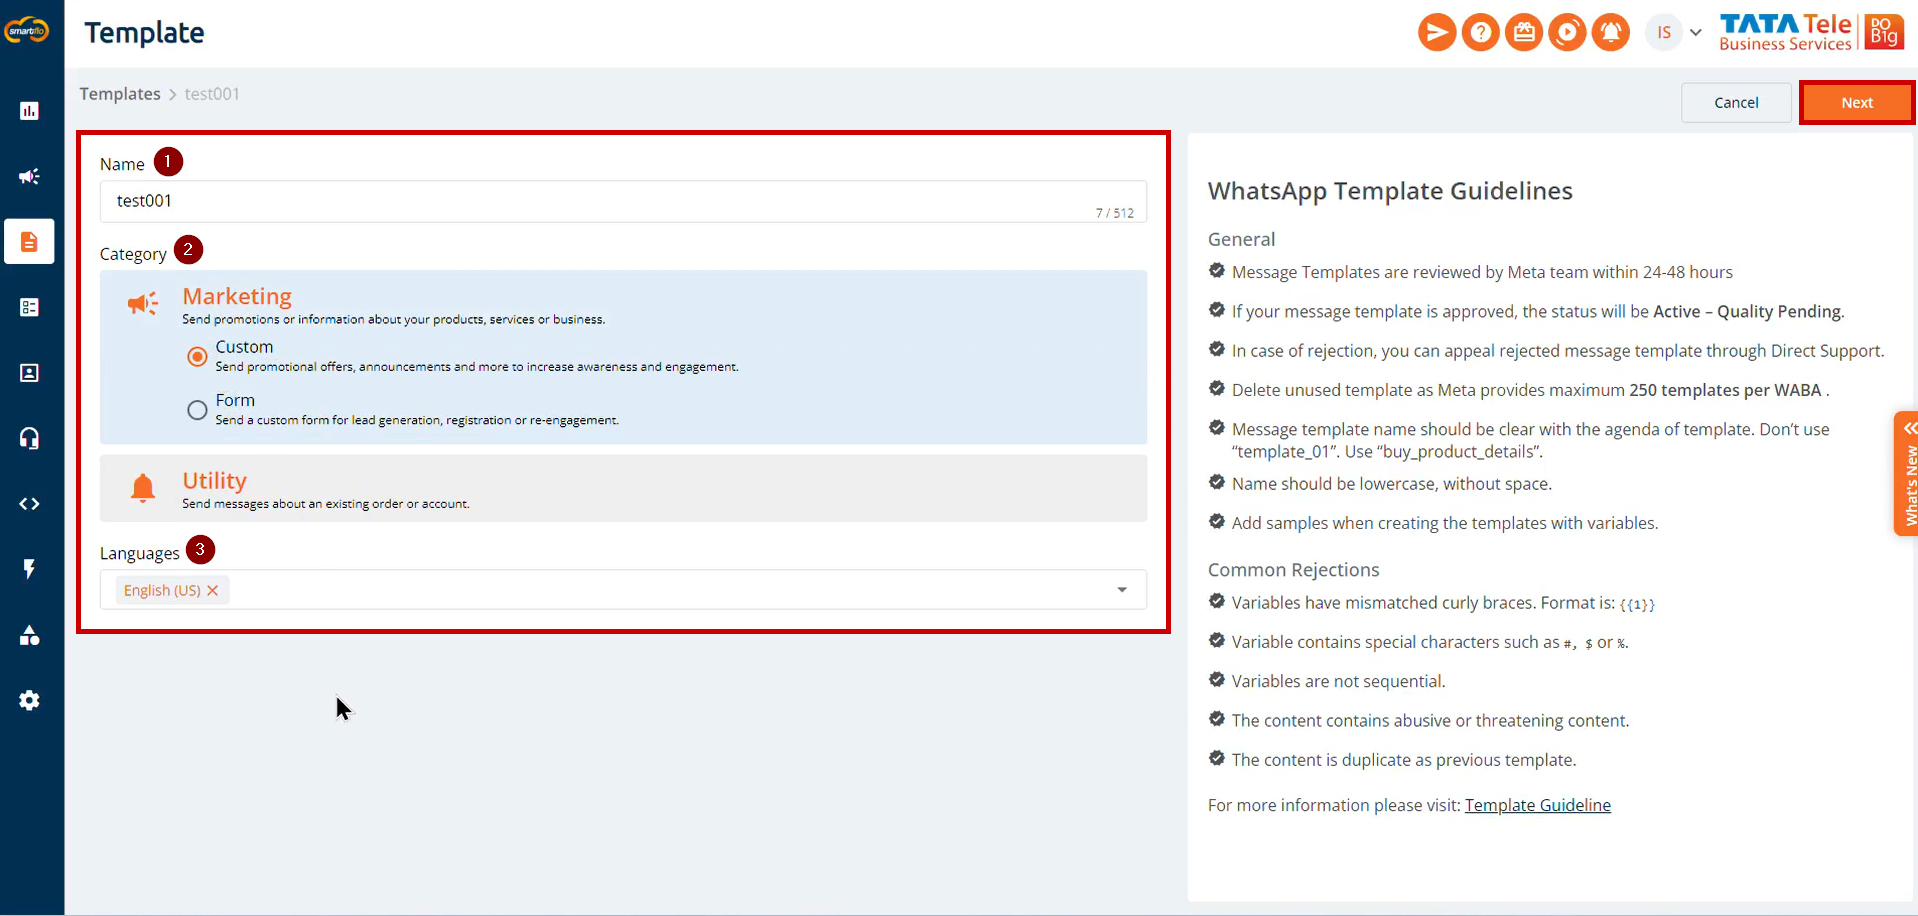
Enter the Name of the Template, choose the appropriate category as Marketing or Utility, and select Language of the Template then click on Next.
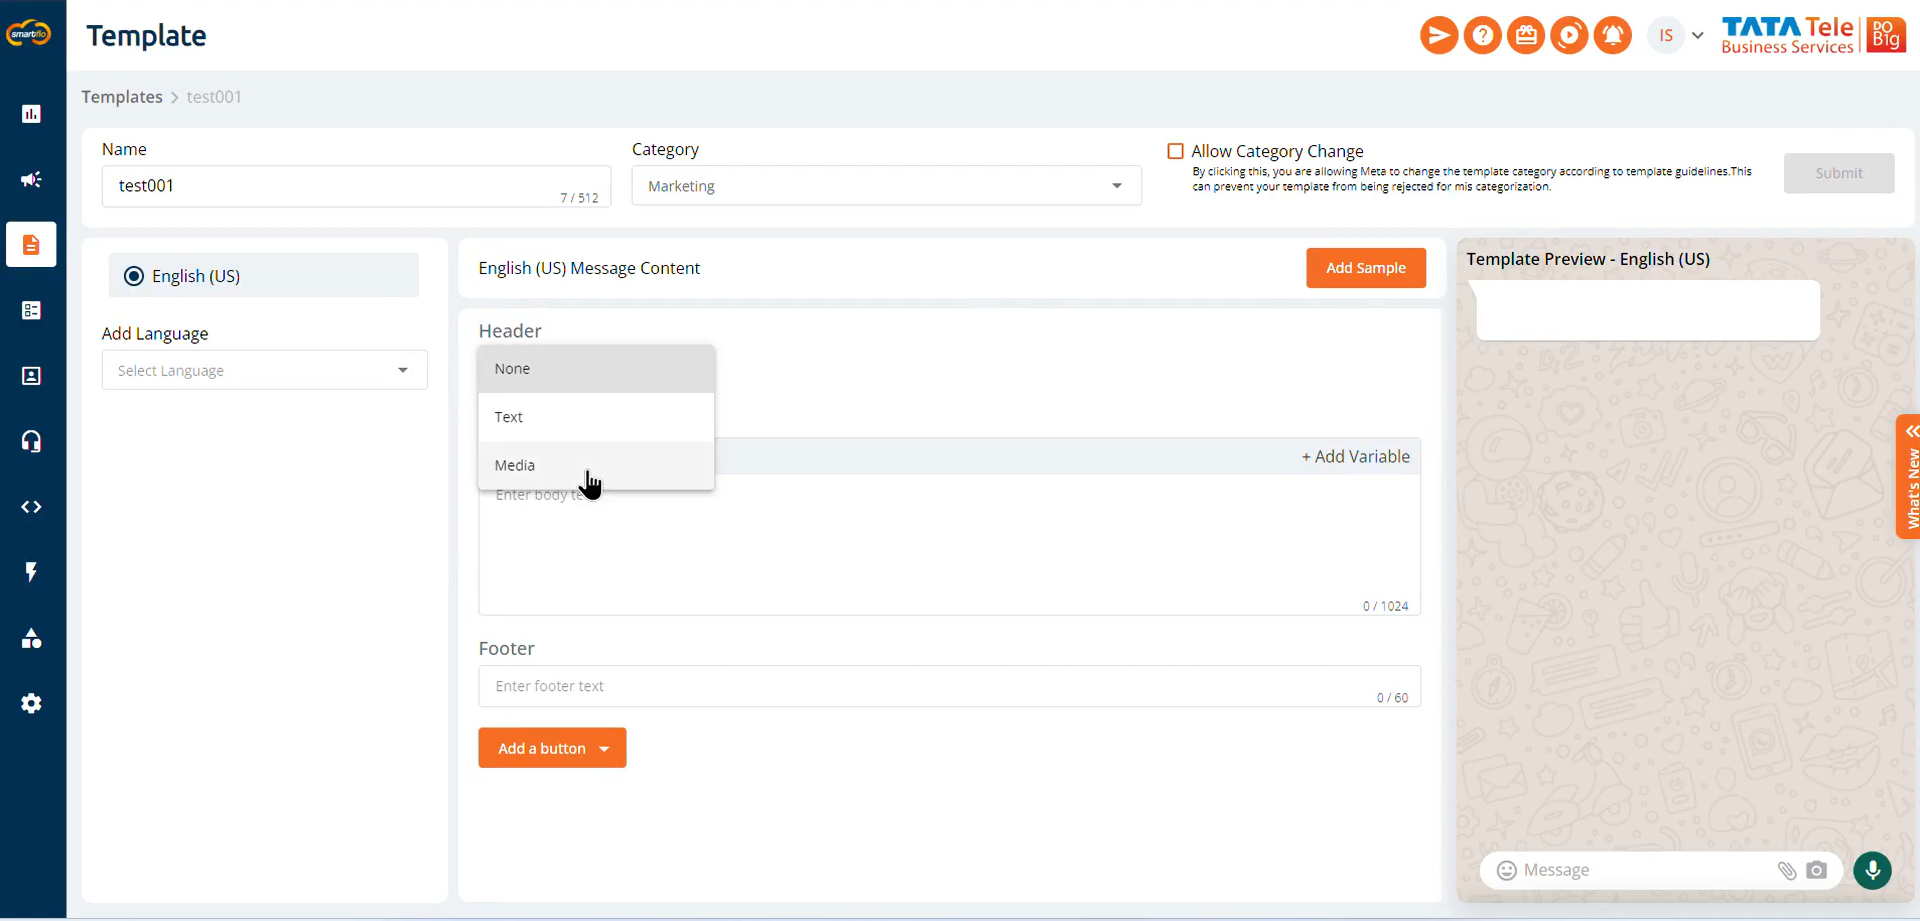
Now let's customize your template according to your business needs. Any template you want to add has the following configuration.
| Field | Description |
|---|---|
| Header | We only support text or media in the Header. Variables are currently not supported. |
| Body | We also support variables in the body. |
| Footer | It should be static text. |
| Buttons | We don’t support variables in buttons. |
For Header
-
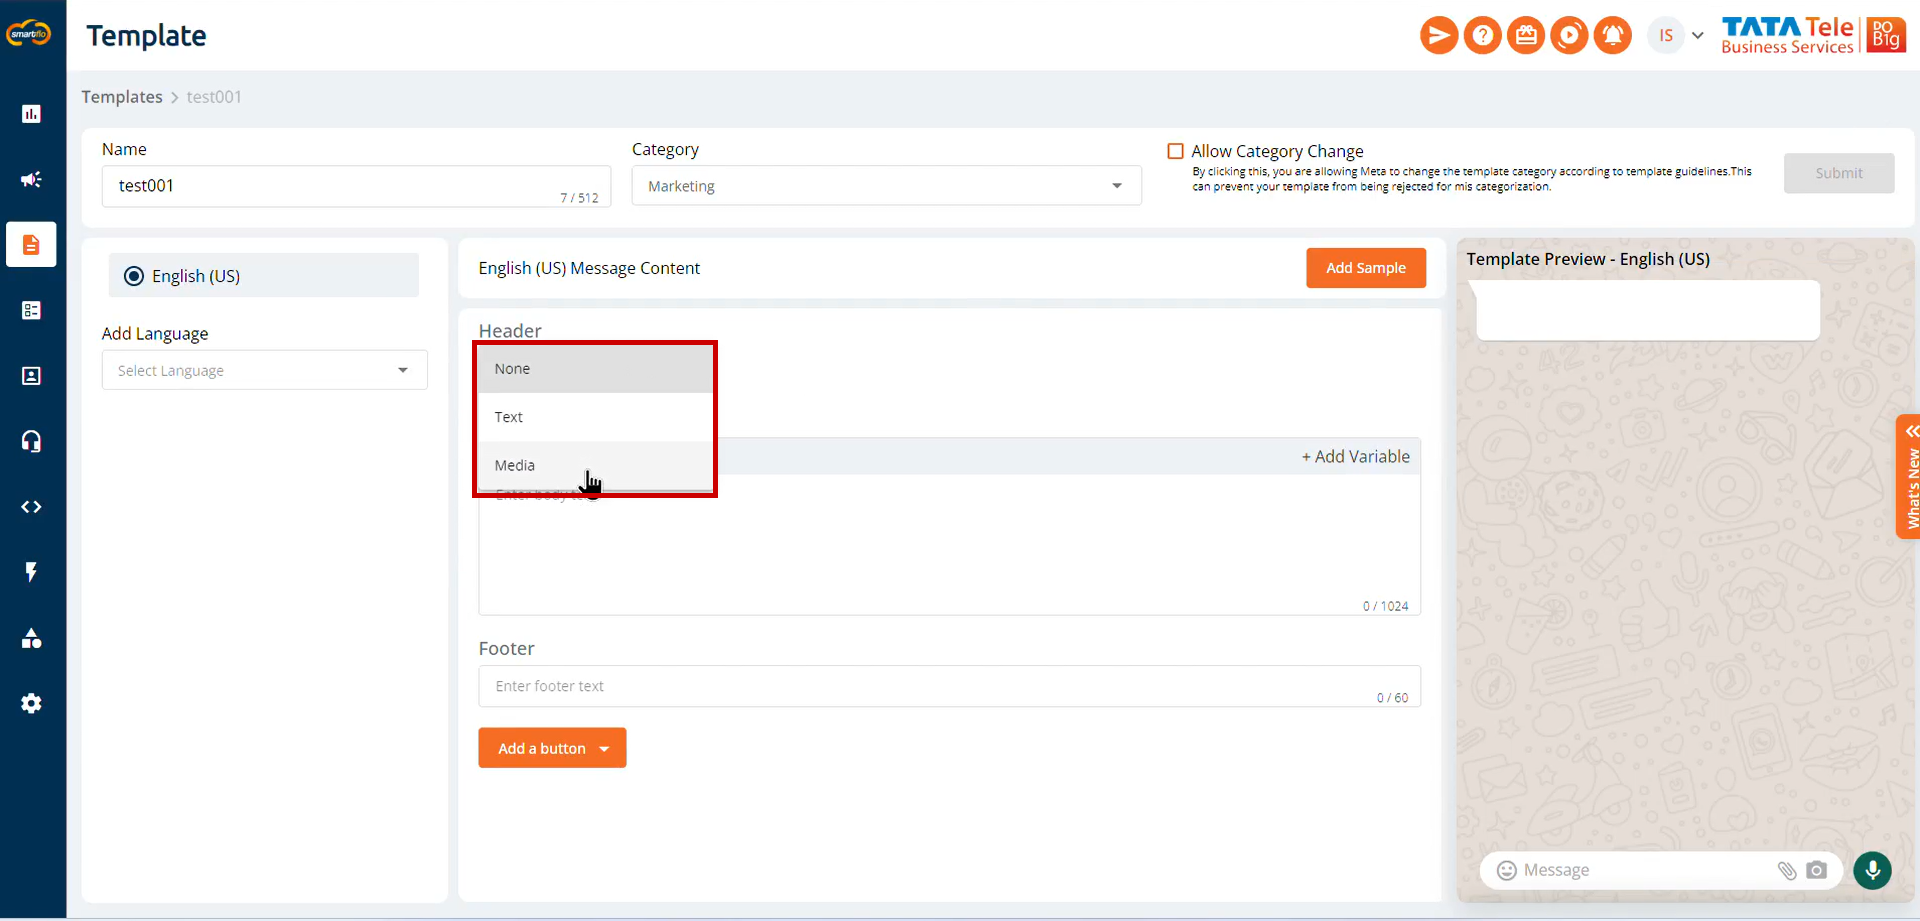
Choose your Type of Header: Text or Media from the dropdown.
-
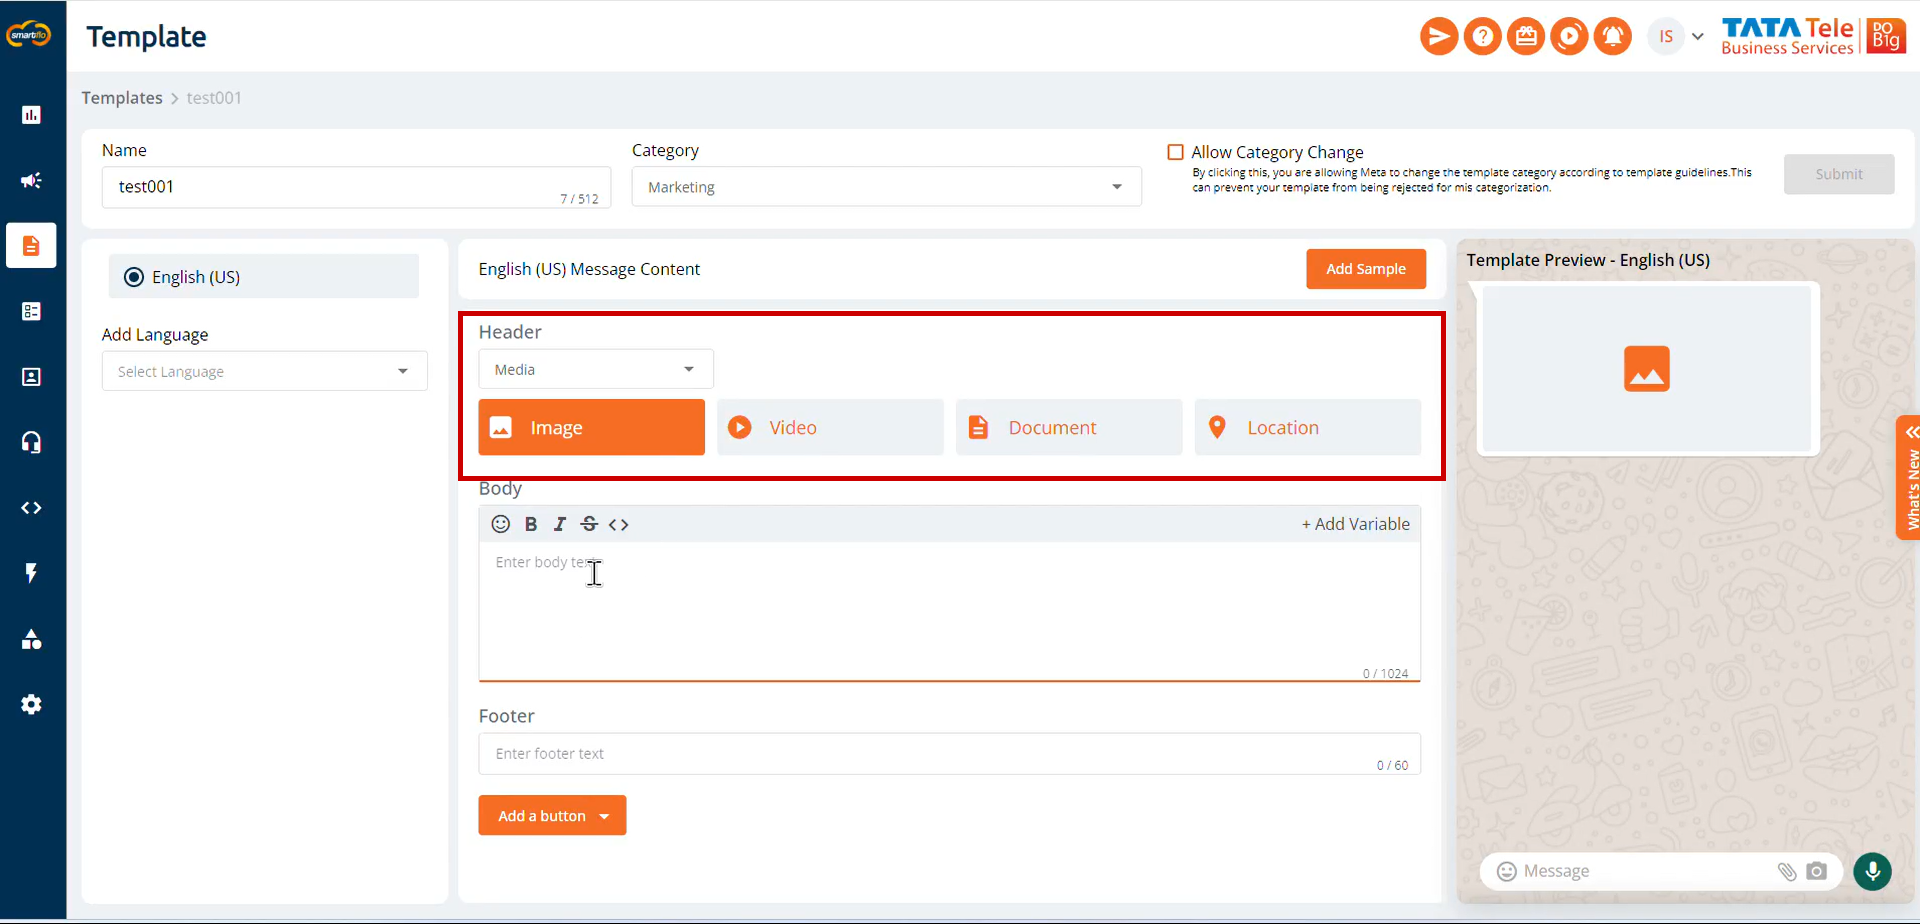
Let's choose Media as a header. It comprised of Image, Video, Document, & Location to be added as header of the template.
For Body
-
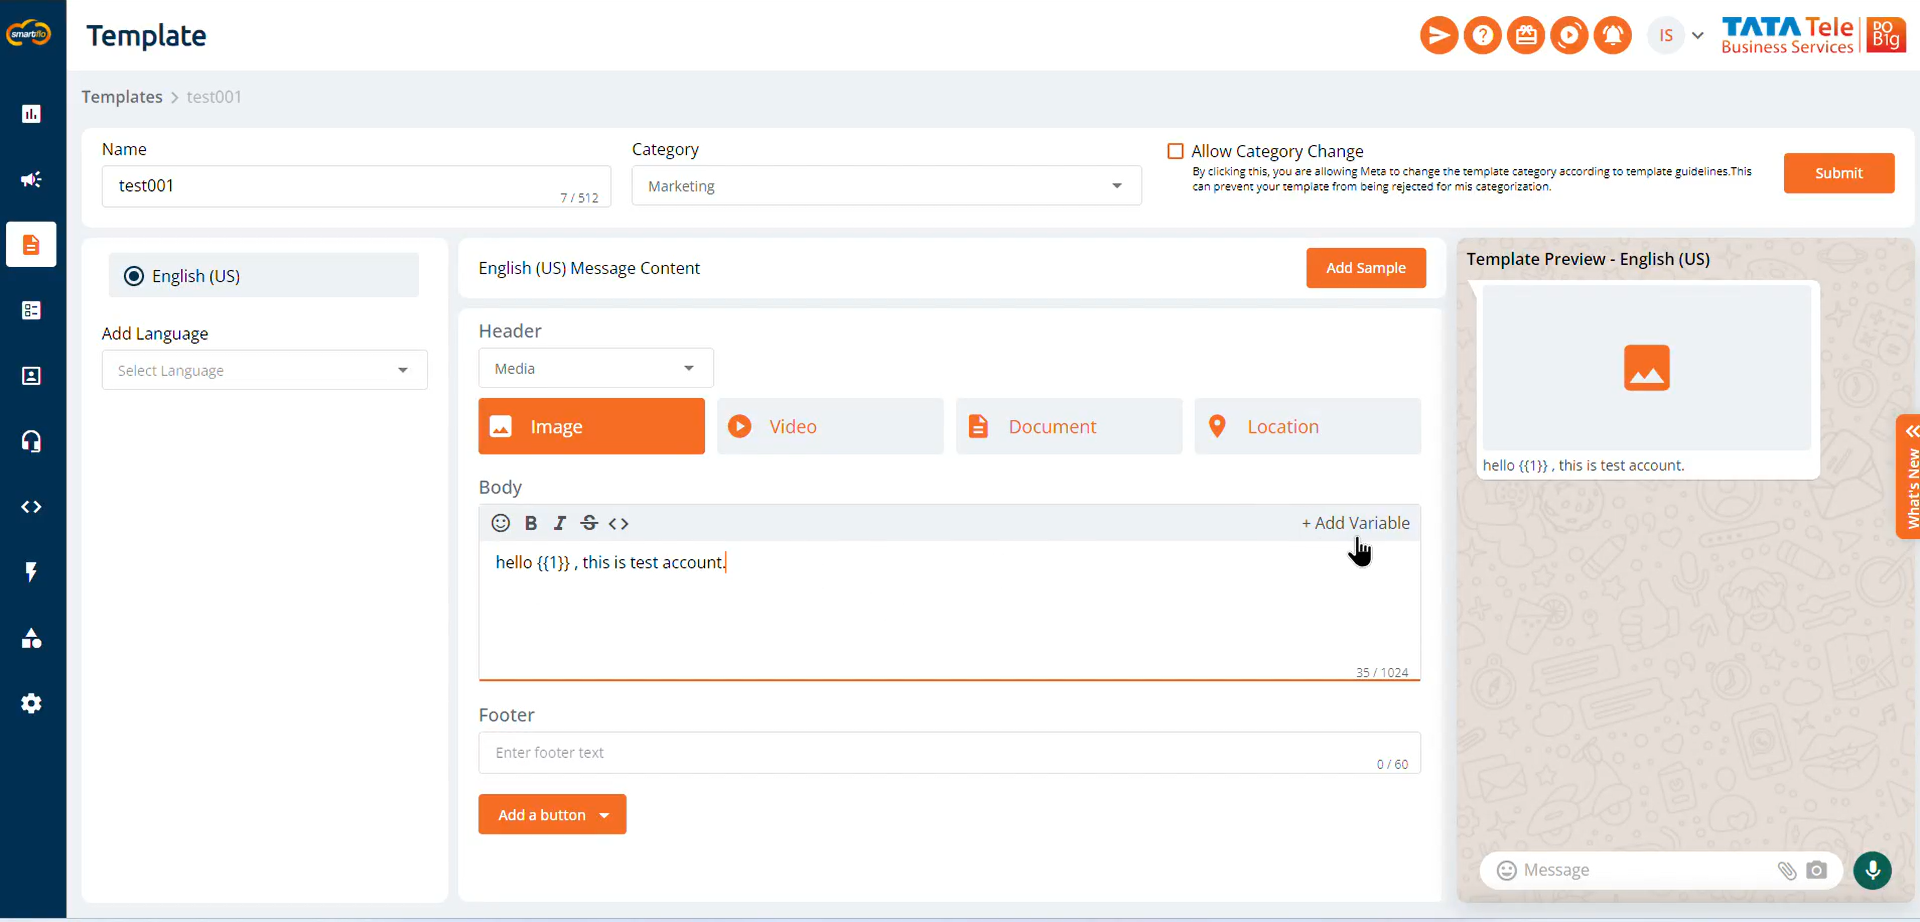
Message or the content of the template is placed under the Body section, it also allows to add variables in your template content as per your requirement, these variables can represent any dynamic information of your customer such as name, phone number, company, etc.
For Footer
- Add your ending salutation or tagline in the Footer section.
For Button
-
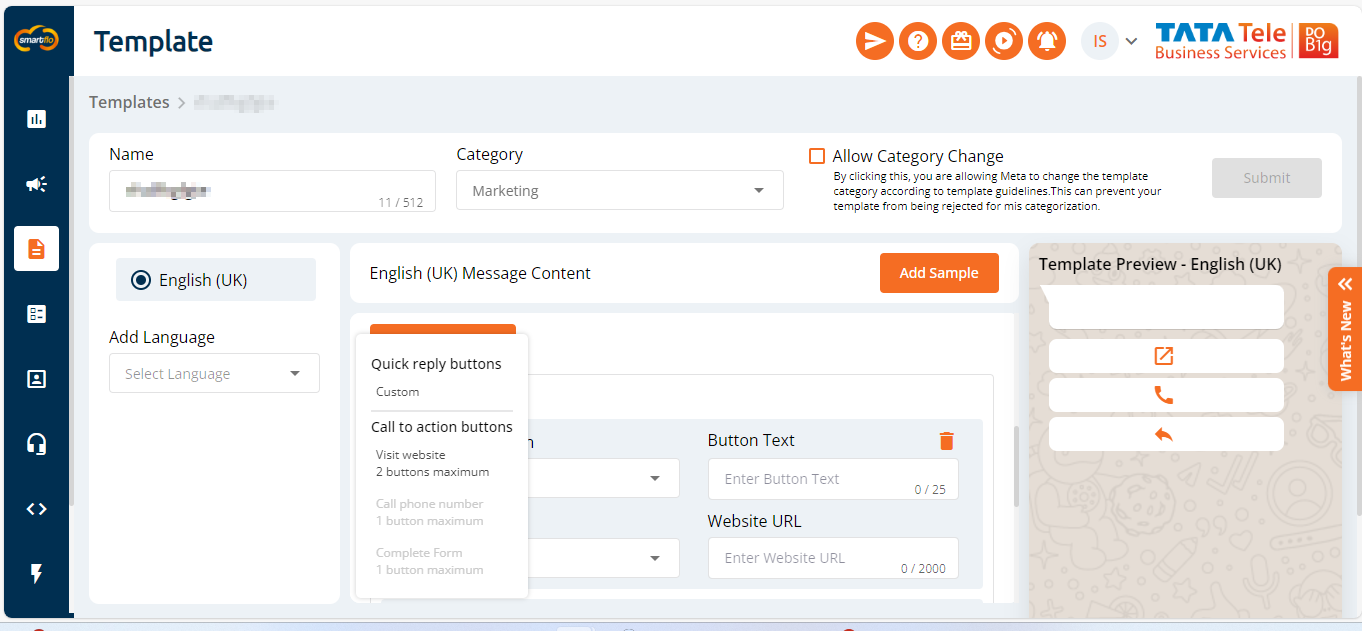
Here, you can add up to three buttons which include Two Call to Action buttons: Visit Website, Call phone number and One Quick Reply button.
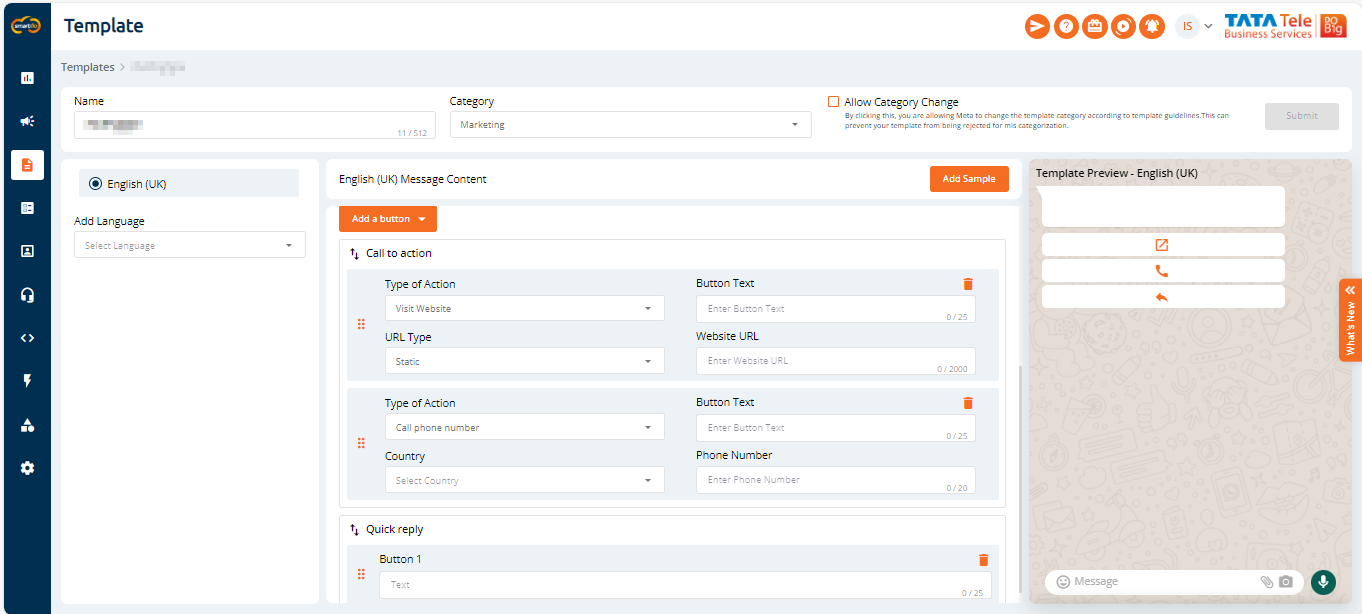
With this, you are all set up with your template on omnichannel, preview your template and hit Submit.
-
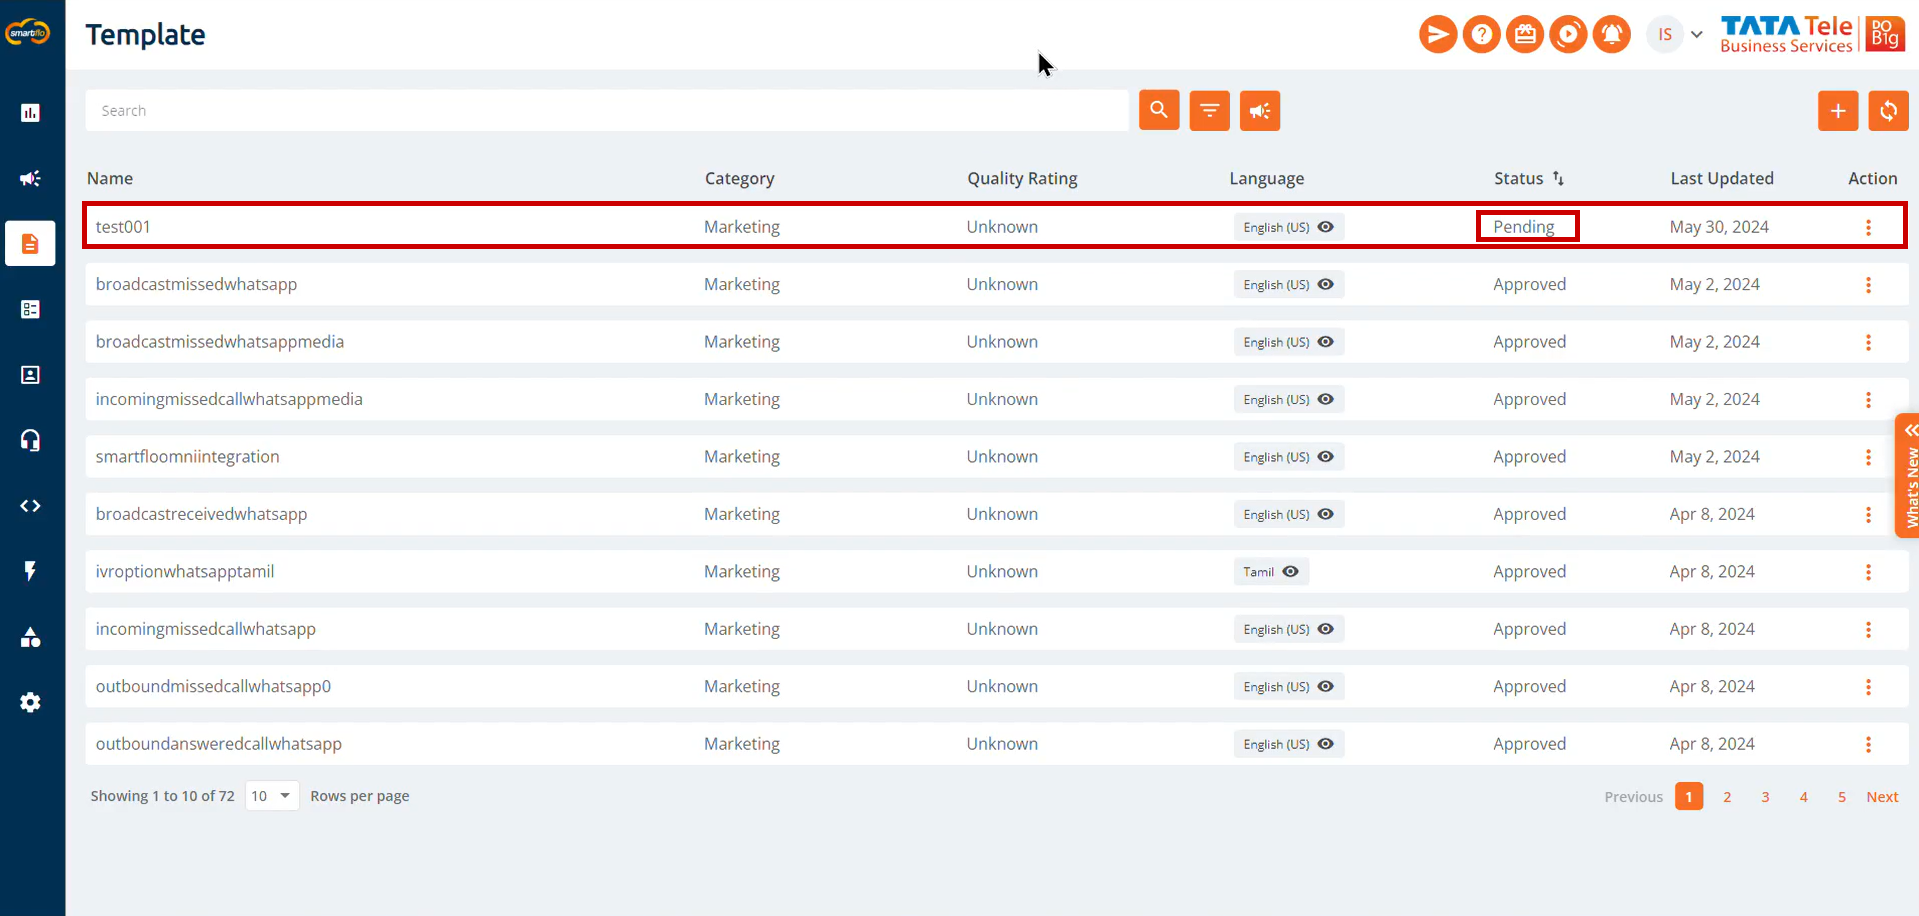
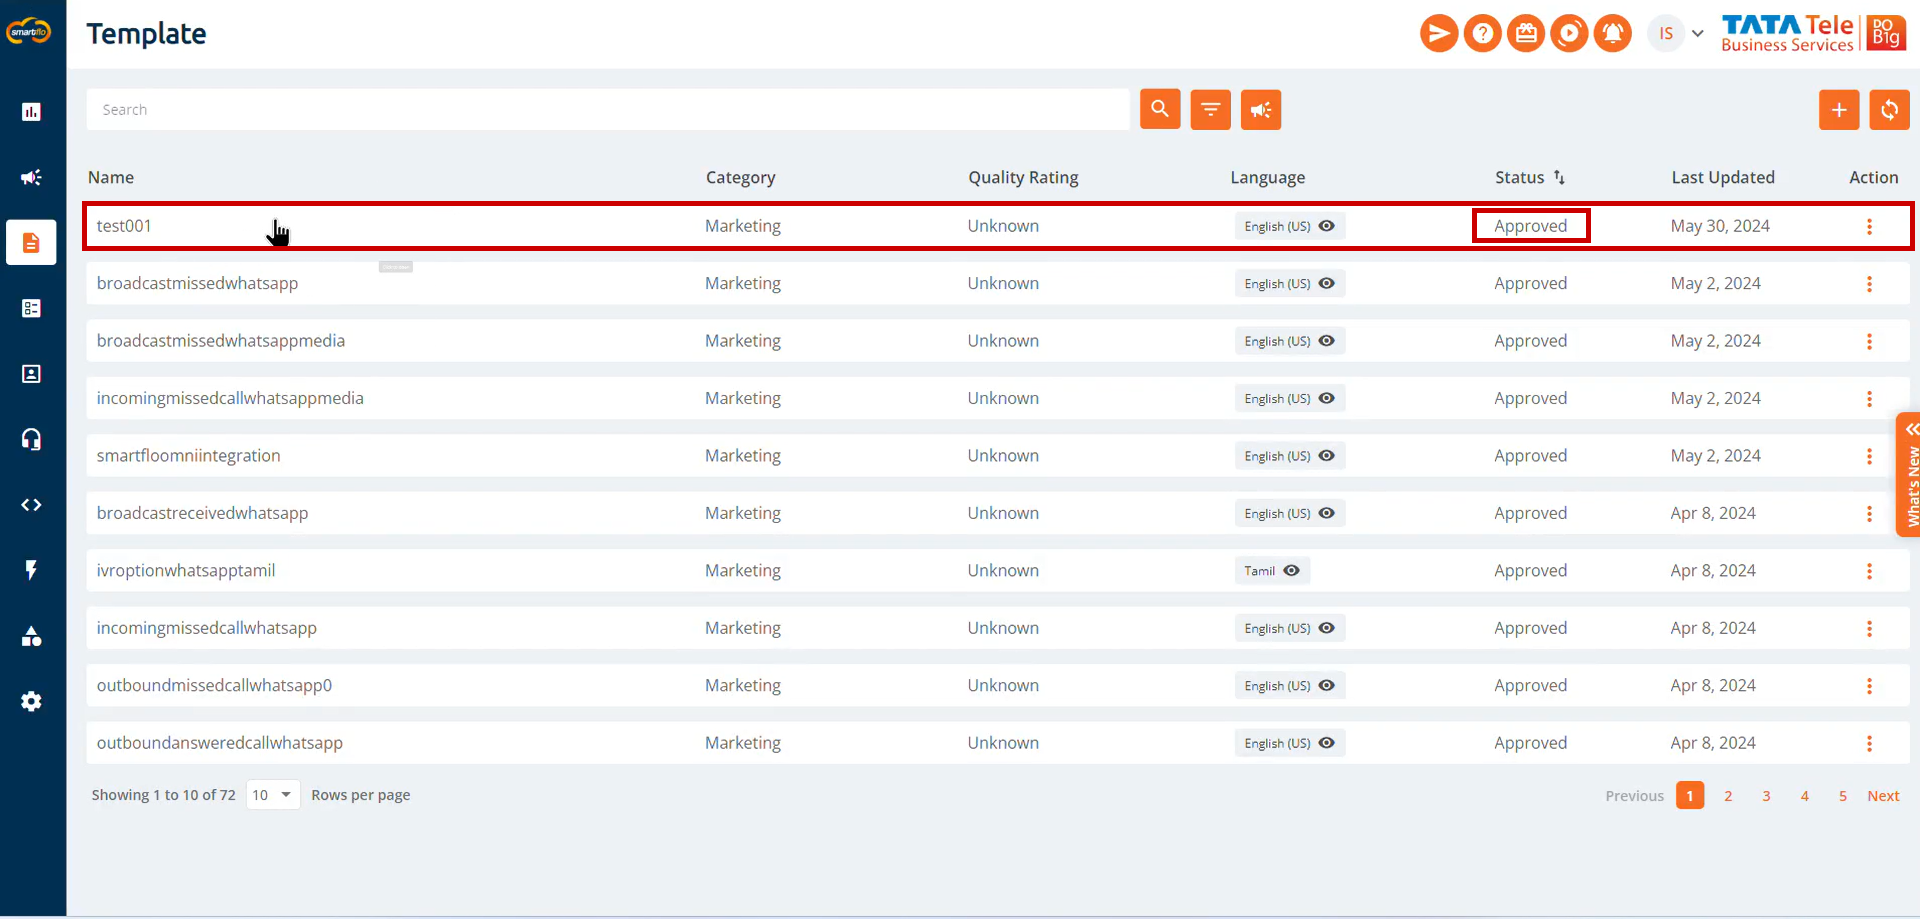
After submitting, your template is saved successfully and is Pending for approval, refresh your browser and check the status if it is Approved or not.
-
Once Approved, browse to Smartflo portal and login using your credentials.
-
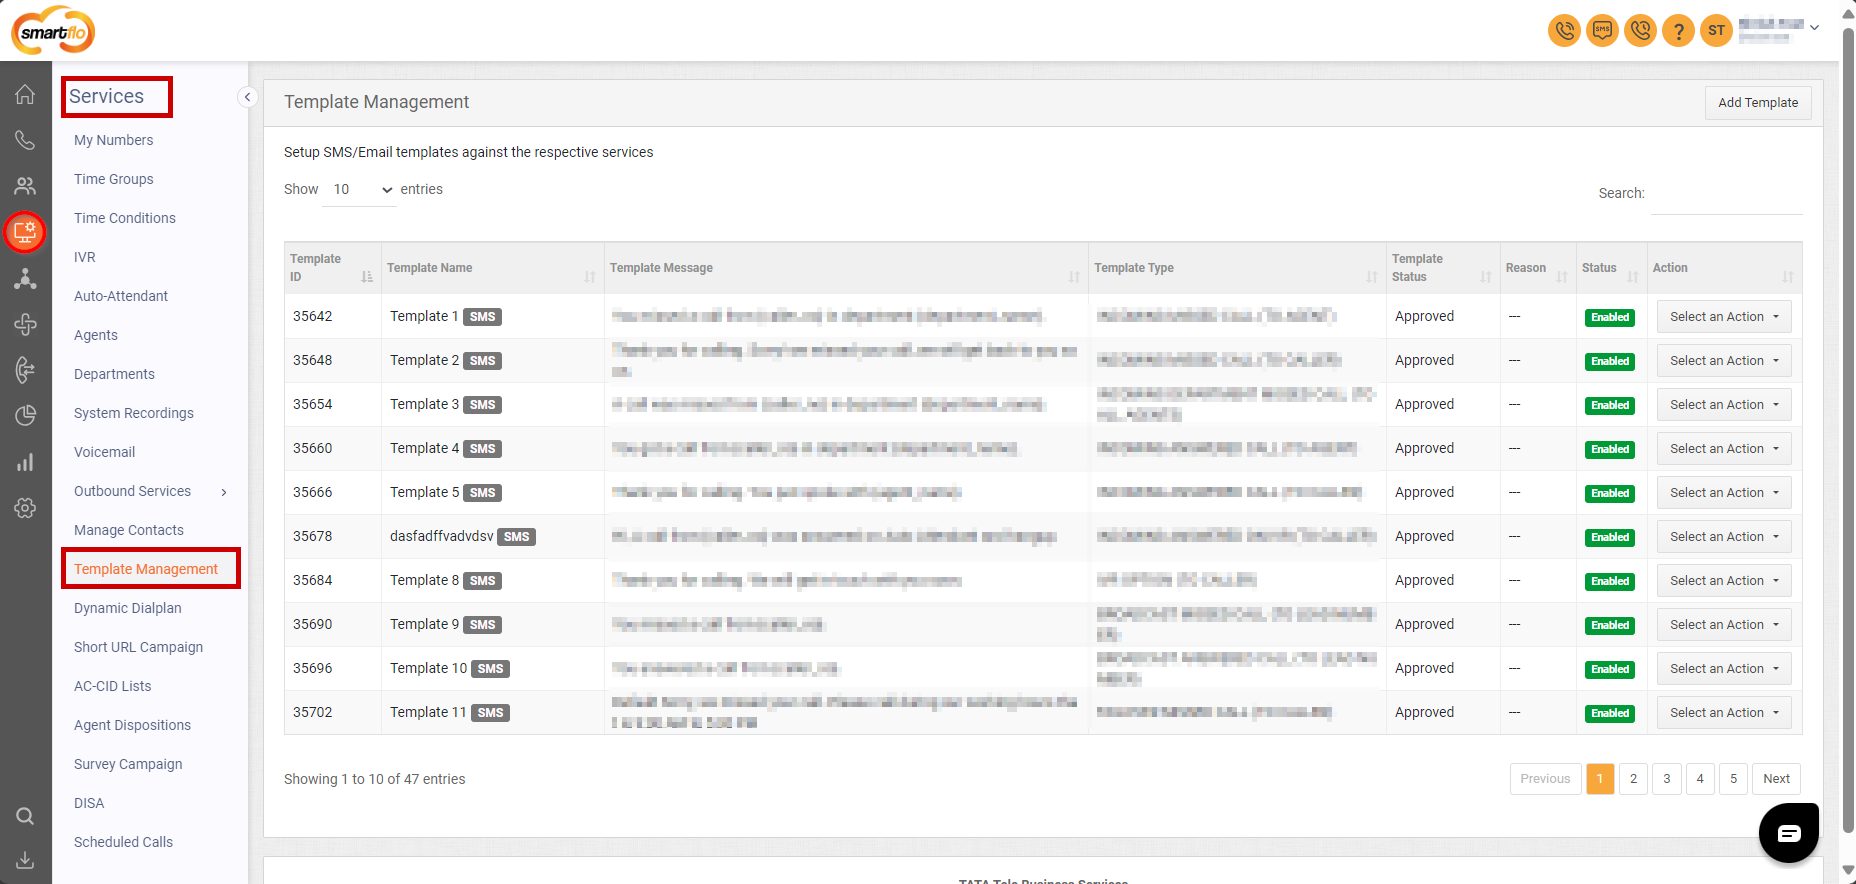
Navigate to Services>Template Management from the side-navigation pane.
-
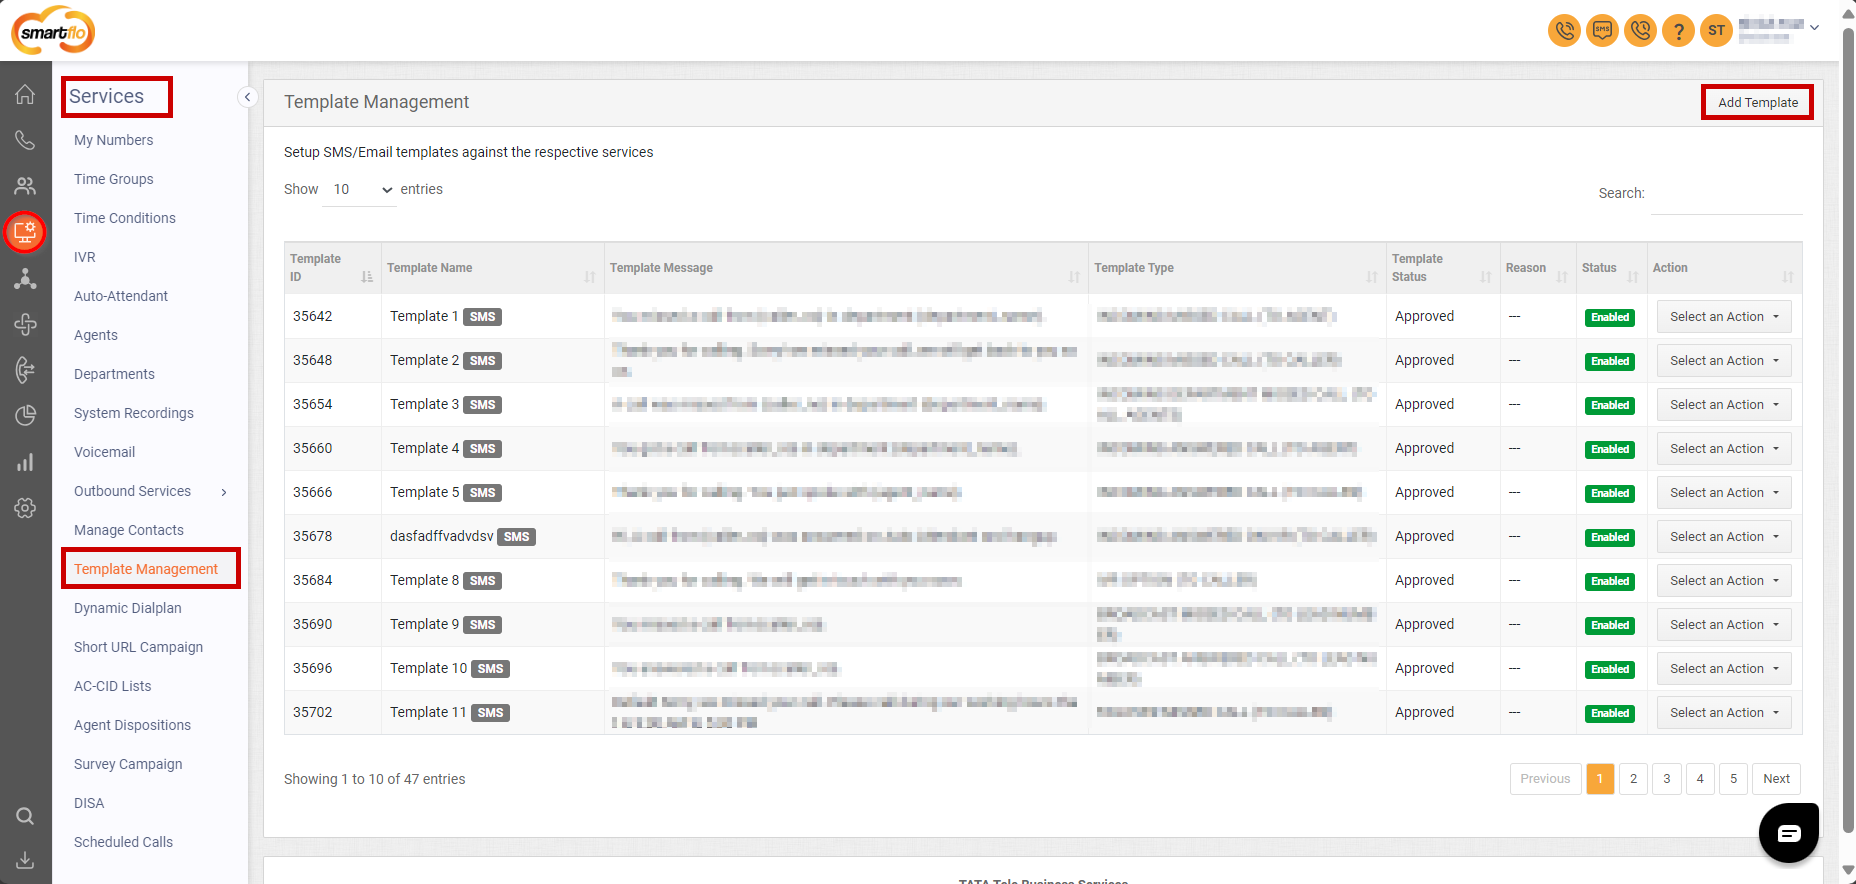
Click on the Add Template button from the top-right section.
-
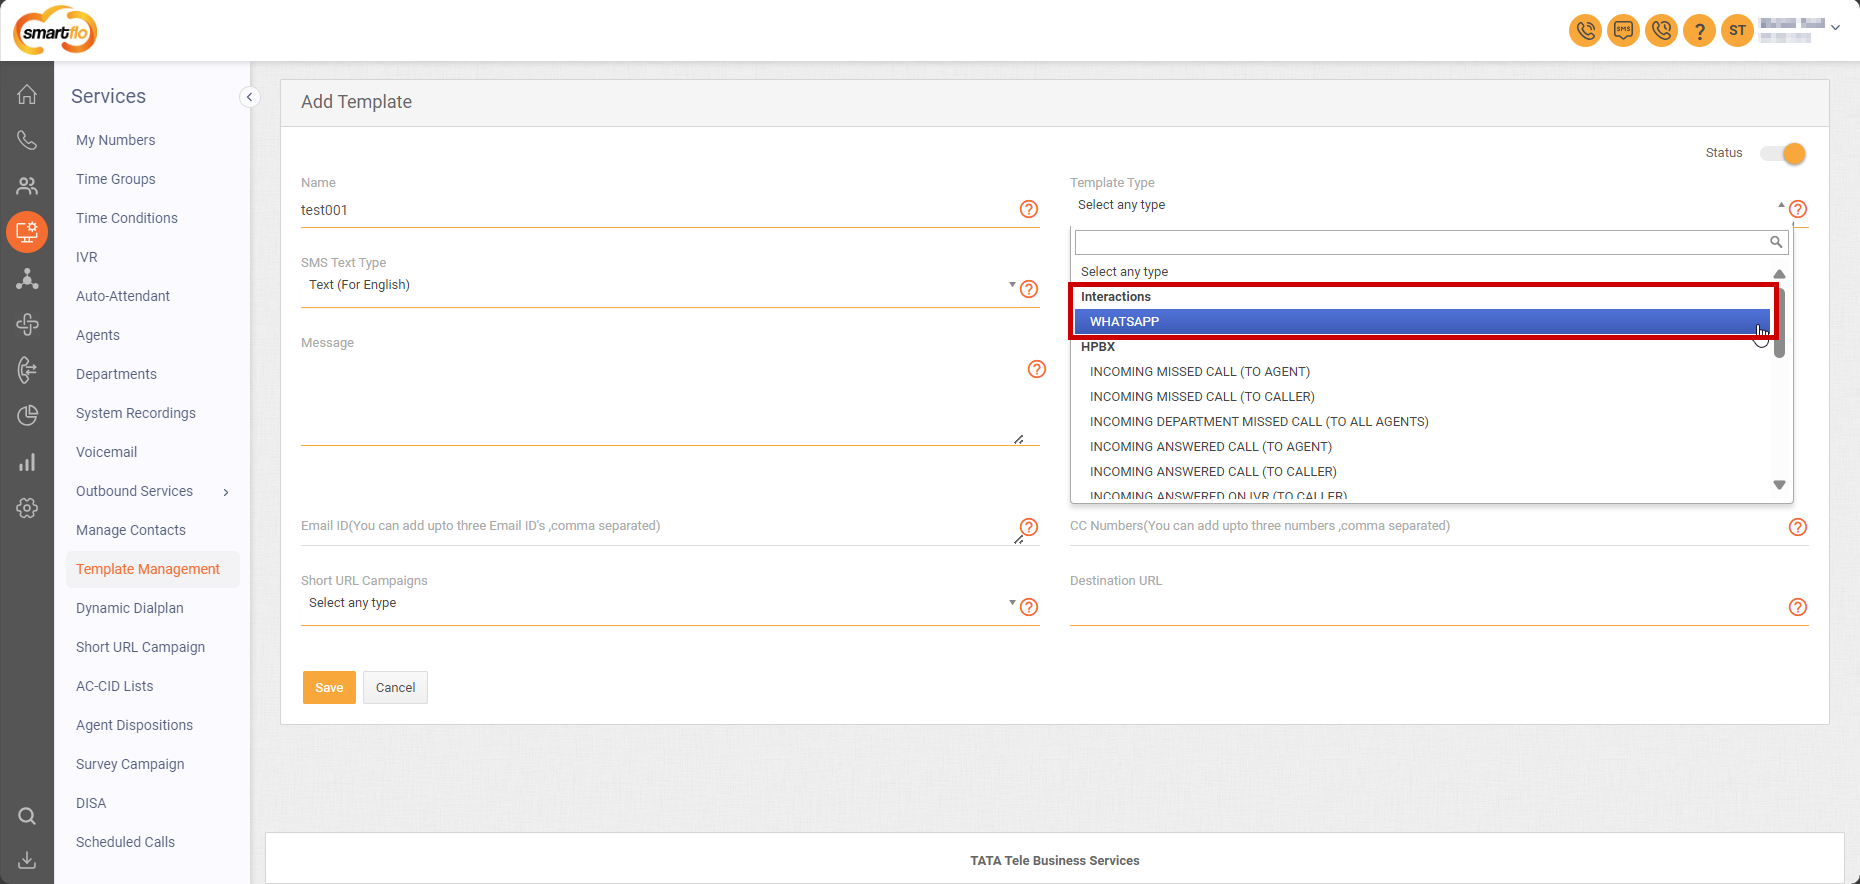
Select the Template Type as Interactions: WHATSAPP from the dropdown.
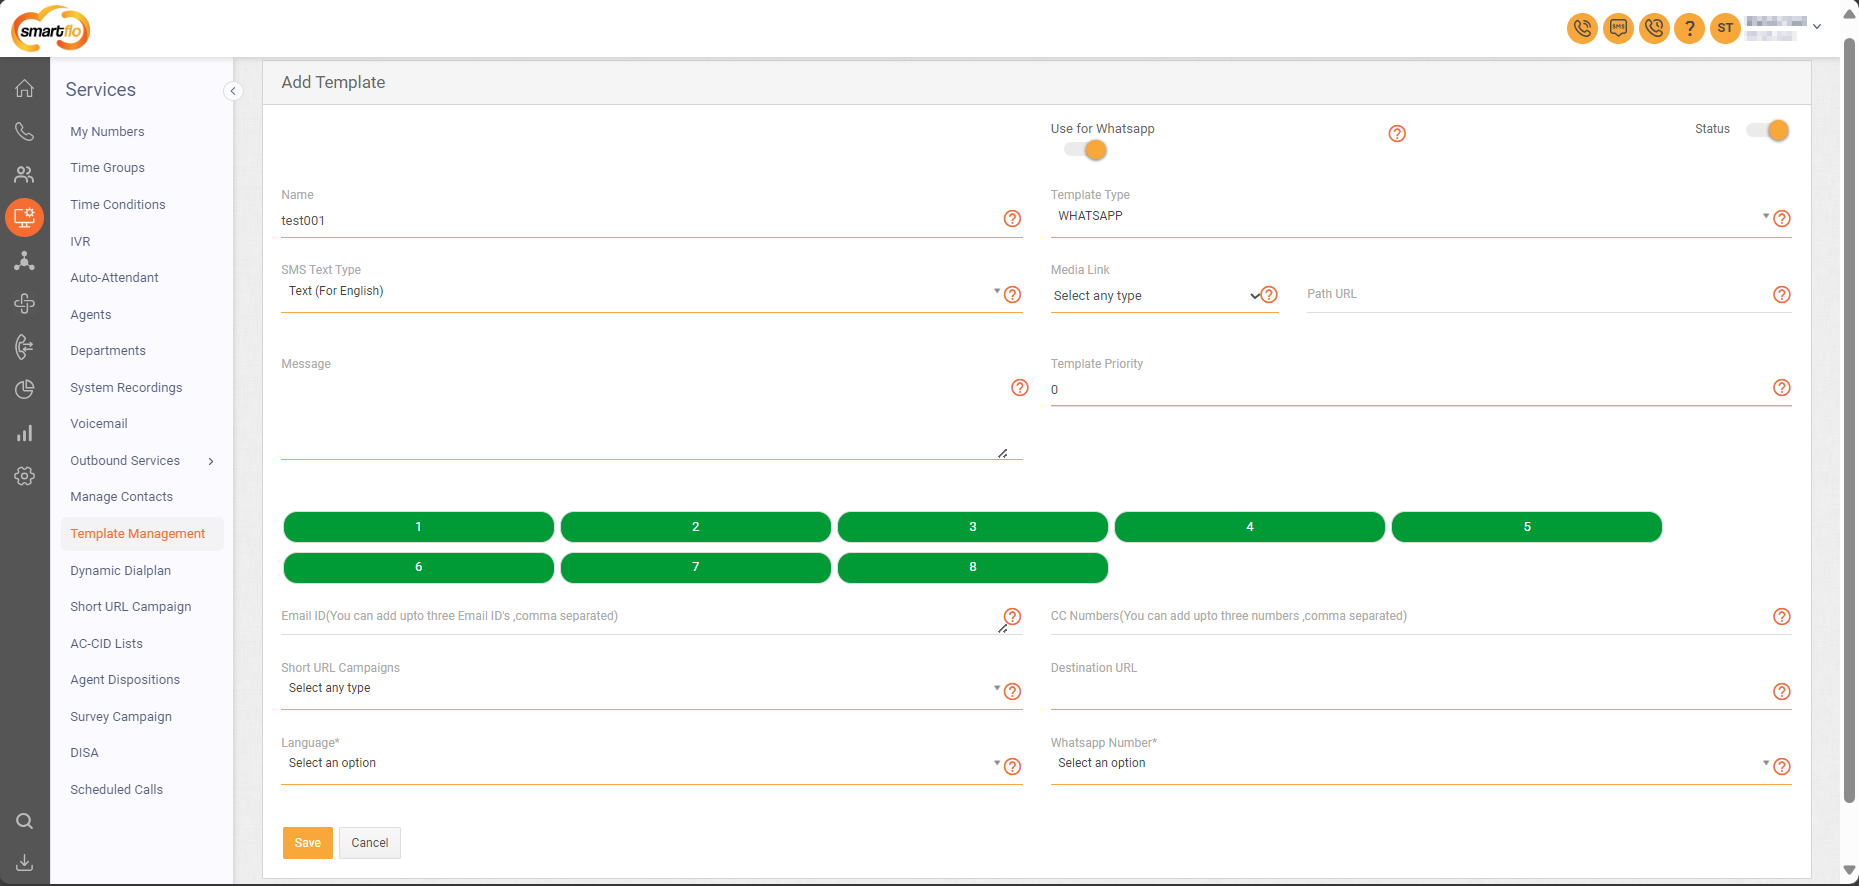
| Field | Description |
|---|---|
| Use for Whatsapp | The toggle will be default enabled in case it is an Interactions template and can be turned on in case the template is used for call events. |
| Status | Choose whether to enable/disable a template |
| Name | The name of the template should be the same as Omnichannel. We don’t support special characters in the name. |
| Template Type | Choose ‘WhatsApp’ for live chat or any other type for using the template for missed/answered calls. |
| SMS Text Type | Keep it default as 'Text (For English) |
| Media Link | Choose the media type (if any) included in the header |
| Path URL | Enter a public URL (website/Google Drive/OneDrive) that you want to include in the header. |
| Message | The body of the template will be the same as Omnichannel. |
| Template Priority | Choose a number from -100 to 100 to manage the order of the agent template list. The lowest number (-100) will have the highest priority. |
| Short URL Campaign | Enter the URL only if you are using the same template for SMS & WhatsApp |
| Destination URL | Enter the URL only if you are using the same template for SMS & WhatsApp |
| Language | Choose the same language of the template as selected on Omnichannel |
| WhatsApp Number | WhatsApp number for which you have created the template on Omnichannel. |
- Fill in the required details as per the above field description and click on Save.
Your Template is Ready to Use for Interactions on Smartflo.
Updated about 1 year ago