Leadsquared CRM Integration Guide
📘 Integration Guide: LeadSquared CRM with Smartflo Dialer
This document provides a step-by-step guide to integrating LeadSquared CRM with Smartflo Dialer for seamless calling and call logging. The integration enables users to:
- Make calls directly from LeadSquared
- Log call details automatically
- Access call recordings for future reference
✅ Prerequisites
Before starting the integration, ensure you have the following:
1. Smartflo Requirements
- Smartflo Admin Account – For telephony integration setup
- Smartflo Agent Account – For making/receiving calls
- Smartflo API Token – For authentication and API access
- Dialer Campaigns Setup – At least one empty lead list assigned throughout the campaign
2. LeadSquared Requirements
- Active LeadSquared CRM Account with Telephony Integration
- API Permissions enabled (for telephony, leads, and marketplace)
- Marketplace Access to install the Universal Telephony Connector
🔧 Integration Steps
Step 1: Enable LeadSquared Dialer Integration in Smartflo
-
Log into your Smartflo India account
-
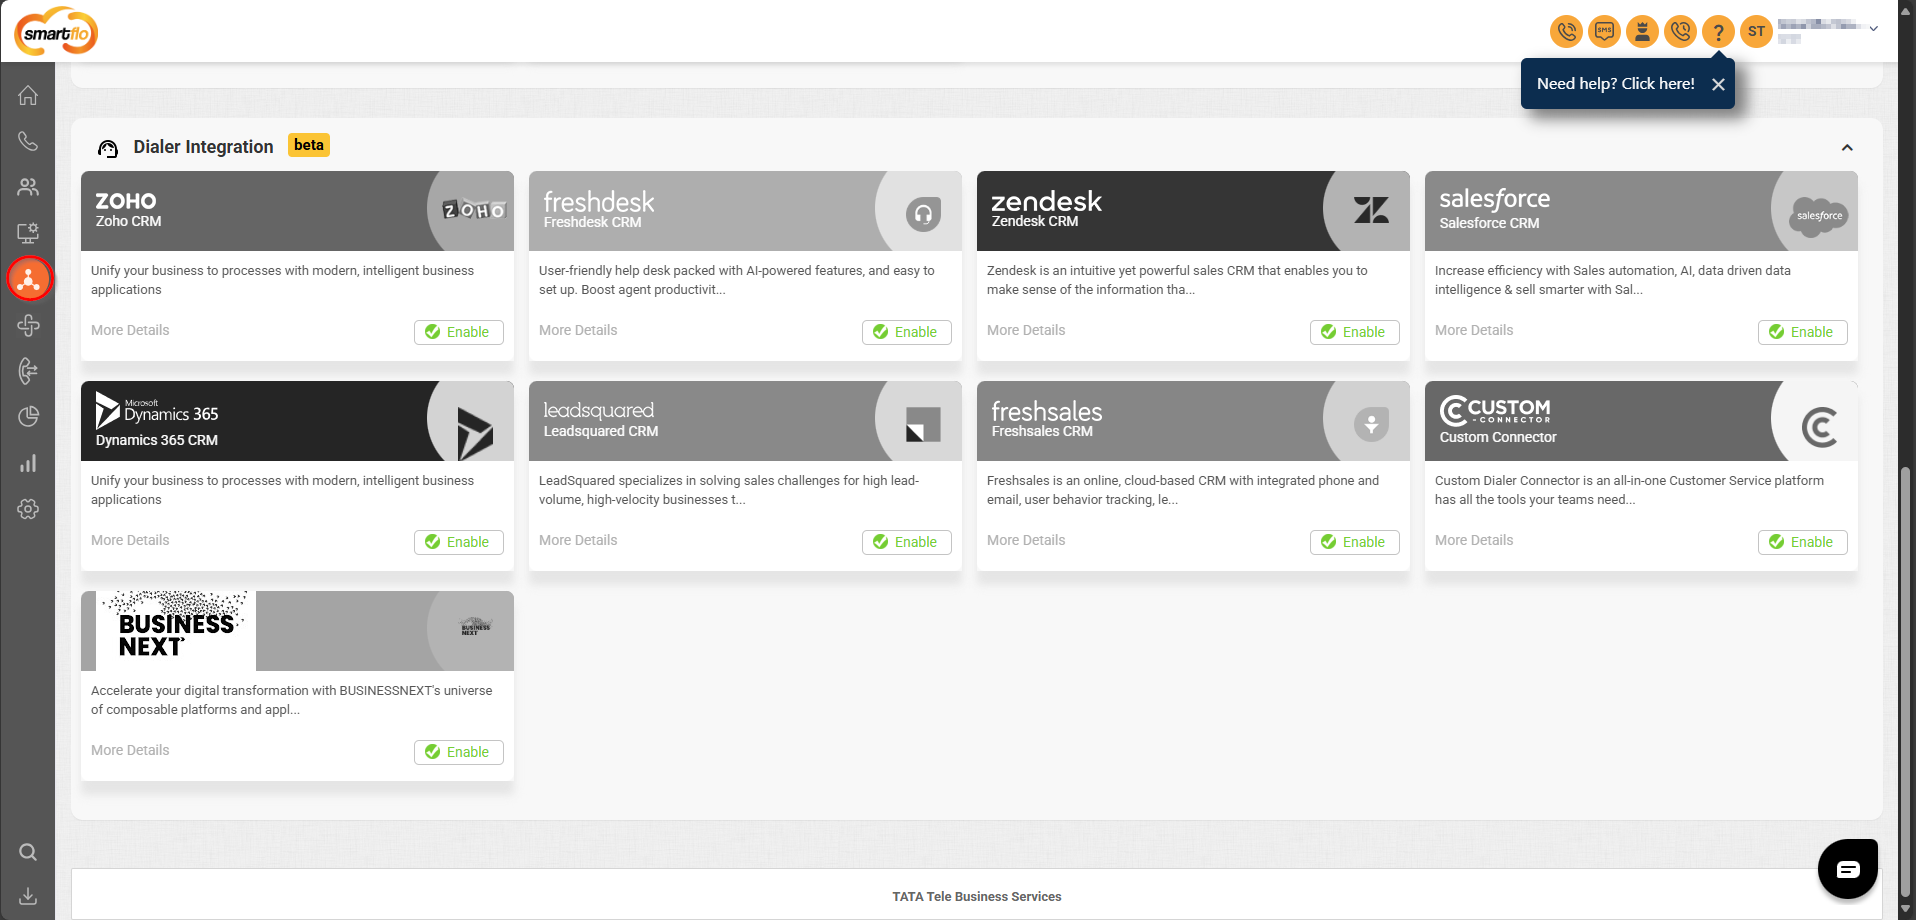
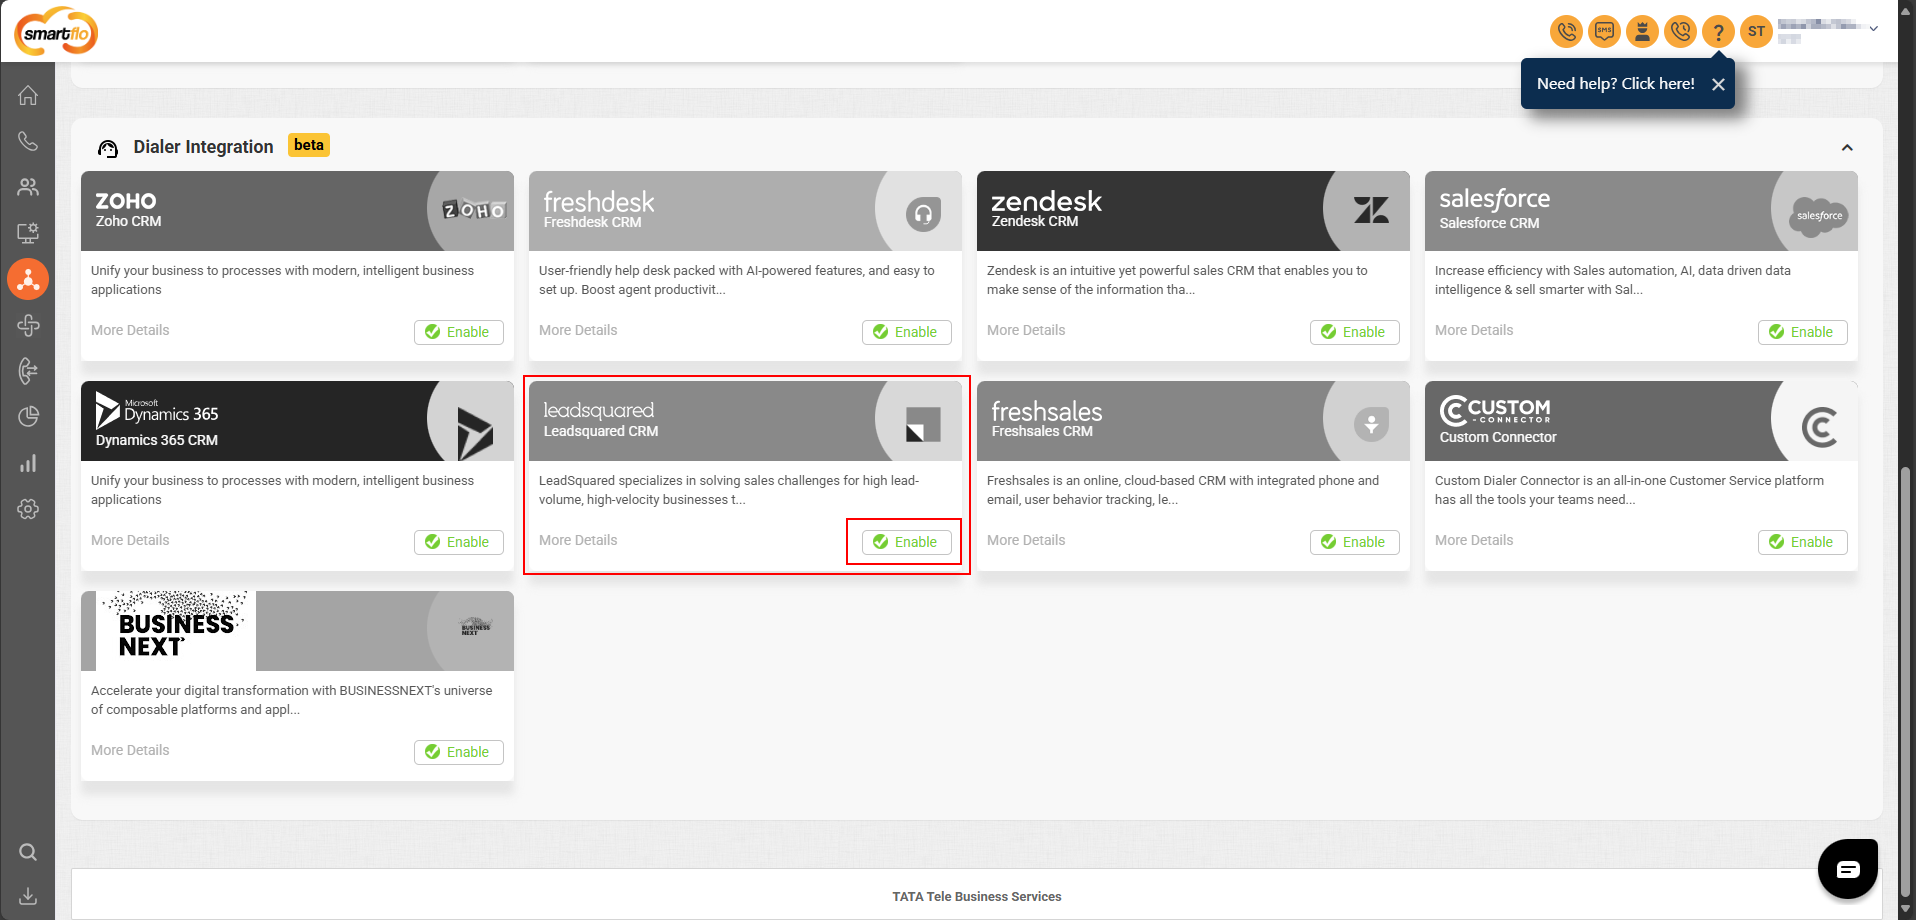
Navigate to the Integrations tab
-
In Dialer Integration, click Enable for LeadSquared CRM
-
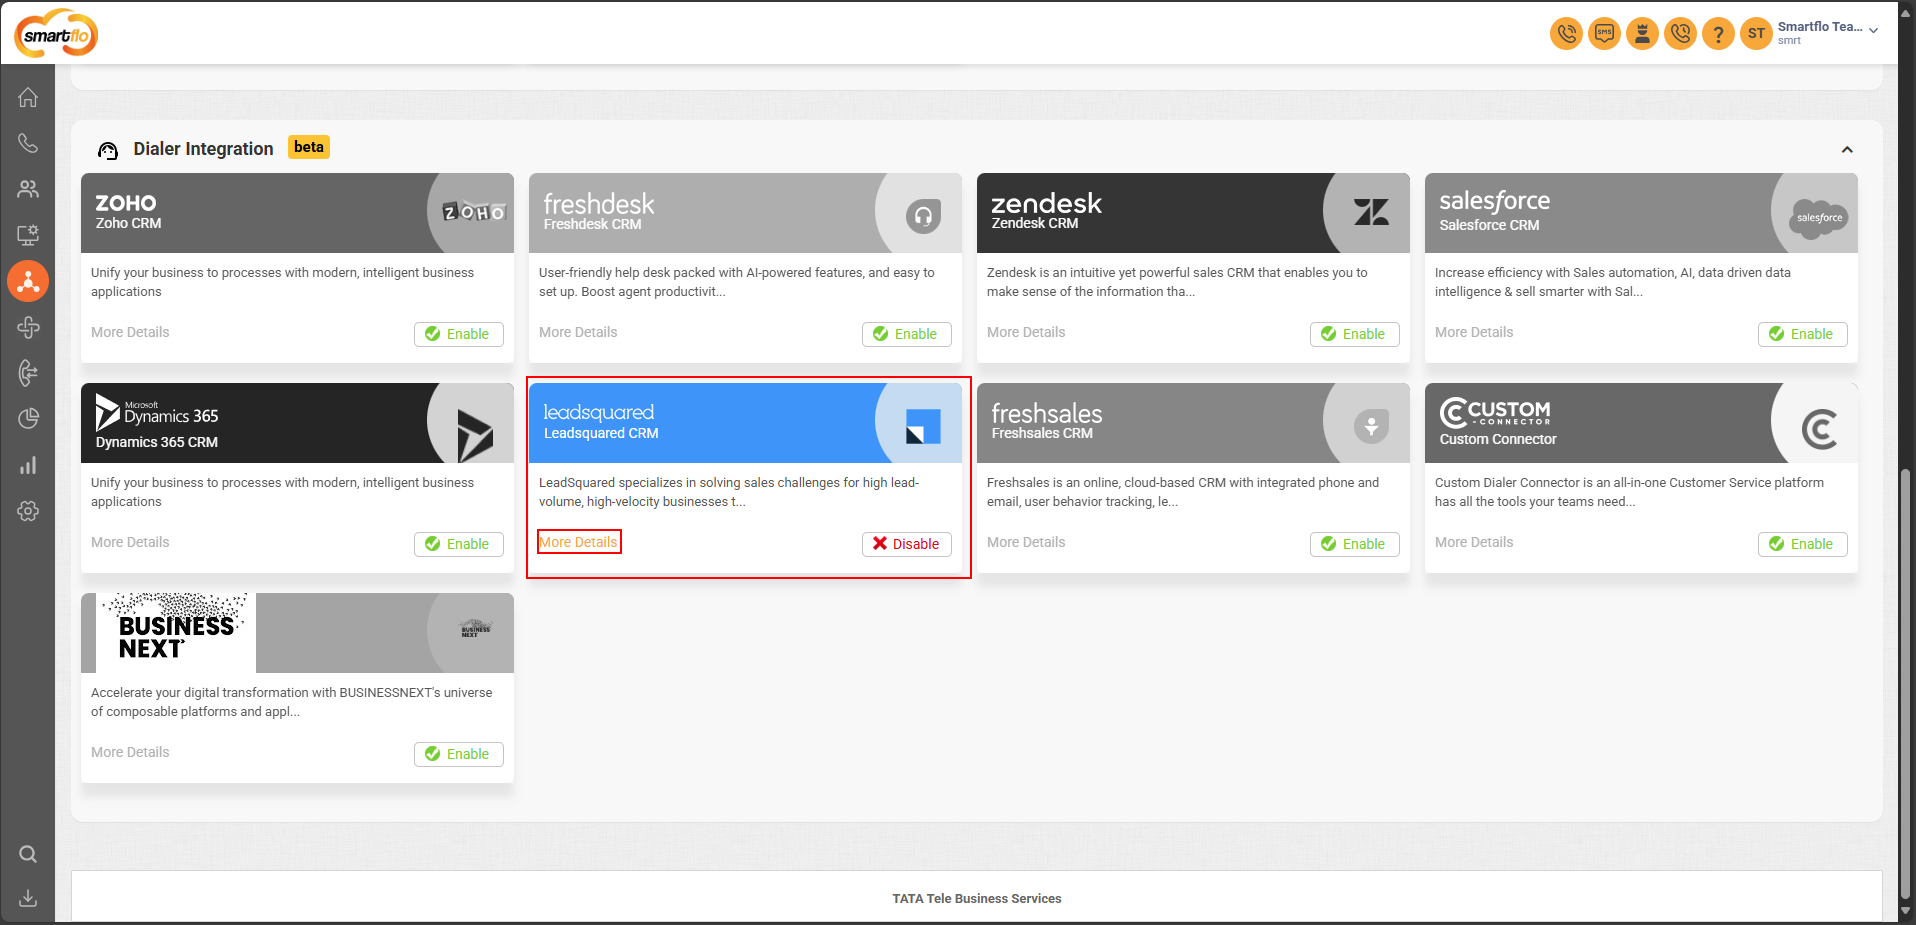
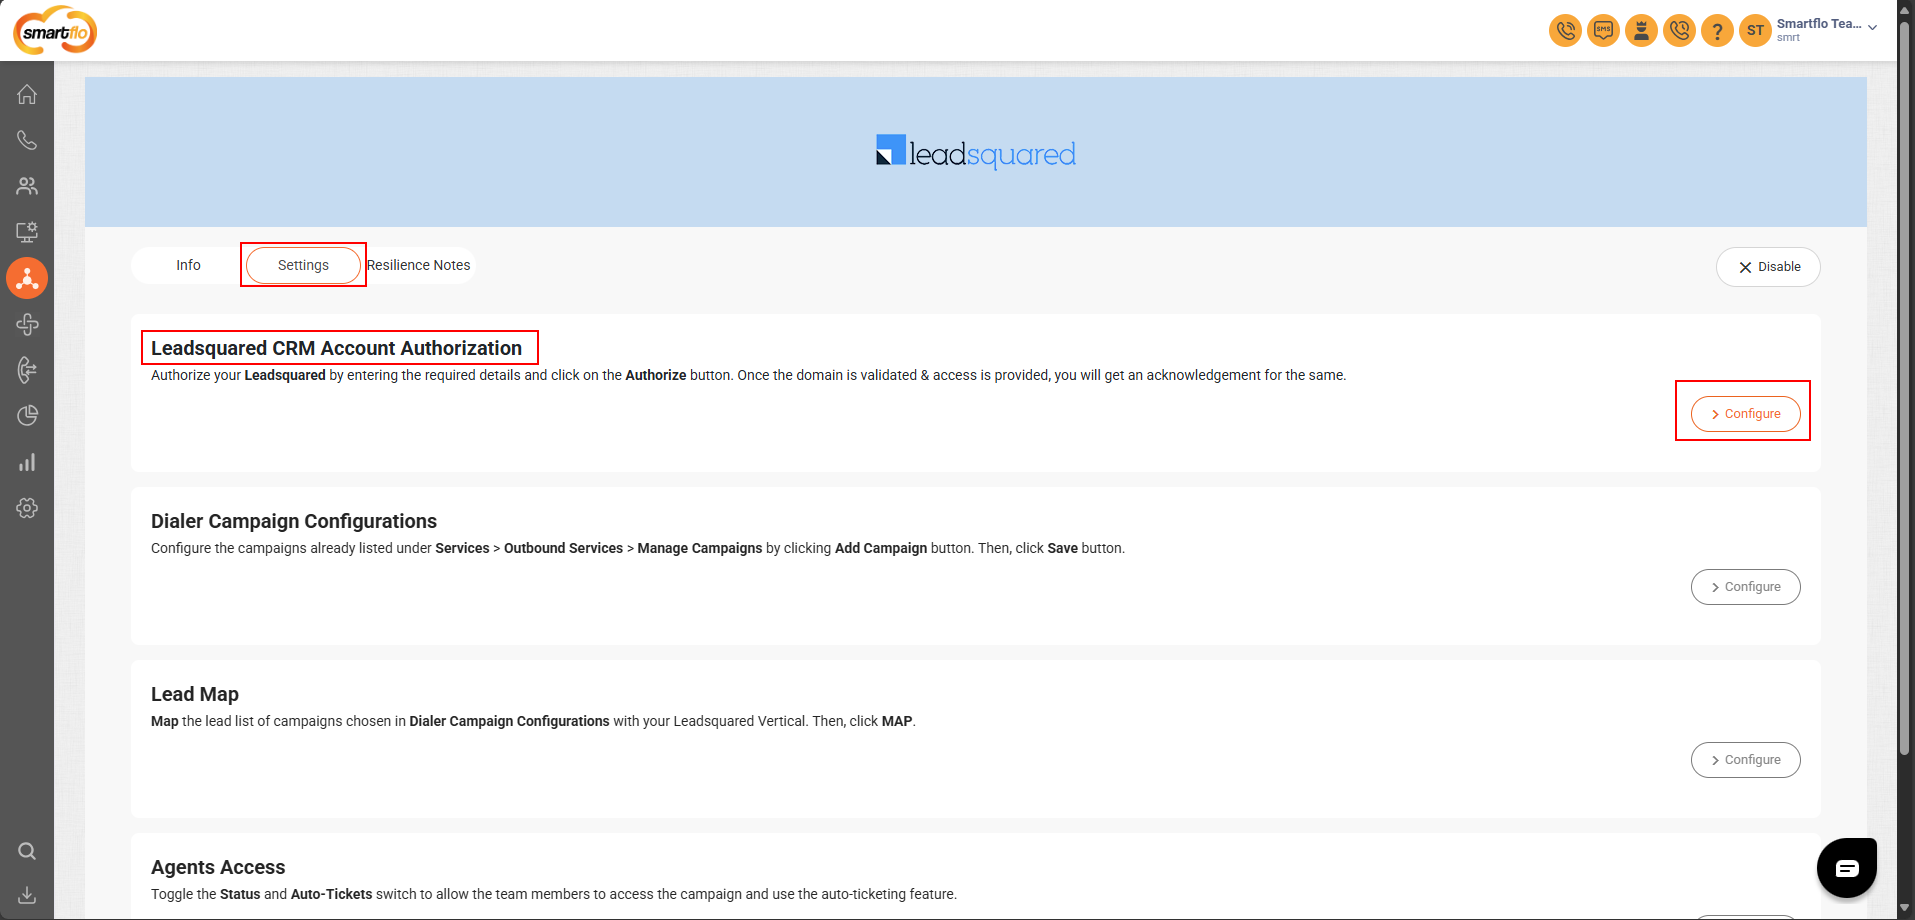
Click More Details for LeadSquared
-
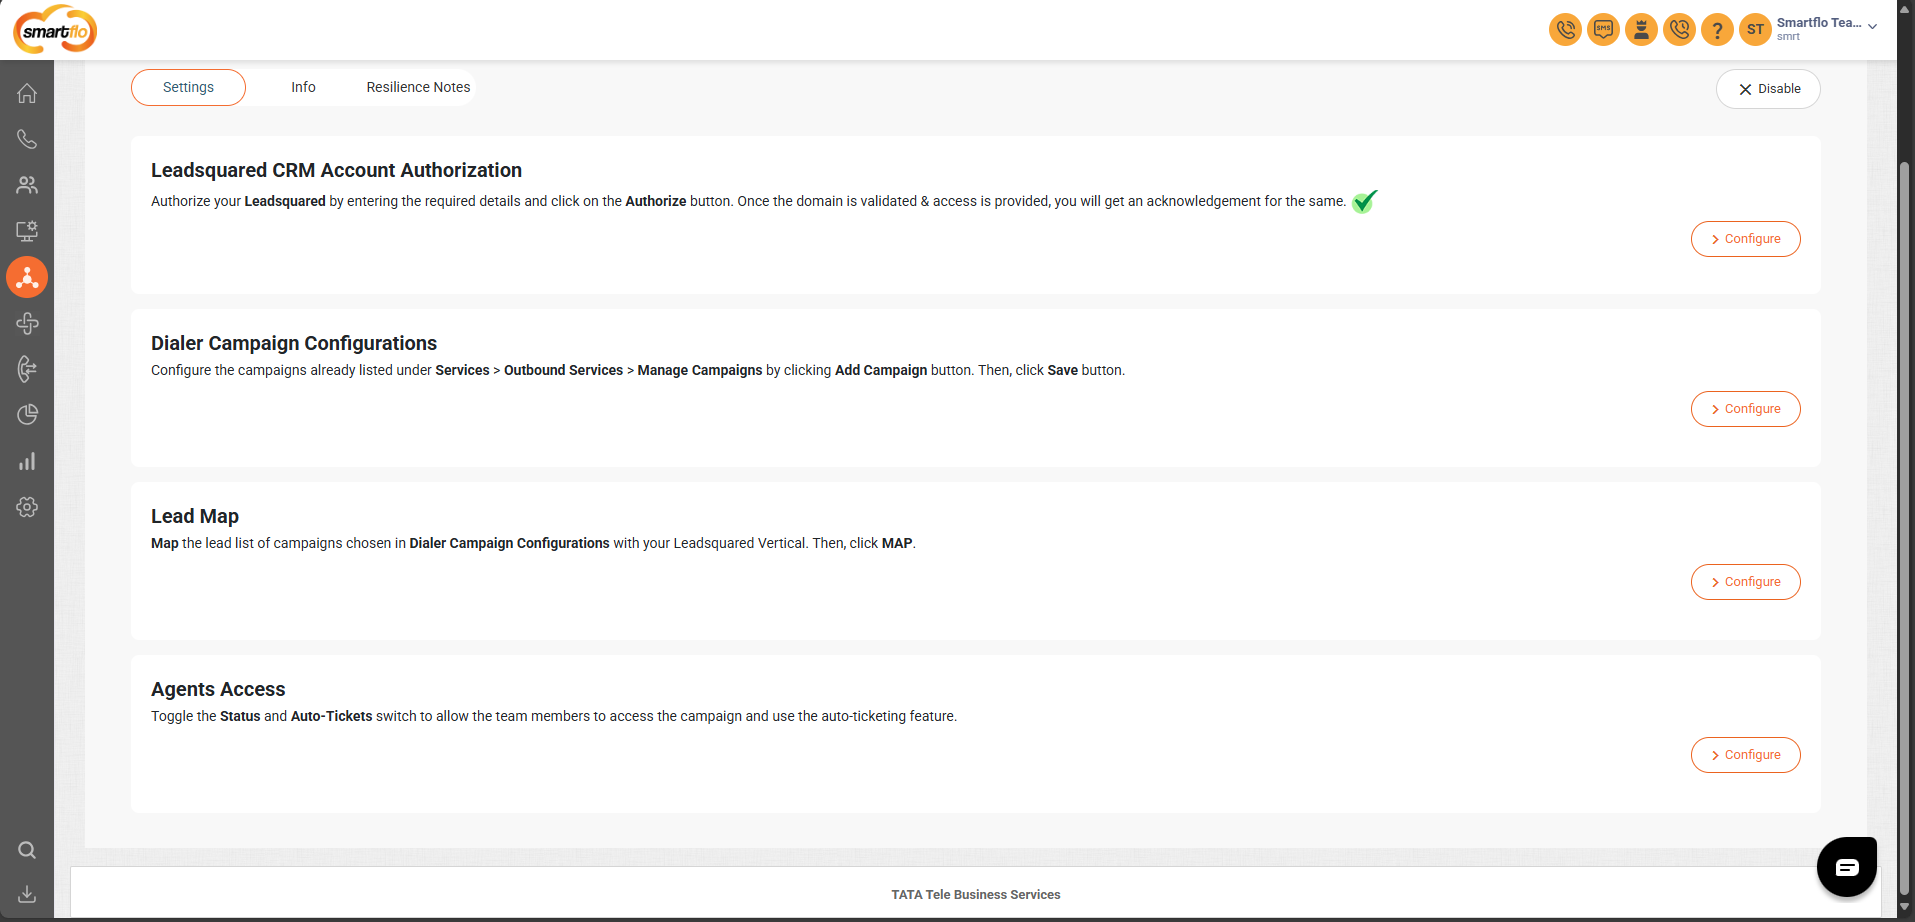
In Settings, click Configure next to LeadSquared CRM Account Authorization
-
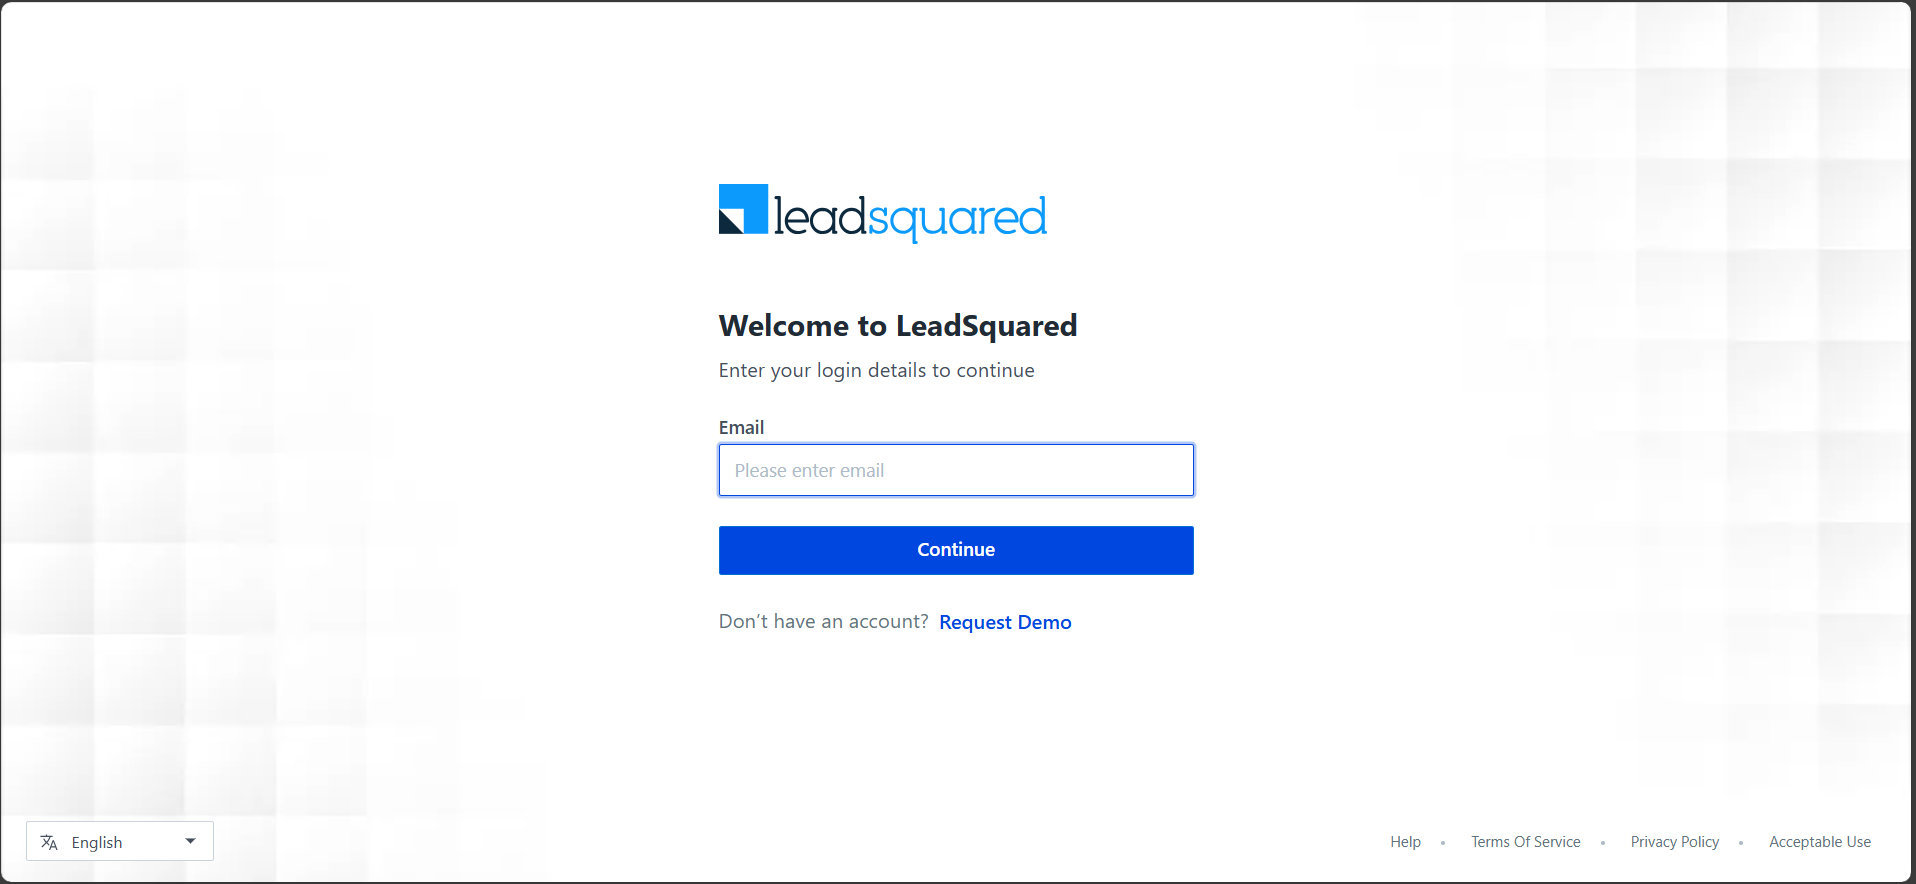
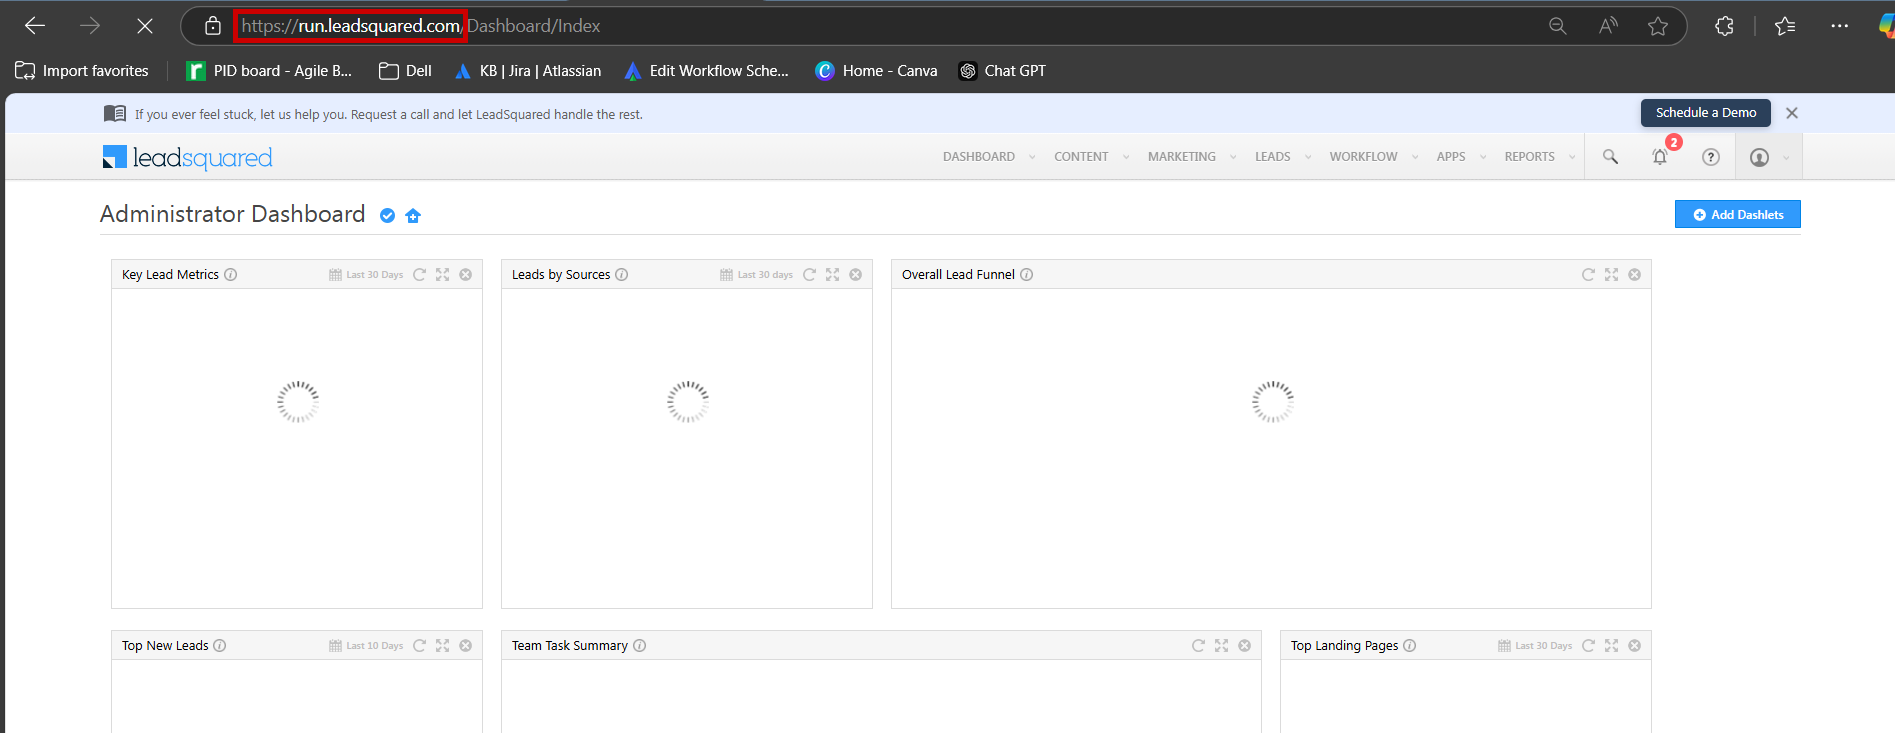
Log in to your LeadSquared CRM in a new tab
-
Copy the CRM Domain URL (till
.com)
-
Click the Profile Icon → Settings
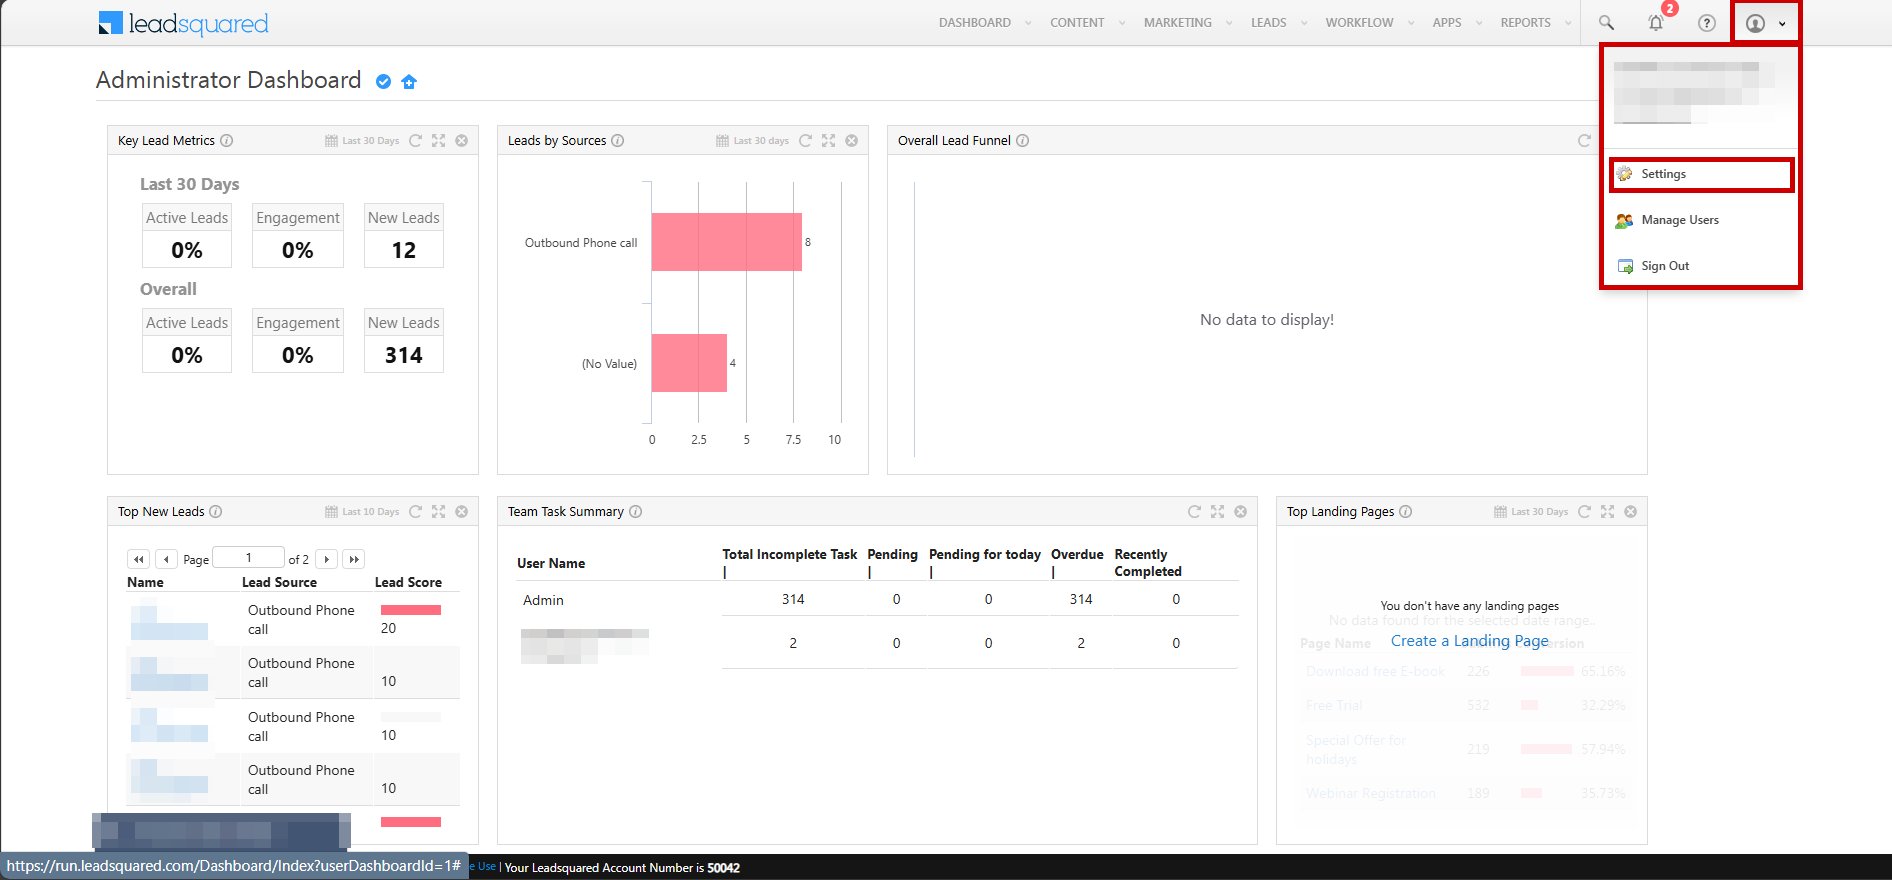
-
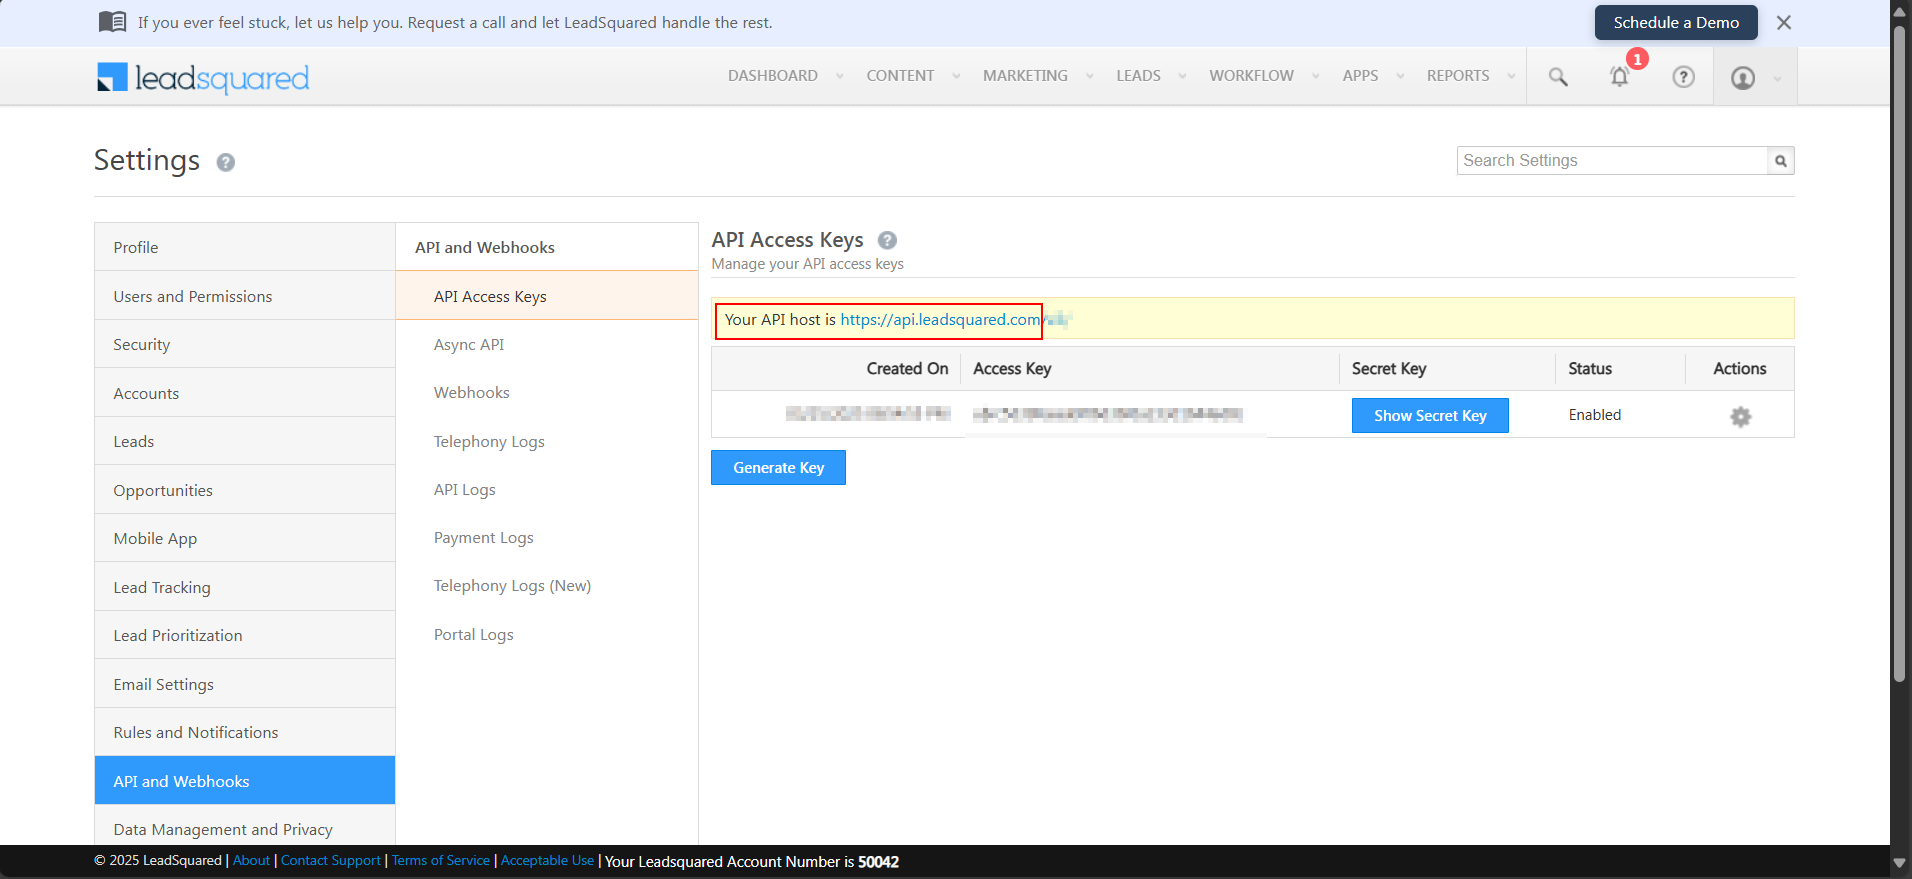
Go to API and Webhooks and click Show Secret Key to copy the Access & Secret Keys
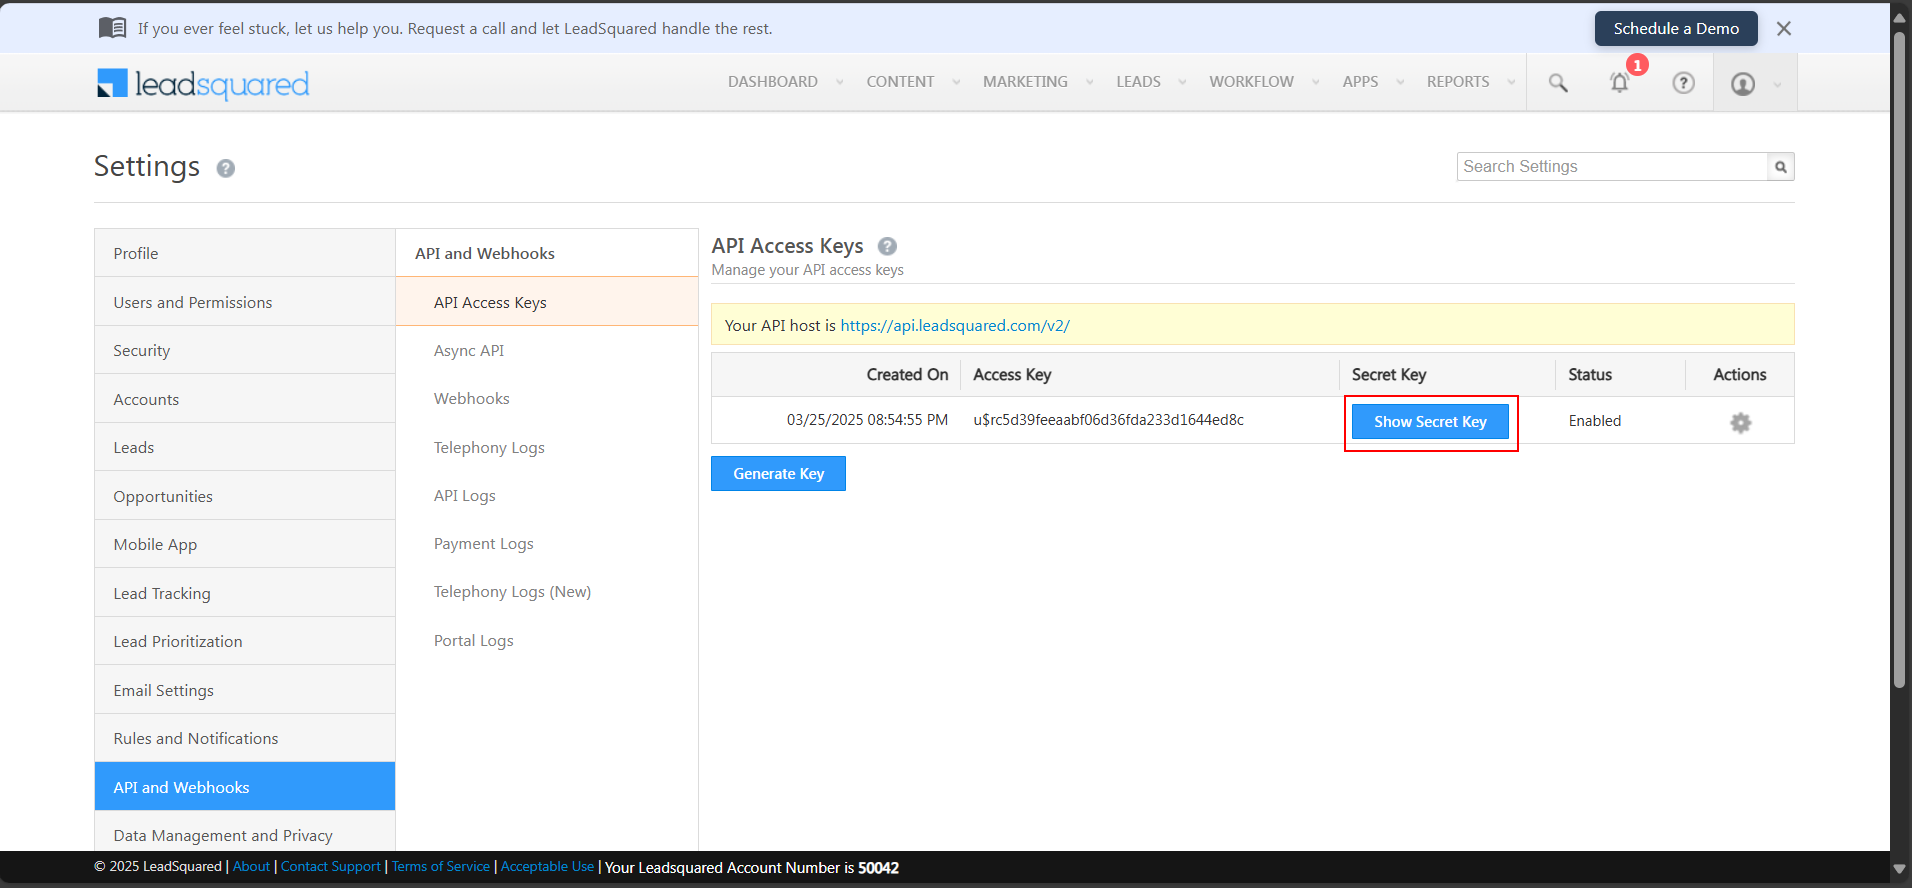

-
Click OK
-
Copy the API Domain (till
.com)
-
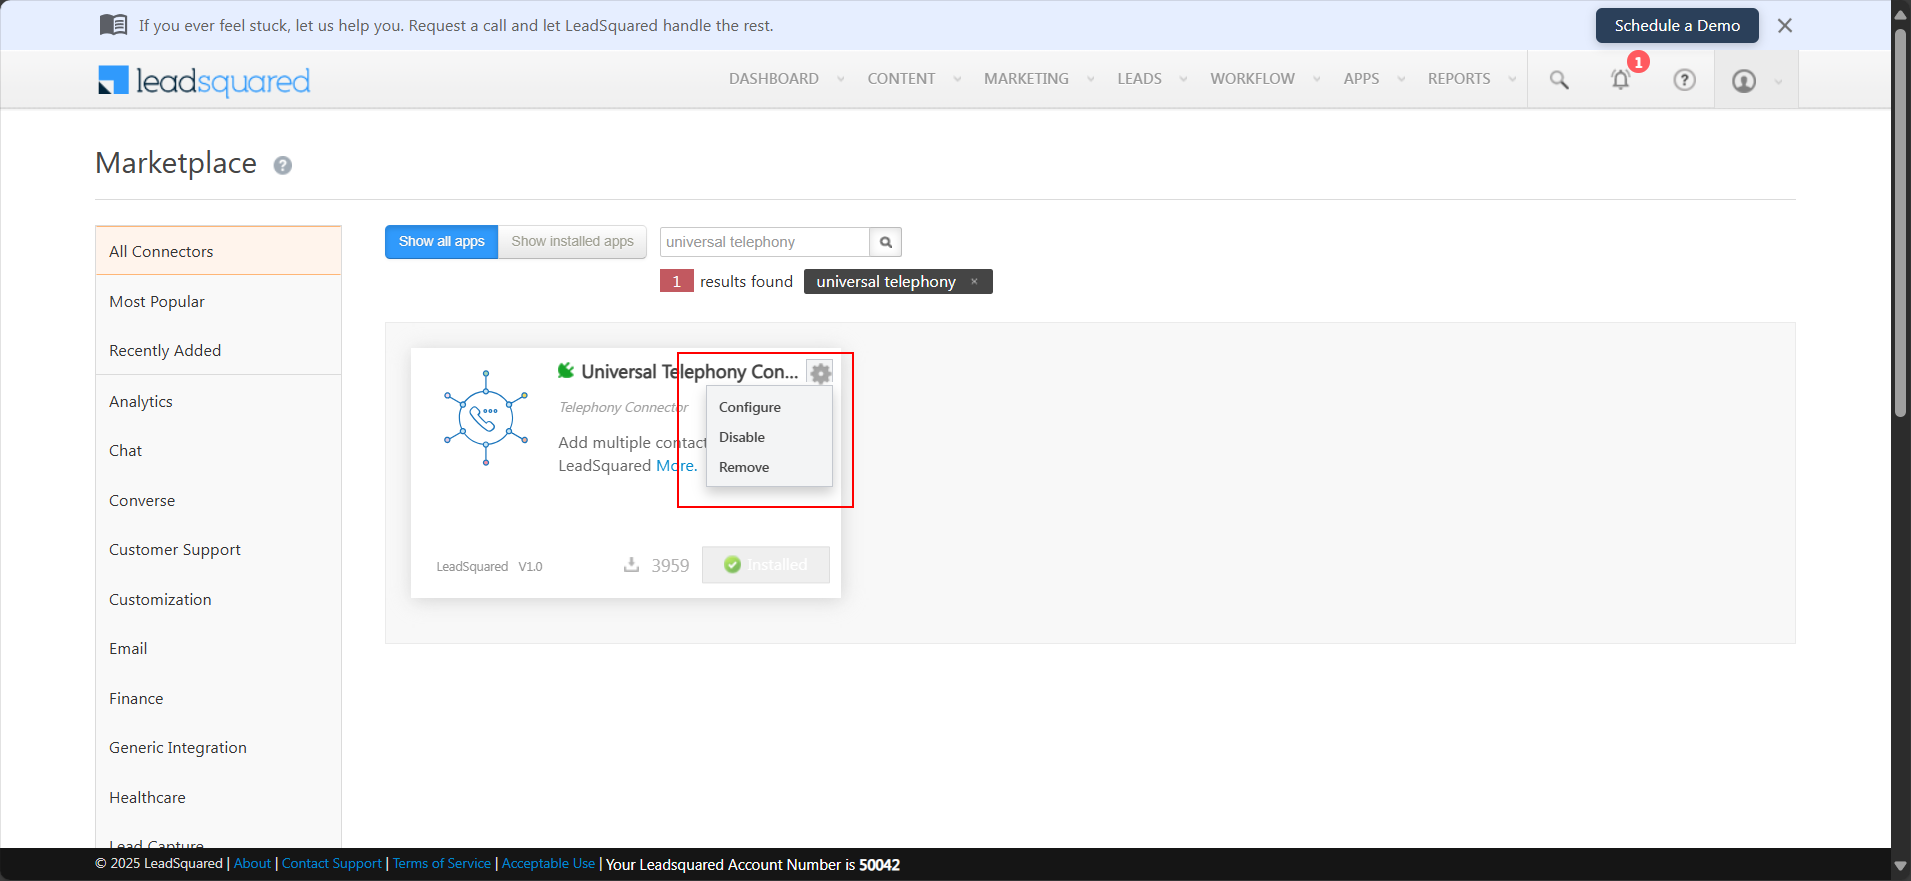
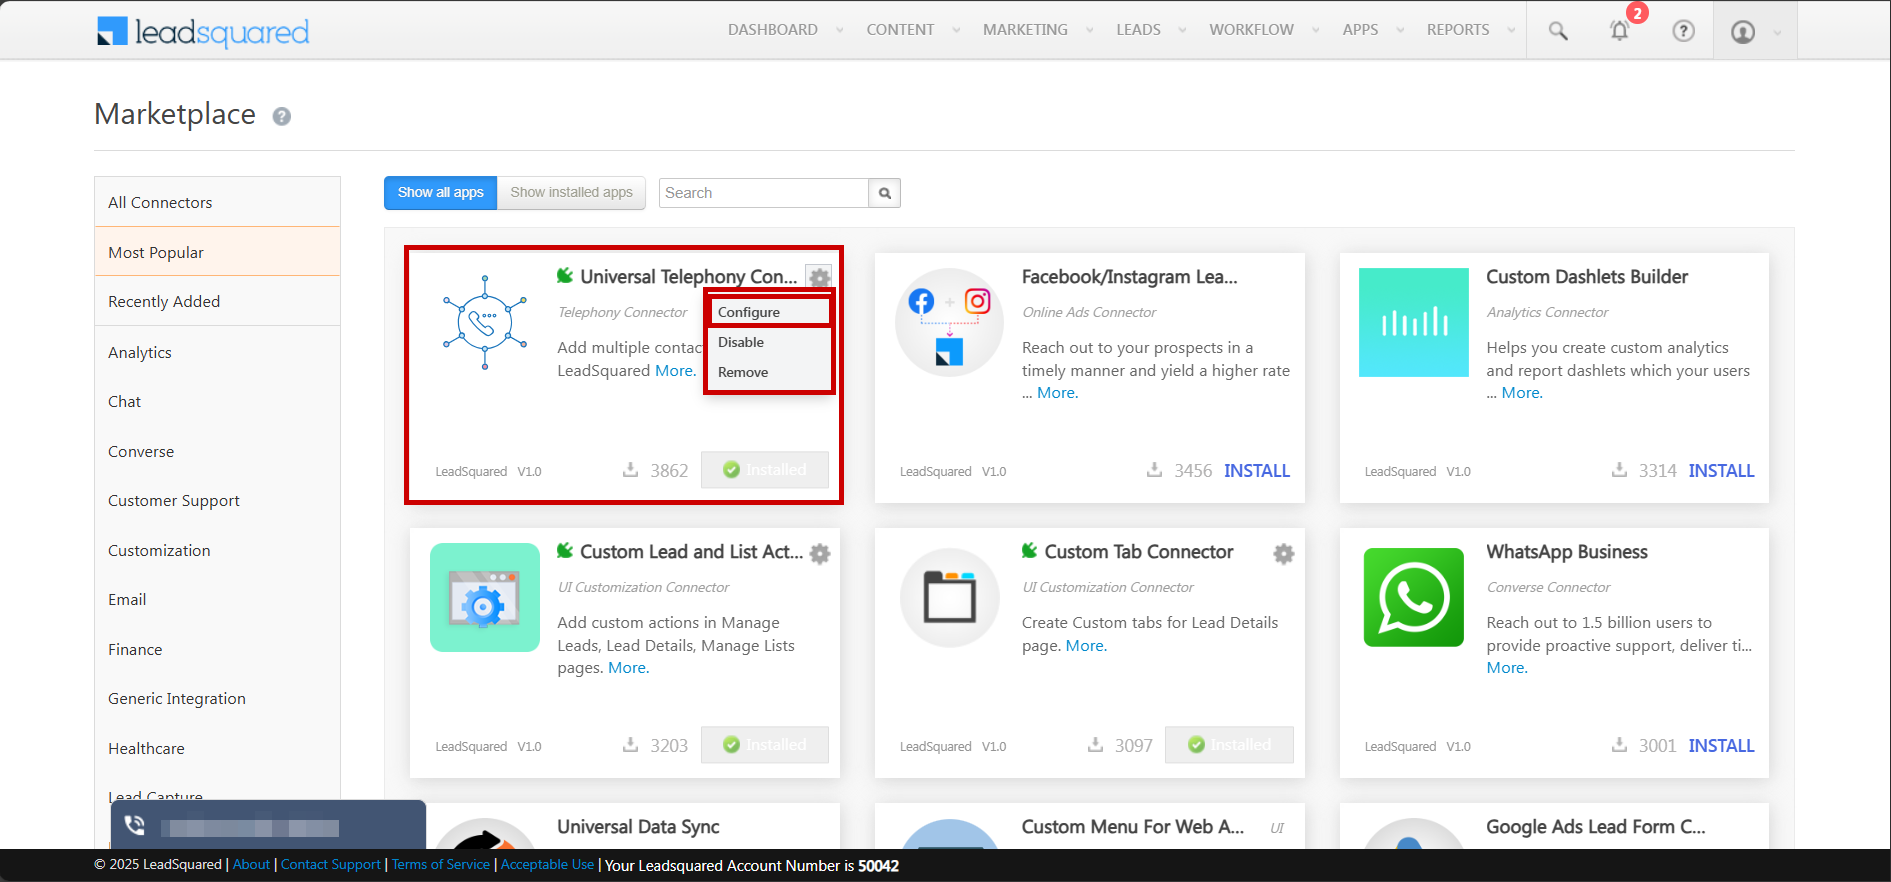
Click Apps > Apps Marketplace
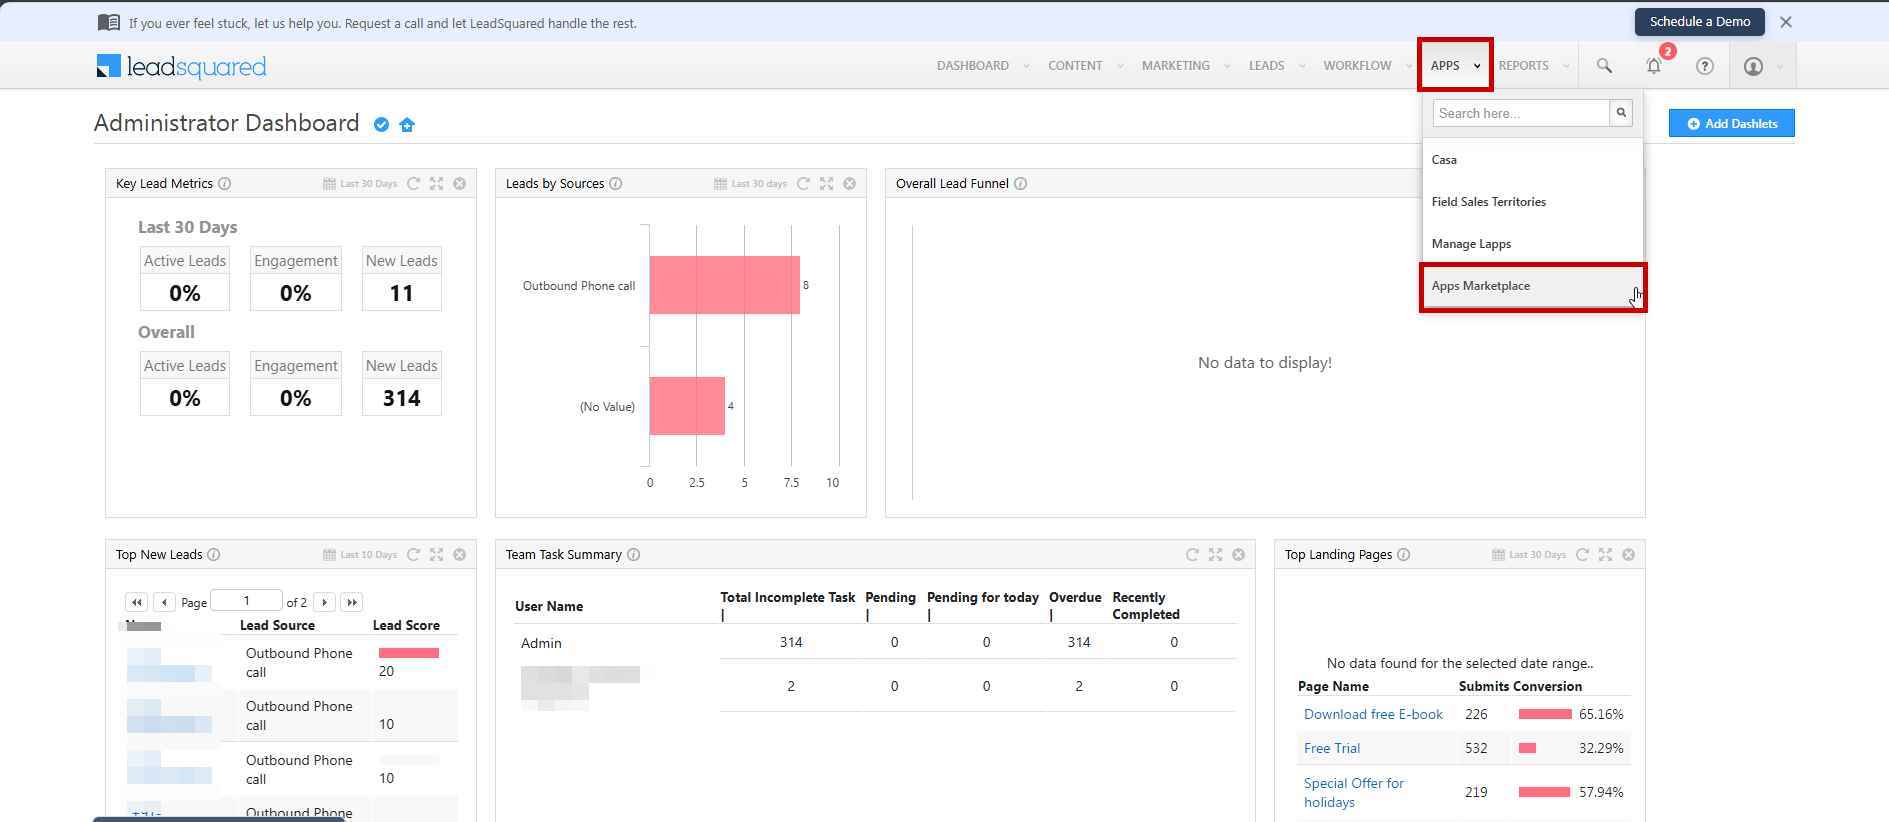
-
Search for Universal Telephony Connector and Install
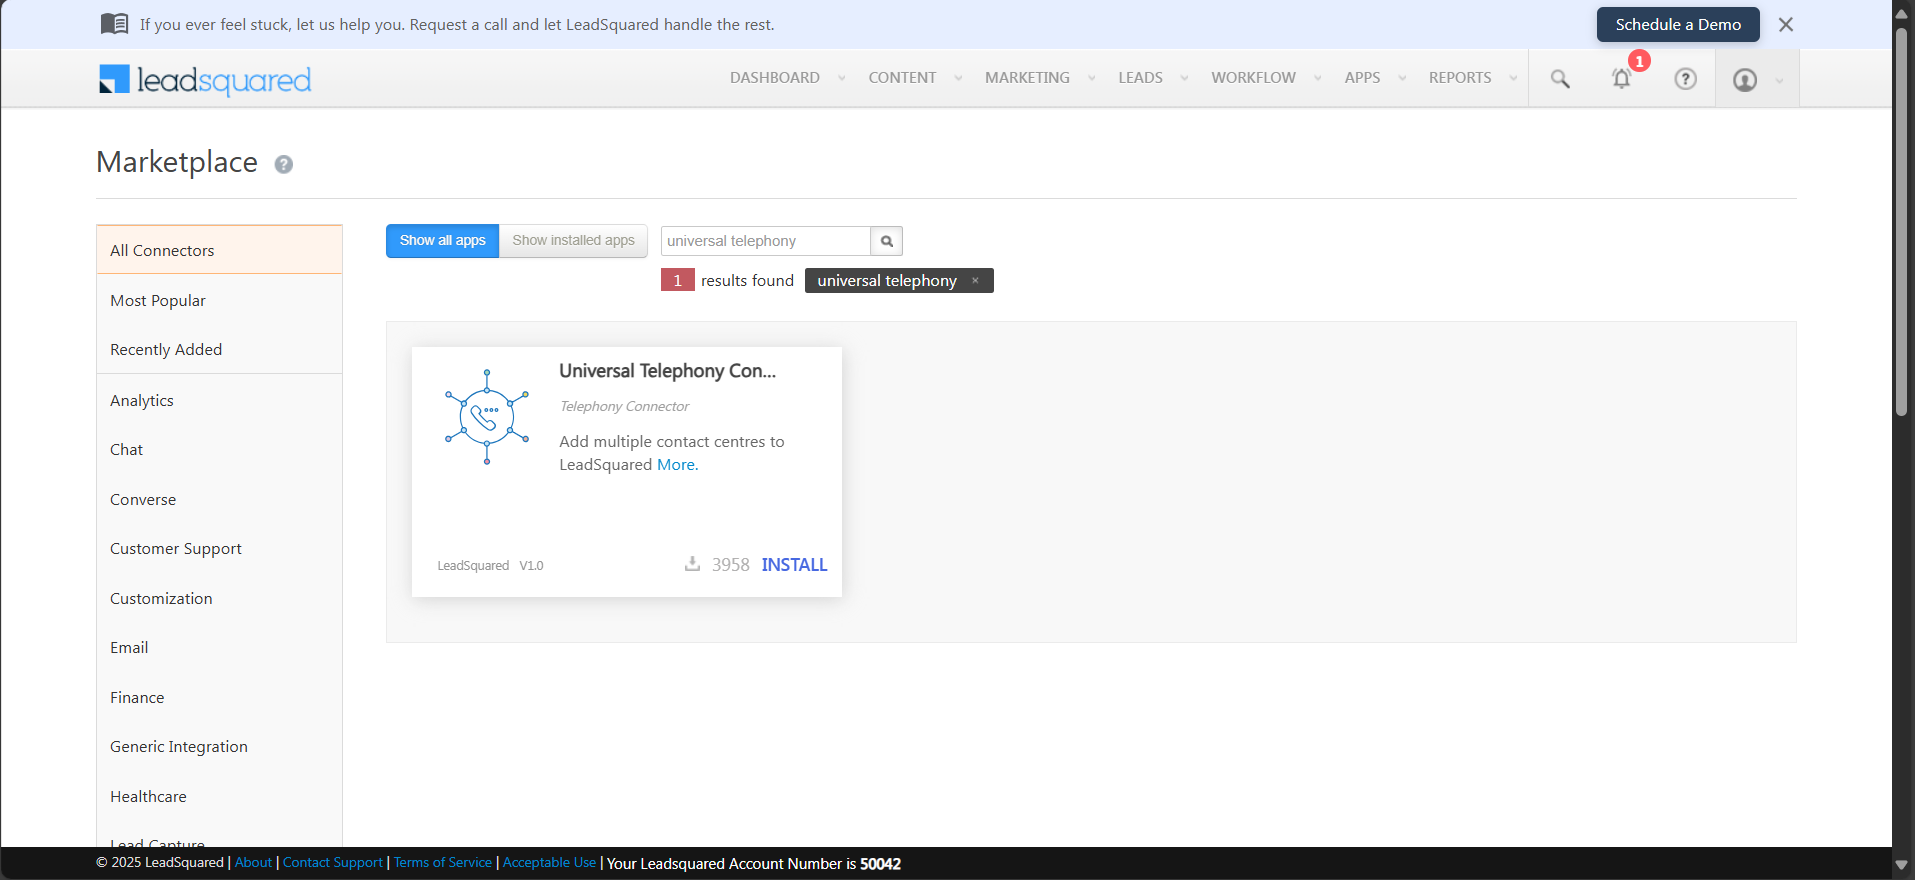
-
Once installed, click Settings
-
Click the Configure icon
-
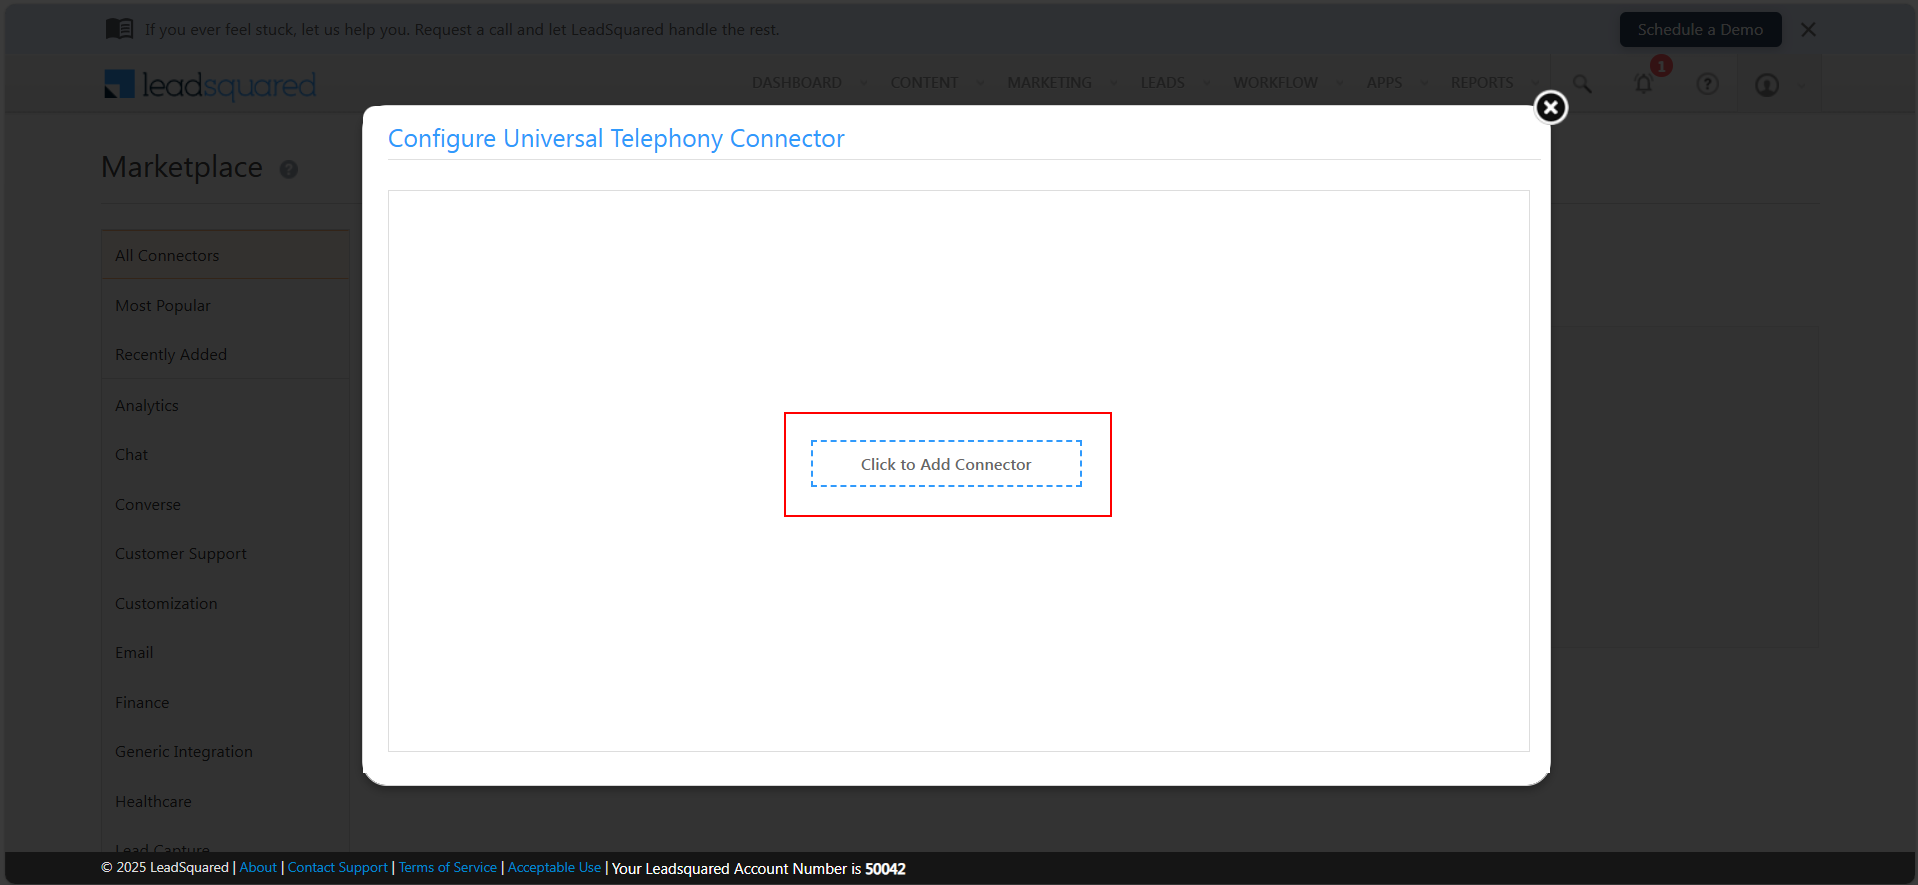
Click Click to Add Connector
-
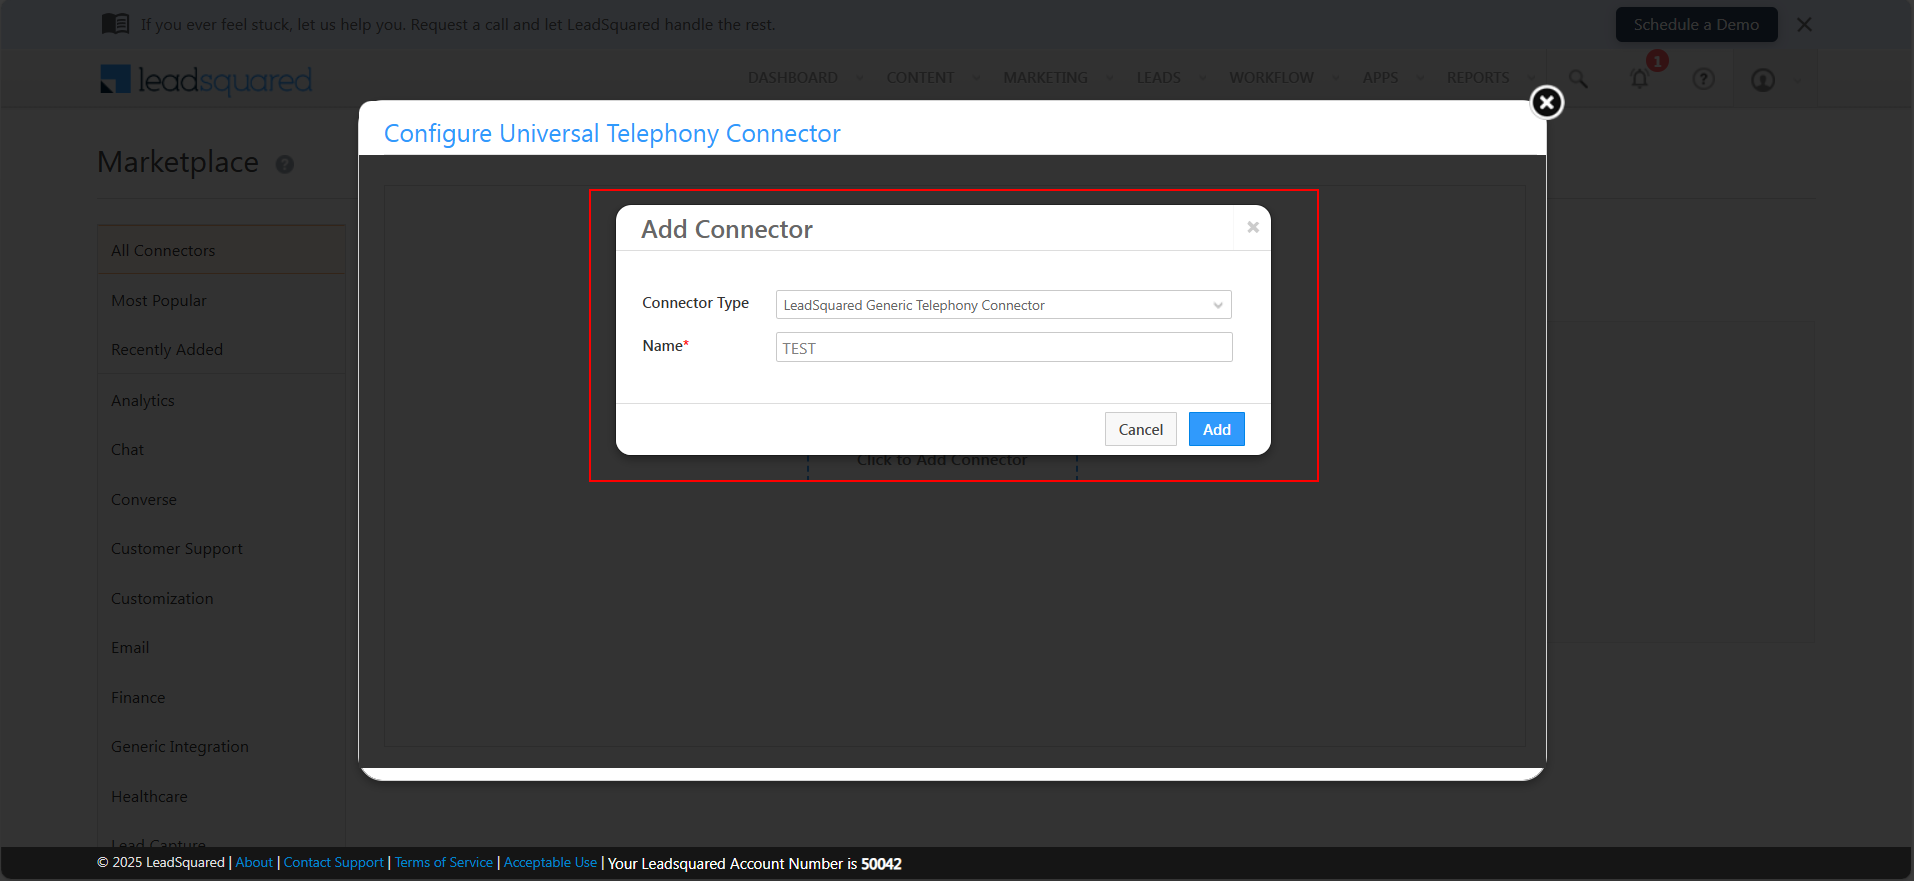
Select the Connector Type as LeadSquared Generic Telephony Connector, enter a name, and click Add
-
Go to Call Log API (CRM call log domain) and copy the URL
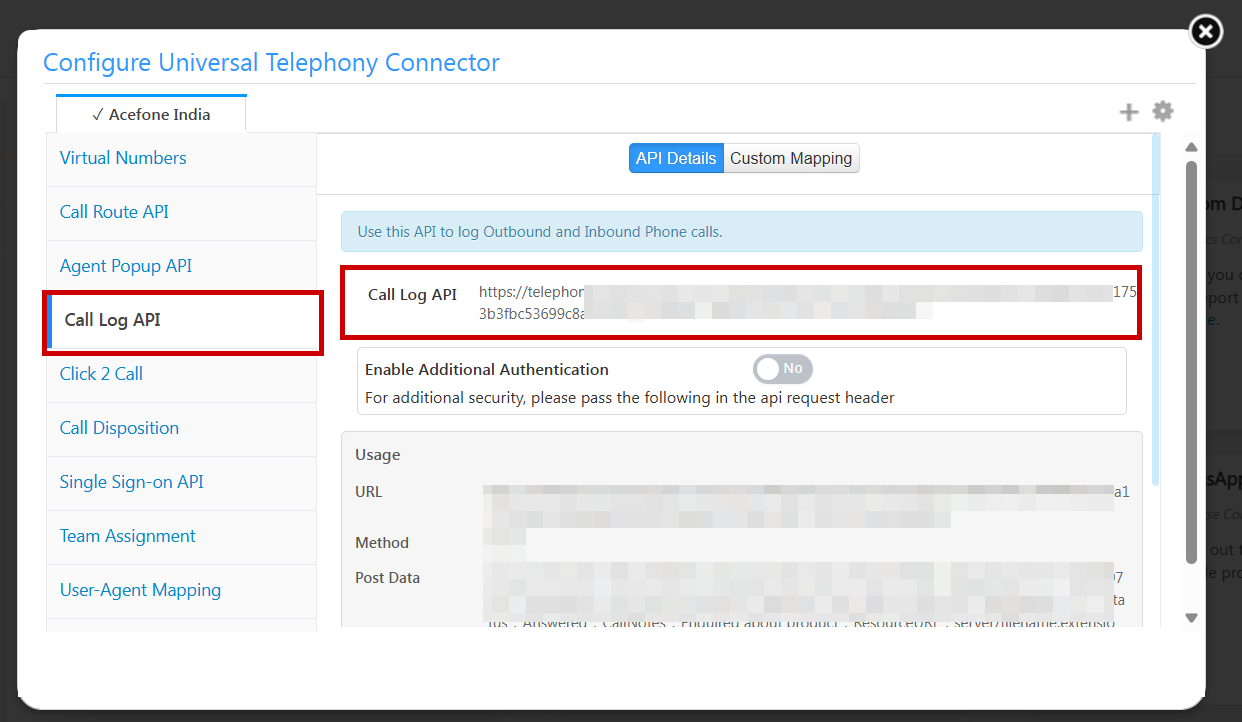
-
Go to Agent Pop-Up API (Agent pop-up domain) and copy the URL
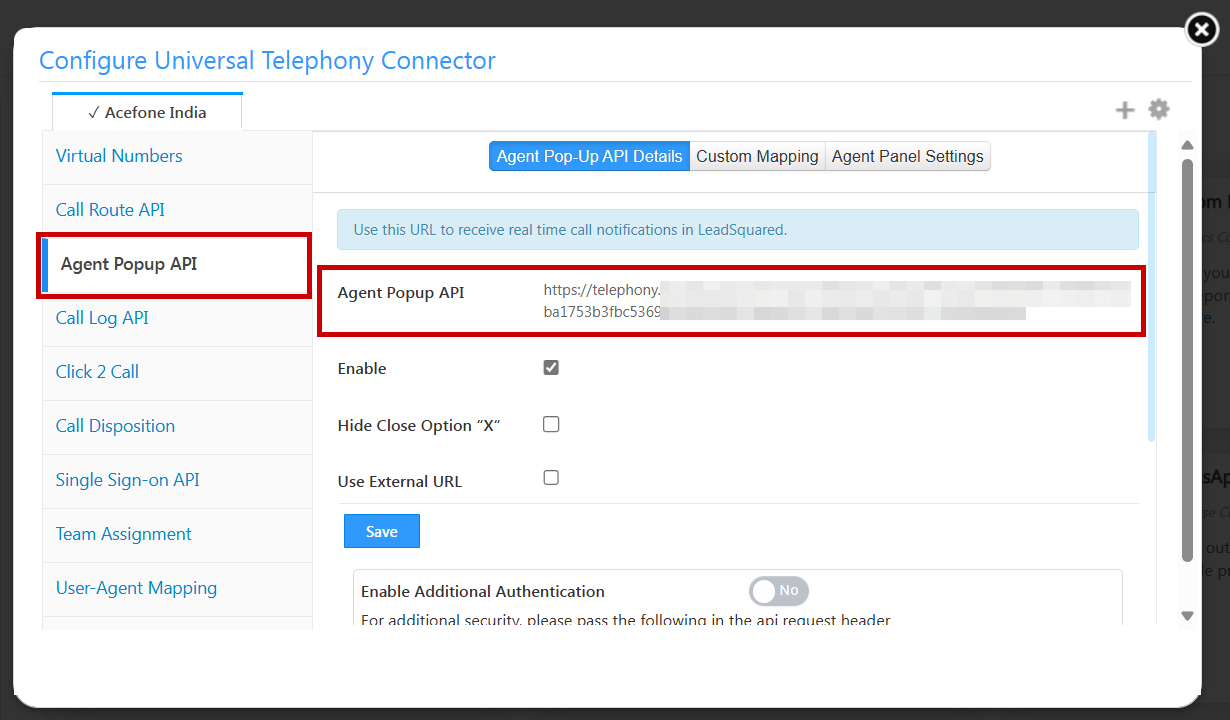
-
Return to Smartflo, fill in all copied details, and click Authorize
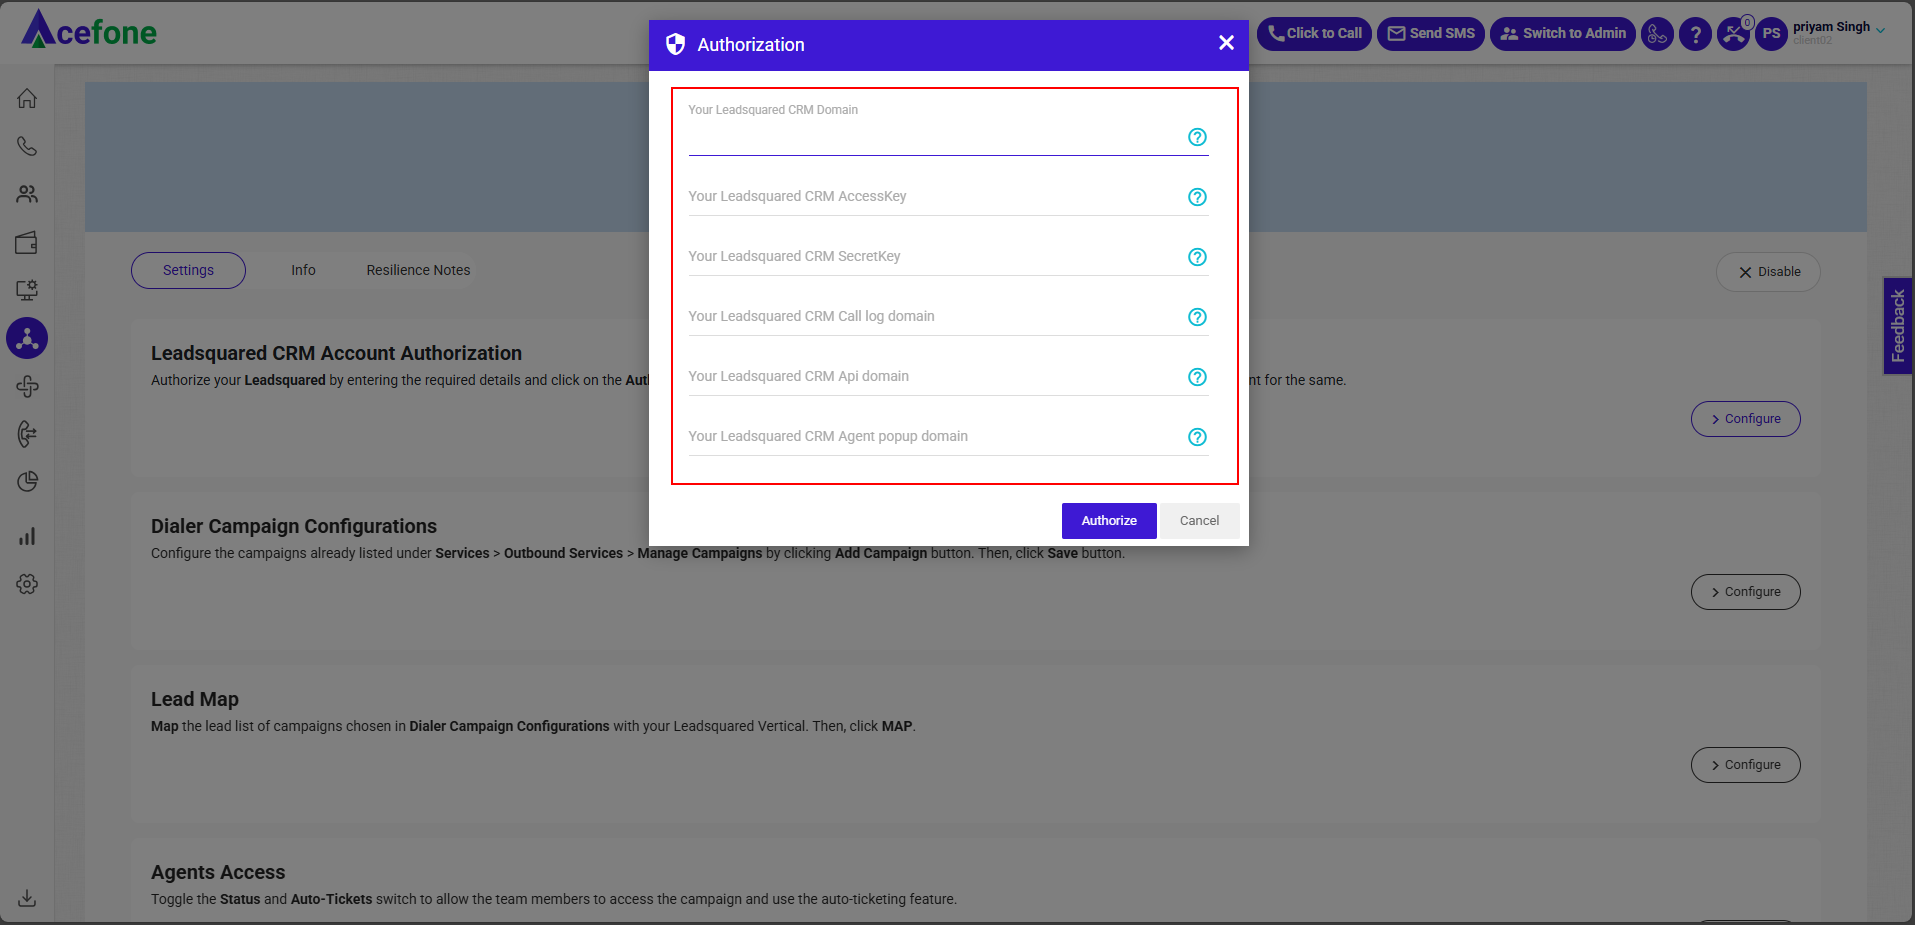
-
✅ Your LeadSquared CRM is now successfully authorized!
Step 2: Dialer Configuration, Lead Map & Agent Access
-
Click Configure next to Dialer Campaign Configurations
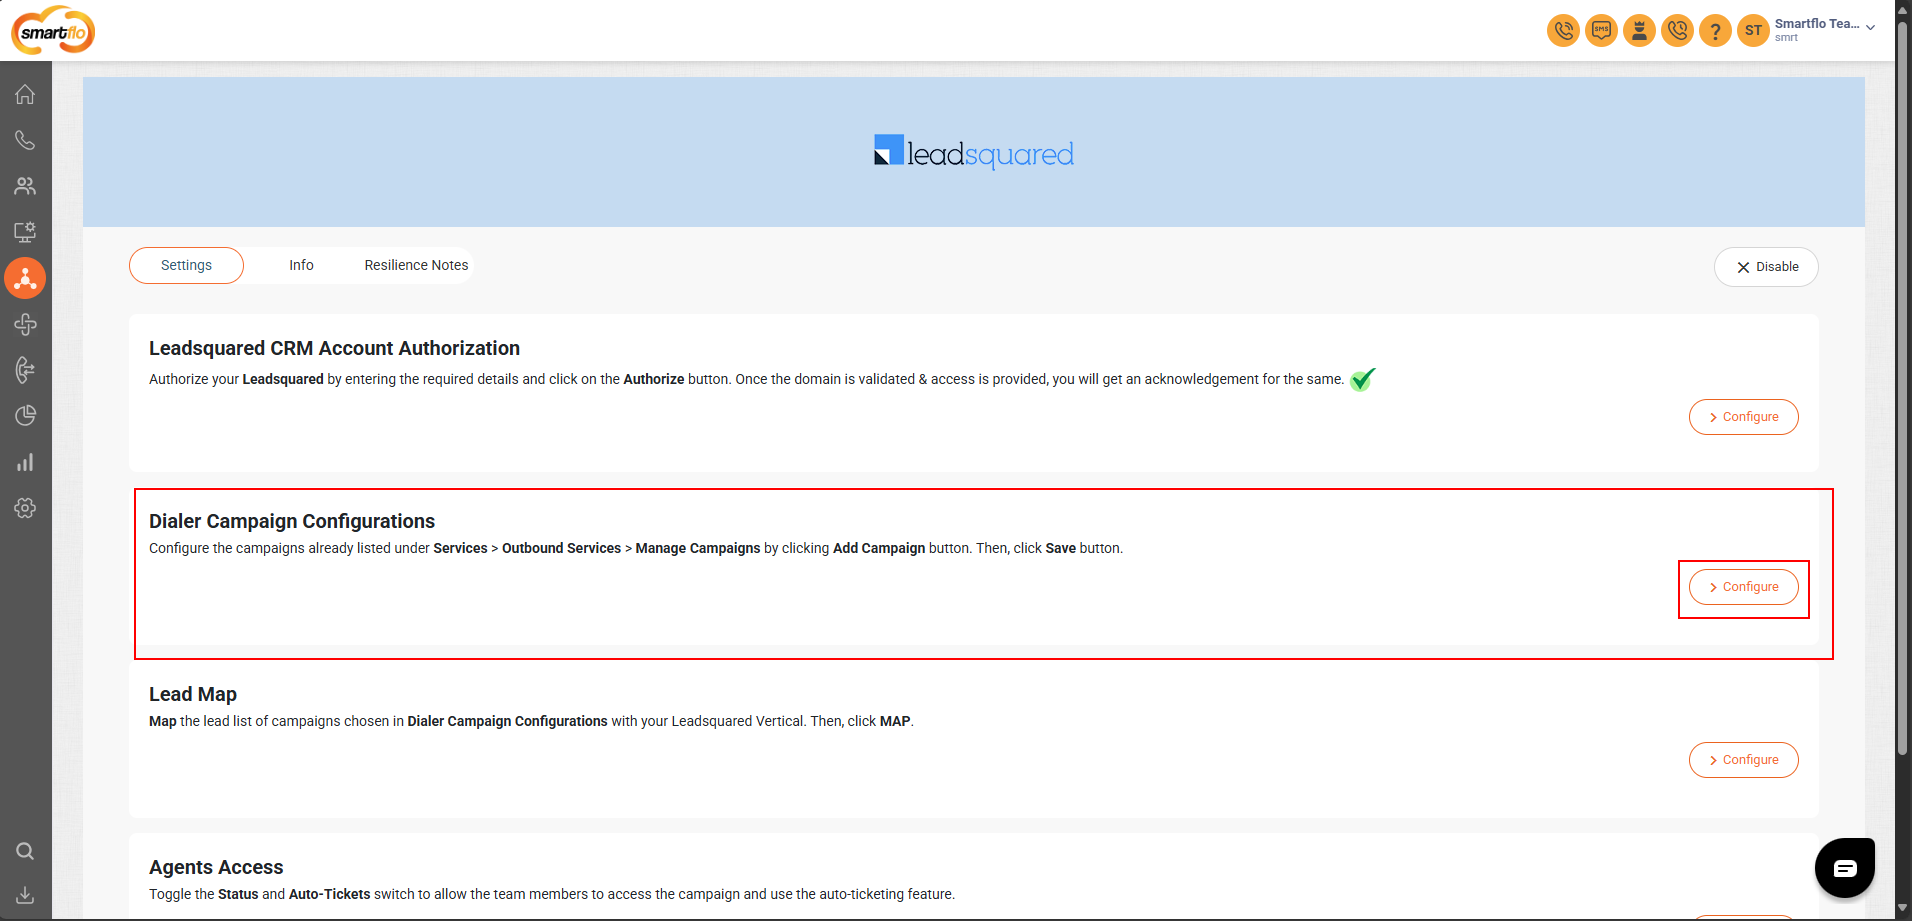
-
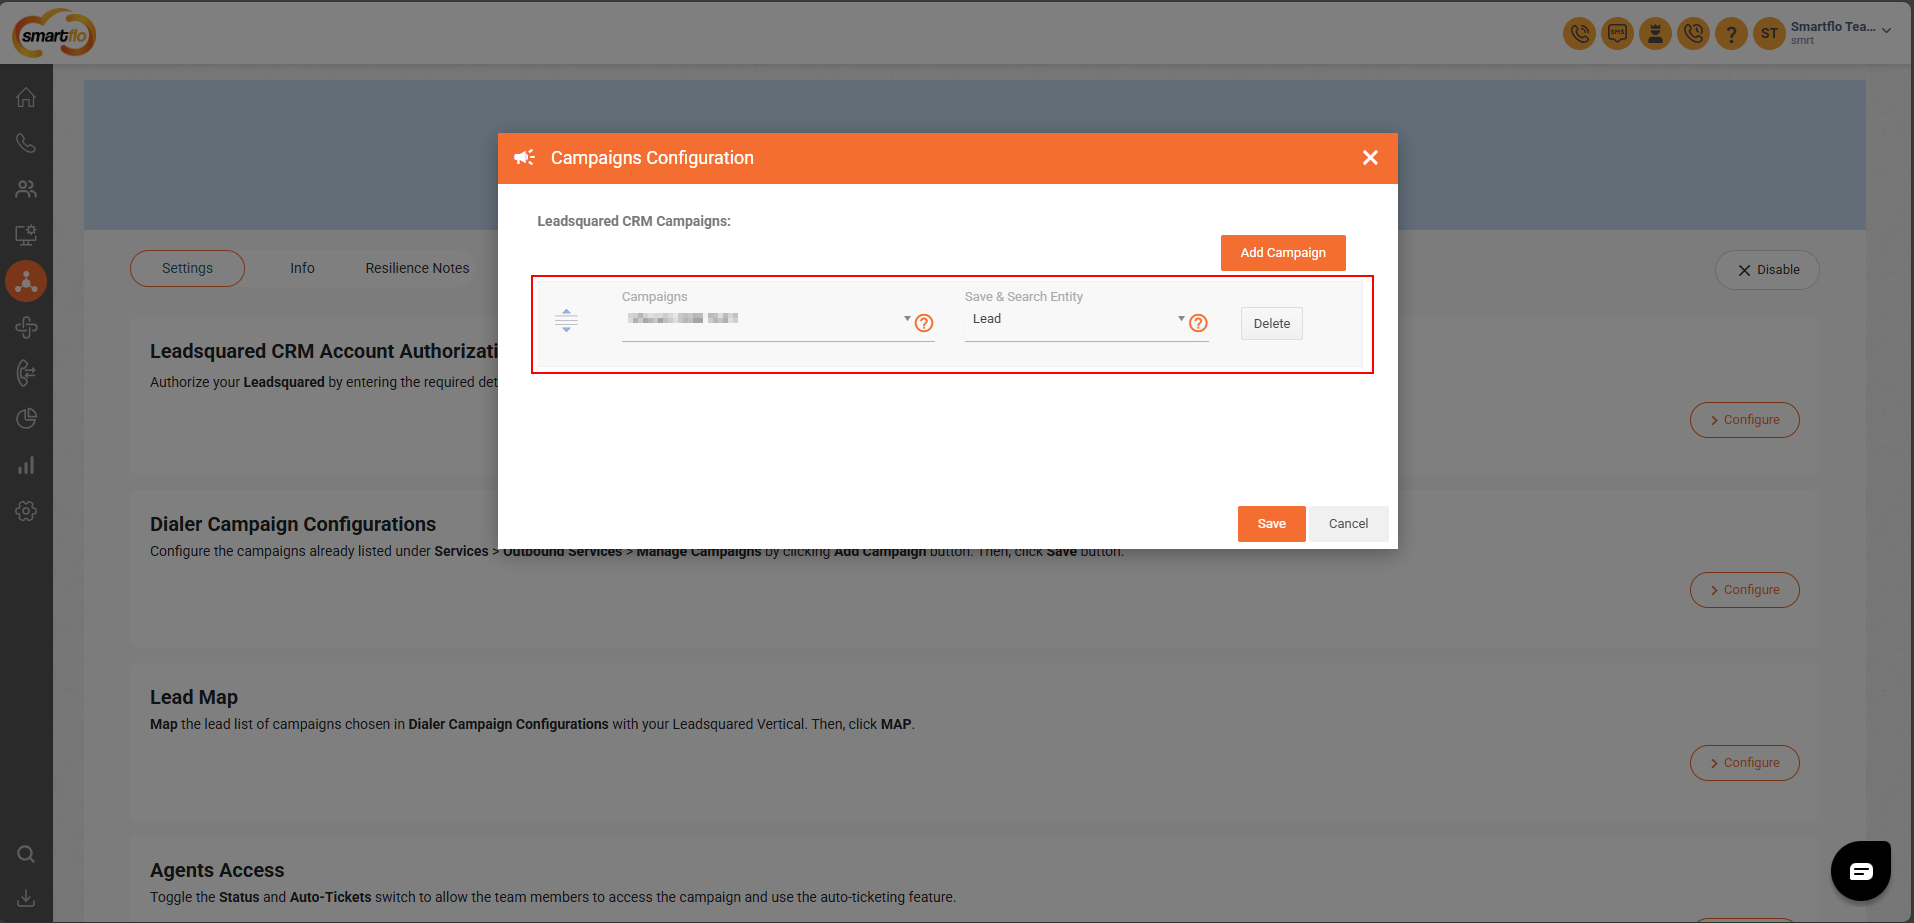
Add campaigns and click Save
| Field | Description |
|---|---|
| Add Campaign | Add one or more campaigns |
| Delete | Remove a selected campaign |
| Save | Save campaign configuration |
Important Note:
- Assign an empty Lead List during integration to ensure smooth data synchronization and prevent any errors
- Only one Lead List should be assigned per campaign
-
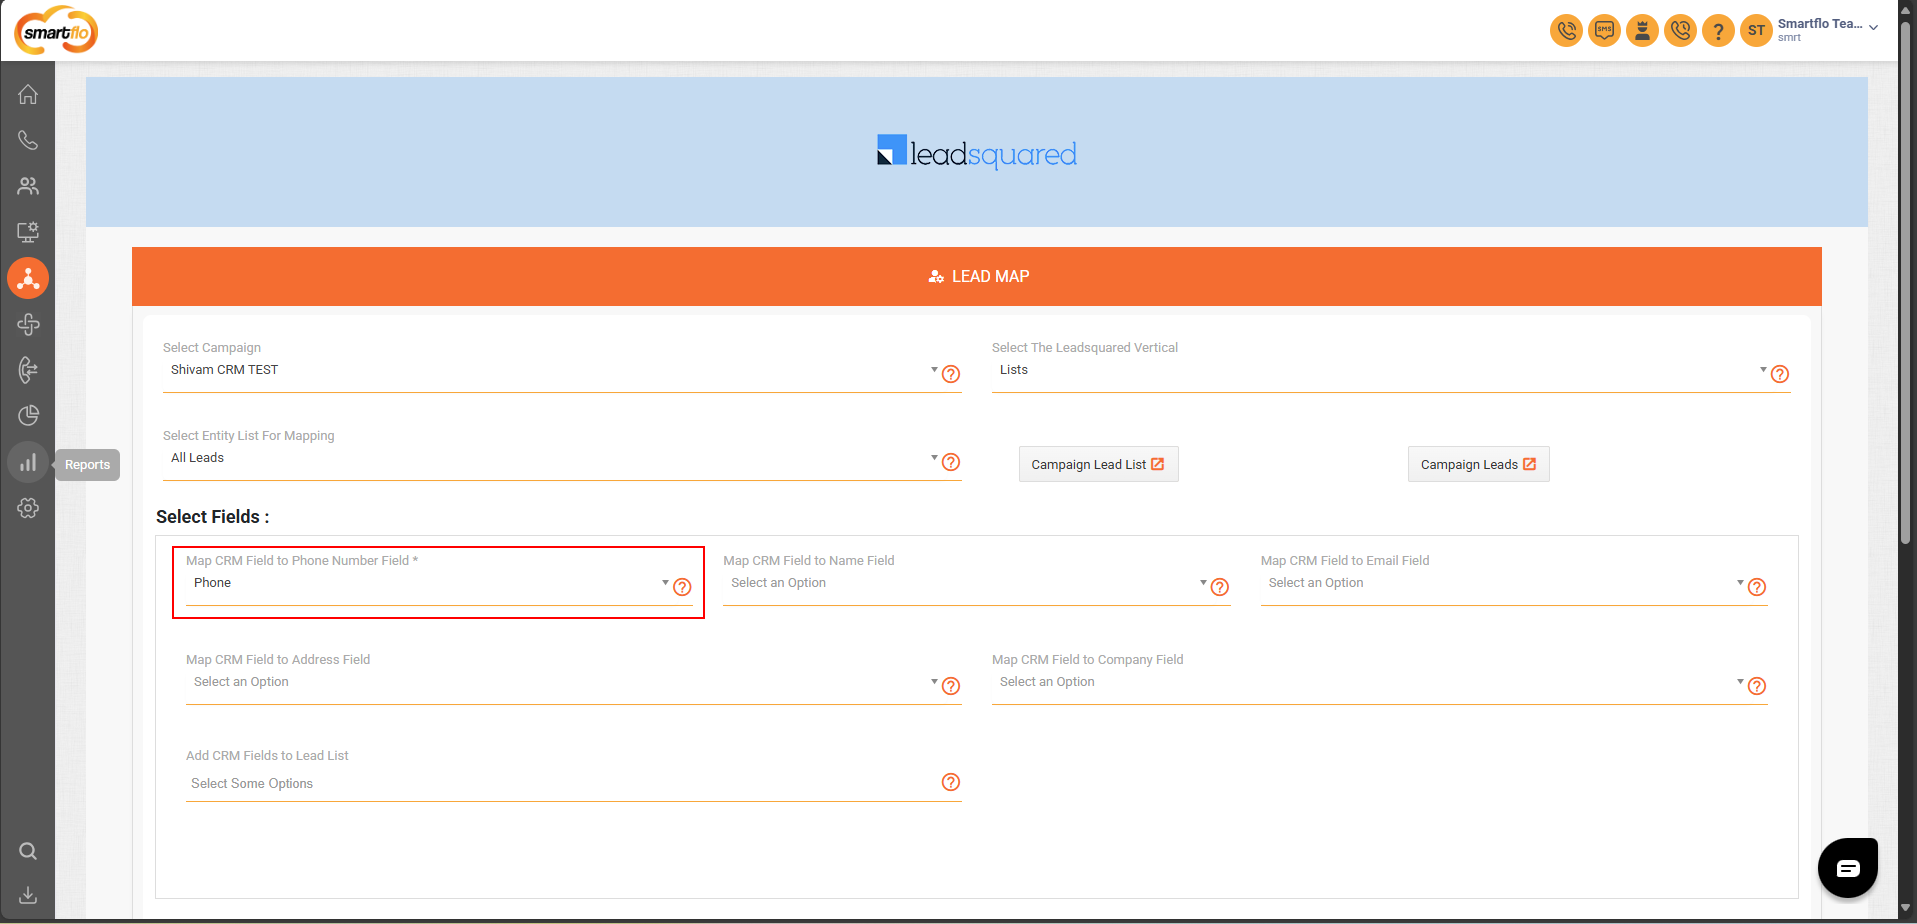
Click Configure next to Lead Map
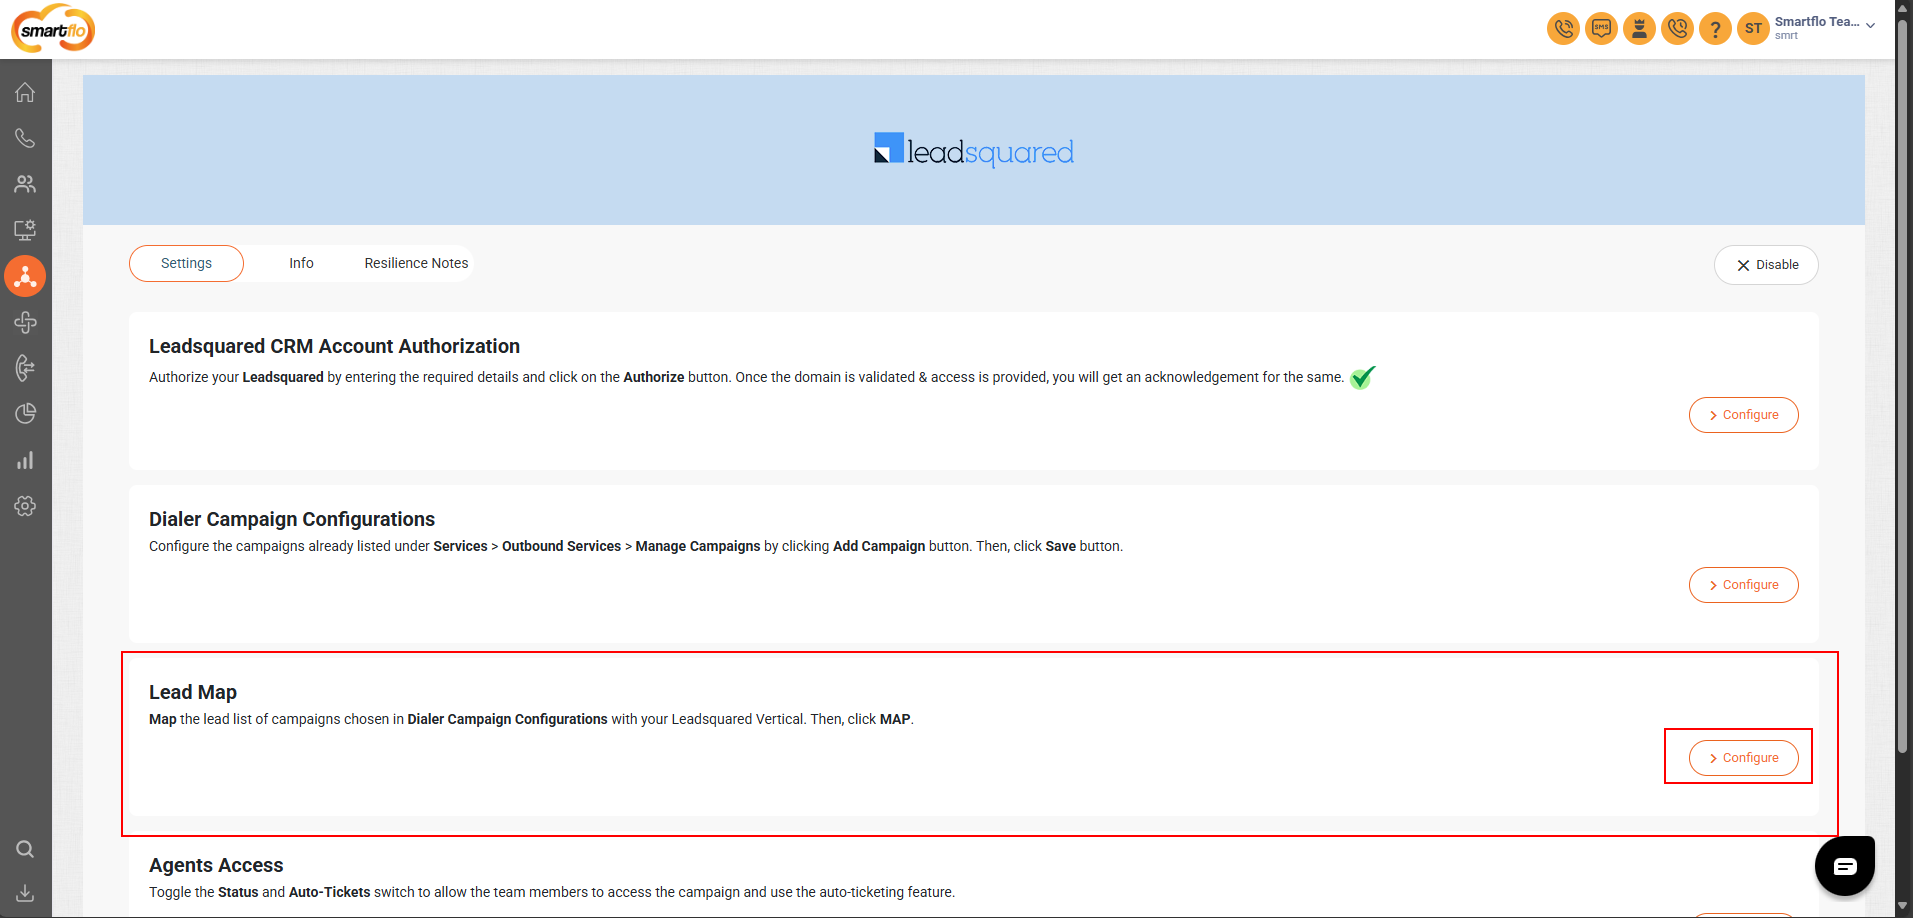
-
Fill in the fields and click Map
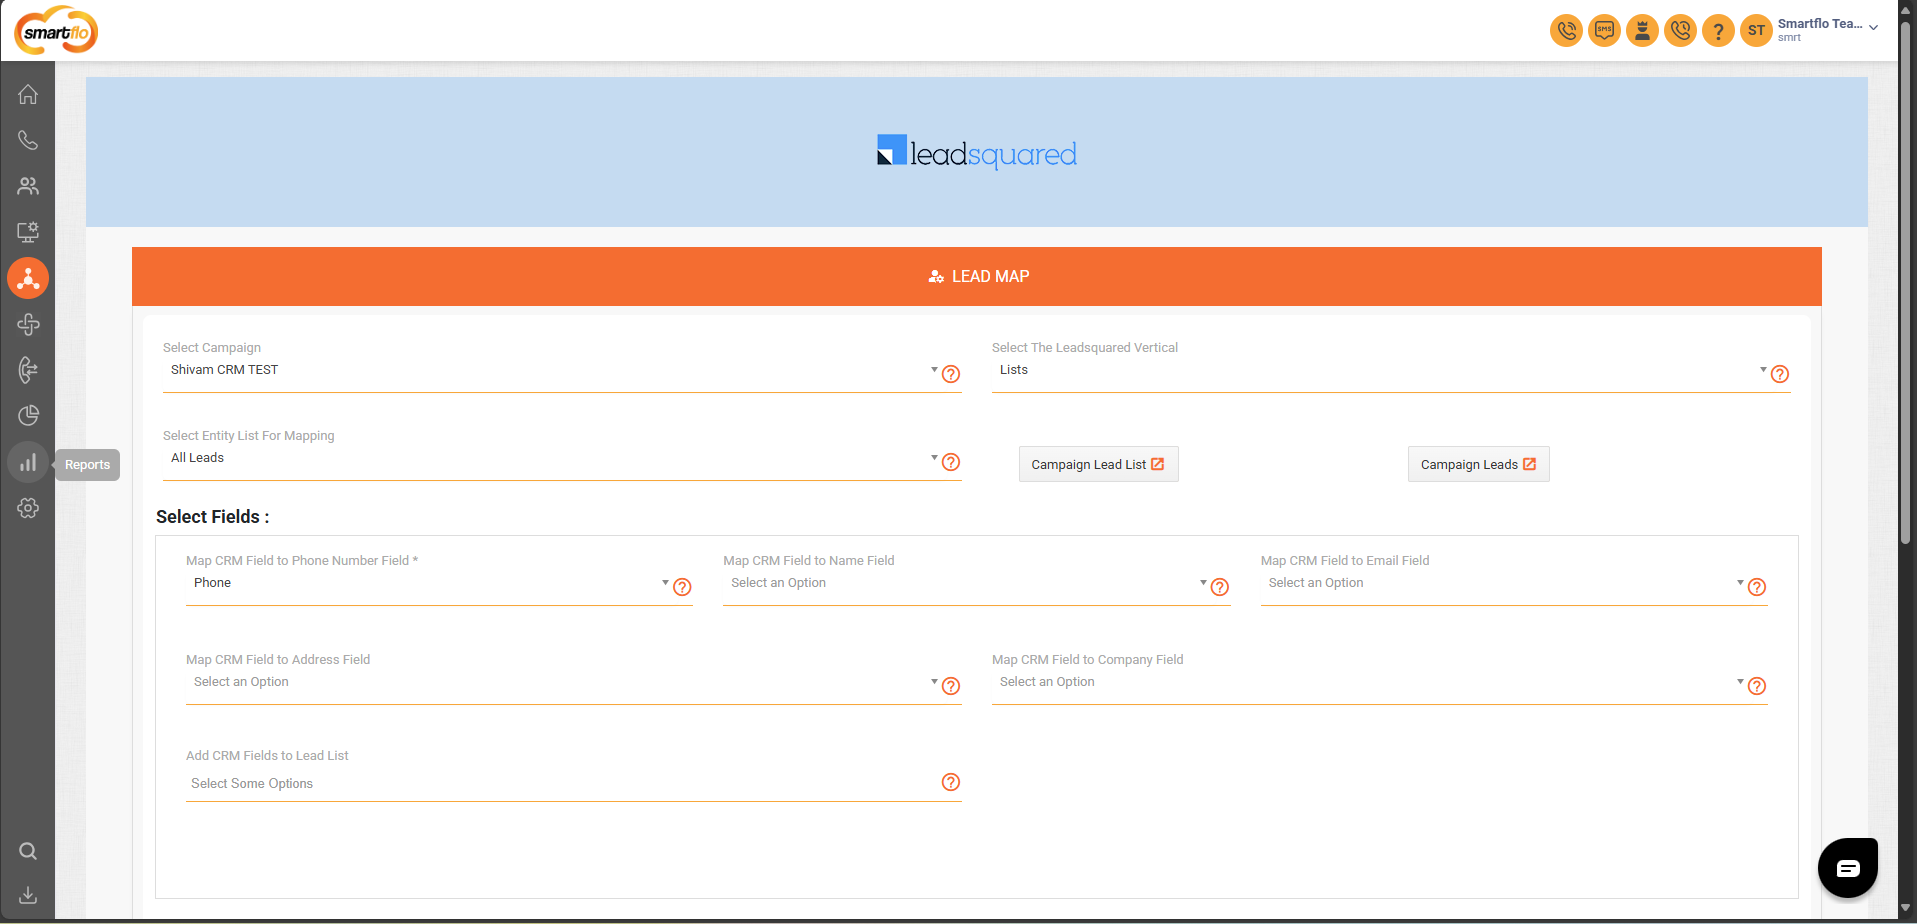
-
Map Disposition and Sub-Disposition to the appropriate fields
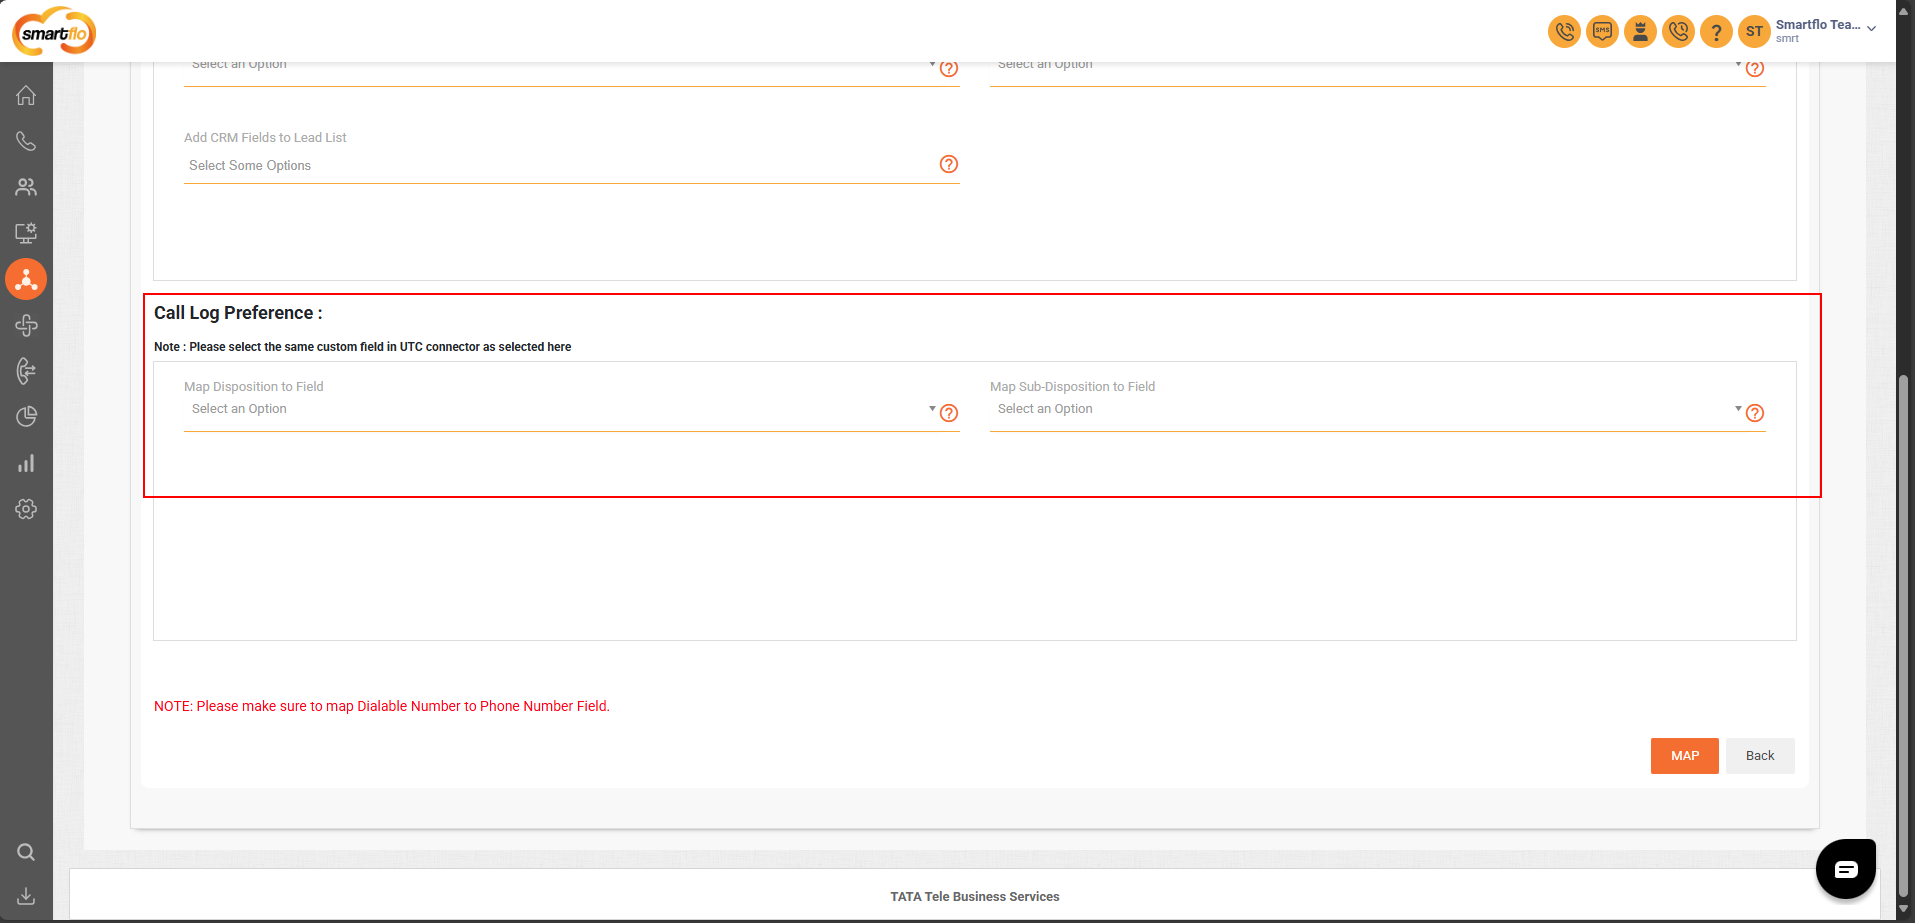
Note:Ensure the dialable number is mapped to the Phone Number Field
Note: Please select the same custom field in UTC connector as selected here
-
Click Configure next to Map Users and Agents
-
Enable Status and Auto-Ticketing for users
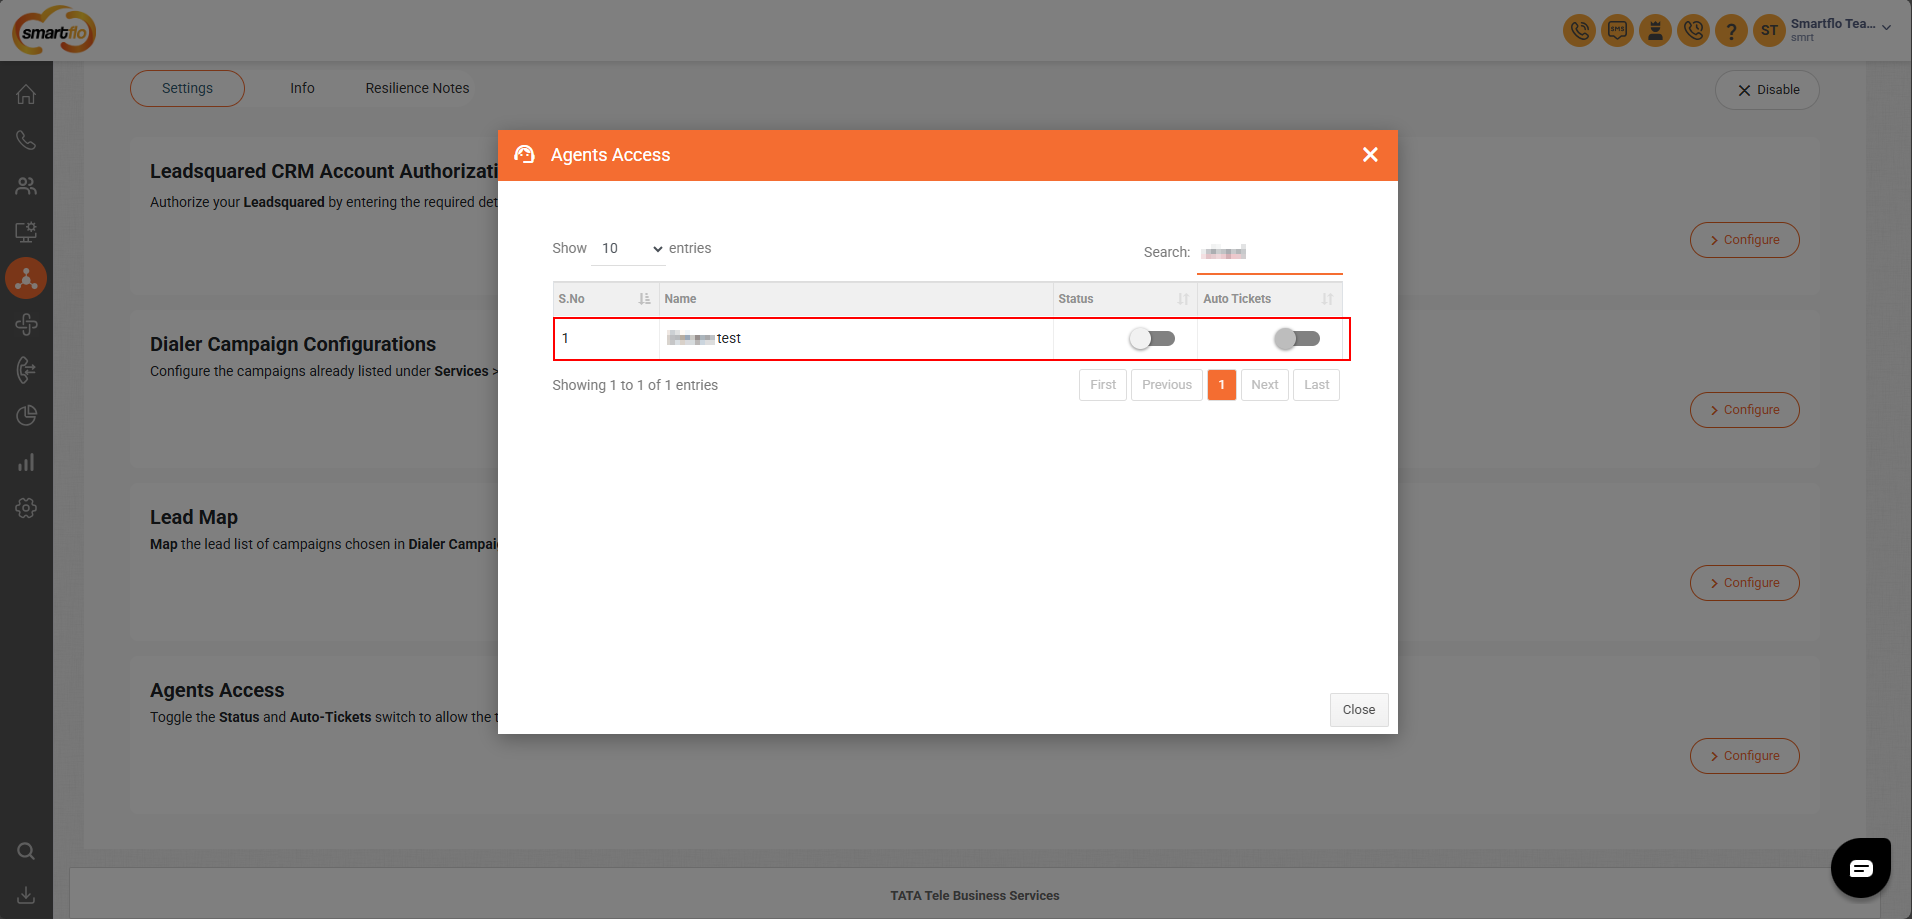
Agent Access Settings:
- Status: Enable LSQ integration for the user
- Auto-Tickets:
- ON: A ticket will be created automatically after the call ends
- OFF: Agent must fill out the disposition form manually
Step 3: Configure Universal Telephony Connector in LeadSquared
-
Go to Universal Telephony Connector → Click Configure

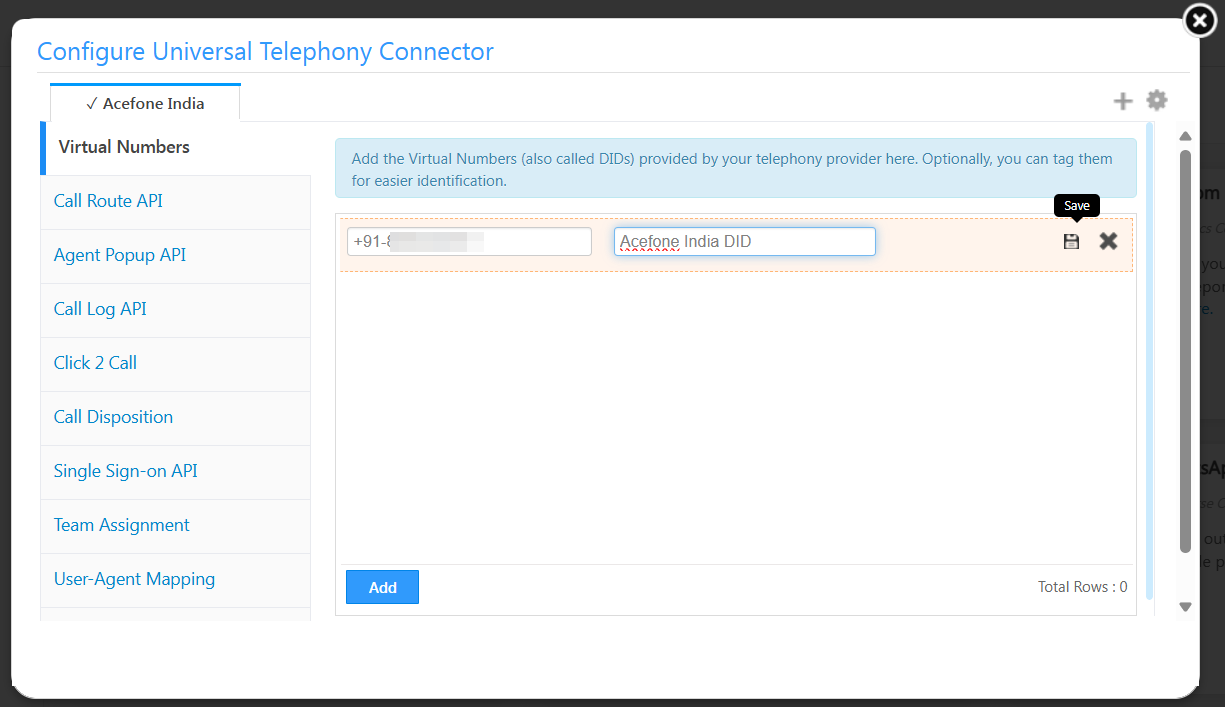
-
Add a Virtual Number and give it a name
Please enter the virtual number in the following format: +91-XXXXXXXXXX
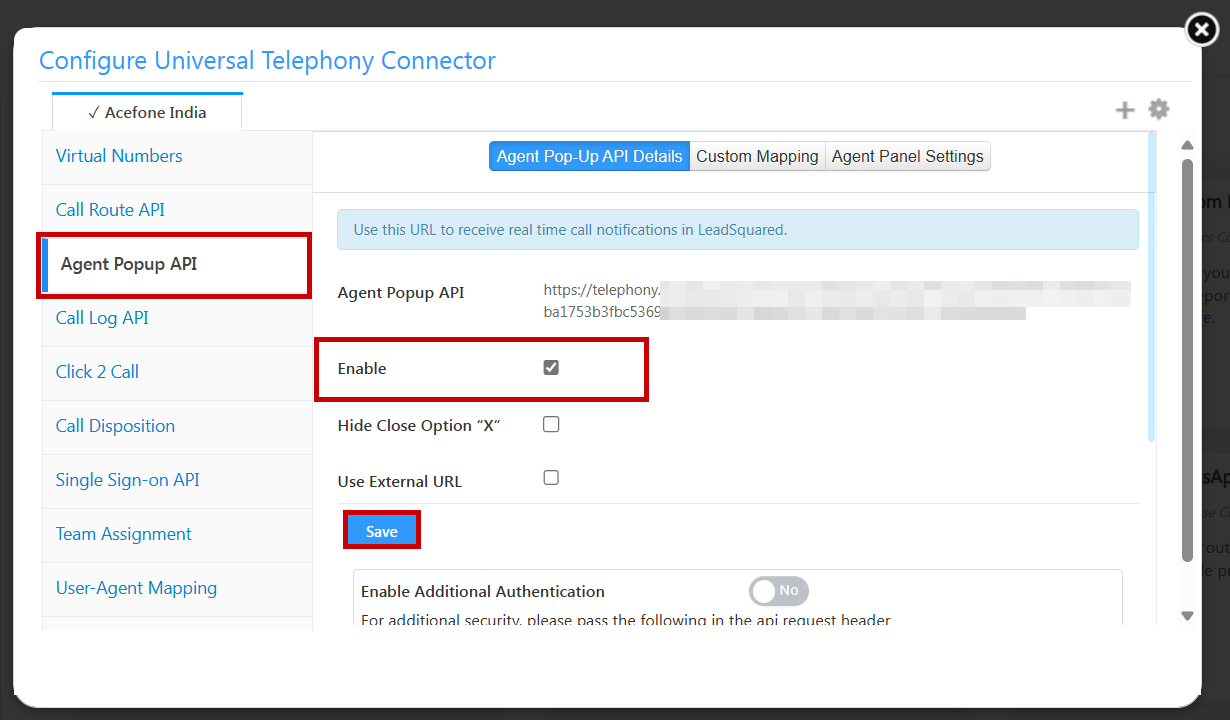
- Enable Agent Pop-Up API and click Save
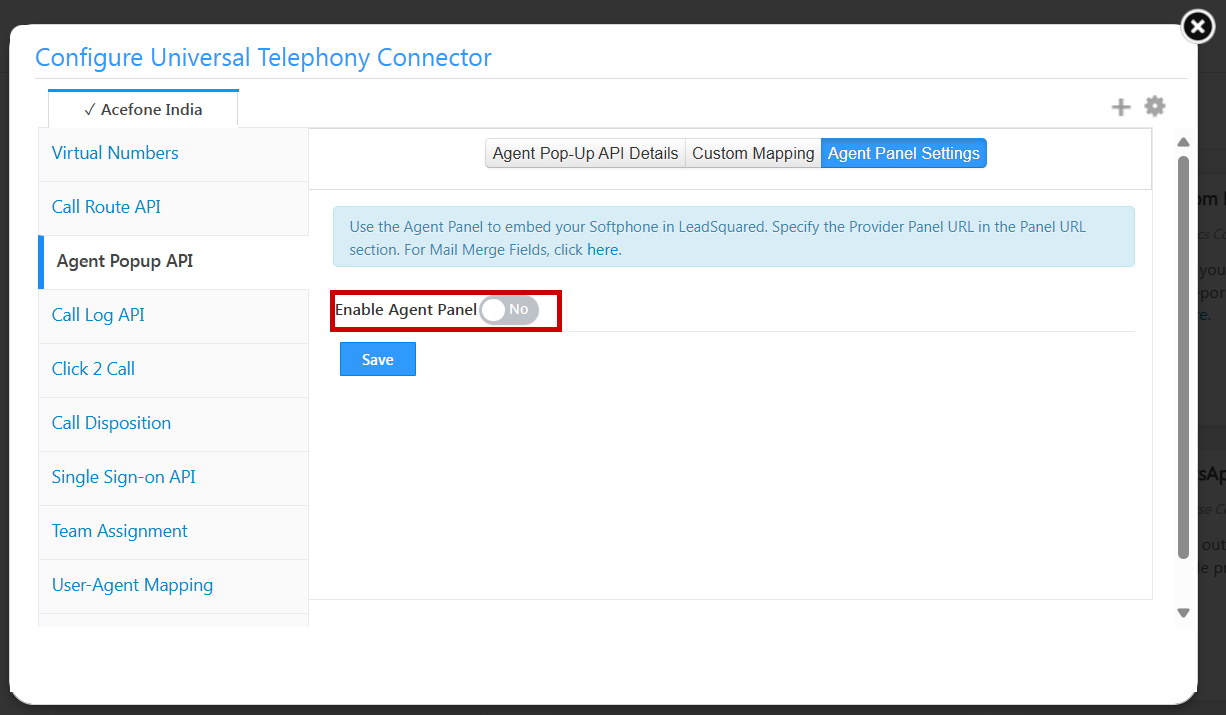
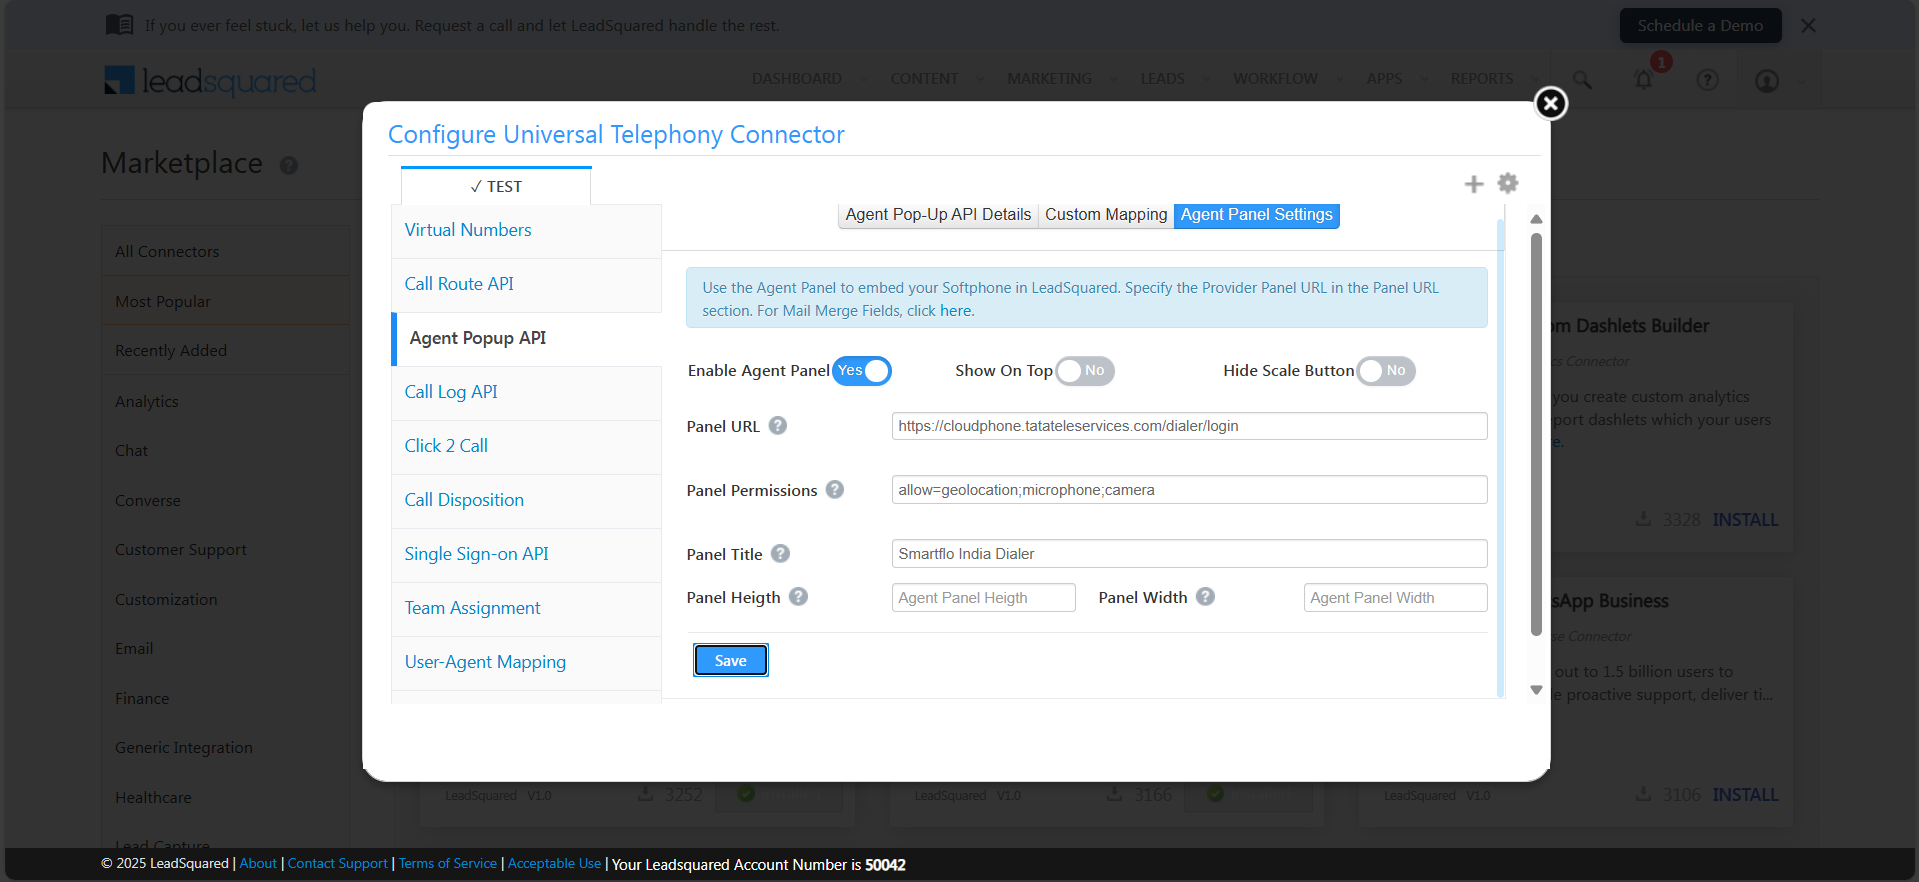
- Go to Agent Panel Settings and enter the following:
| Field | Value |
|---|---|
| Panel URL | https://cloudphone.tatateleservices.com/dialer/login |
| Panel Permissions | allow=geolocation;microphone;camera |
| Panel Title | Smartflo India Dialer |
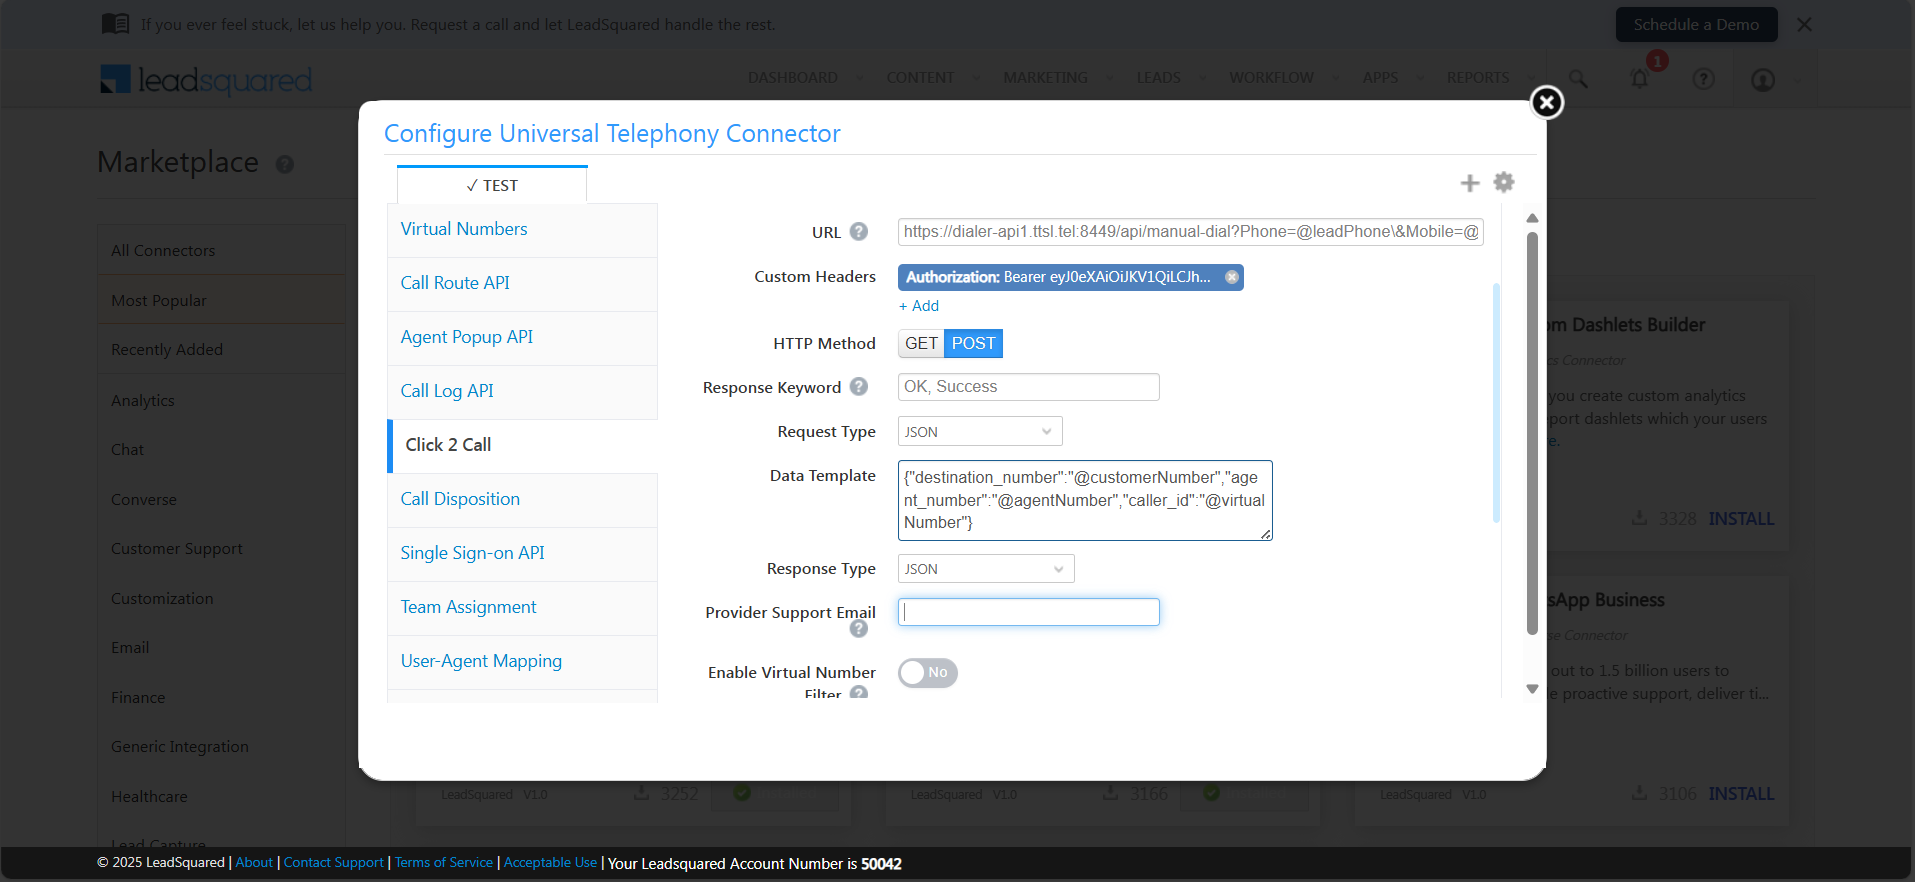
- Click 2 Call Configuration
| Field | Value |
|---|---|
| Method | Server Side API (Default) |
| URL | https://dialer-api1.ttsl.tel:8449/api/manual-dial?Phone=@leadPhone&Mobile=@agentNumber |
| Custom Header | Name: Authorization Value: Bearer (space) Auth_Token (Your Smartflo token) |
| HTTP Method | POST |
| Response Keyword | OK, Success |
| Request Type | JSON |
| Data Template | {"destination_number":"@customerNumber","agent_number":"@agentNumber","caller_id":"@virtualNumber"} |
| Response Type | JSON |
| Enable | ✅ Check to enable |
To generate the
Auth_Token, go to the Smartflo portal → API Connect → API Token, and click Generate a token.Enter a name and click Save.
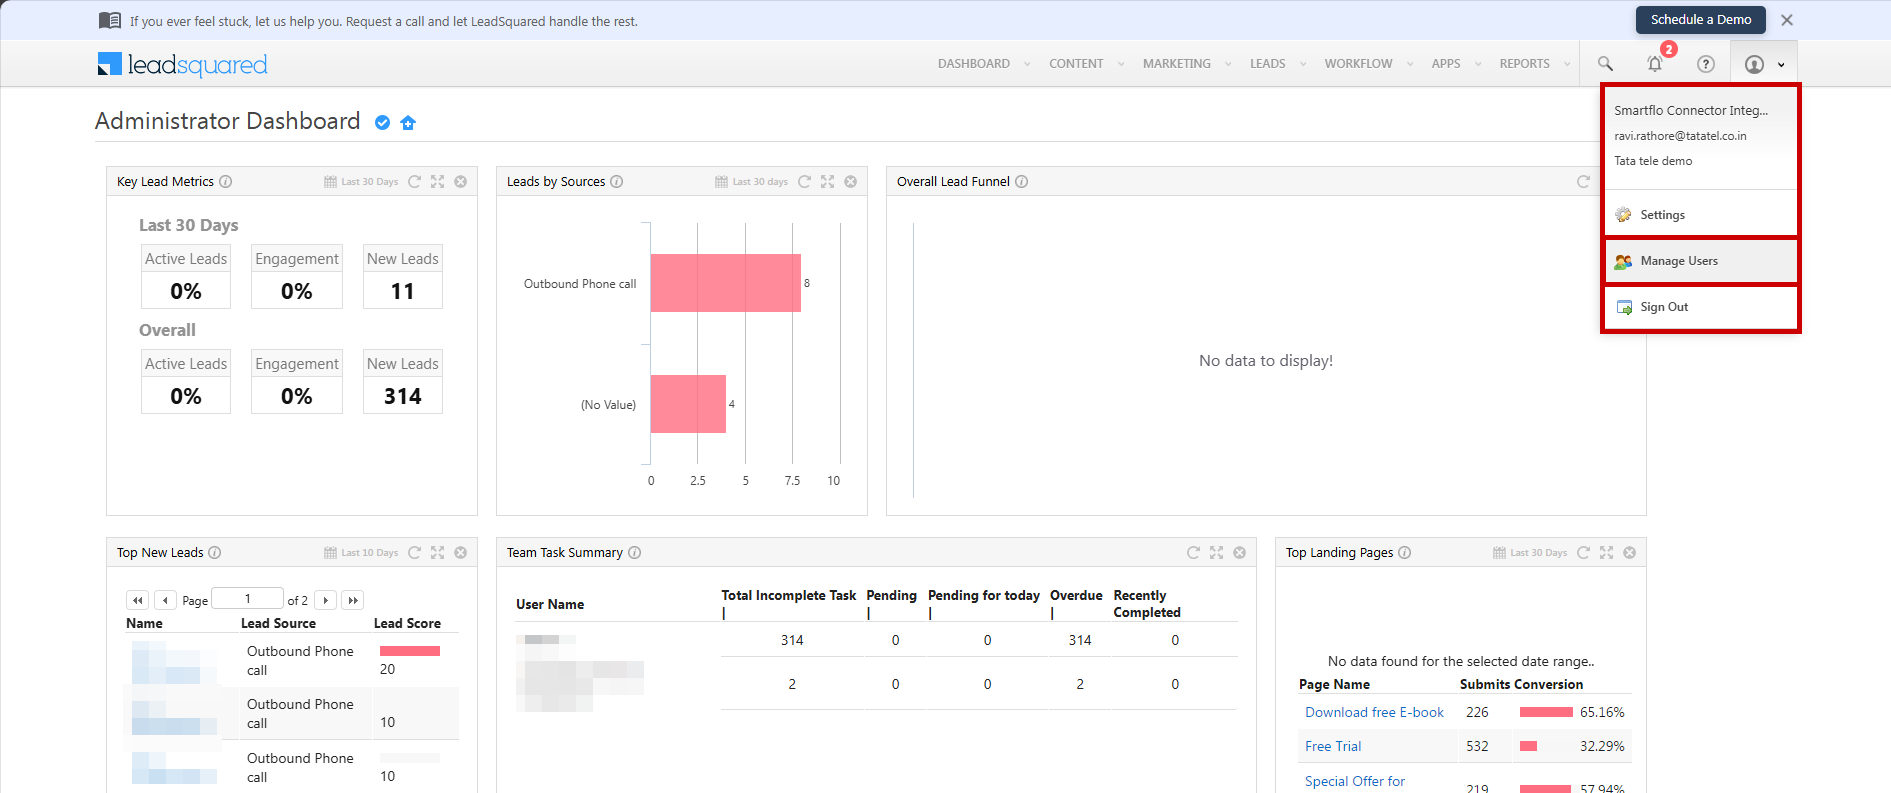
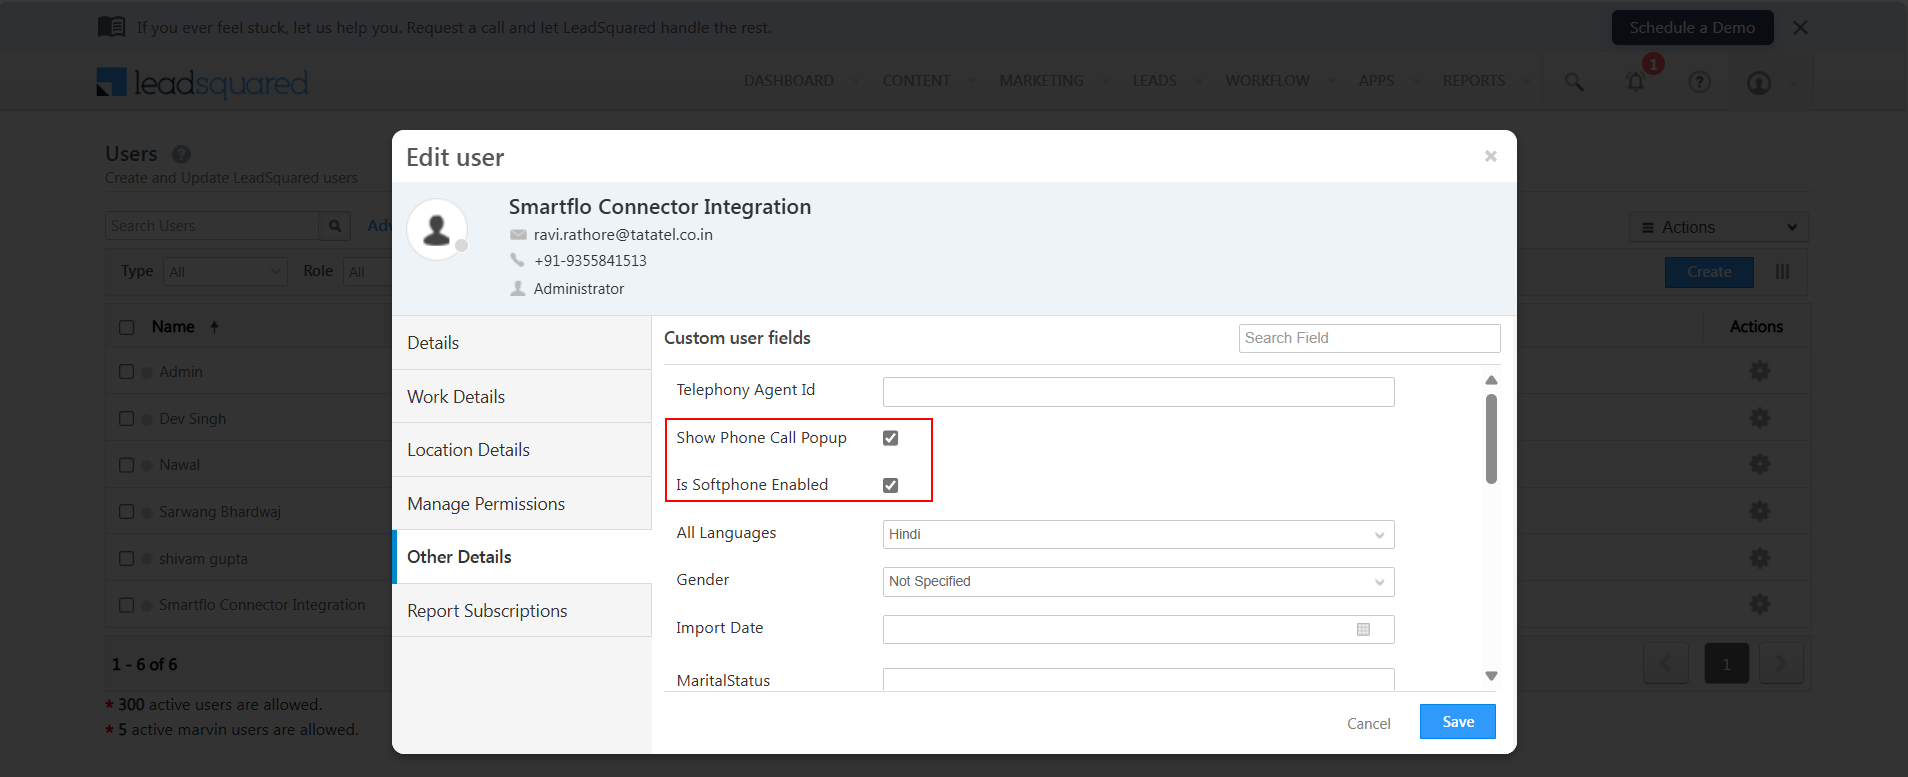
Step 4: Manage Users in LeadSquared
-
Go to Manage Users
-
Click the Settings icon to edit a user
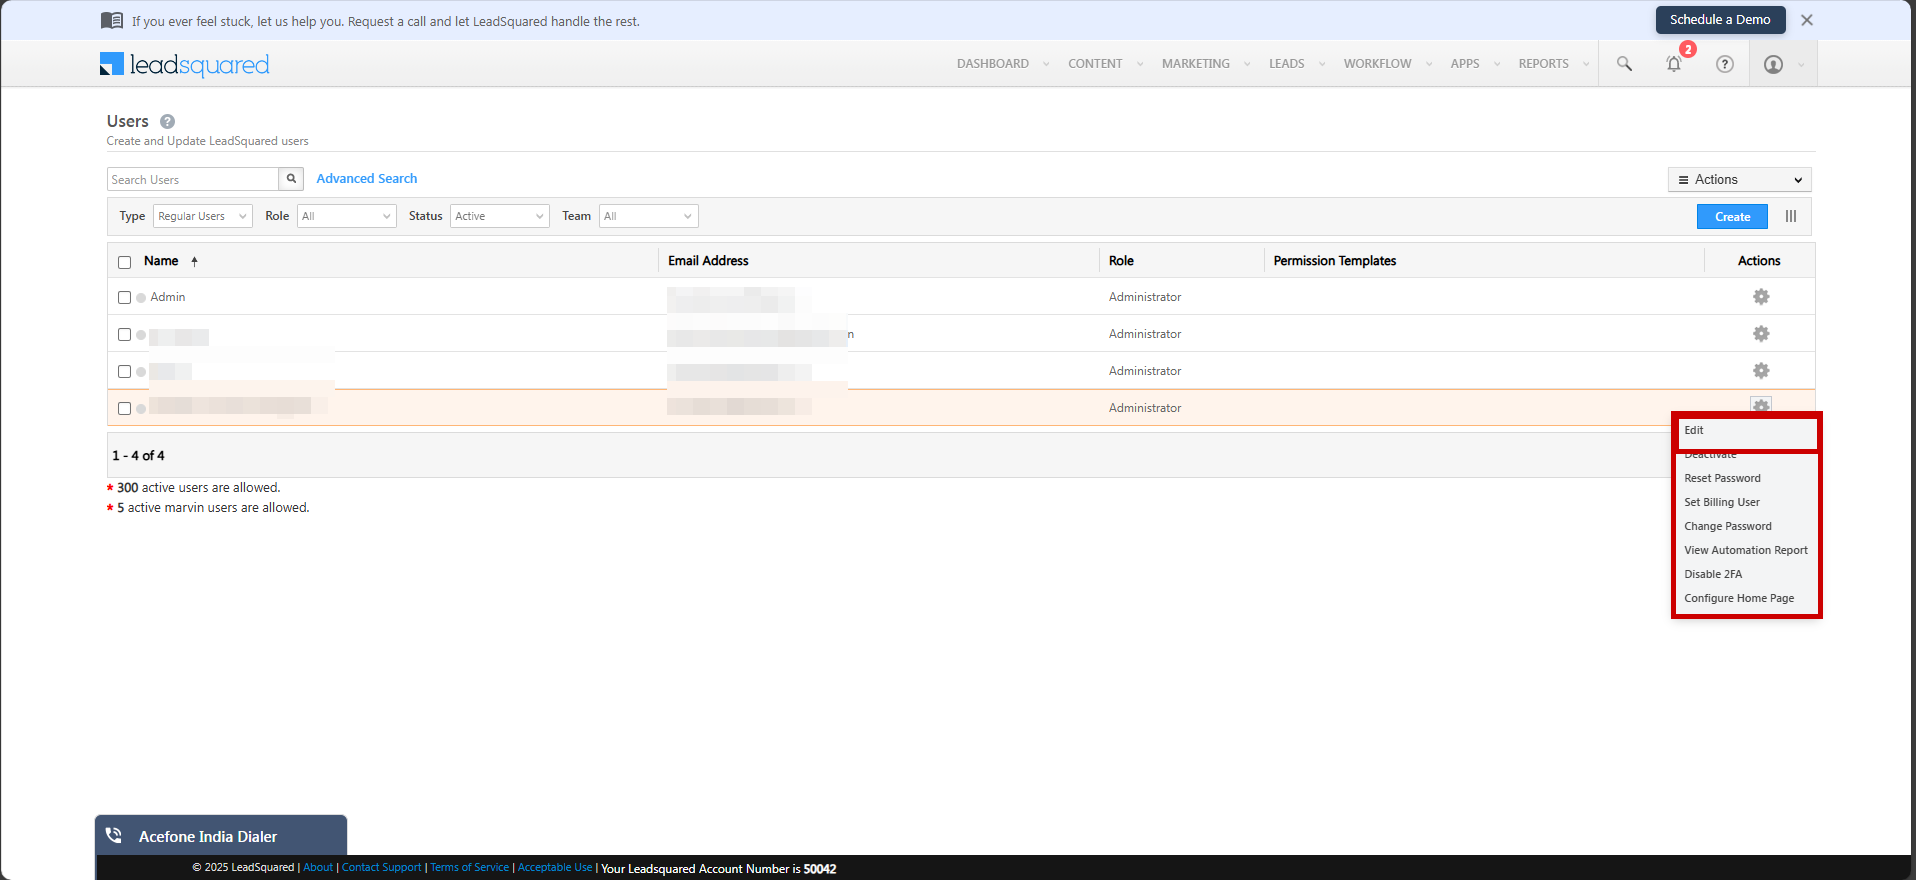
-
Under Other Details, click Edit
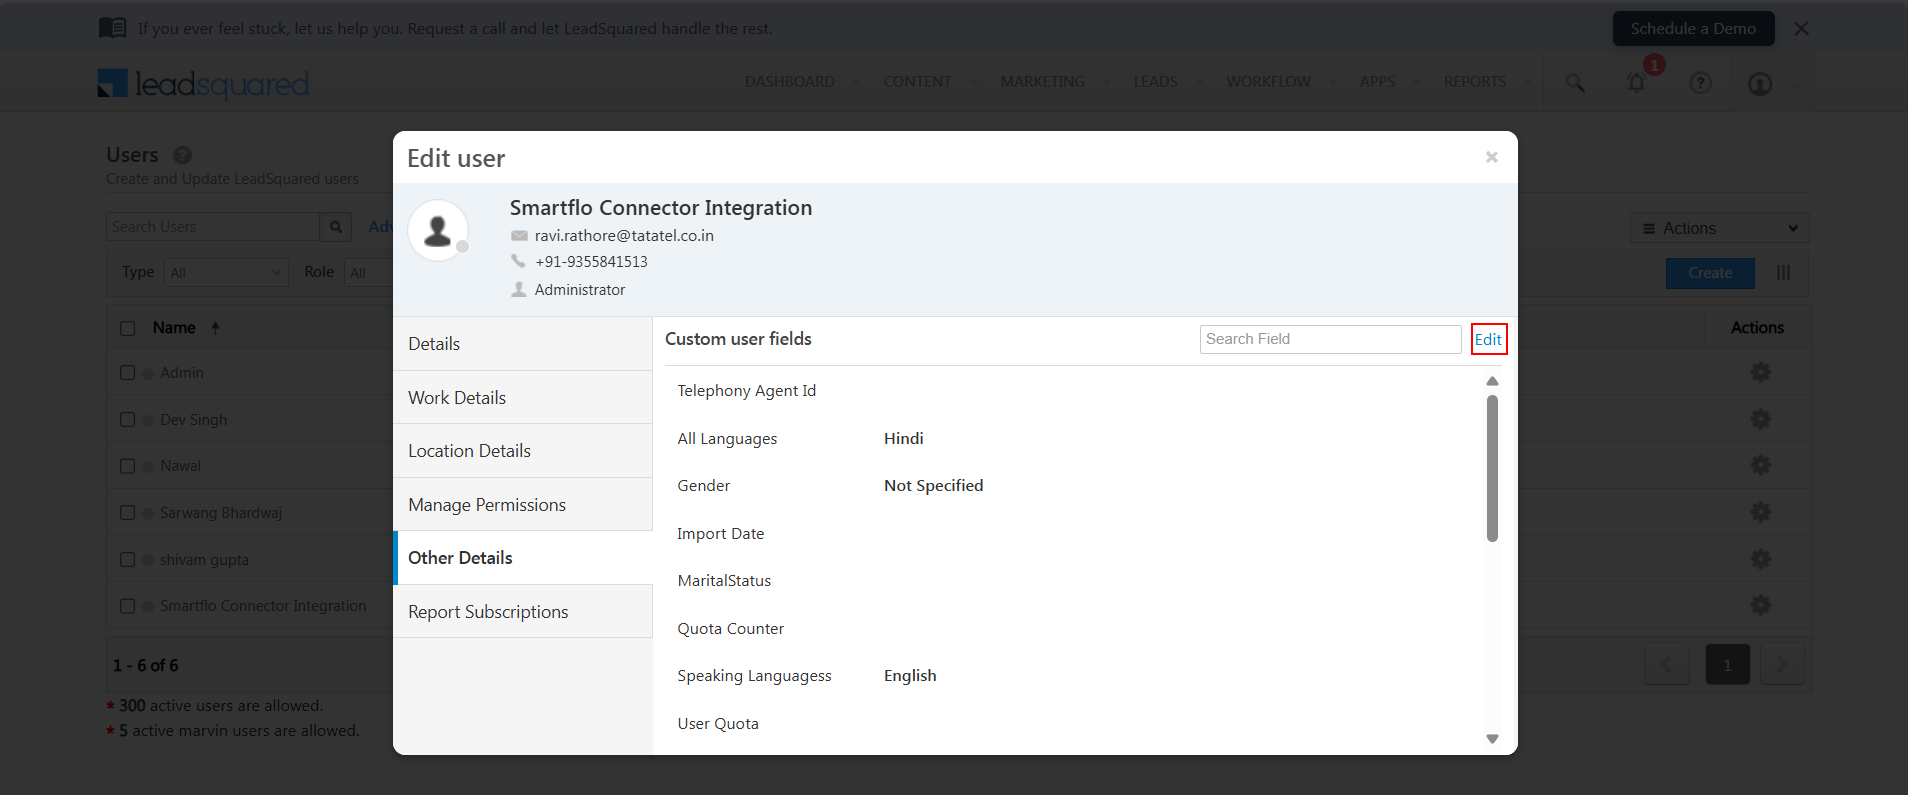
-
Set Show Phone Call Popup and Is Softphone Enabled to Yes
-
Log in to LeadSquared as an agent to see the Smartflo Agent Panel
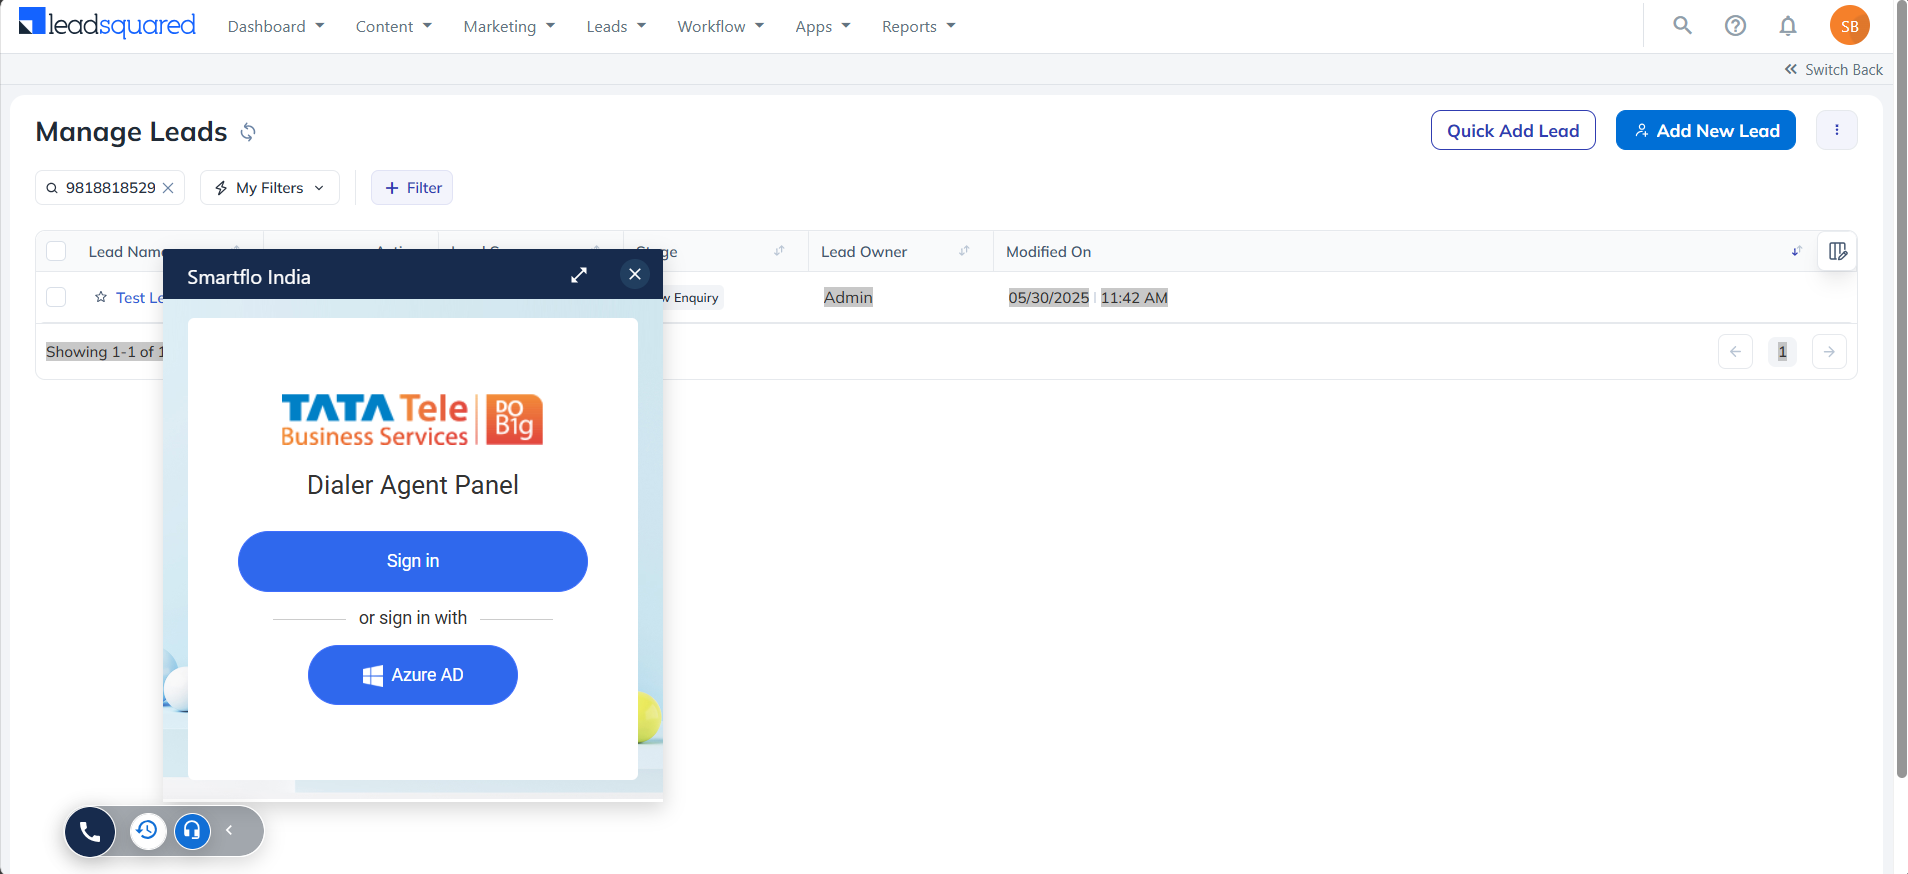
🎉 You’ve successfully integrated Smartflo with LeadSquared CRM. Happy calling!