Leadsquared
Leadsquared CRM is a marketing automation and sales execution platform that helps businesses increase closing rates and easily manage their pipelines. Integrating with Smartflo helps with call-related activities inside CRM that increase your business’s productivity and lead scoring.
Instructions
Follow the steps below to integrate Smartflo with Leadsquared.
-
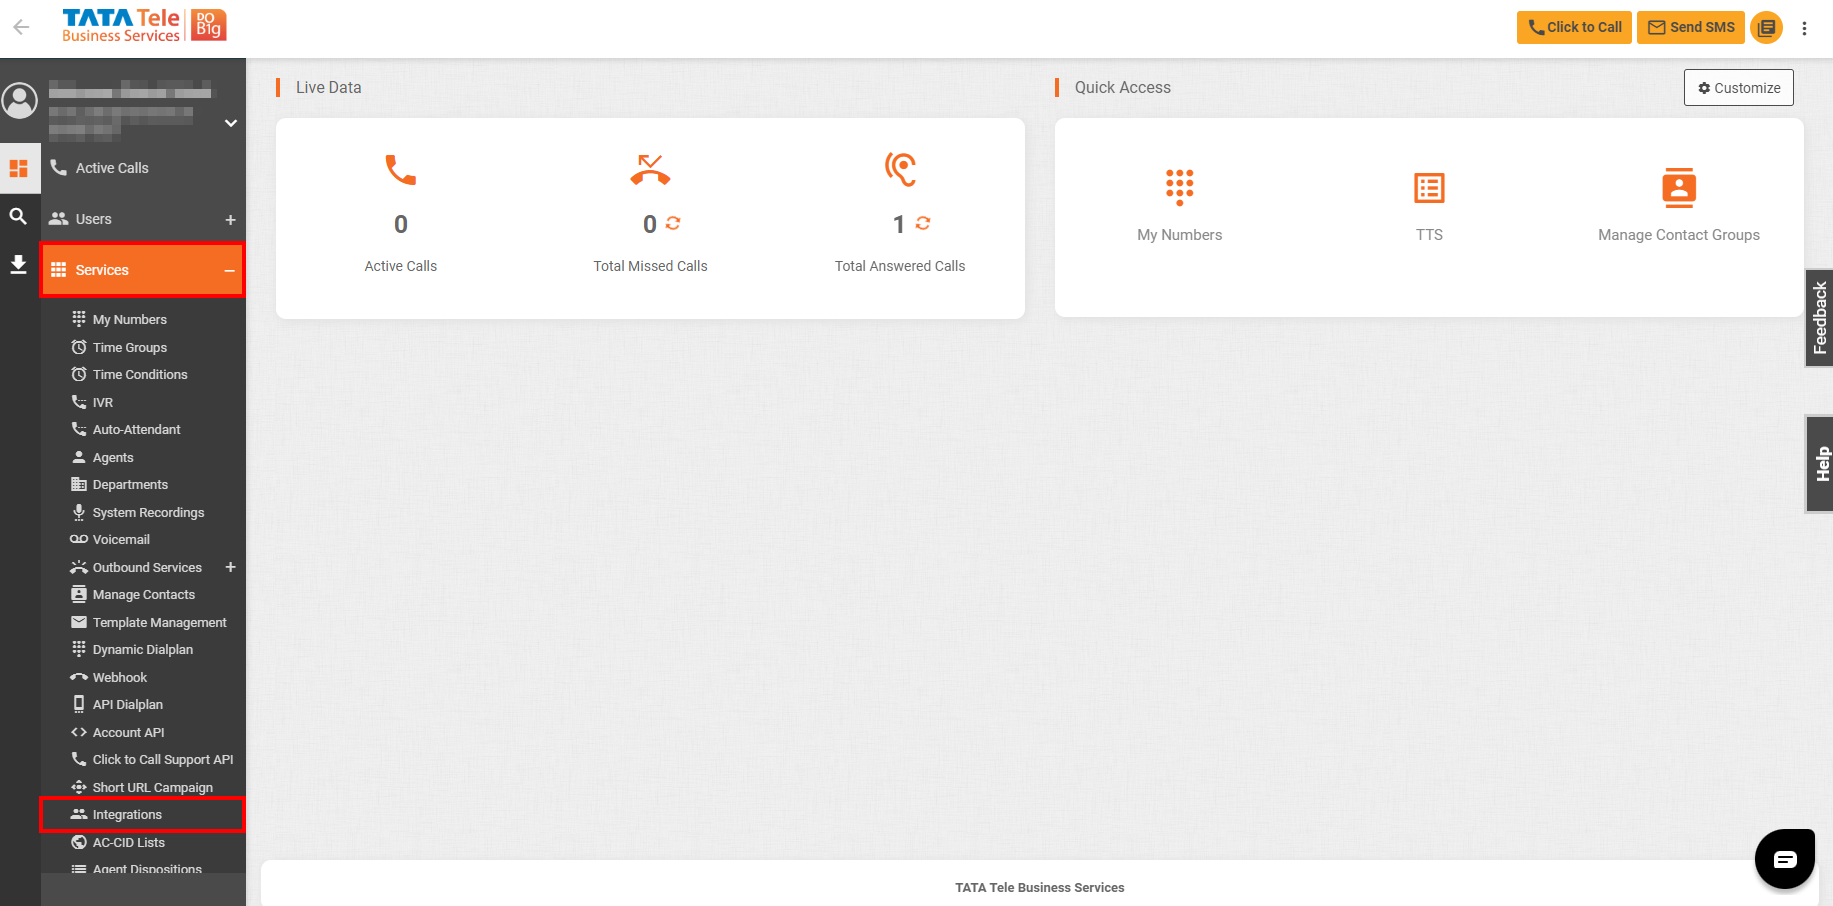
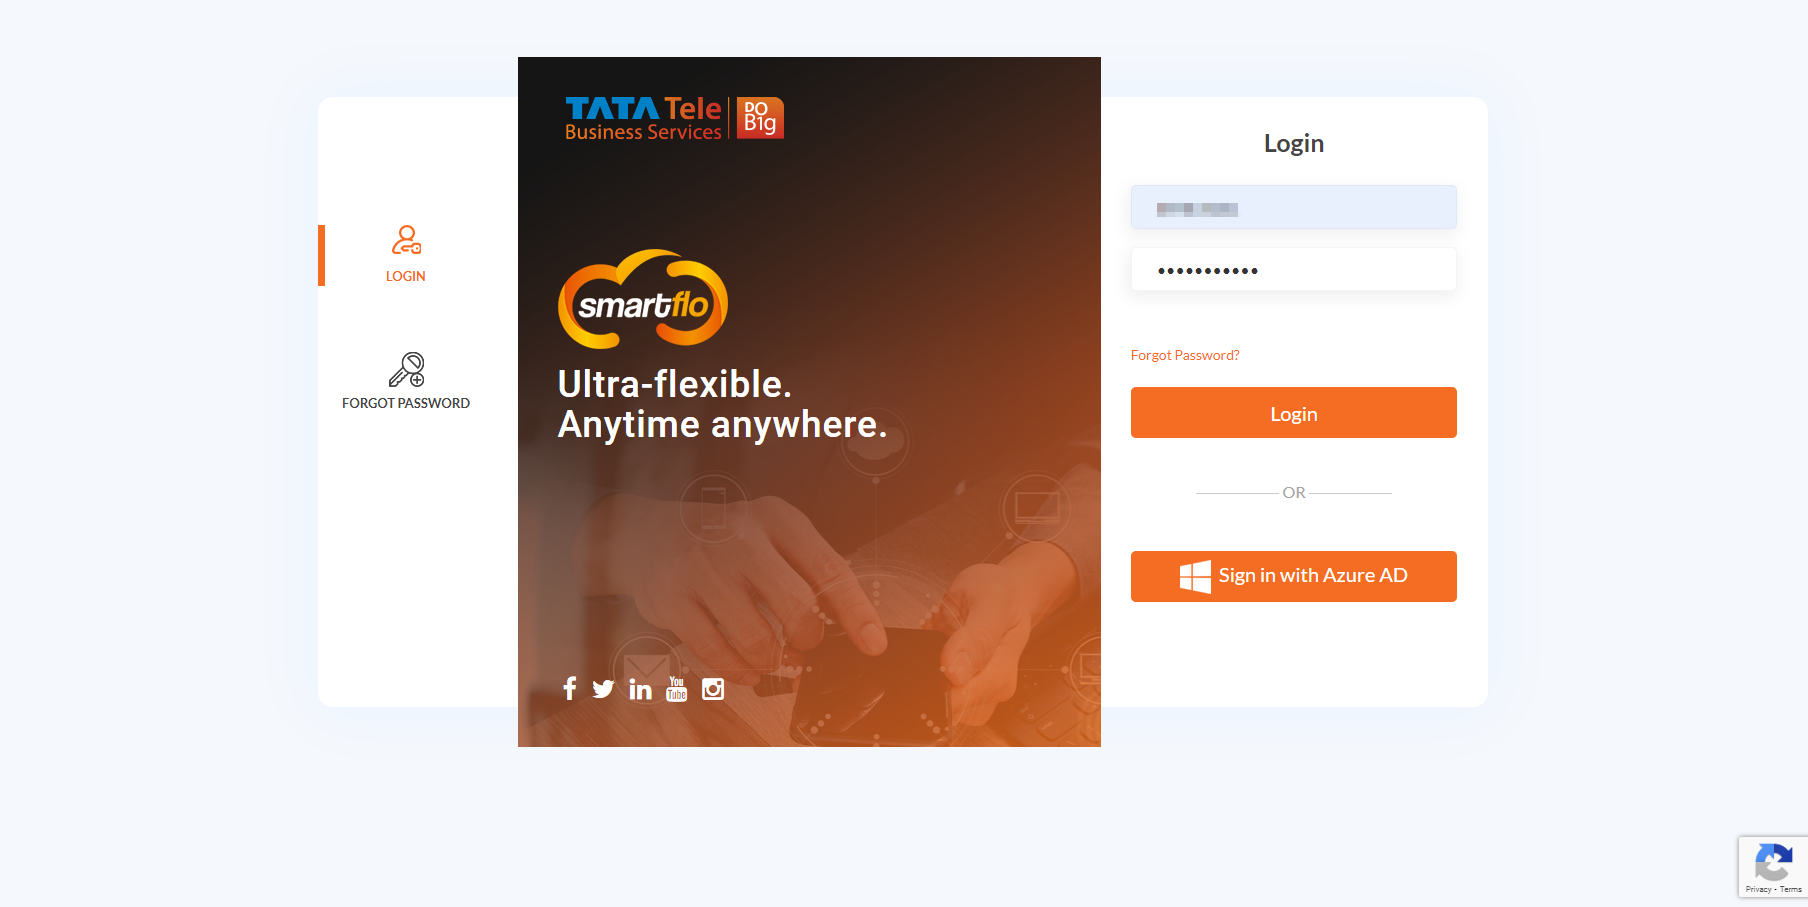
Login to your Smartflo account.

-
Click on Integrations under the Services tab.
-
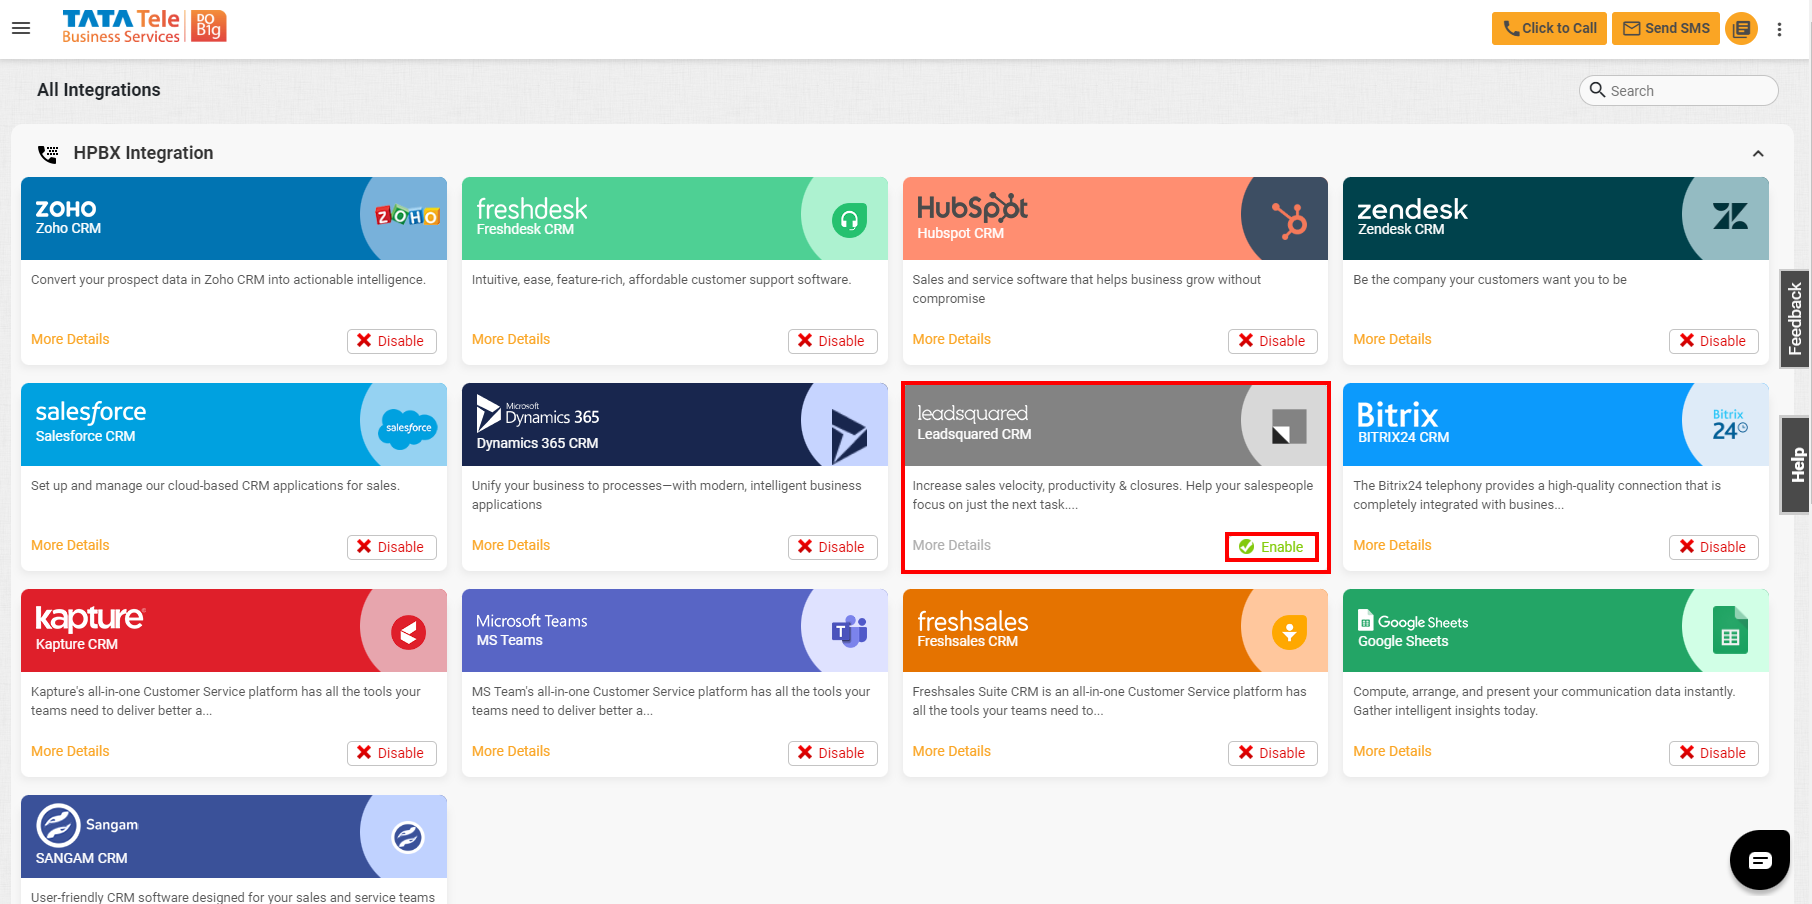
Move over to the Leadsquared integration and click on Enable.
-
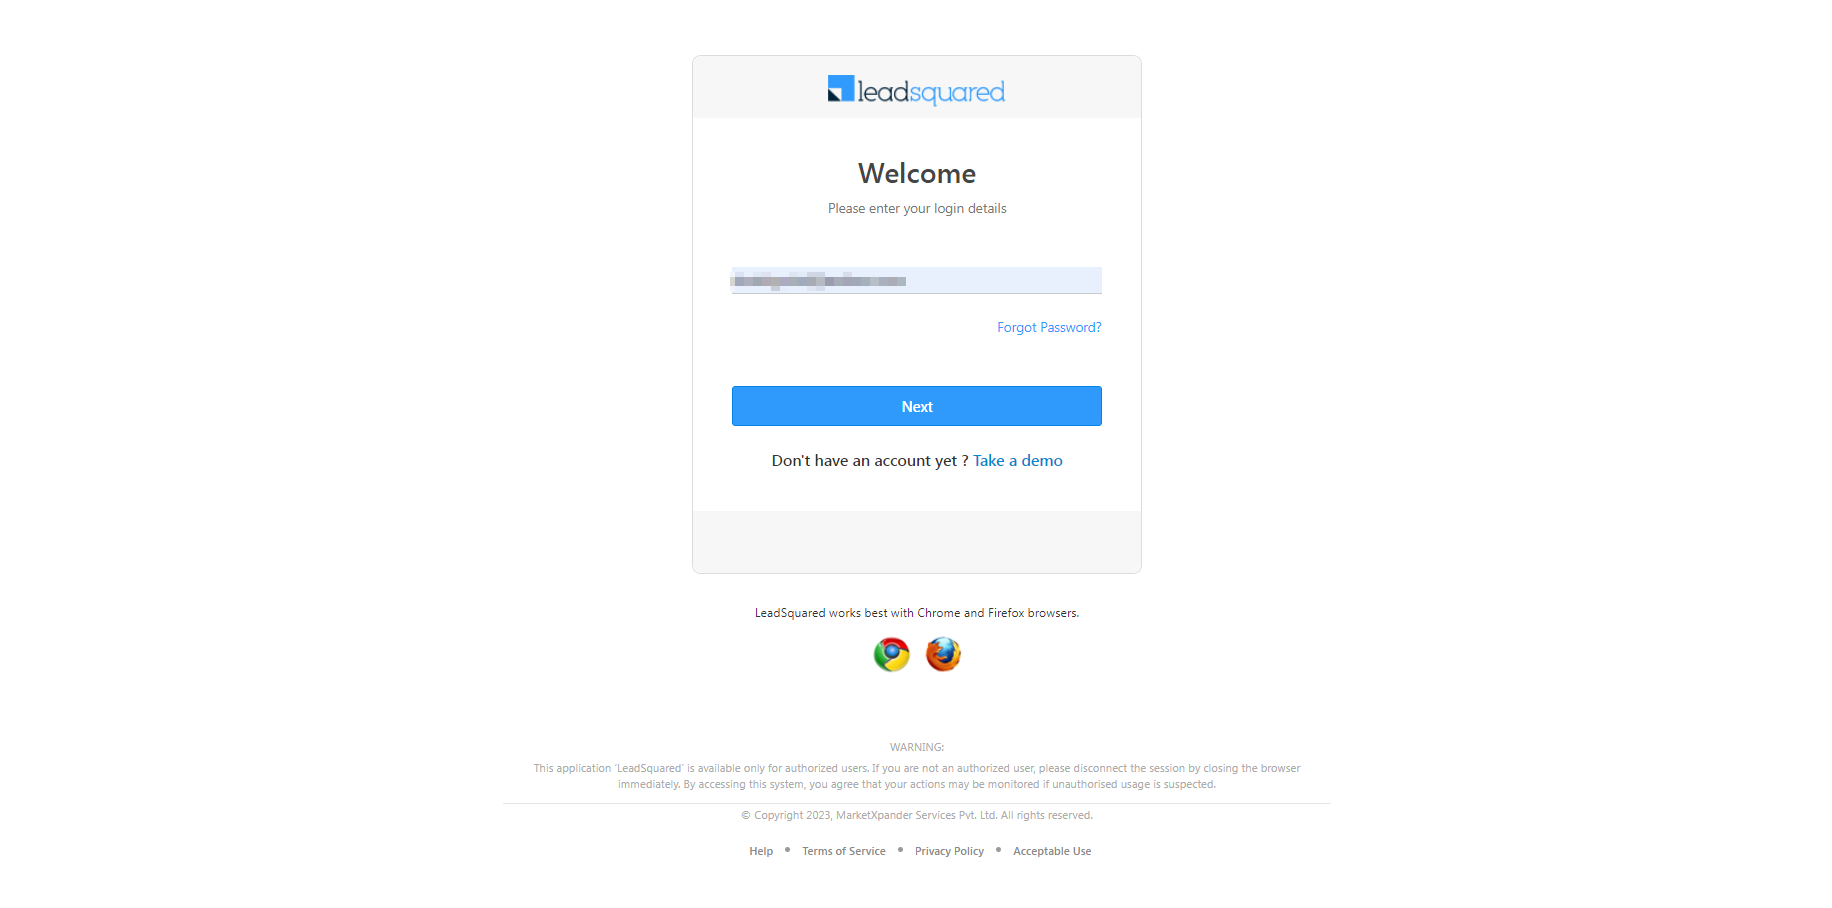
Log into your LeadSquared account.
-
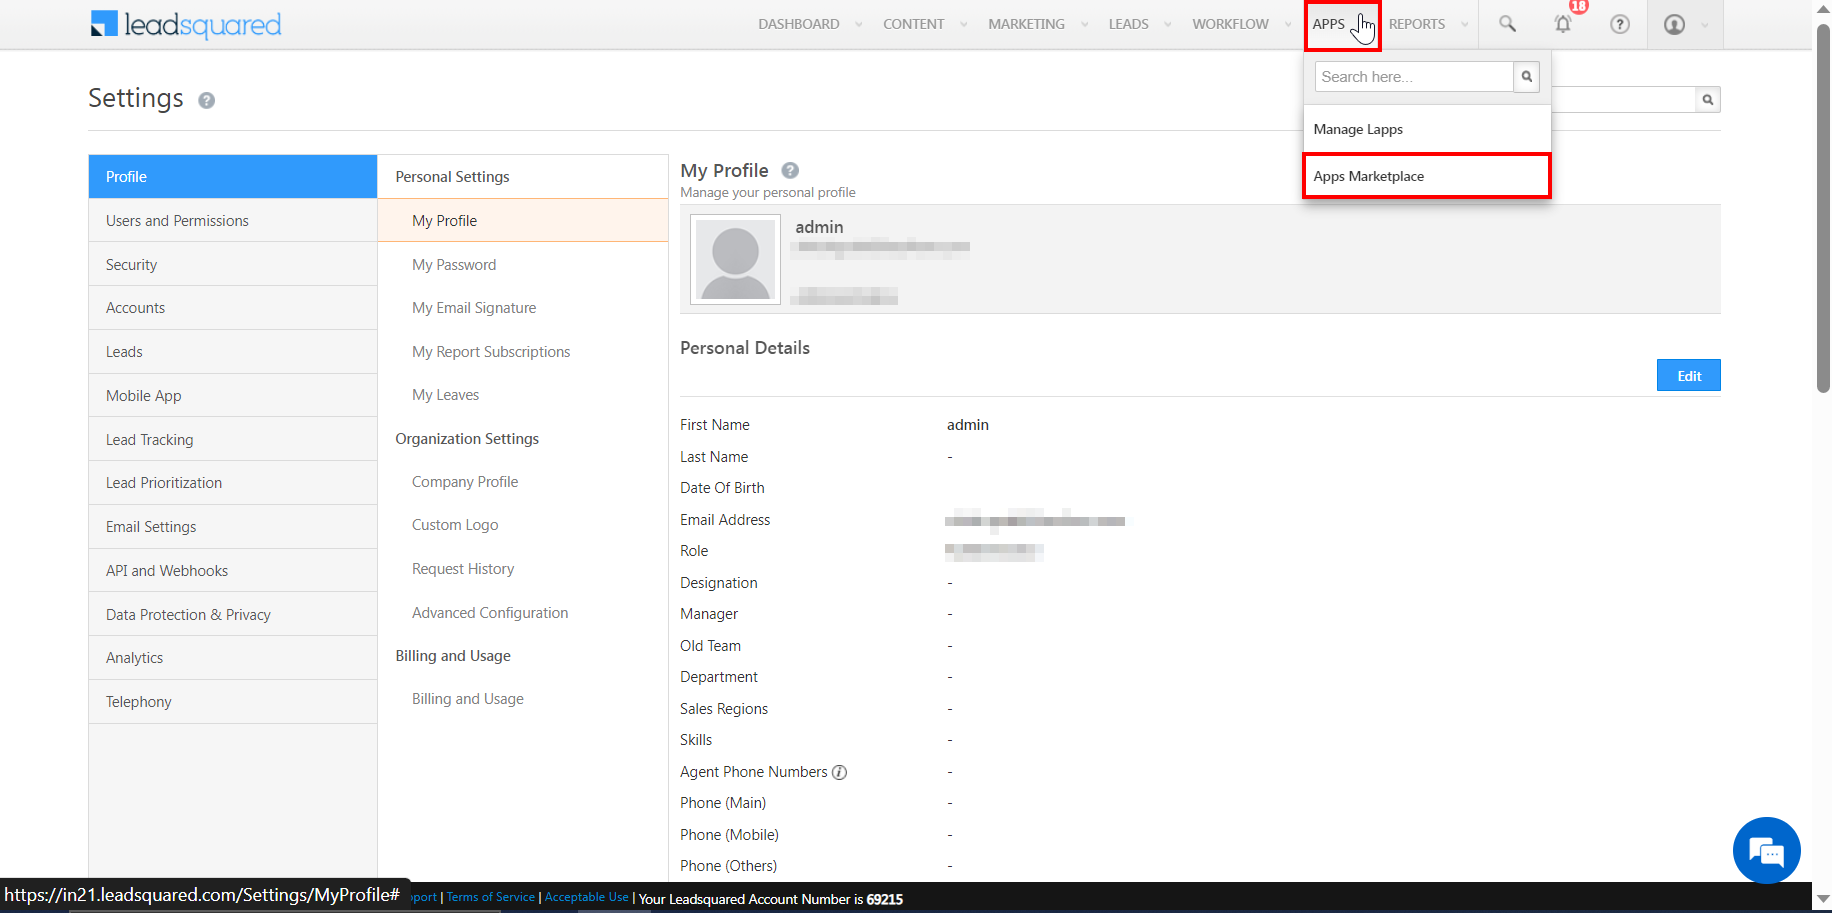
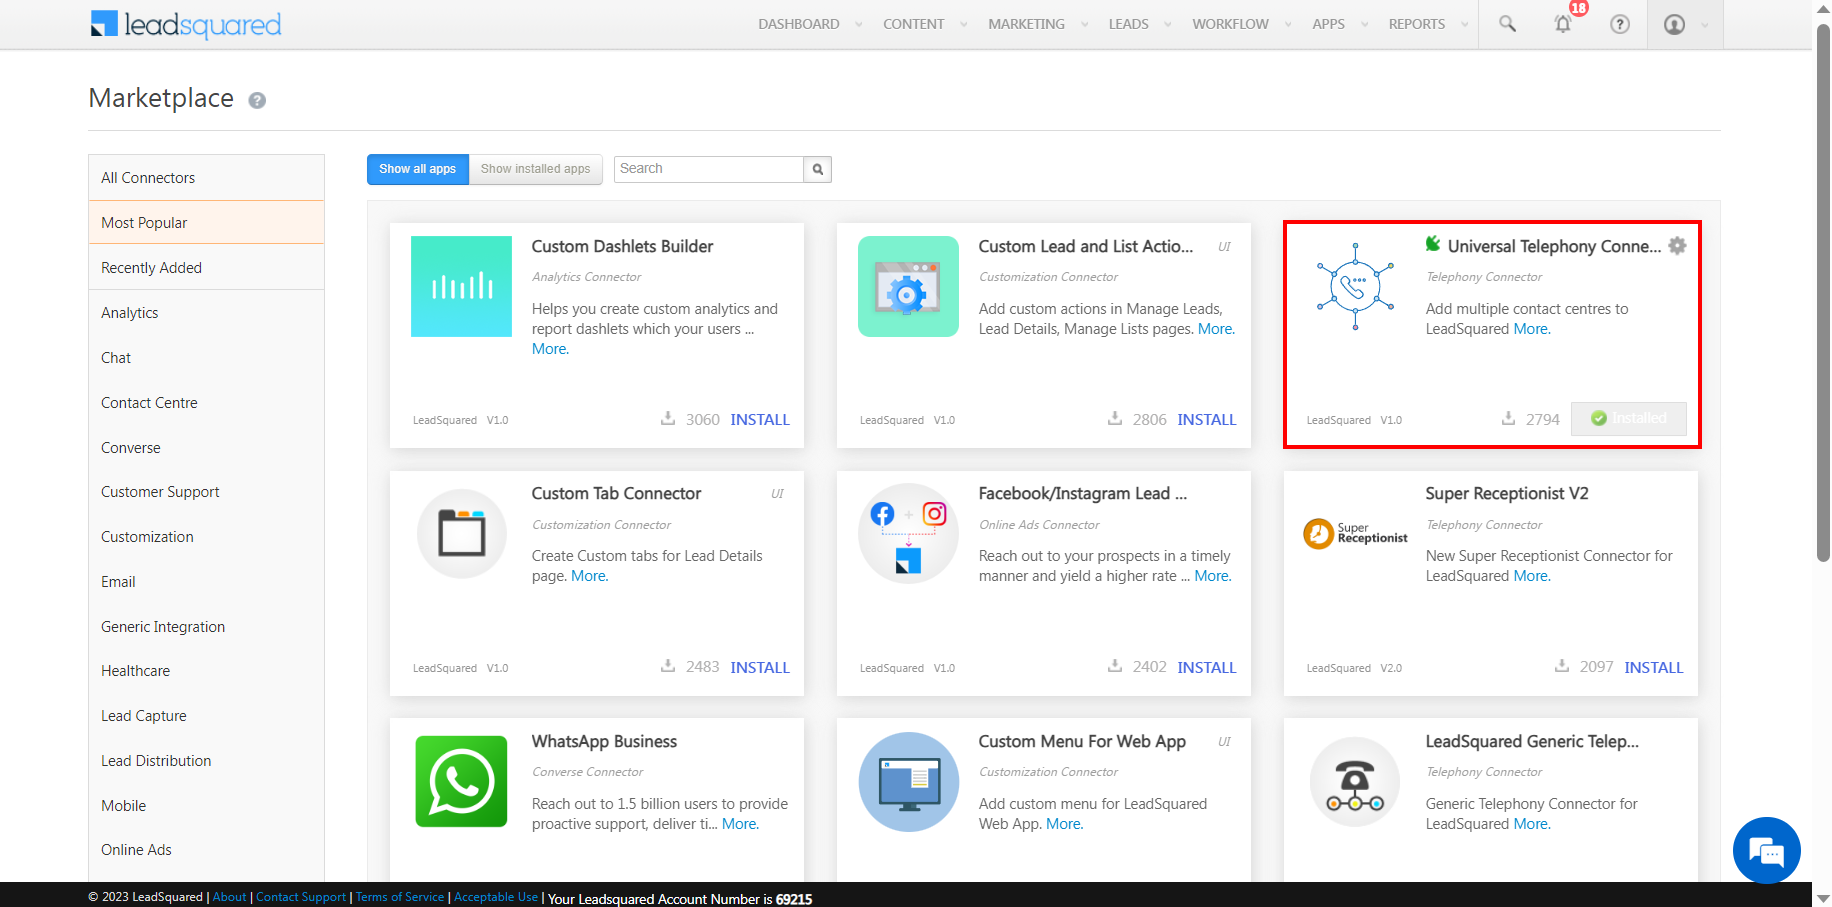
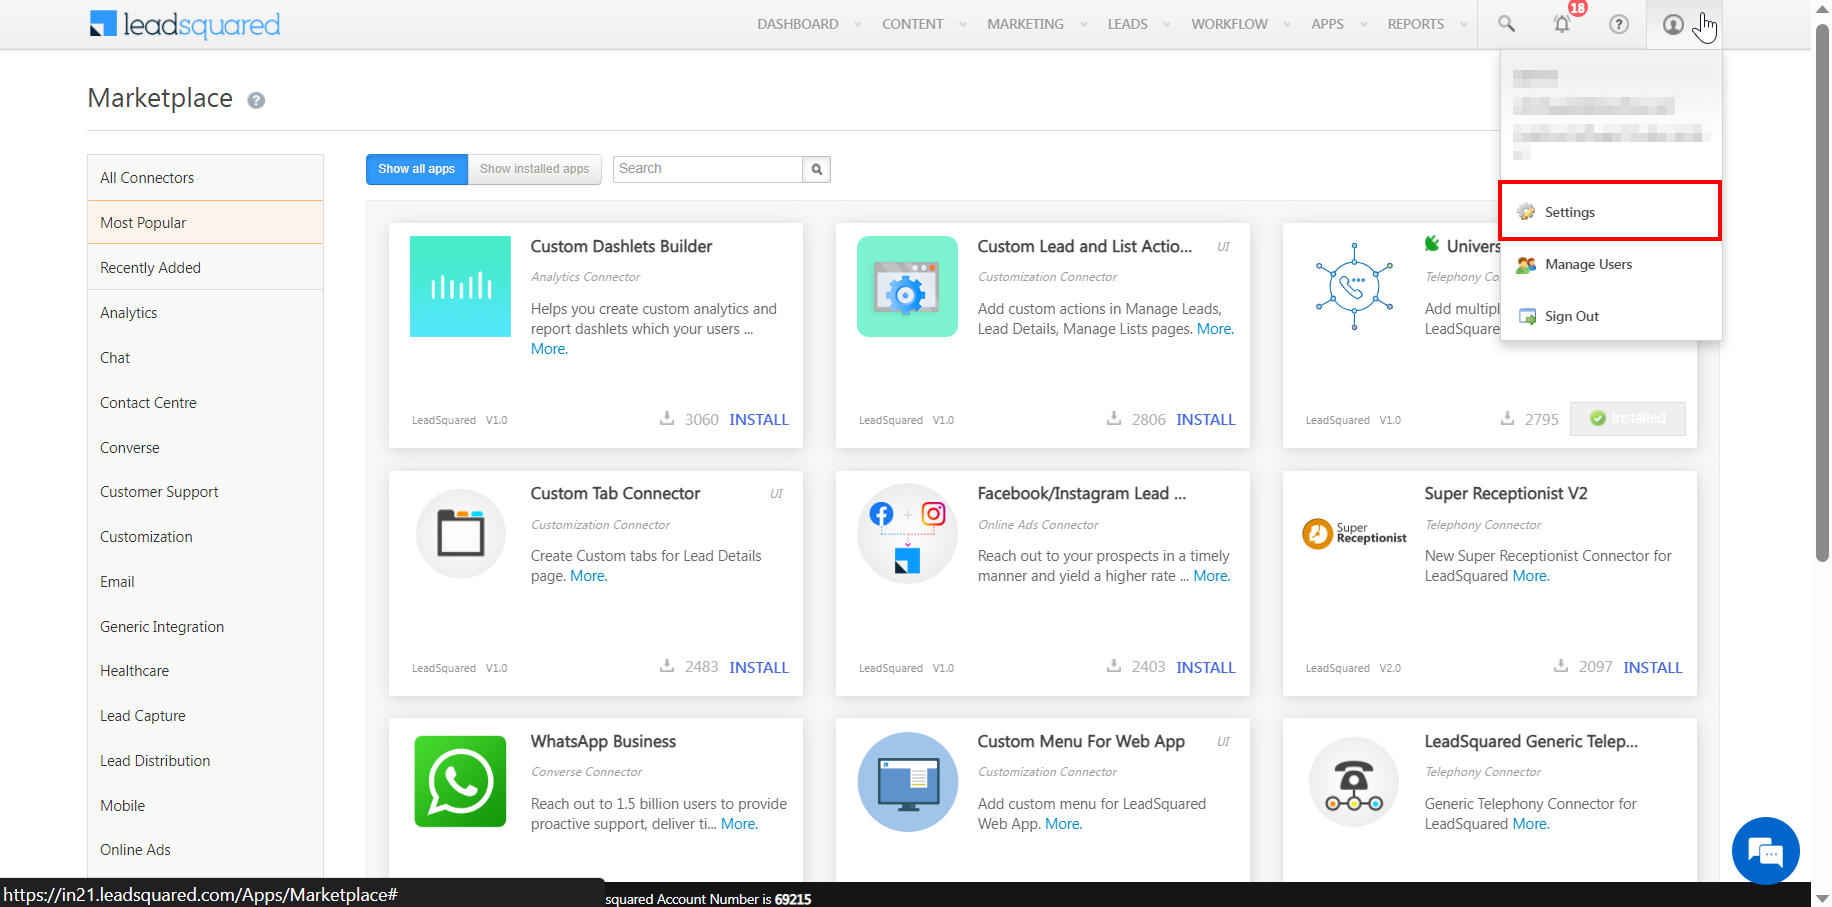
Click Apps > Apps Marketplace
-
Verify it contains the LeadSquared Universal Telephony Connector; if not, then install it.
-
Configure the settings by clicking the configure icon.

-
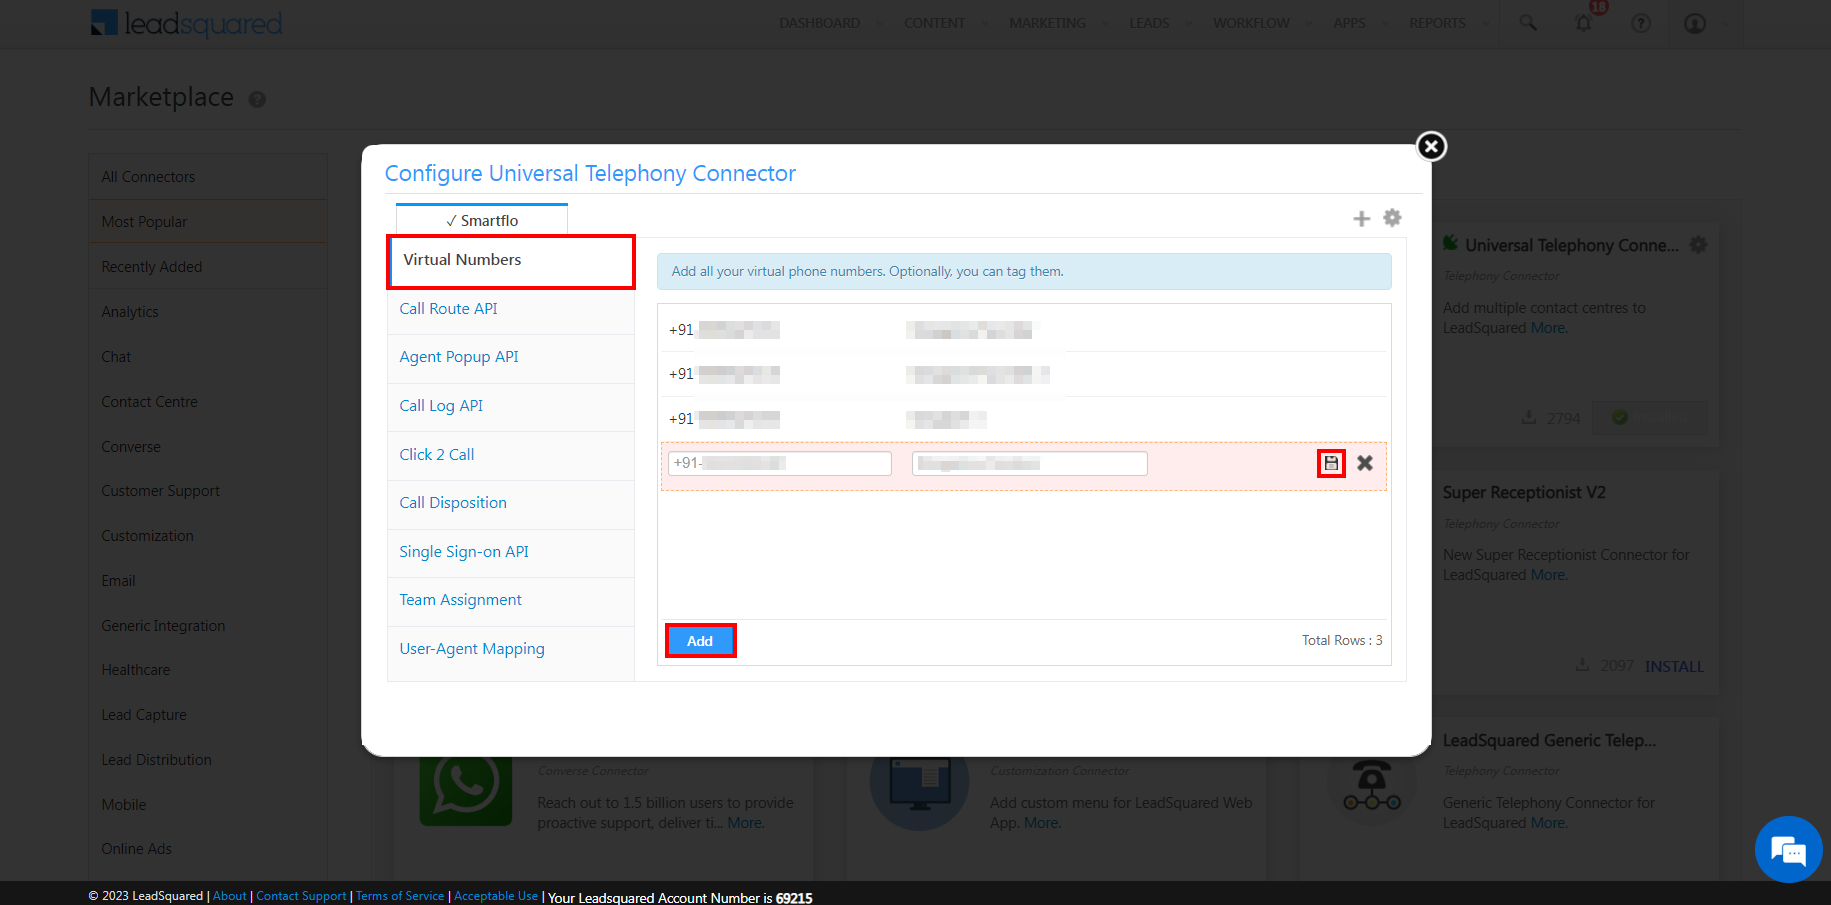
The below configuration page appears. Now, add Virtual Number in the format +91-XXXXXXXXXX and give a name to it.
-
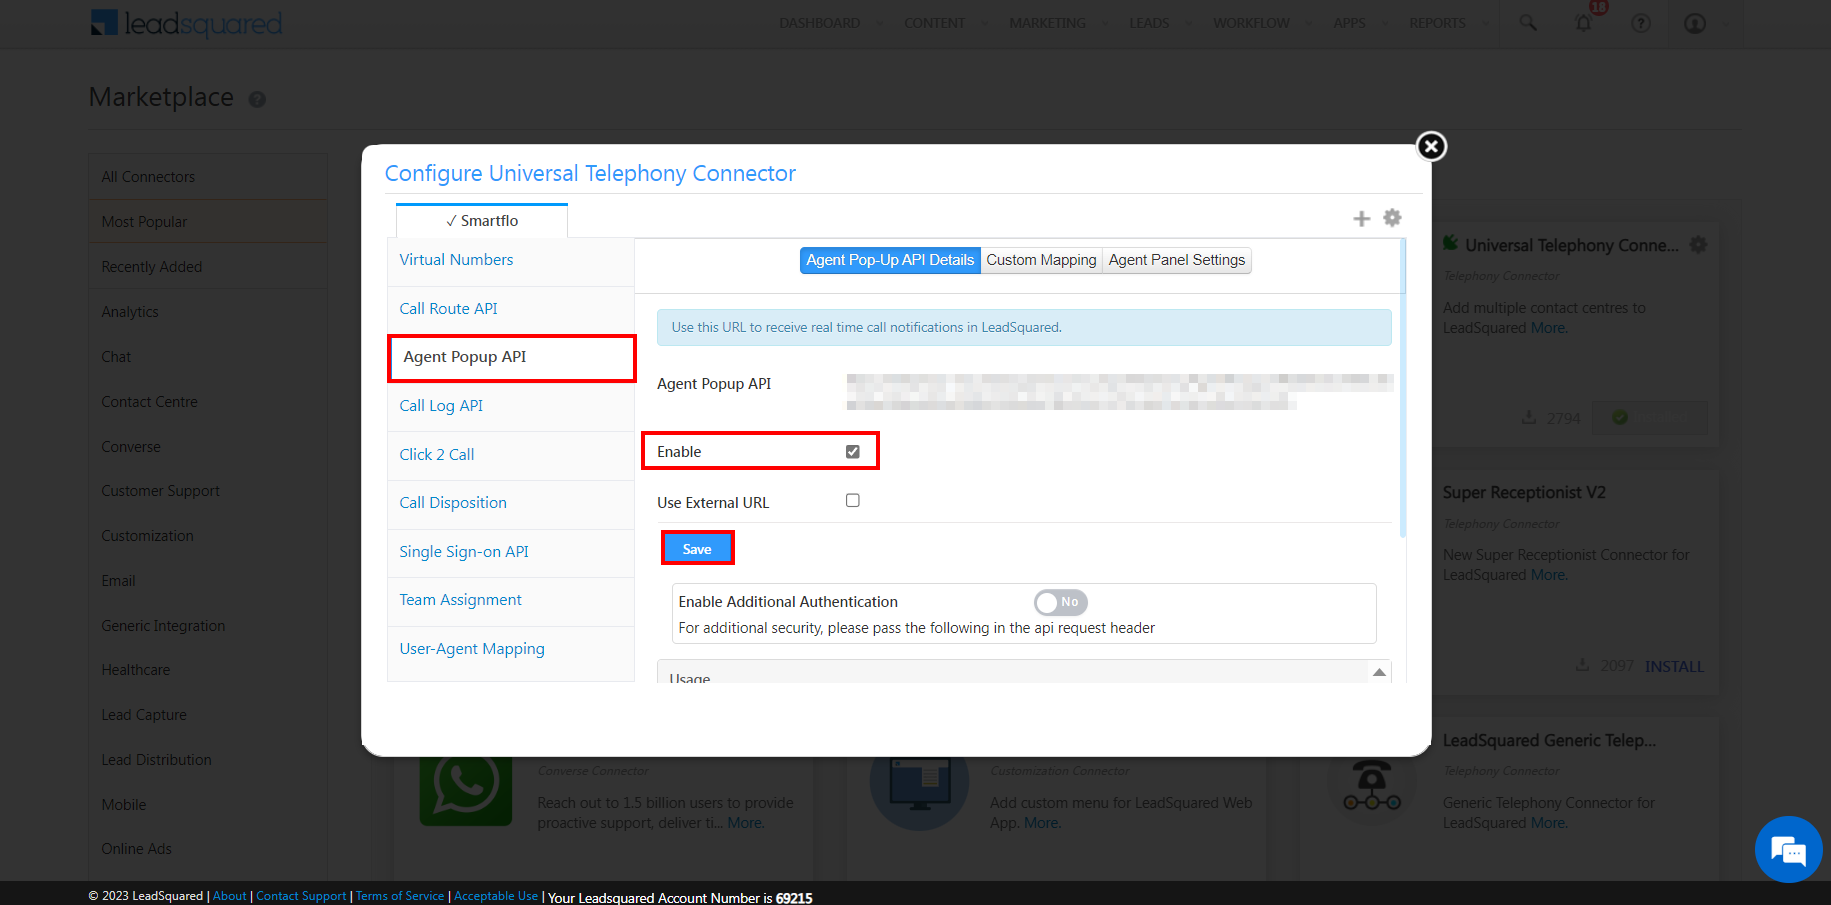
Next, enable the Agent popup API and click Save button.
-
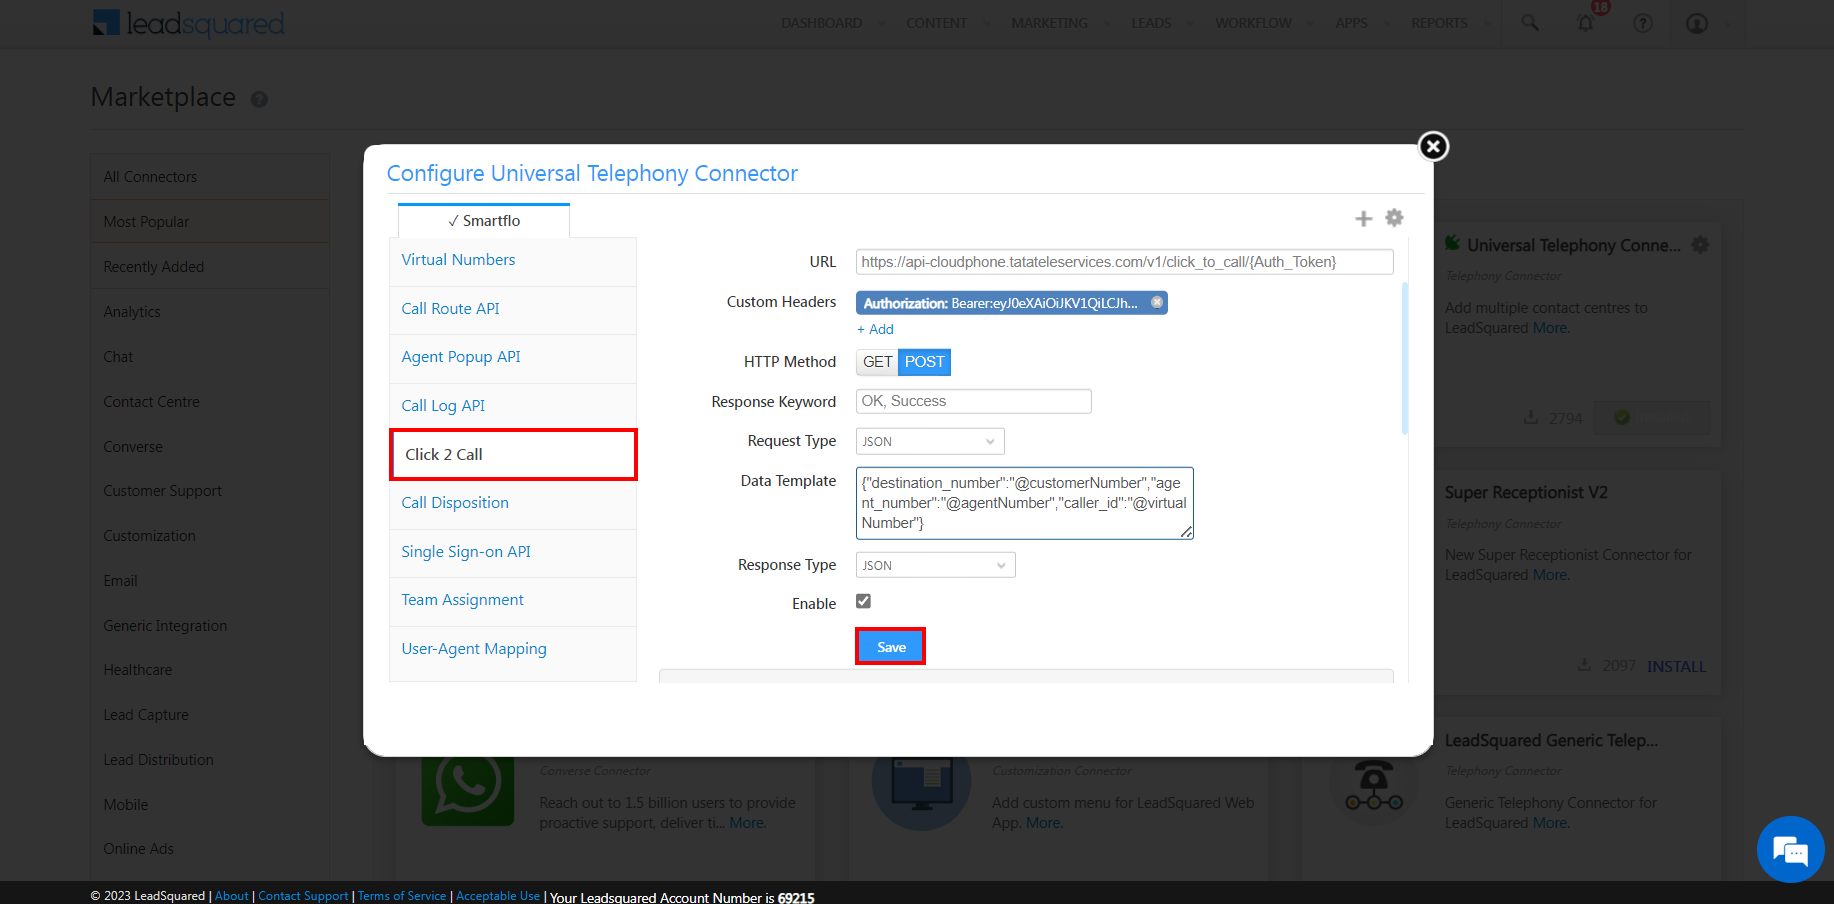
Under Click 2 Call, ensure the fields have the following details:
| Field | Value |
|---|---|
| URL | https://api-cloudphone.tatateleservices.com/v1/click_to_call/{Auth_Token} |
| HTTP Method | POST |
| Response Keyword | OK, Success |
| Request Type | JSON |
| Data Template | {"destination_number":"@customerNumber","agent_number":"@agentNumber","caller_id":"@virtualNumber"} |
| Response Type | JSON |
Use the following details for Custom Header:
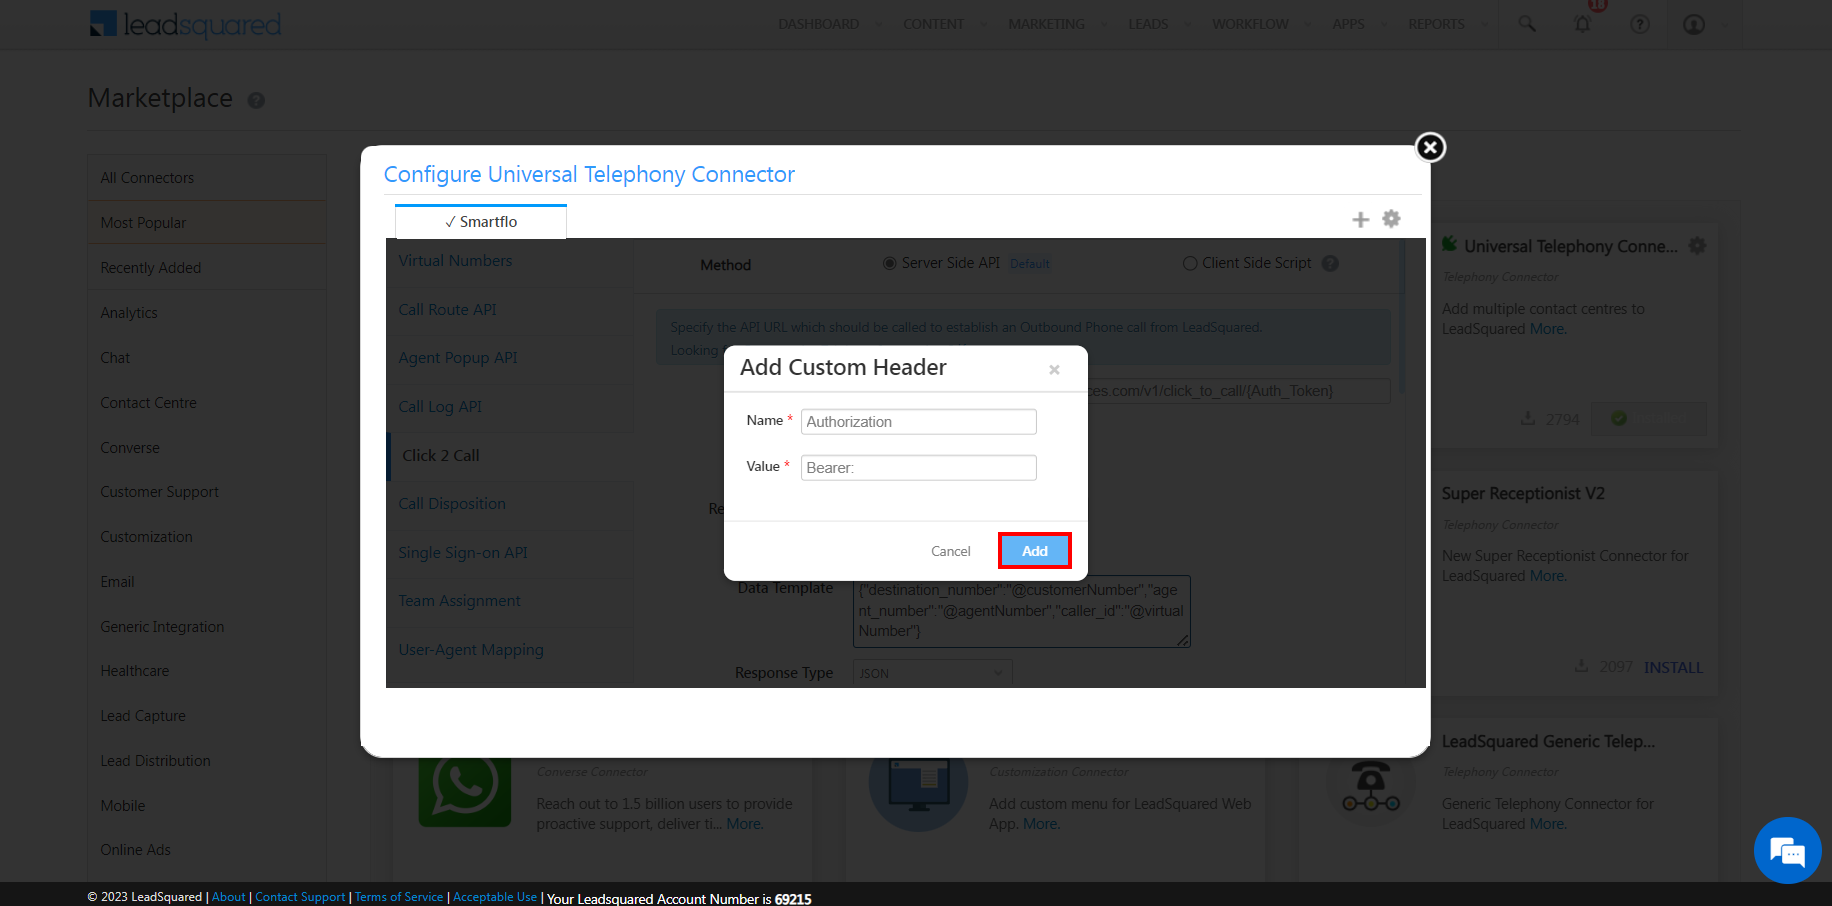
| Field | Value |
|---|---|
| Name | Authorization |
| Value | Bearer:Auth_Token |
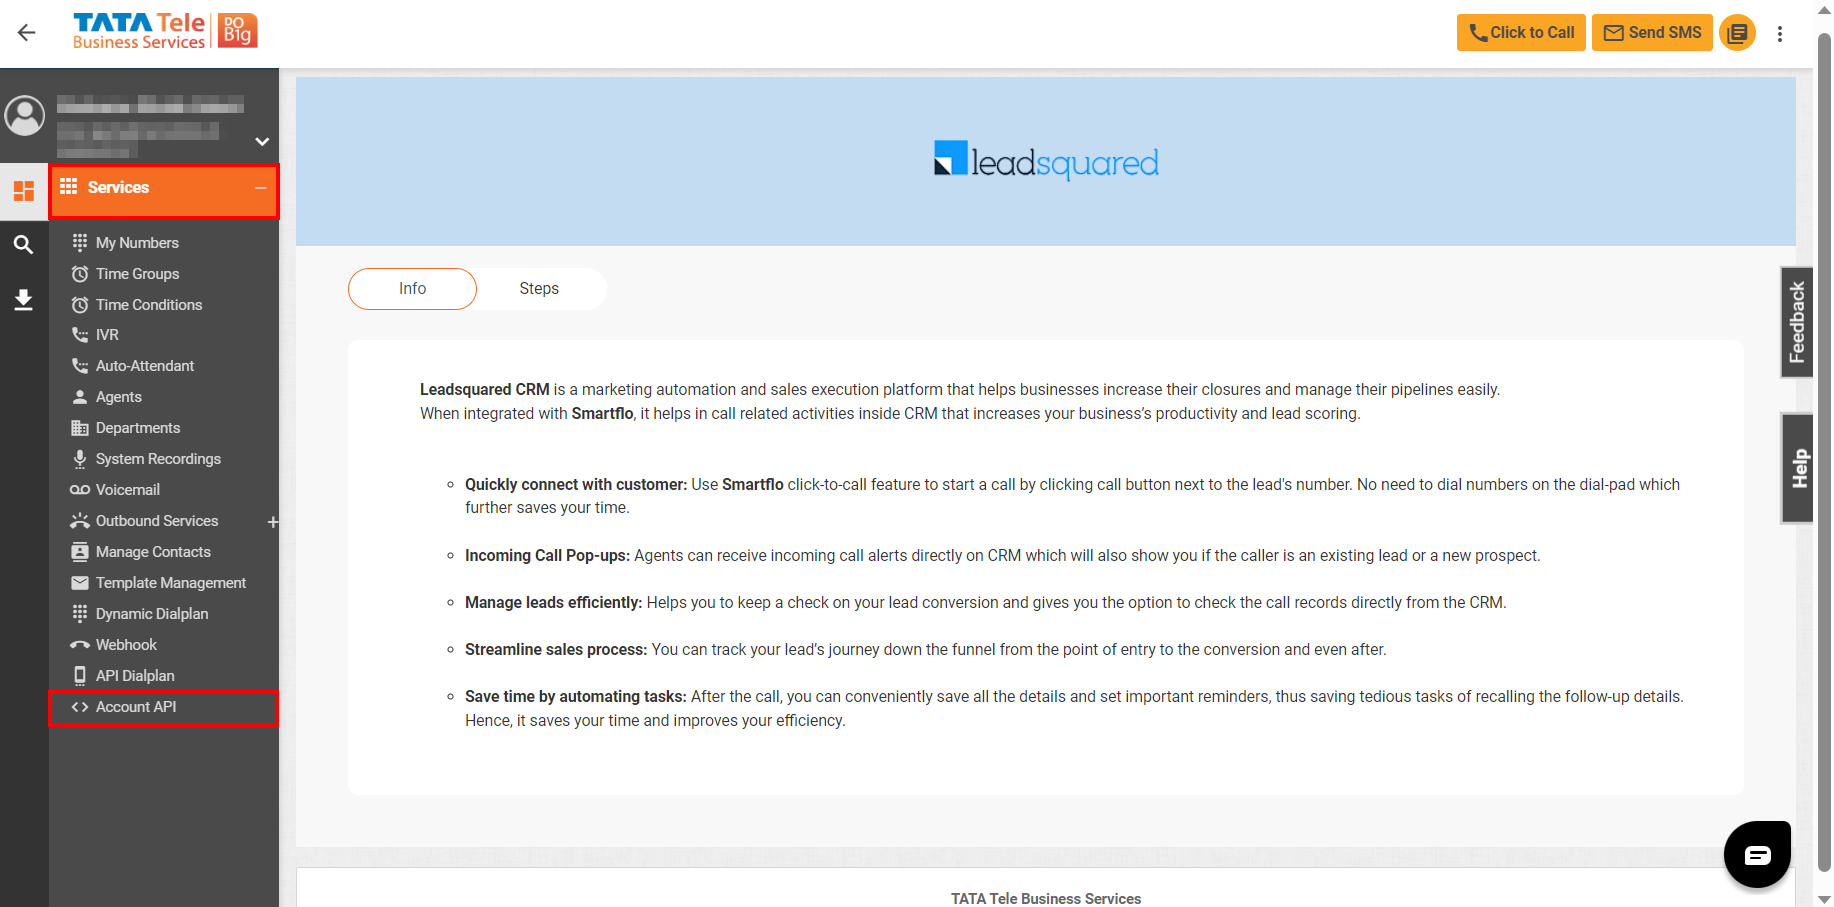
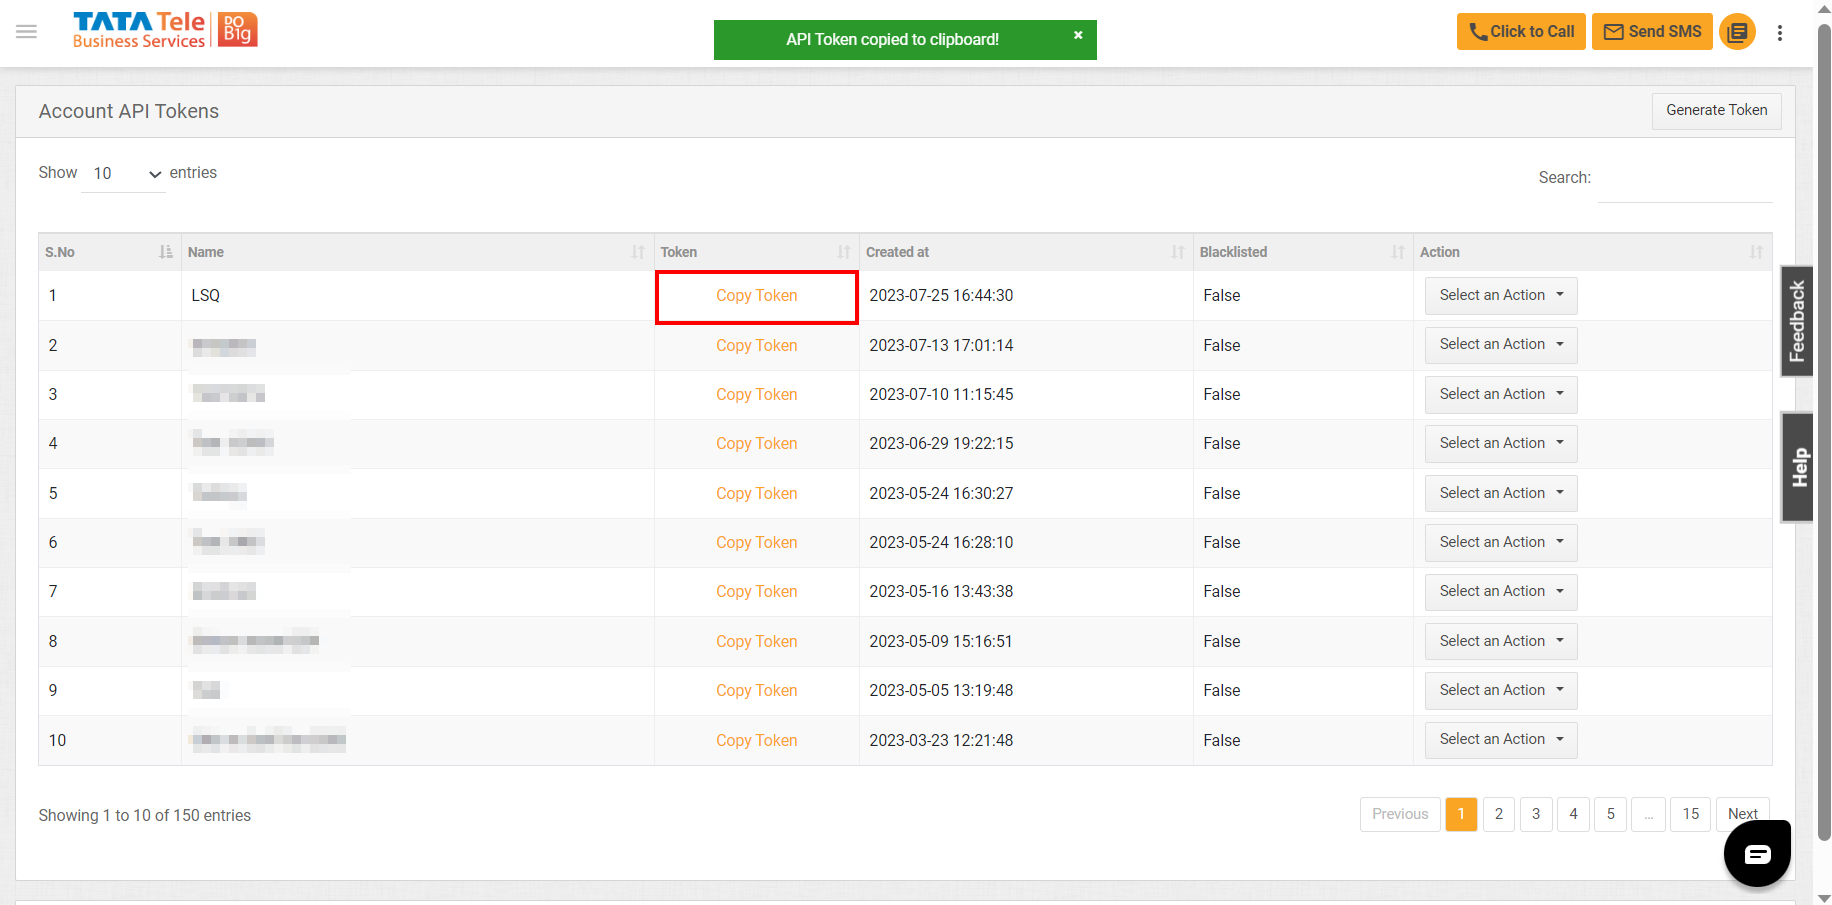
Follow the steps below to generate Auth_Token
a. Login to your Smartflo account.

b. Click on Account API under the Services tab.
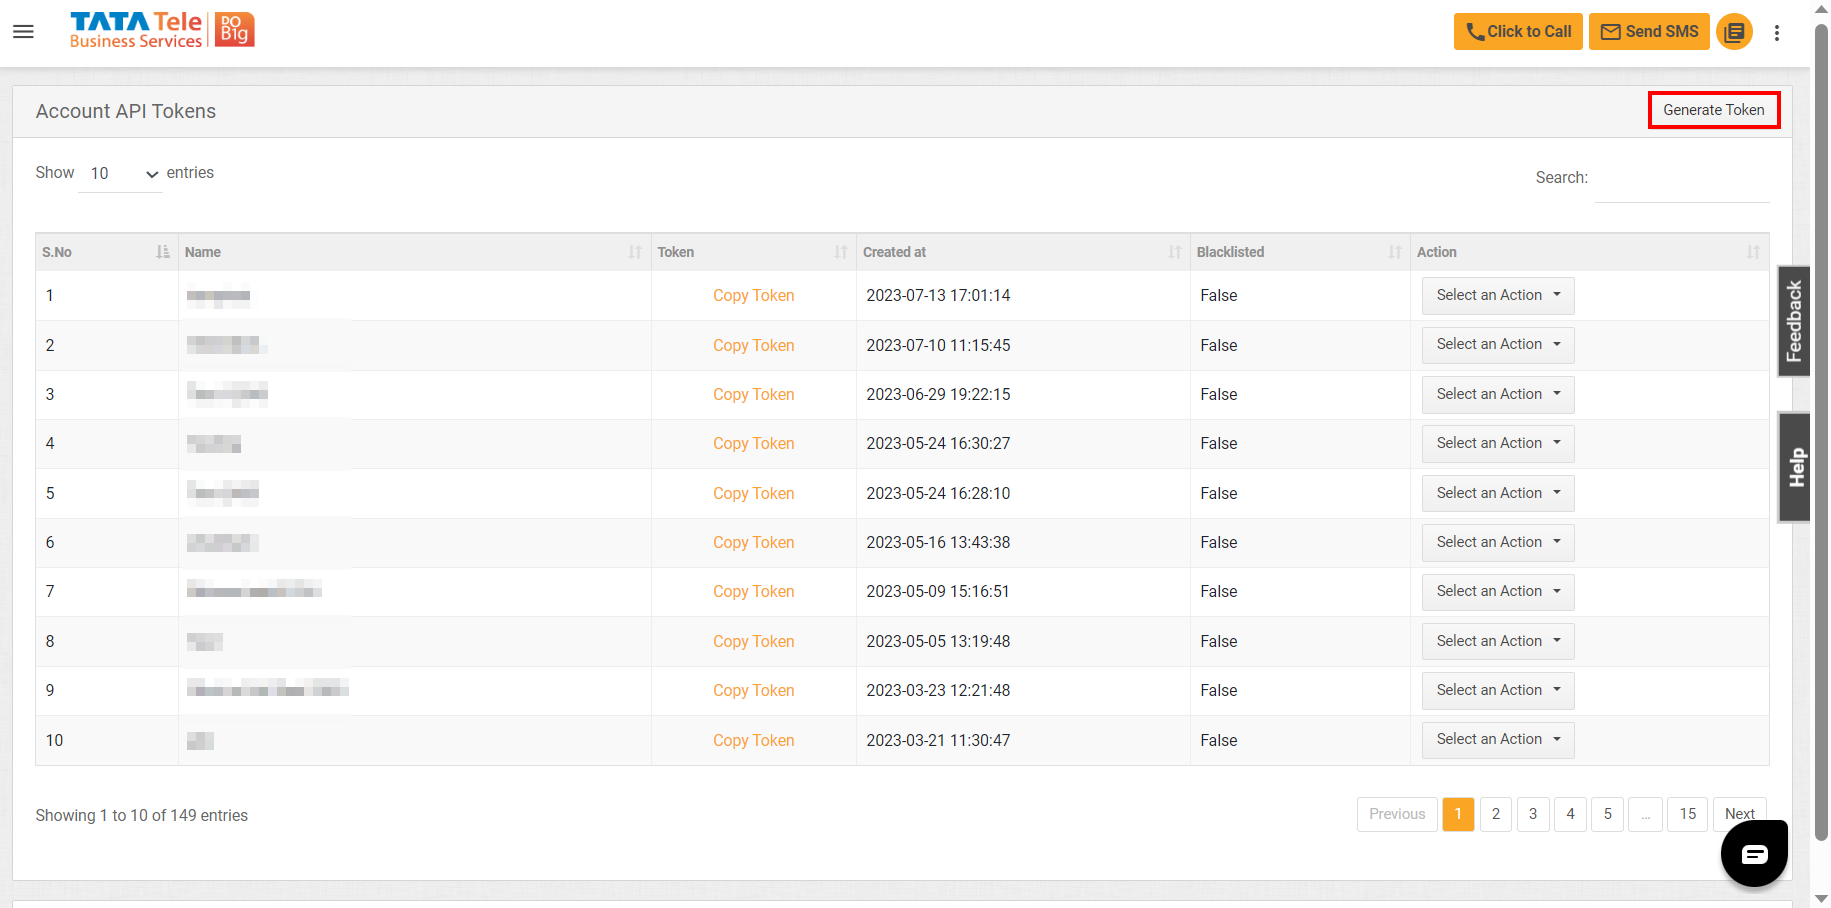
c. Click on Generate Token.
d. Give a token name and click on Save.
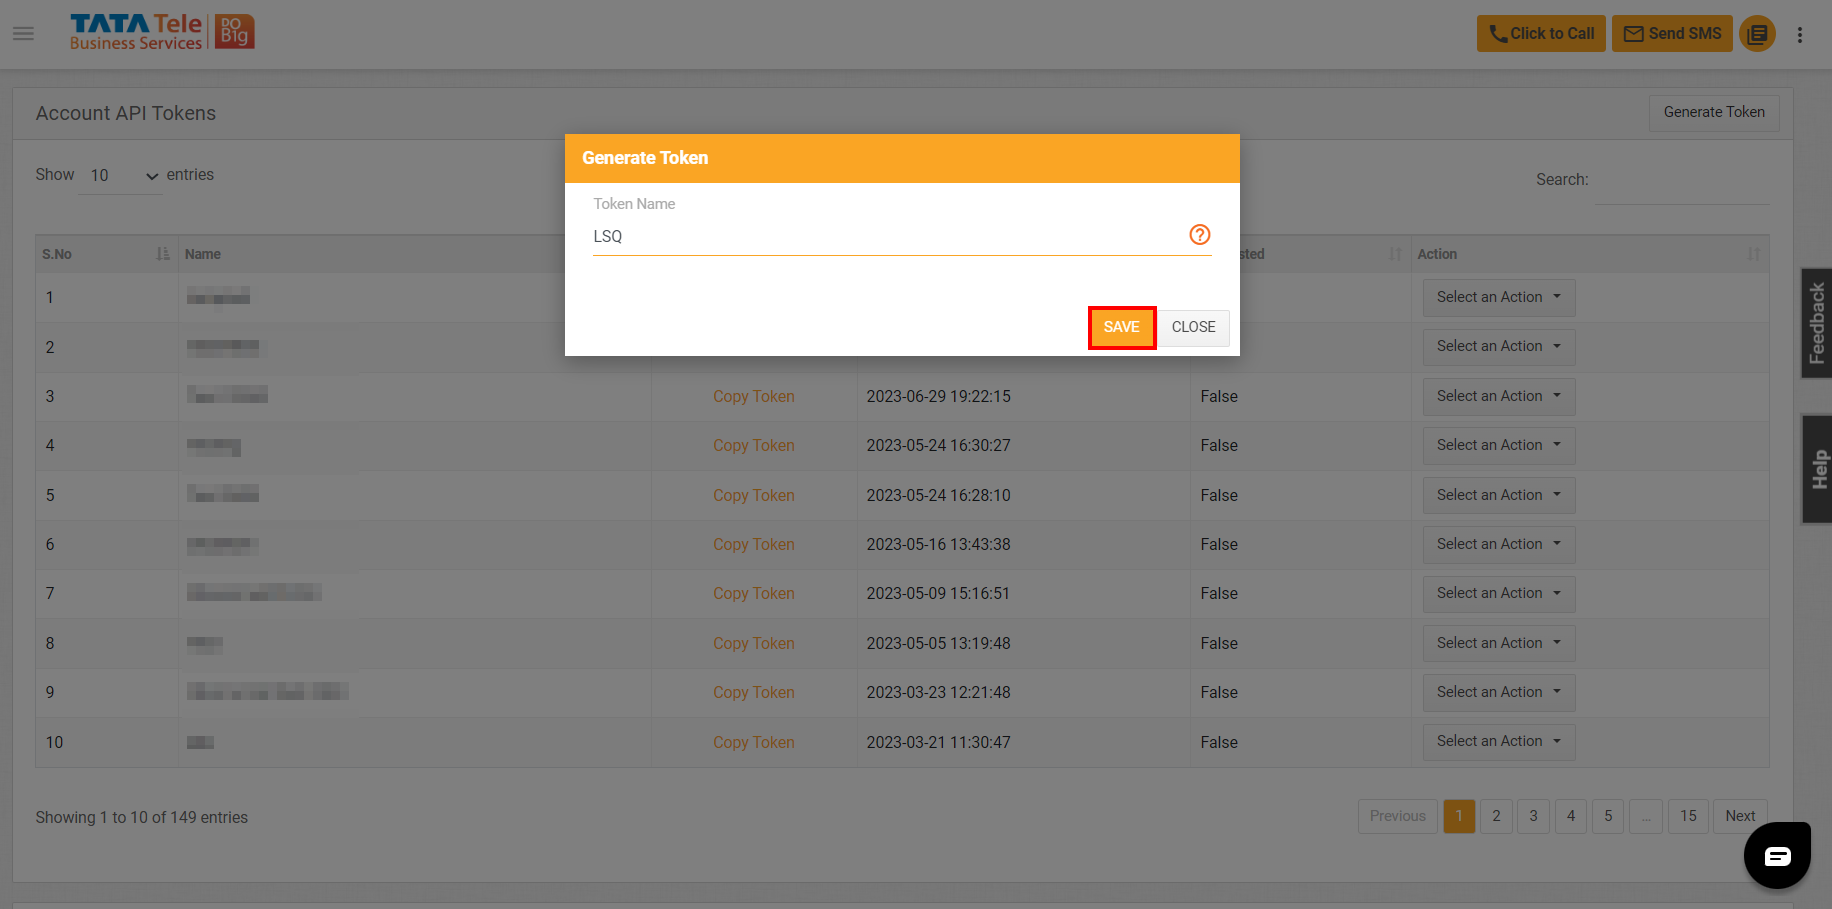
e. Click on Copy Token to copy the value.
-
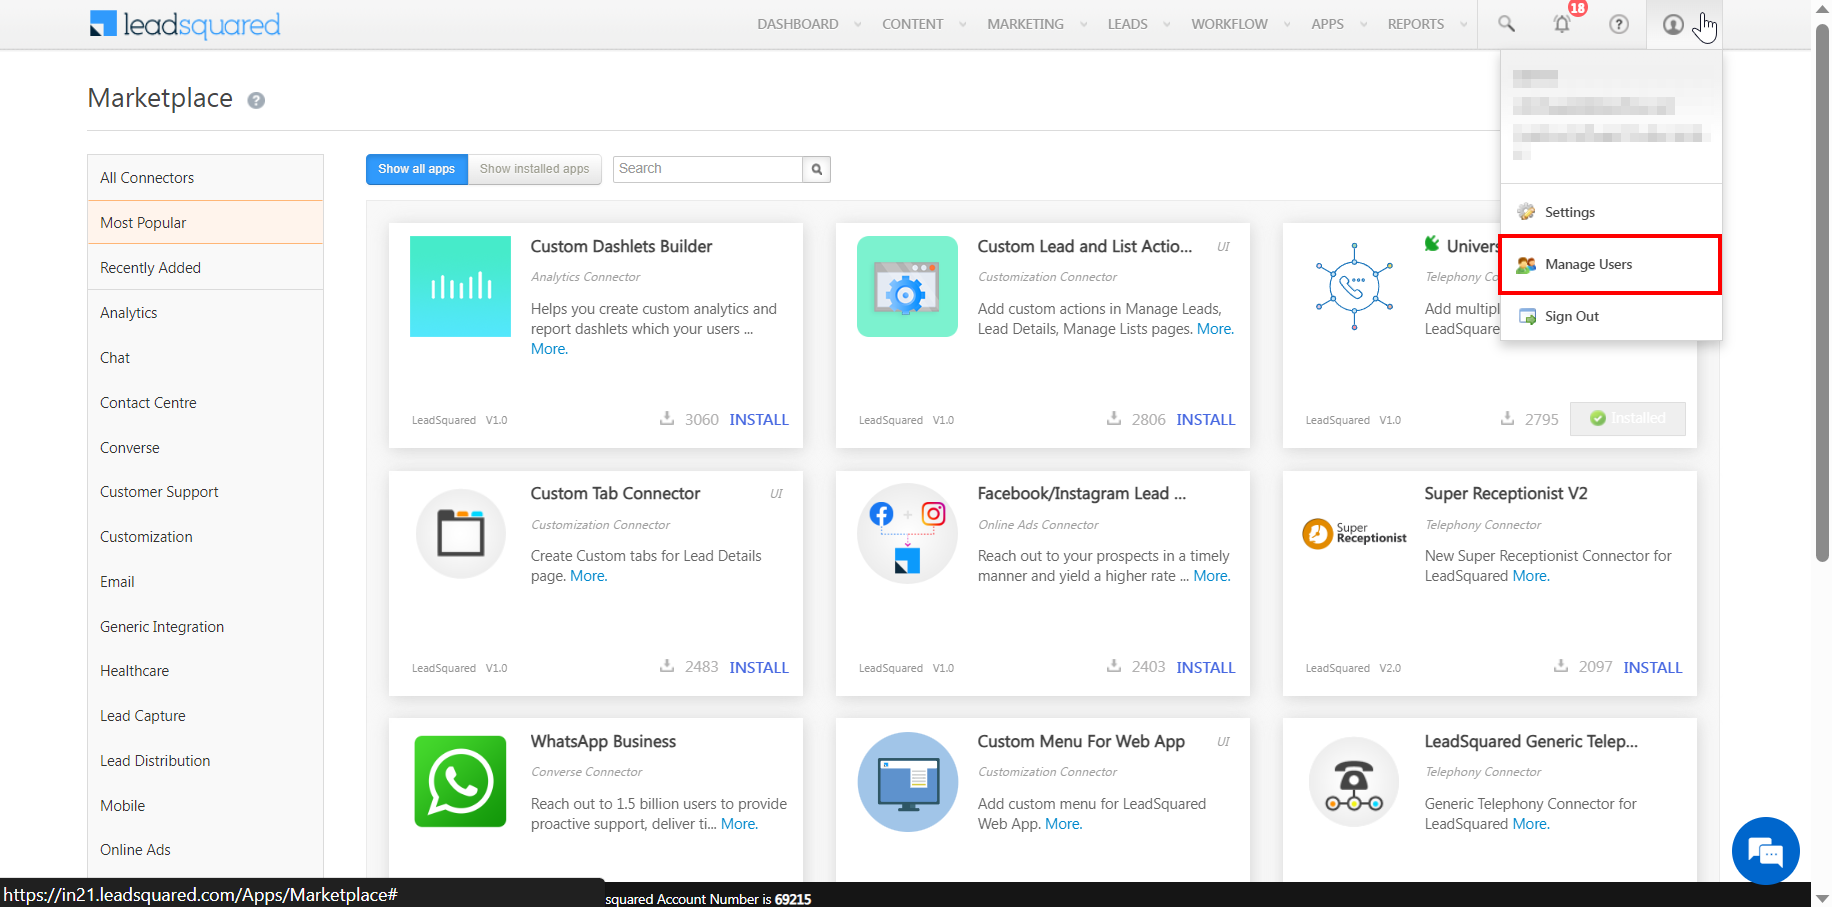
Now, click on Manage Users.
-
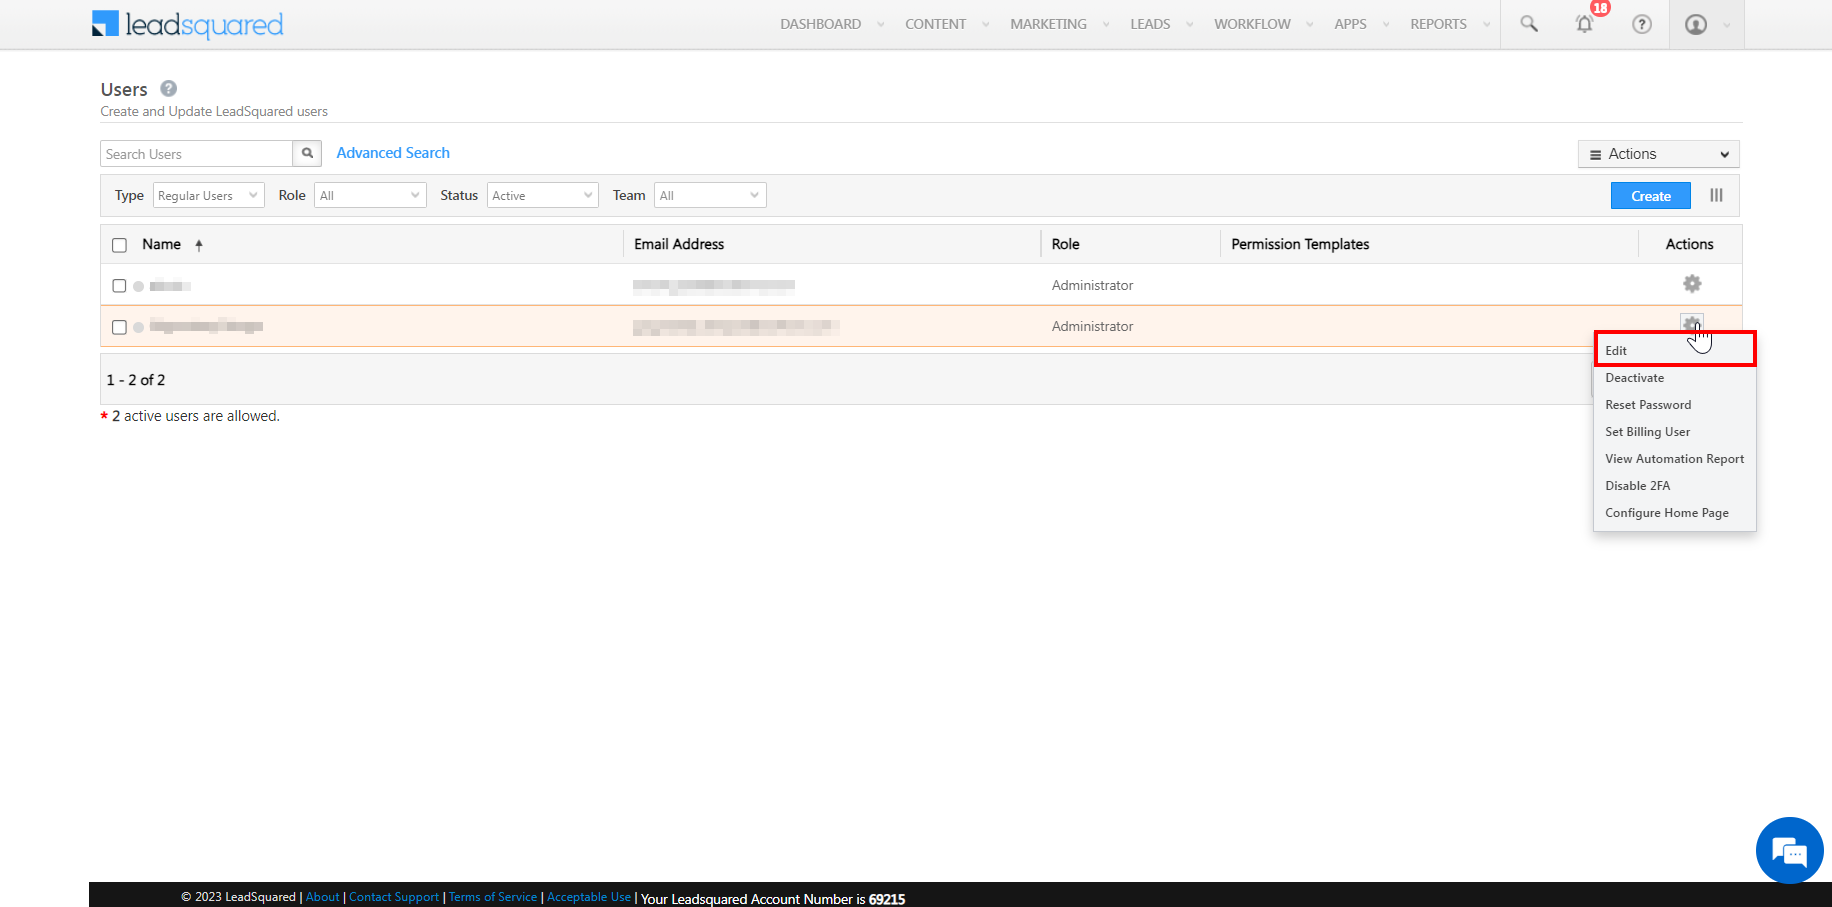
Edit the user by clicking on the cog icon present next to it.
-
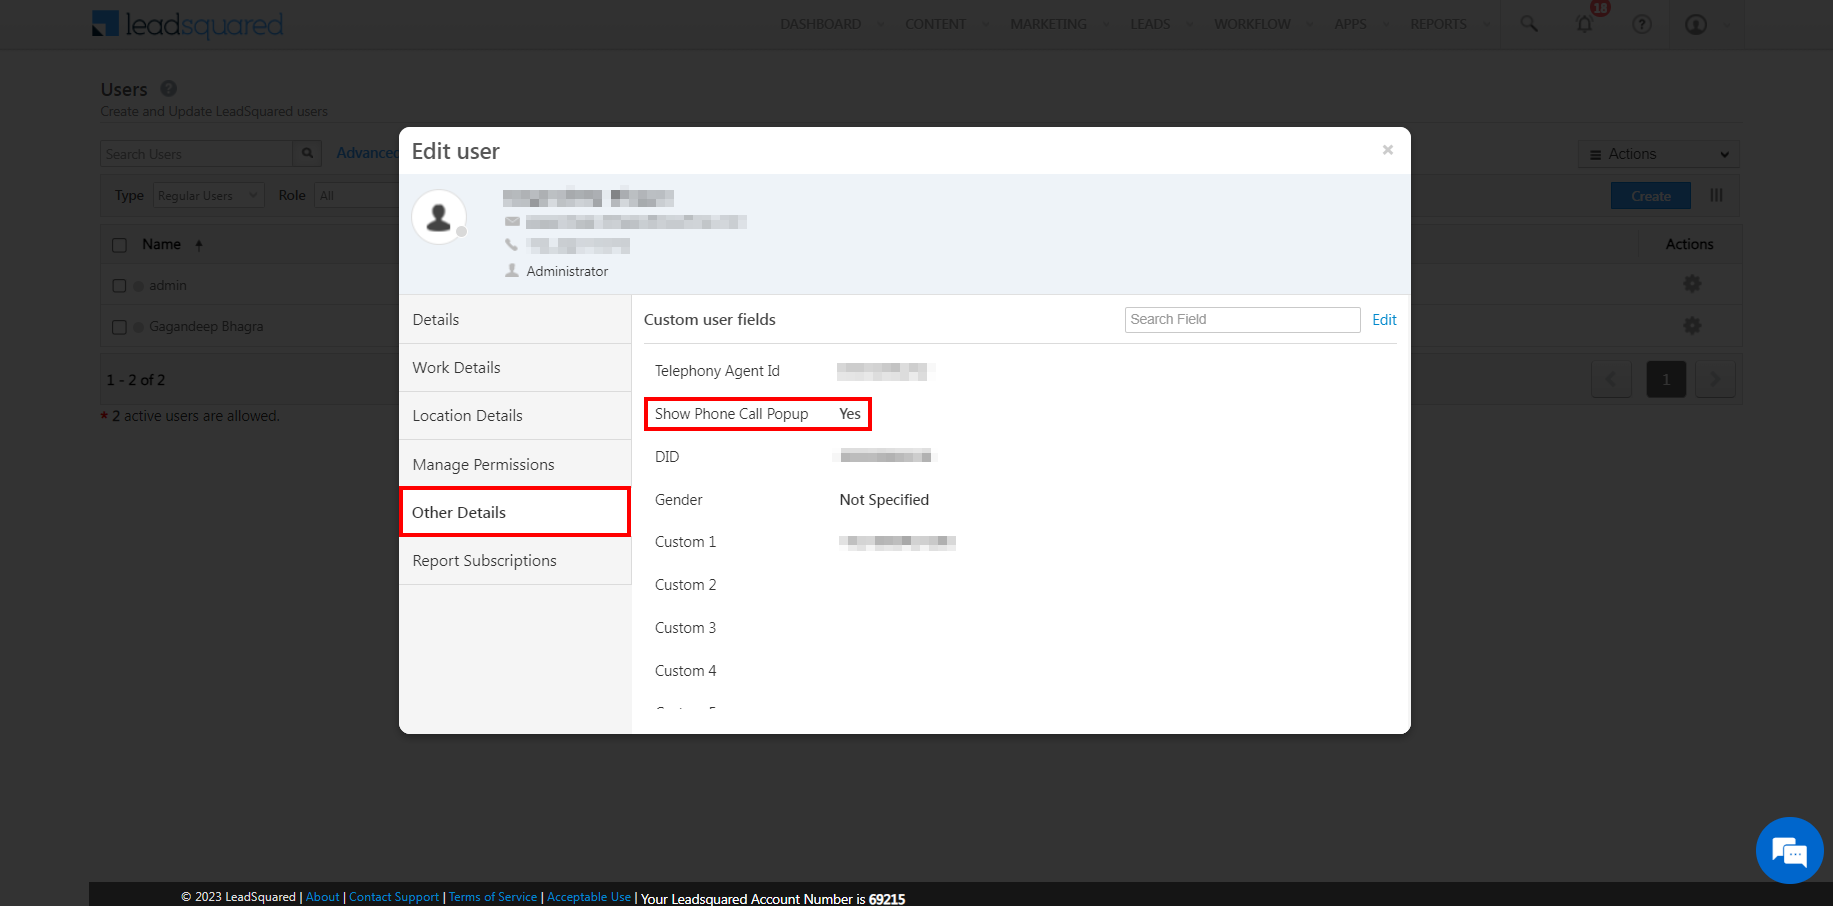
Ensure the Show Phone Call Popup under Other Details is stated as Yes. If not, then you can change the settings by clicking Edit.
-
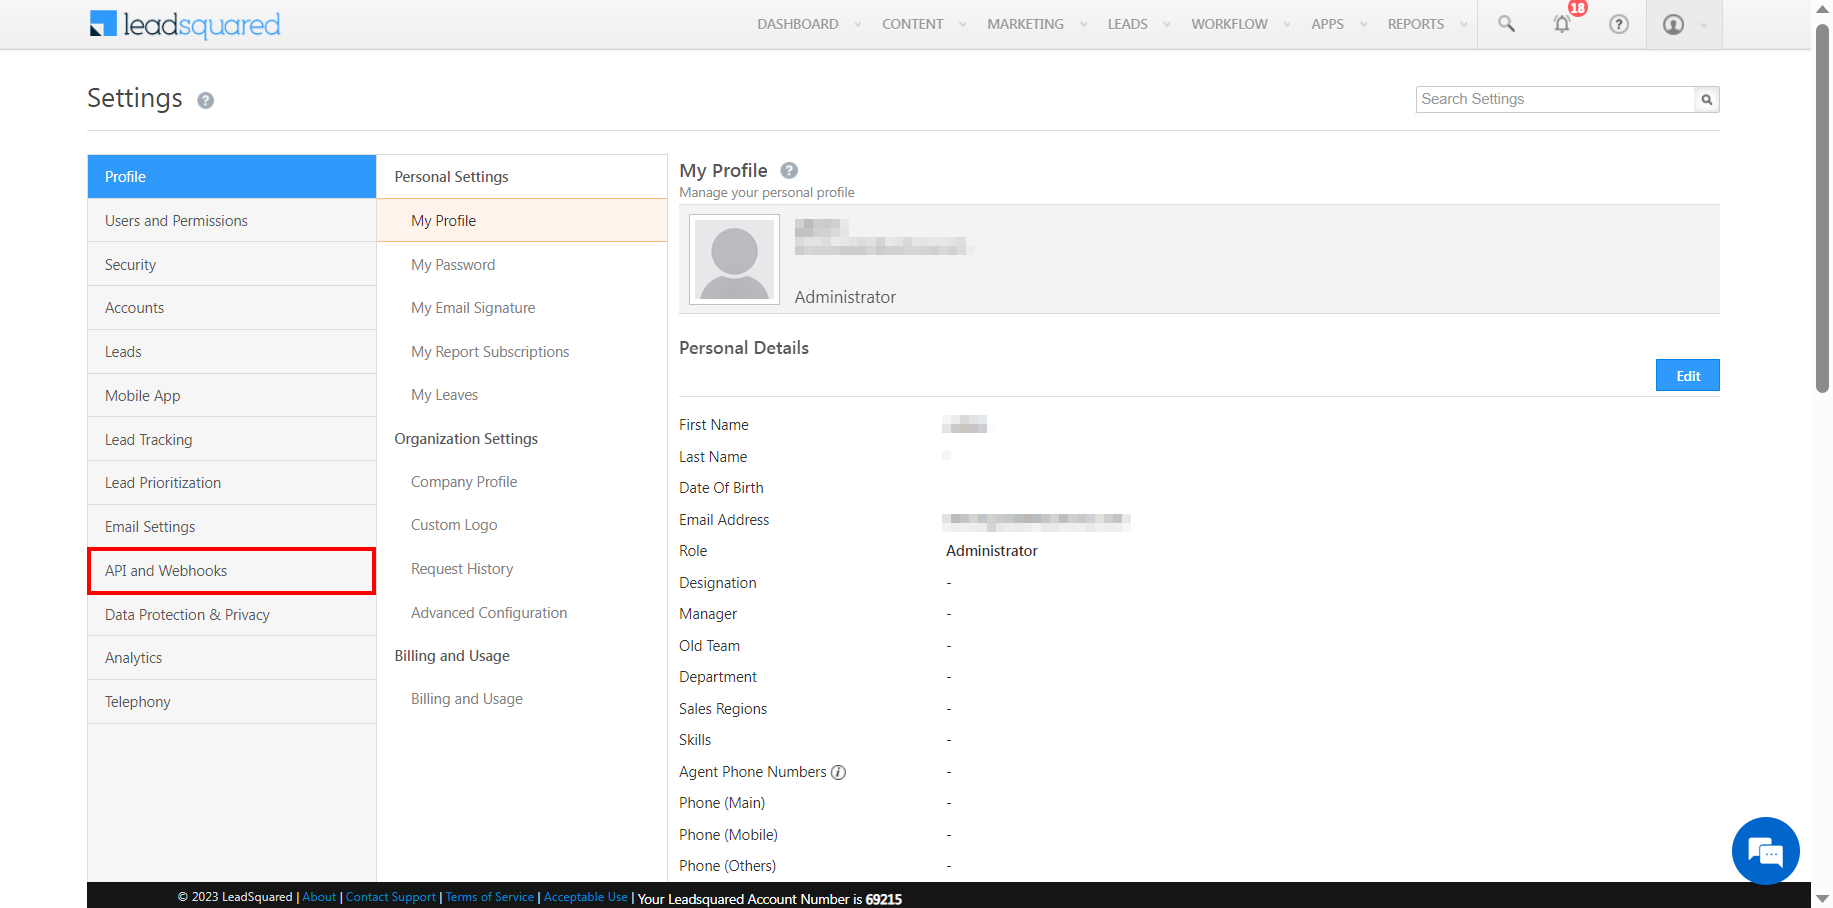
Go to User Settings.
-
Click on API and Webhooks.
-
The API and Webhooks page display the "Access Key" and "Secret Key".
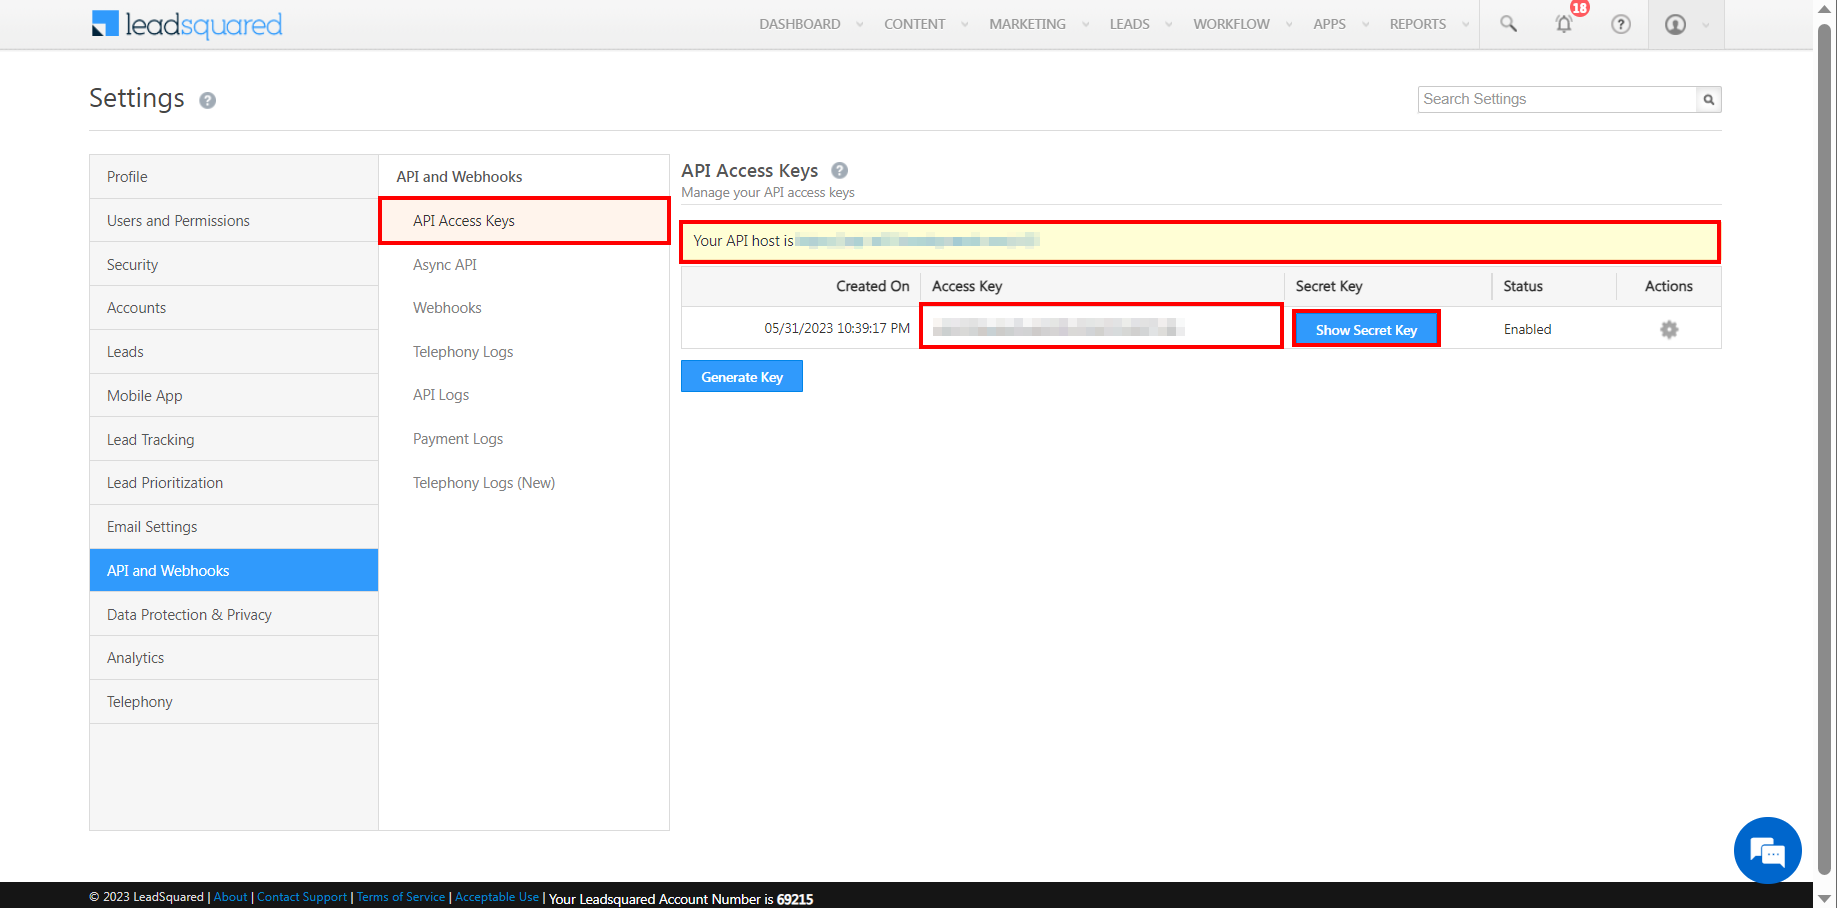
The above highlighted API host URL, access key and secret key will be used while configuring the webhooks. The secret key is supposed to be confidential and should not be shared with anyone.
-
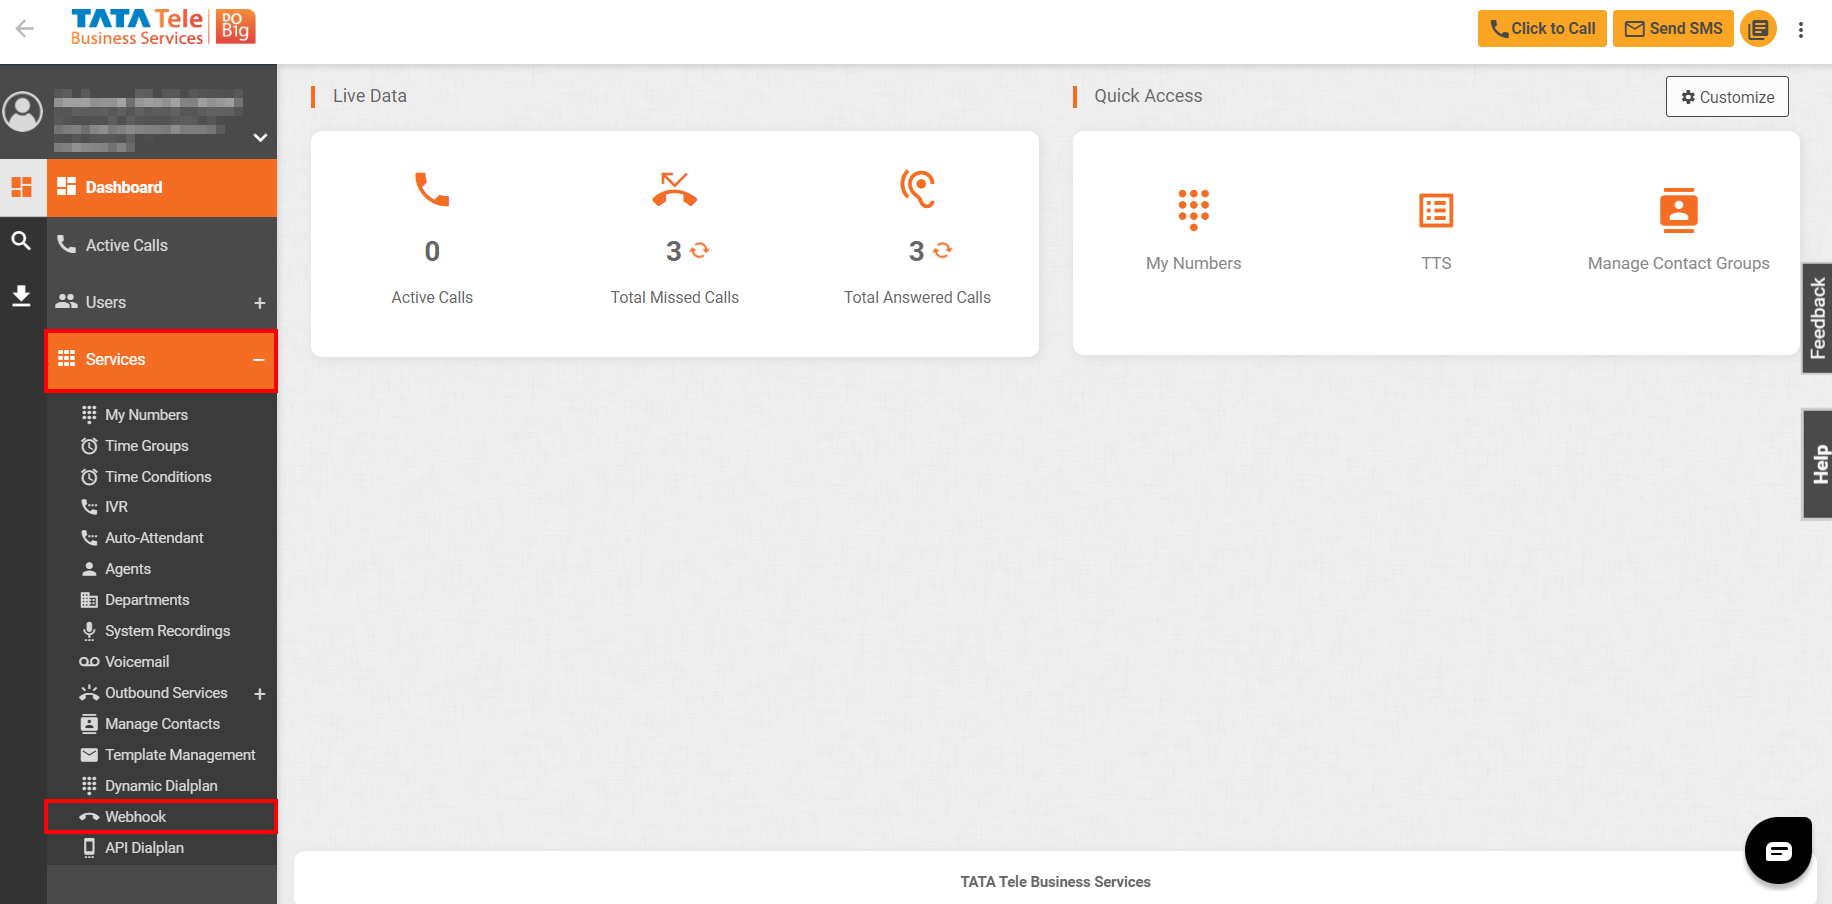
Login to your Smartflo account.
-
Click on Webhook under Services
-
Create four webhooks by clicking Add Webhook.
-
Agent Pop up to get screen prompt when a prospect/lead call you.
-
Call Log API LS(Incoming-Answered) to manage logs for incoming answered calls.
-
Call Log API LS(Incoming-Missed) to manage logs for incoming missed calls.
-
Call Log API LS (Outgoing) to manage logs of outgoing calls.
-
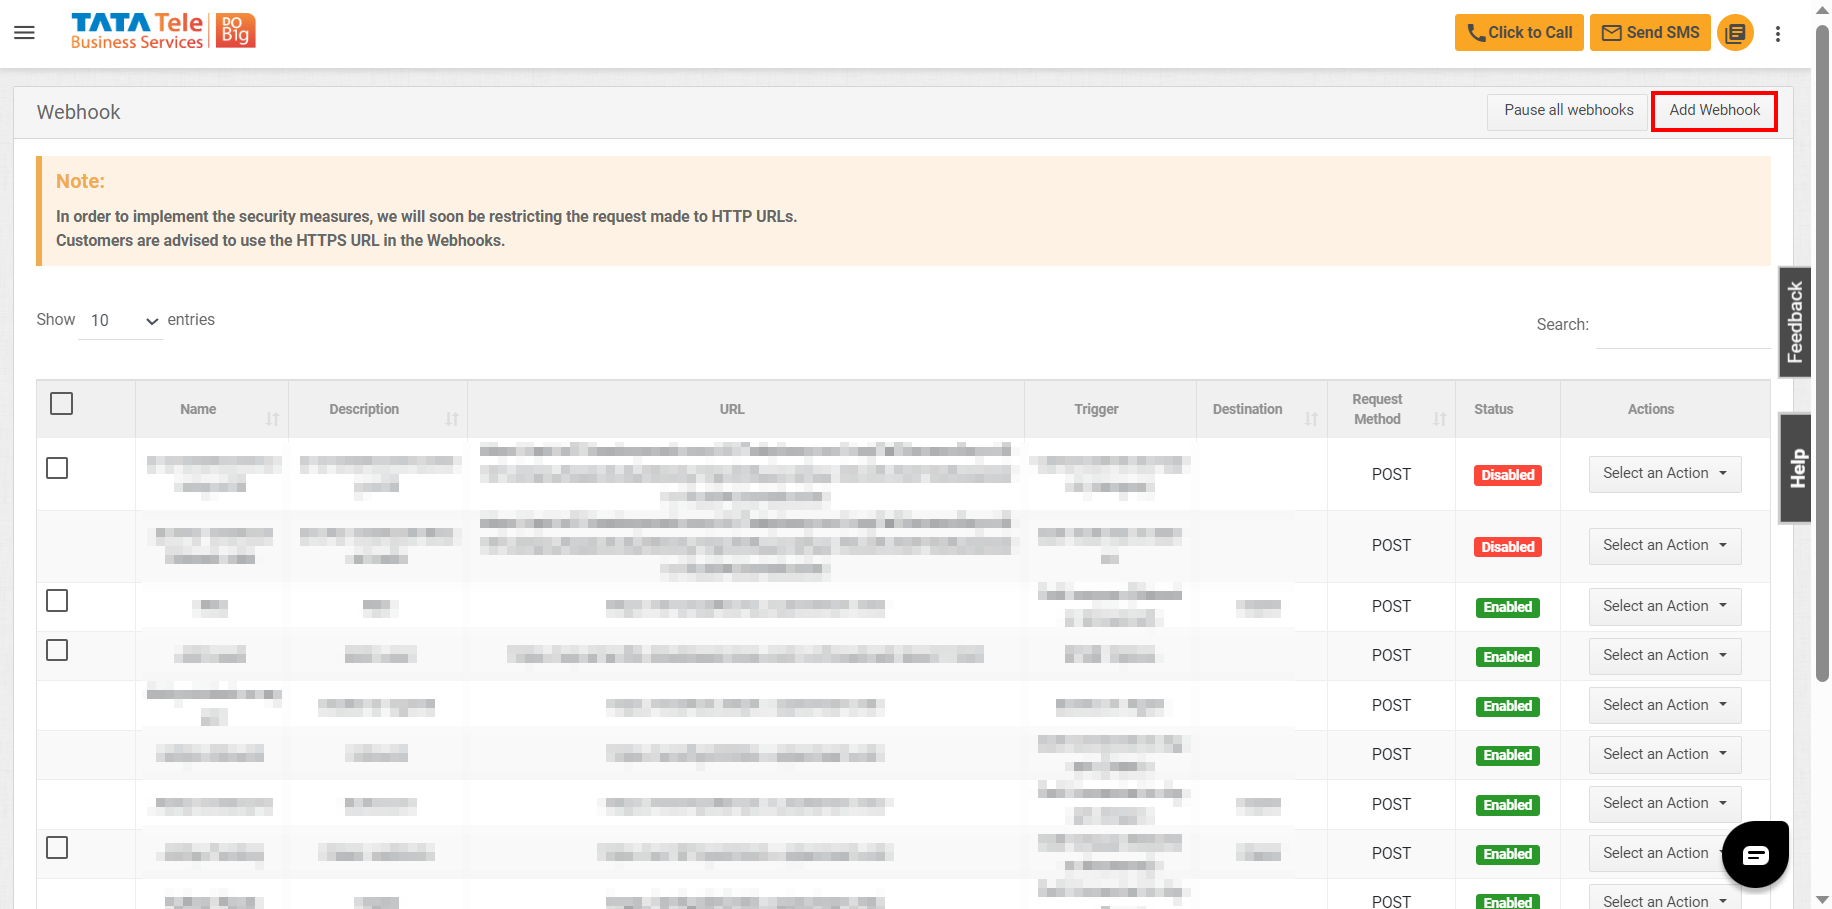
Create the First Webhook by entering the below mentioned details.
| Field | Value |
| Name | Agent Pop up LS |
| Description | Agent Pop up LS |
| Trigger | Dialed on Agent |
| URL | http://{host}/v2/Telephony.svc/ShowAgentPopup?accessKey={AccessKey}&secretKey={SecretKey}Note: Host refers to the API host URL, AccessKey is your unique access key and SecretKey is your unique secret key |
| Request | POST |
| Call Type | Inbound |
| Content Type | application/json |
| My Numbers | Choose the virtual number from the list |
| Time zone | Choose the time zone |
Enter the below code in Response Body:
{
"SourceNumber": "$caller_id_number",
"DestinationNumber": "$agent_number",
"DisplayNumber": "$caller_id_number",
"Direction": "inbound"
}
Click Save button once all the details have been added.
-
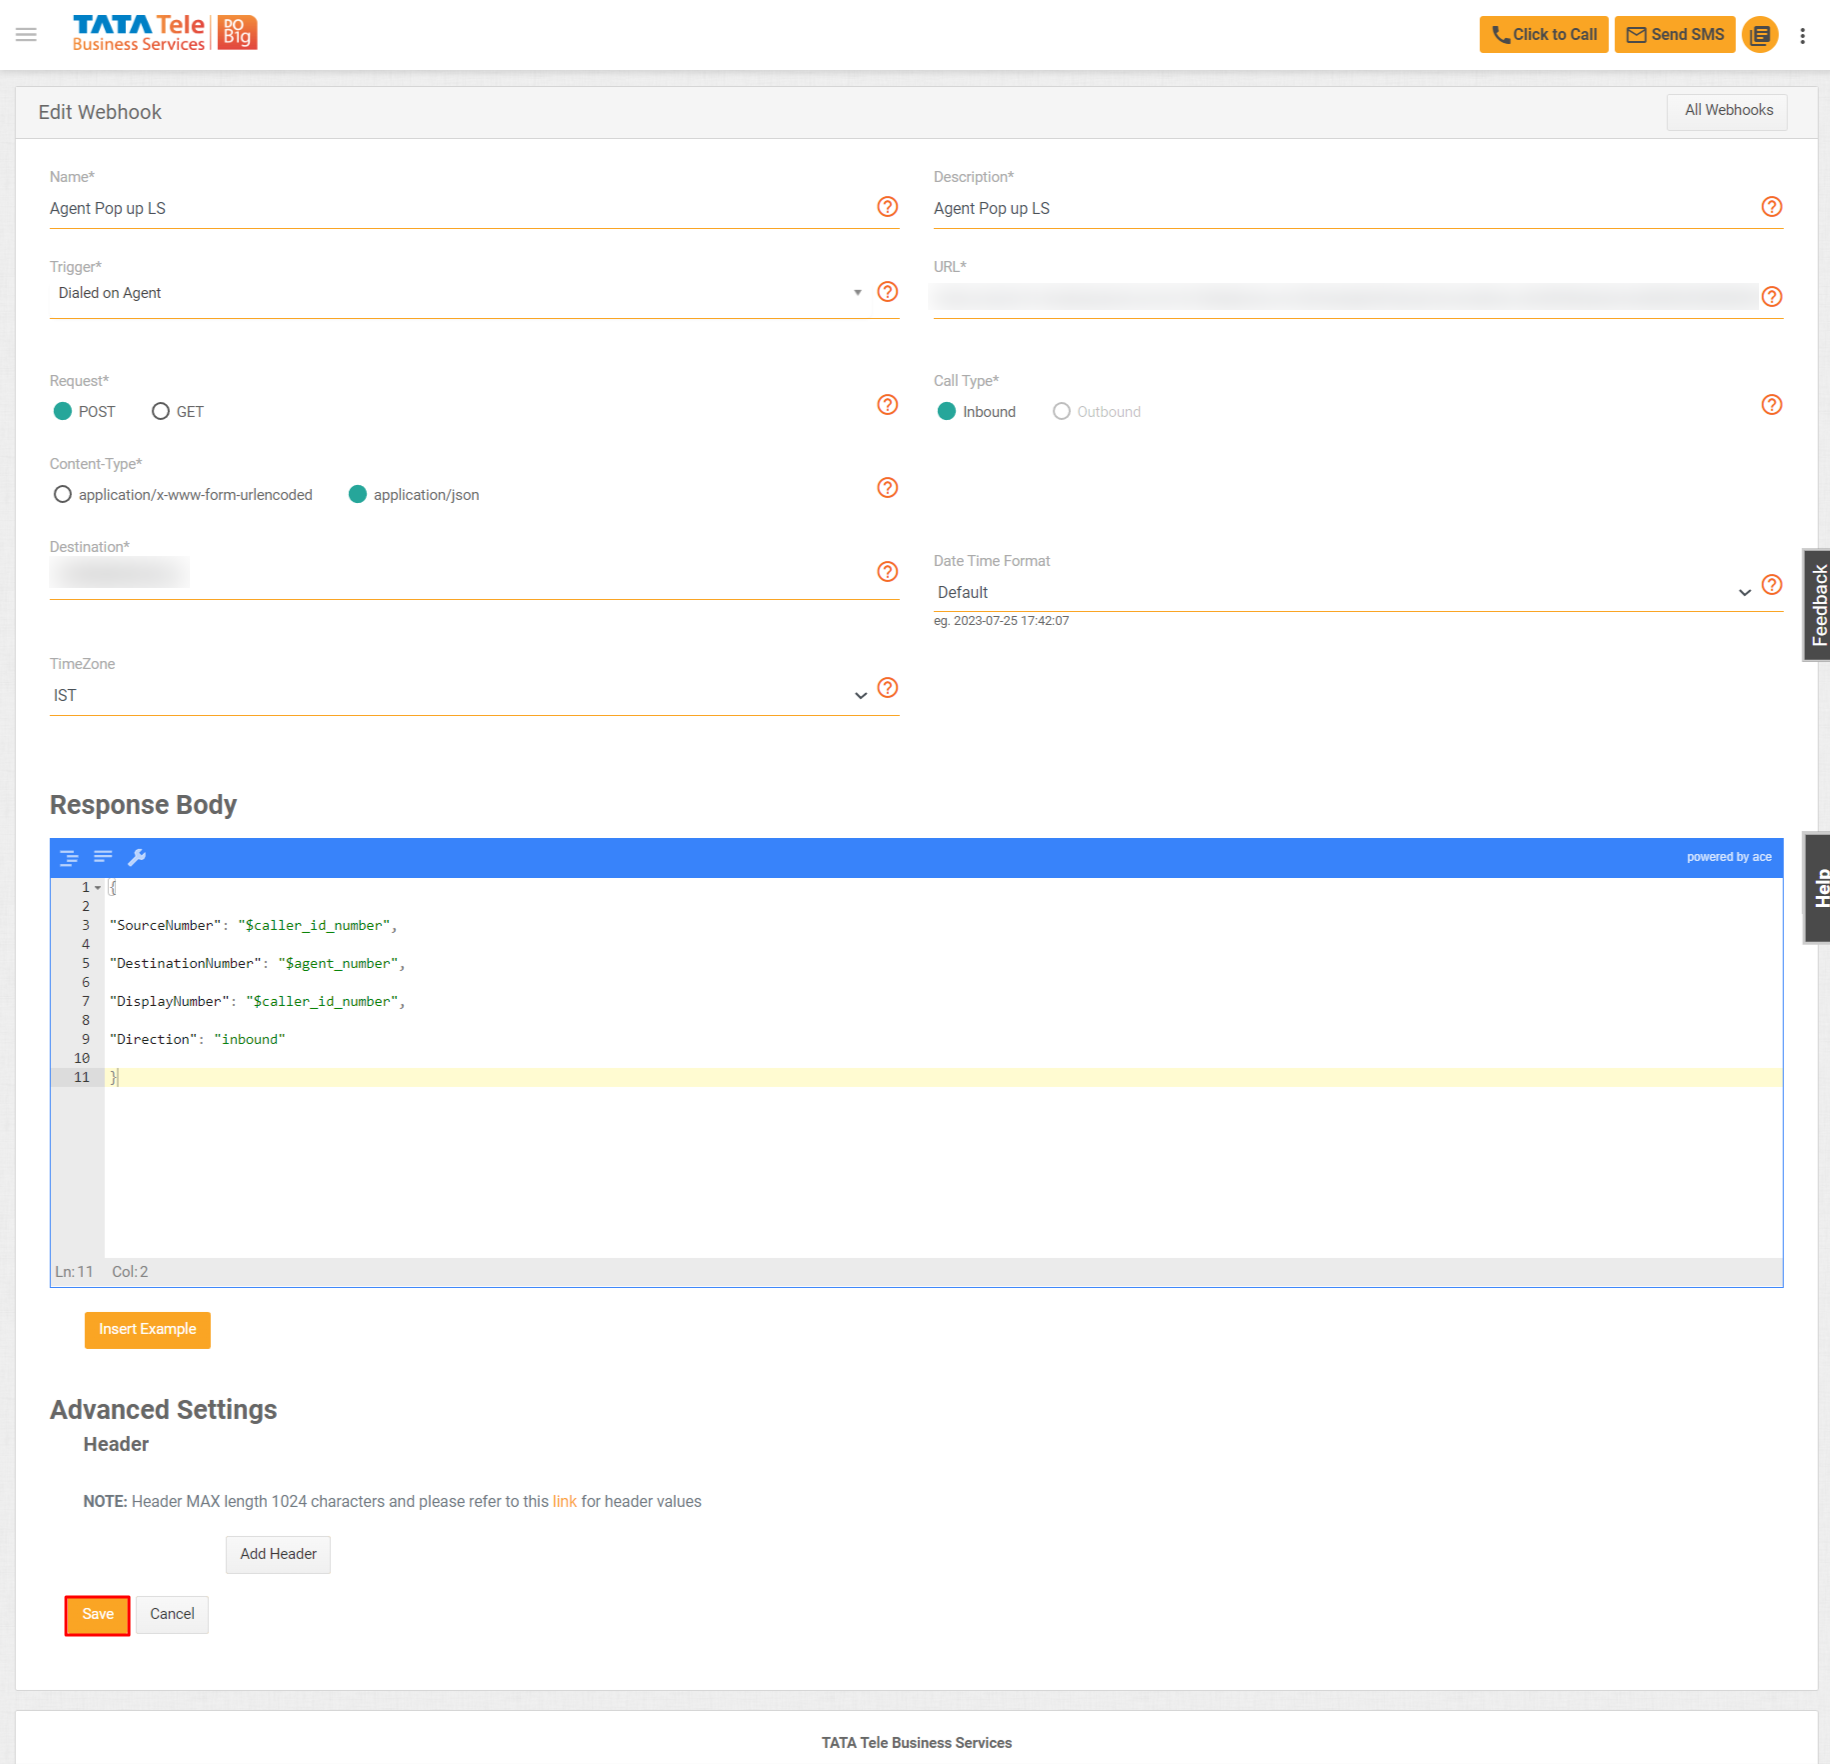
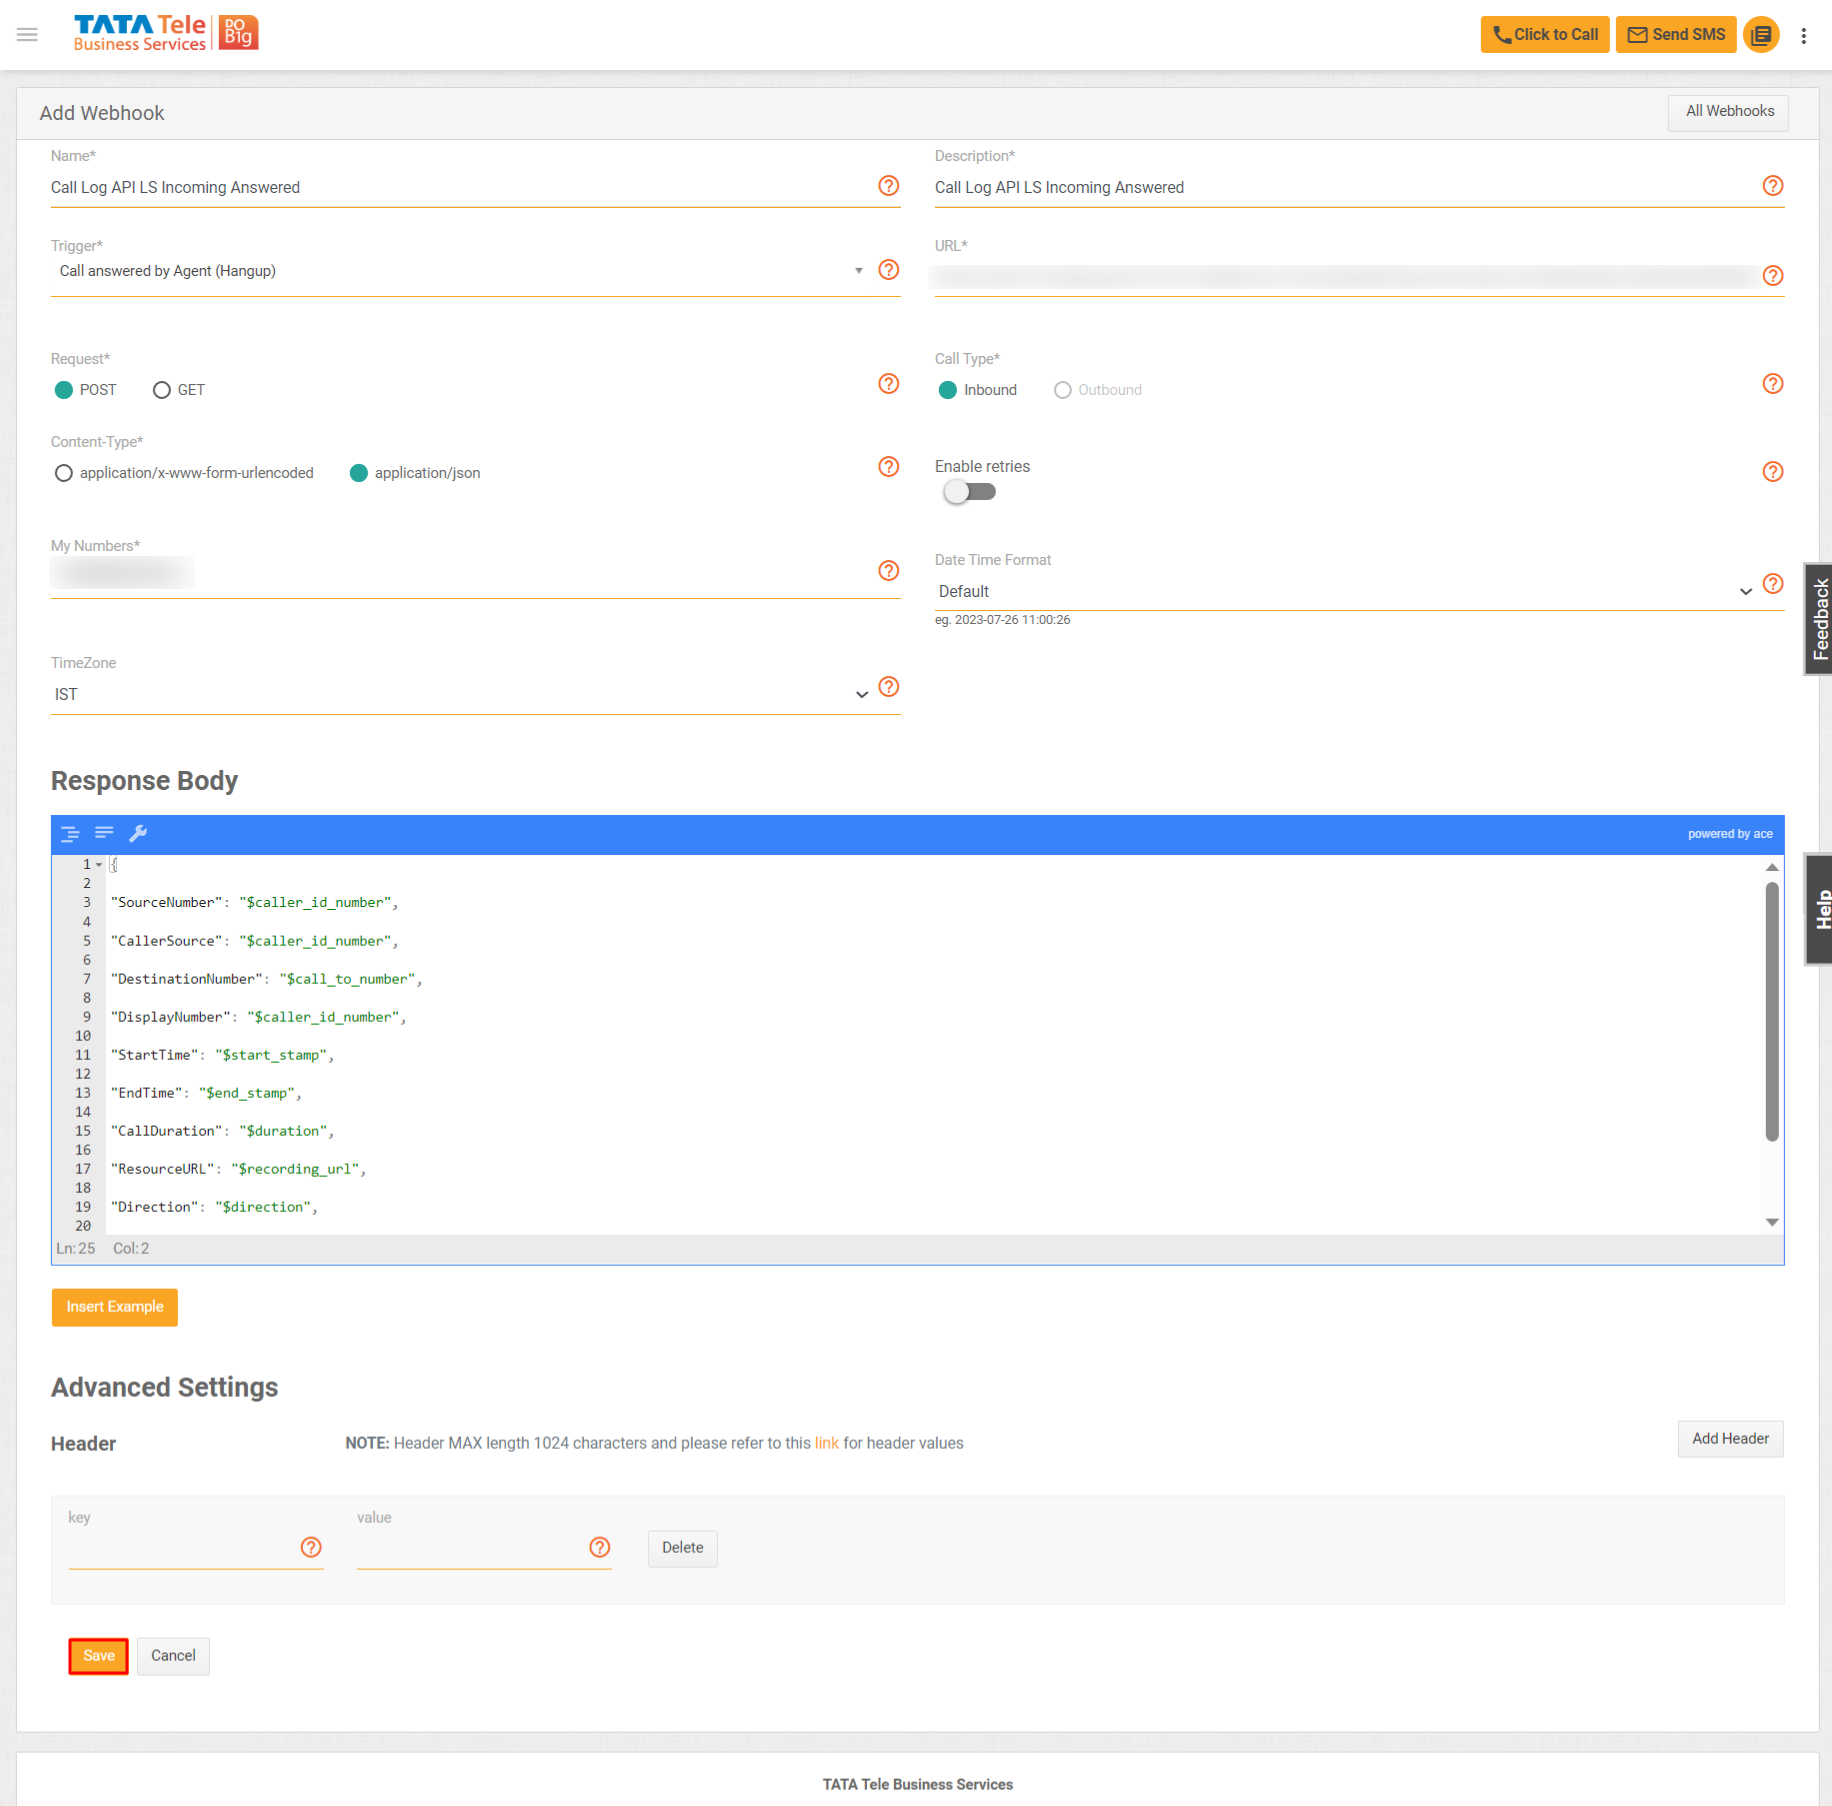
Create the Second Webhook by entering the below mentioned details Call Log API:
| Field | Value |
| Name | Call Log API LS Incoming Answered |
| Description | Call Log API LS Incoming Answered |
| Trigger | Call answered by Agent (Hangup) |
| URL | http://{host}/v2/Telephony.svc/ShowAgentPopup?accessKey={AccessKey}&secretKey={SecretKey}Note: Host refers to the API host URL, AccessKey is your unique access key and SecretKey is your unique secret key |
| Request | POST |
| Call Type | Inbound |
| Content Type | application/json |
| My Numbers | Choose the virtual number from the list |
| Time zone | Choose the time zone |
Enter the below code in Response Body:
{
  "SourceNumber": "$caller_id_number",
  "DestinationNumber": "$answered_agent_number",
  "DisplayNumber": "$call_to_number",
  "StartTime": "$start_stamp",
  "EndTime": "$end_stamp",
  "CallDuration": "$duration",
  "Status": "$call_status",
  "CallNotes": "Enquired about product",
  "ResourceURL": "$recording_url",
  "Direction": "Inbound",
  "CallSessionId": "$call_id"
}
Click Save button once all the details have been added.
-
Create the Third Webhook by entering the below mentioned details Call Log API:

| Field | Value |
| Name | Call Log API LS Incoming Missed |
| Description | Call Log API LS Incoming Missed |
| Trigger | Call answered by Agent (Hangup) |
| URL | http://{host}/v2/Telephony.svc/ShowAgentPopup?accessKey={AccessKey}&secretKey={SecretKey}Note: Host refers to the API host URL, AccessKey is your unique access key and SecretKey is your unique secret key |
| Request | POST |
| Call Type | Inbound |
| Content Type | application/json |
| My Numbers | Choose the virtual number from the list |
| Time zone | Choose the time zone |
Enter the below code in Response Body:
{
  "SourceNumber": "$caller_id_number",
  "DestinationNumber": "$first_missed_agent_follow_me_number",
  "DisplayNumber": "$call_to_number",
  "StartTime": "$start_stamp",
  "EndTime": "$end_stamp",
  "CallDuration": "$duration",
  "Status": "$call_status",
  "CallNotes": "Enquired about product",
  "ResourceURL": "$recording_url",
  "Direction": "Inbound",
  "CallSessionId": "$call_id"
}
Click Save button once all the details have been added.
-
Create the Fourth webhook by entering the below mentioned details Call Log API:
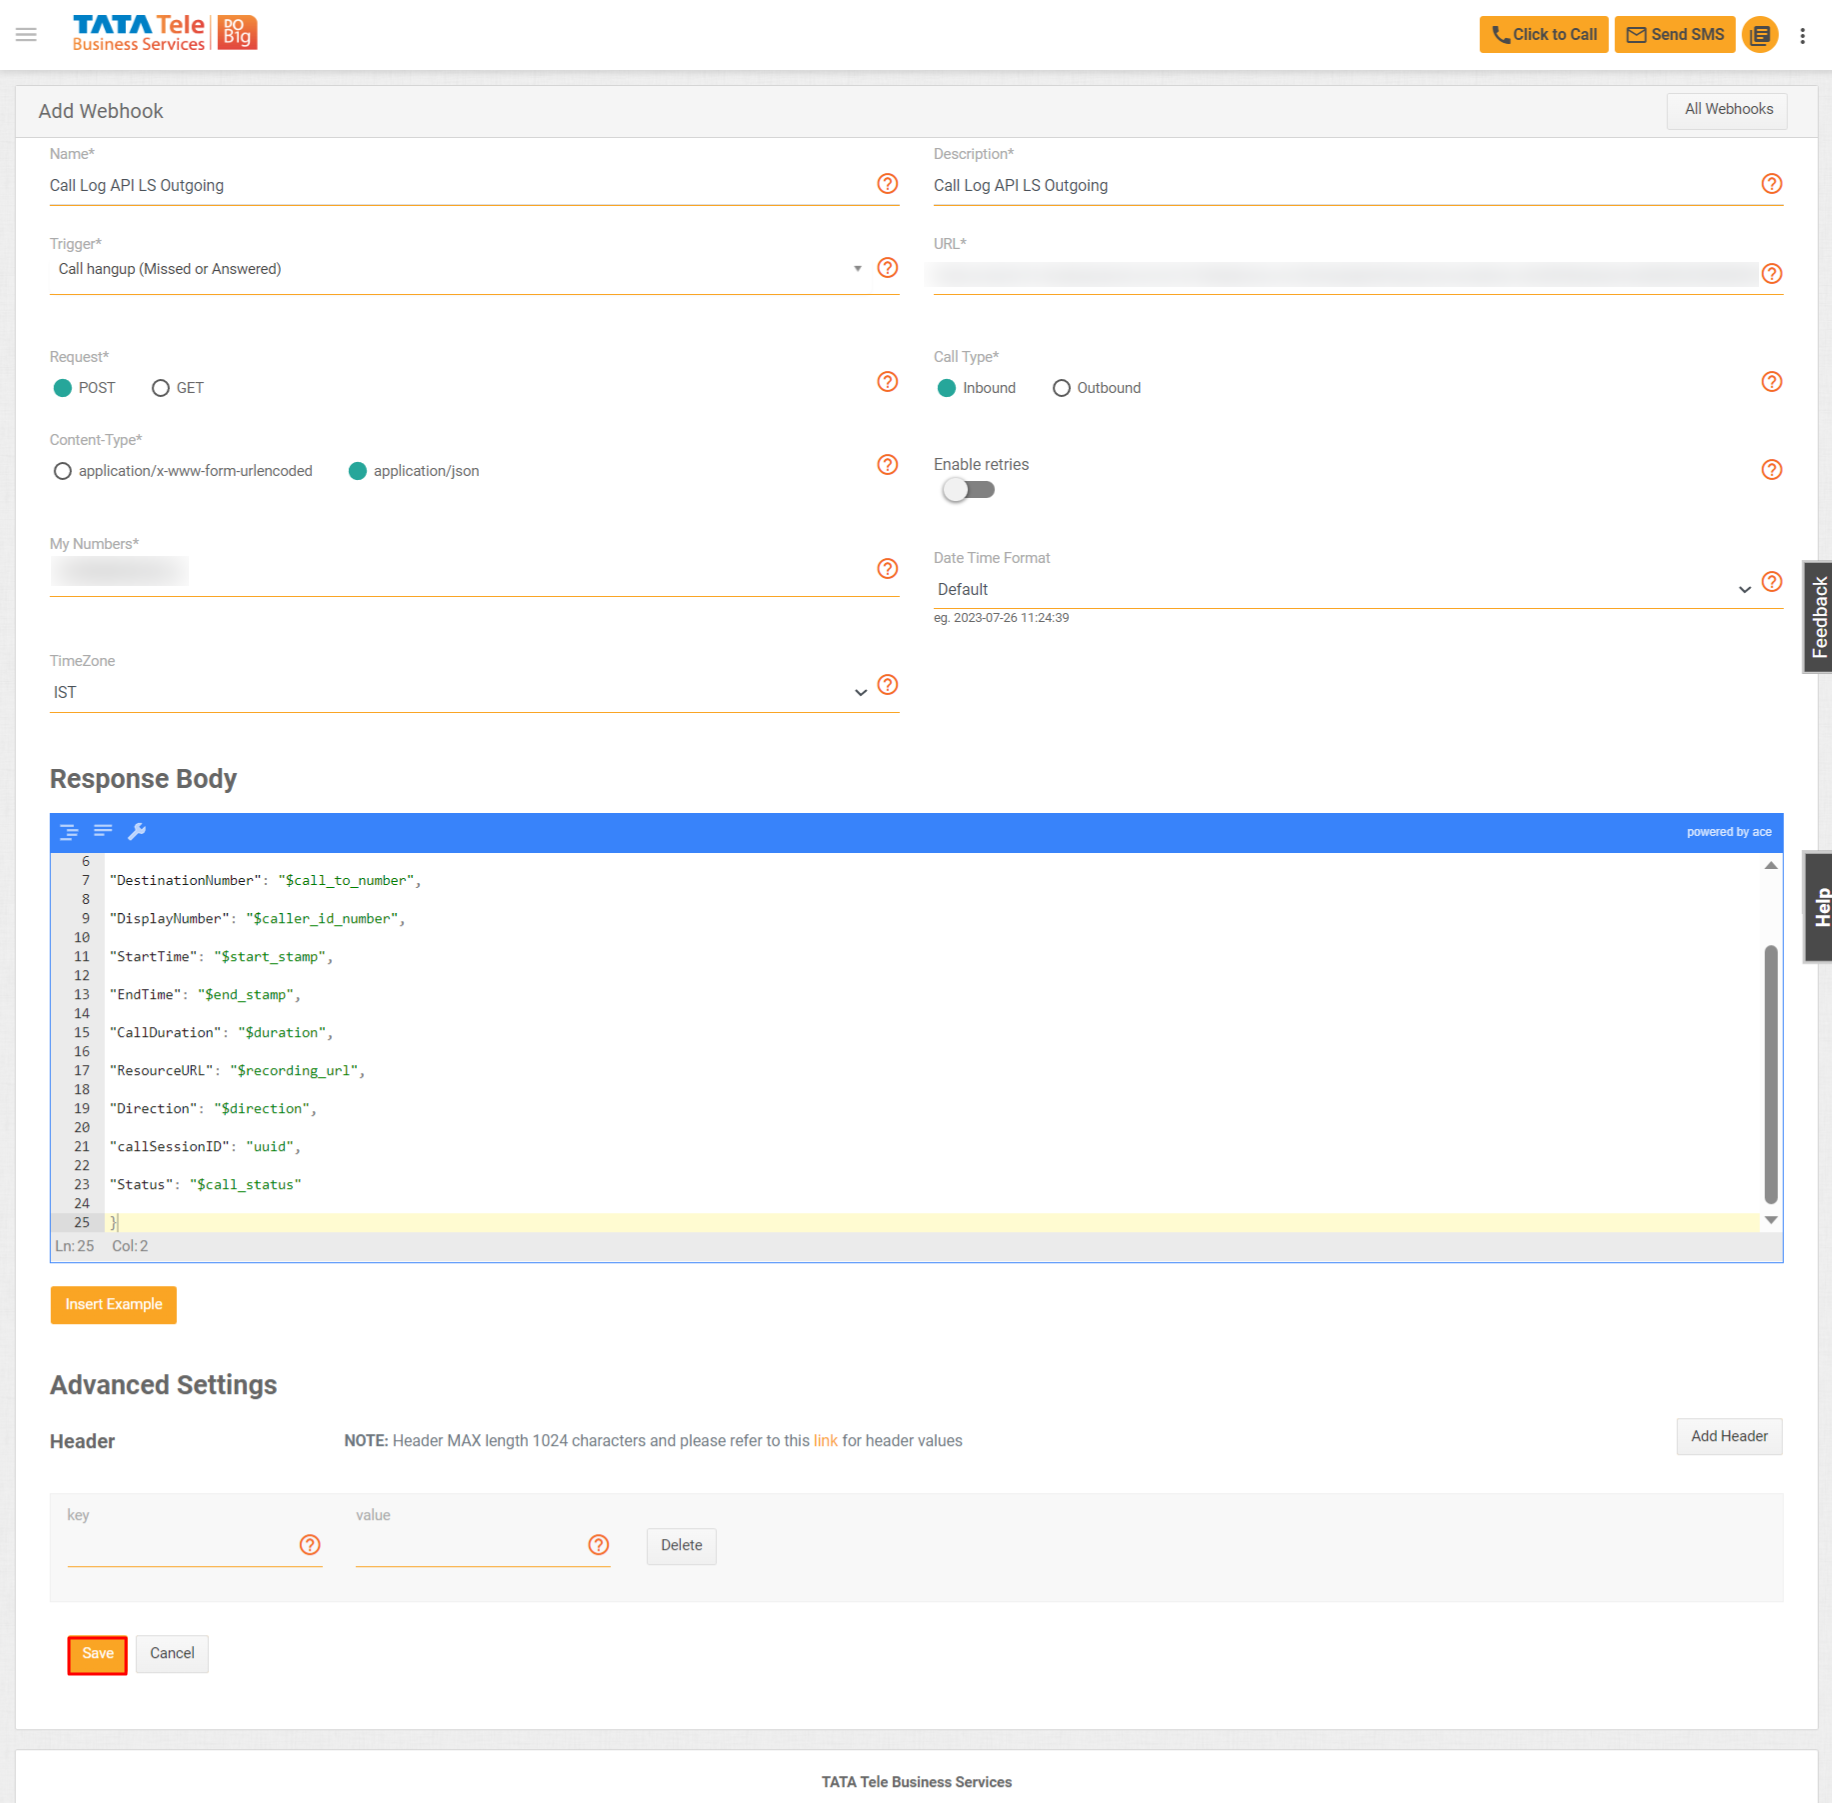
| Field | Value |
| Name | Call Log API LS Outgoing |
| Description | Call Log API LS Outgoing |
| Trigger | Call hangup (Missed or Answered) |
| URL | http://{host}/v2/Telephony.svc/ShowAgentPopup?accessKey={AccessKey}&secretKey={SecretKey}Note: Host refers to the API host URL, AccessKey is your unique access key and SecretKey is your unique secret key |
| Request | POST |
| Call Type | Inbound |
| Content Type | application/json |
| My Numbers | Choose the virtual number from the list |
| Time zone | Choose the time zone |
Enter the below code in Response Body:
{
    "SourceNumber": "$answered_agent_number",
    "DestinationNumber": "$call_to_number",
    "DisplayNumber": "$caller_id_number",
    "StartTime": "$start_stamp",
    "EndTime": "$end_stamp",
    "CallDuration": "$duration",
    "Status": "$call_status",
    "CallNotes": "Enquired about product",
    "ResourceURL": "$recording_url",
    "Direction": "$direction",
    "CallSessionId": "$call_id",
    "AgentName": "$answered_agent_name"
}
Click Save button once all the details have been added.
📙 Leadsquared integration provides the below-listed functionalities of Smartflo
- Click To Call (Outbound Calls)
- Agent Extension
- Call Notes or Call Description
- Call Detail Records
Follow the steps below to start using Leadsquared on Smartflo.
-
Log In to the app.

-
To use the Click to Call functionality, click on the number to which you want to make a call.

You’ll see the following pop-up.

Click on Call to make a call.
You’ll see the following message once the call has been made successfully.

- To view the Call Detail Records, click on Activity History.

The CDR gives the following details.

How to Use The Integration:
Leadsquared integration provides the below-listed functionalities of Smartflo.
- Click To Call (Outbound Calls)
- Agent Extension
- Call Notes or Call Description
- Call Detail Records
Follow the steps below to start using Leadsquared on Smartflo.
- Log In to the app.

- To use the Click to Call functionality, click on the number to which you want to make a call.

You’ll see the following pop-up.

Click on Call to make a call.
You’ll see the following message once the call has been made successfully.

- To view the Call Detail Records, click on Activity History.

The CDR gives the following details.

Updated 3 months ago