Bring Your Own AWS Bucket (BYOB) Guide
This Bring Your Own AWS Bucket (BYOB) Guide will help you associate your AWS S3 bucket to your Smartflo account. This setup guide is important if you want to store your call recordings or reports on your AWS.
This guide is bifurcated into two parts wherein first part illustrates the settings to be done on your AWS account and the second part gives you a walkthrough of steps to perform on the Smartflo portal.
Step 1: AWS Configuration
i. Click here to sign in to your AWS account.
ii. Select IAM user and enter Account ID. Click Next.
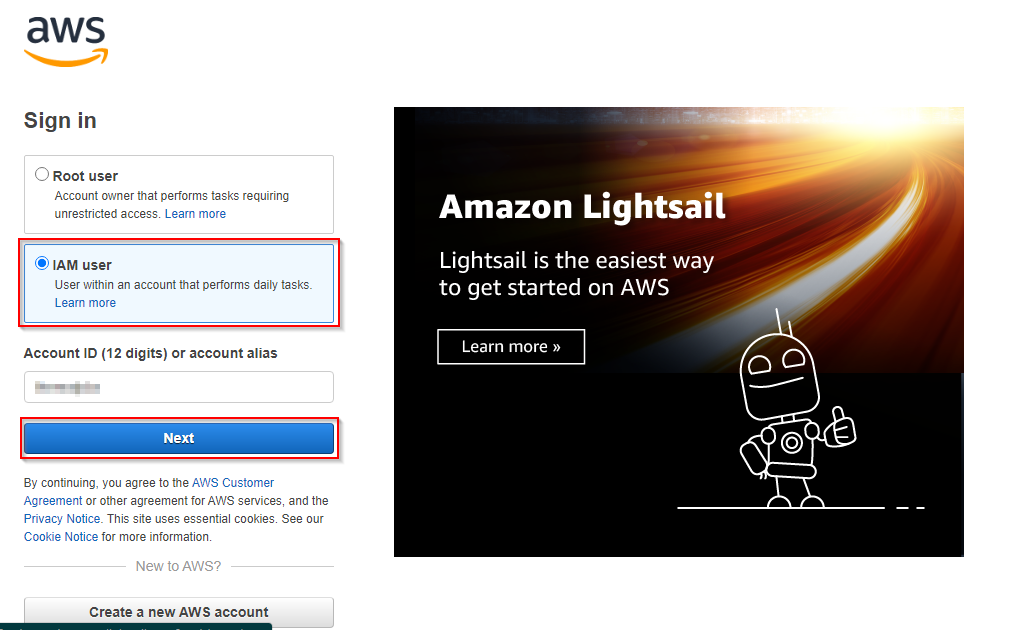
iii. Enter IAM user name and Password. Click Sign in.
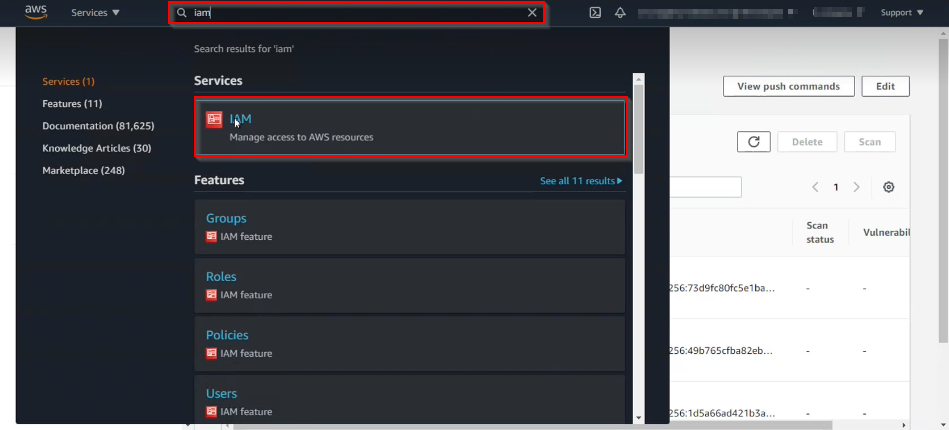
iv. Search for IAM in the search bar and the IAM page populates.
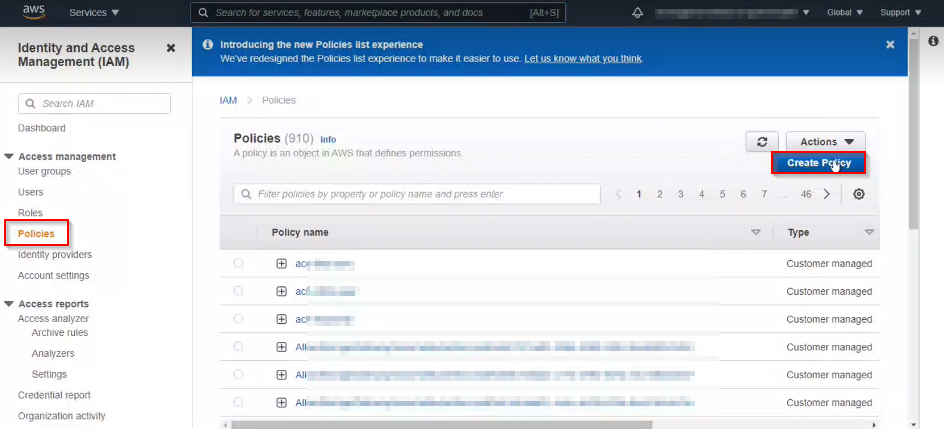
v. Click Policies on the left navigation panel and click on Create Policy.
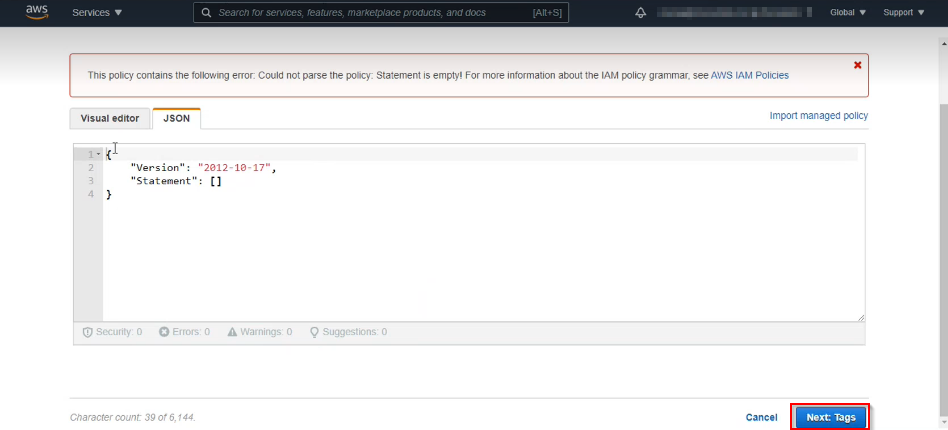
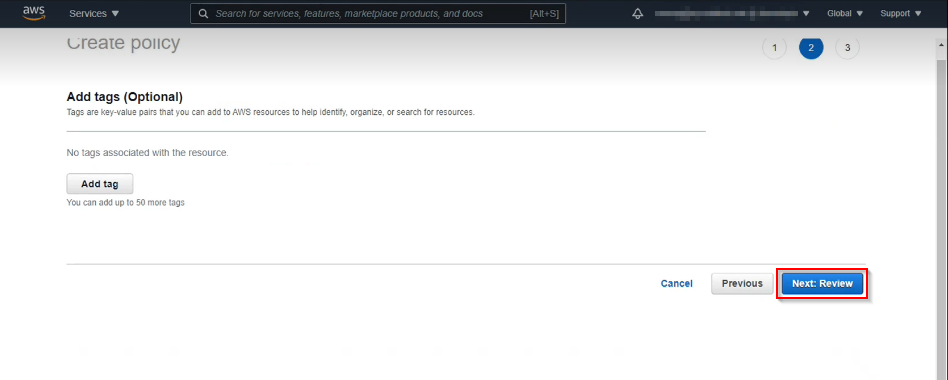
vi. Click on JSON, copy and paste the below-mentioned code. Click Next: Tags.
{ "Version": "2012-10-17",
"Statement": [
{
"Sid": "VisualEditor0",
"Effect": "Allow",
"Action":[
"s3:ListStorageLensConfigurations",
"s3:ListAccessPointsForObjectLambda",
"s3:GetAccessPoint",
"s3:PutAccountPublicAccessBlock",
"s3:GetAccountPublicAccessBlock",
"s3:ListAllMyBuckets",
"s3:ListAccessPoints",
"s3:ListJobs",
"s3:PutStorageLensConfiguration",
"s3:ListMultiRegionAccessPoints",
"s3:CreateJob"
][
"s3:ListStorageLensConfigurations",
"s3:ListAccessPointsForObjectLambda",
"s3:GetAccessPoint",
"s3:PutAccountPublicAccessBlock",
"s3:GetAccountPublicAccessBlock",
"s3:ListAllMyBuckets",
"s3:ListAccessPoints",
"s3:ListJobs",
"s3:PutStorageLensConfiguration",
"s3:ListMultiRegionAccessPoints",
"s3:CreateJob"
],
"Resource":
[
"arn:aws:s3:::BUCKETNAME/",
"arn:aws:s3:::BUCKETNAME"
][
"arn:aws:s3:::BUCKETNAME/",
"arn:aws:s3:::BUCKETNAME"
]
},
{
"Sid": "VisualEditor1",
"Effect": "Allow",
"Action": "s3:",
"Resource":
[ "arn:aws:s3:::BUCKETNAME/",
"arn:aws:s3:::BUCKETNAME" ]
}
]
}
Note: Write your bucket name in place of BUCKETNAME for example, Testbucket in place of BUCKETNAME.
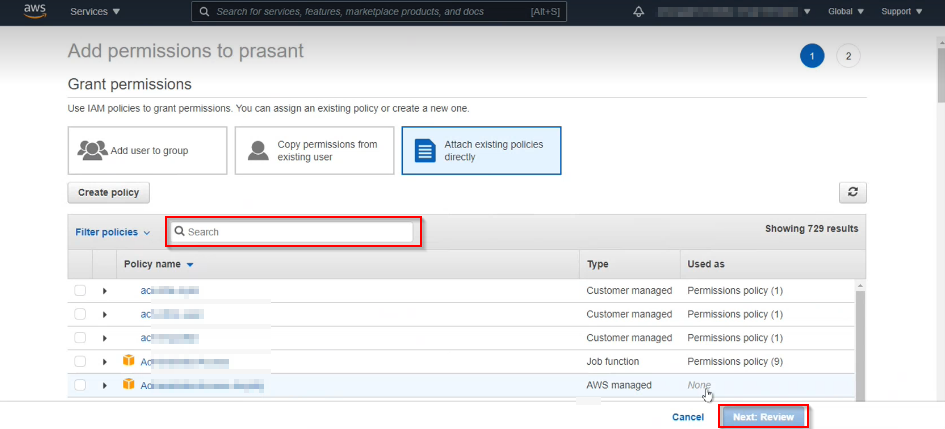
vii. Click Next: Review.
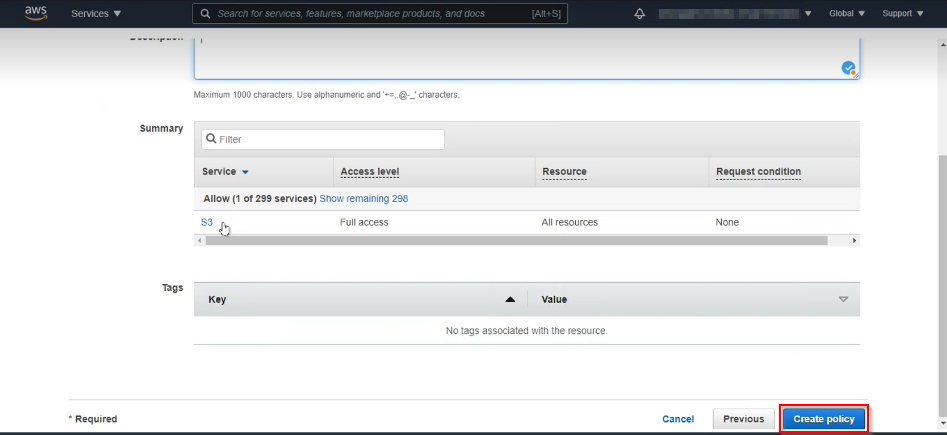
viii. Enter Name and Description of the policy.
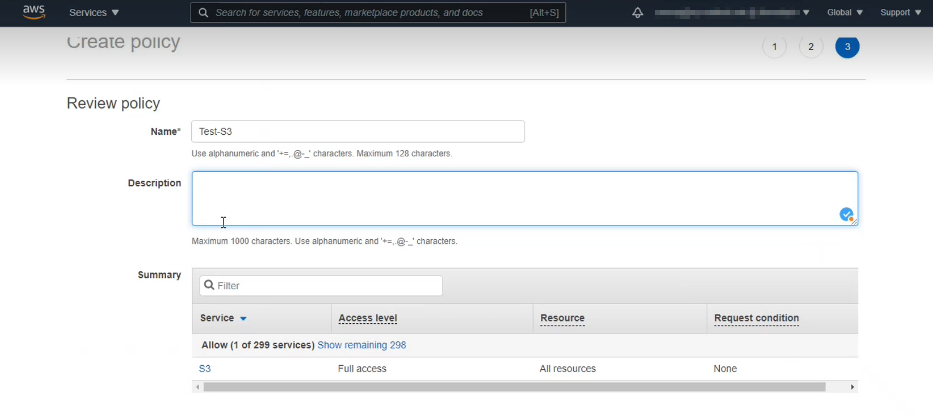
ix. Click Create policy.
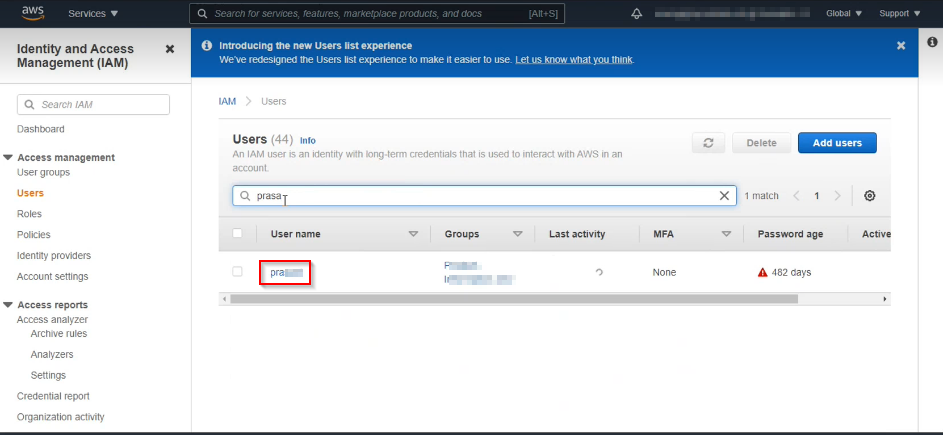
x. Click Users on the left navigation panel and find the user to which you want to assign the policy.
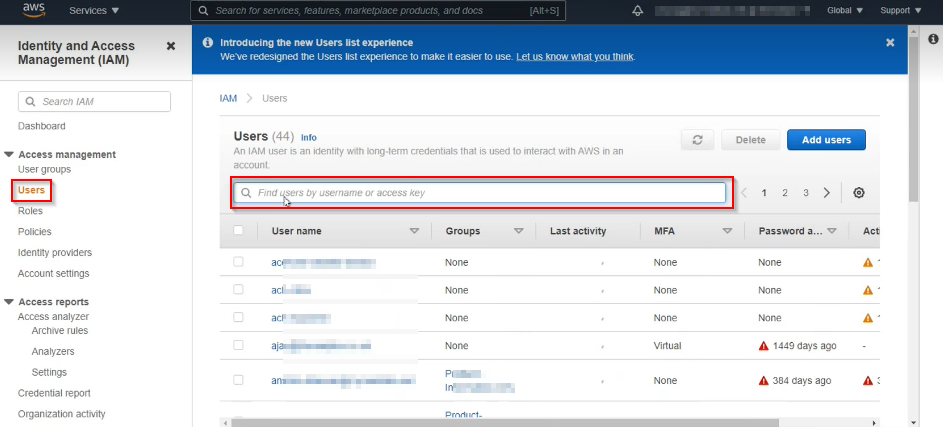
xi. Click on the user.
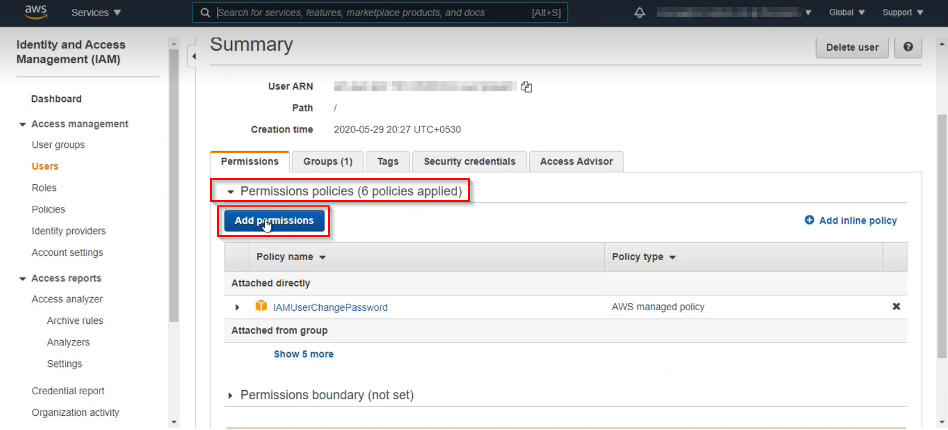
xii. Click Permissions tab> Permissions policies > Add permissions.
xiii. Click on Attach existing policies directly.
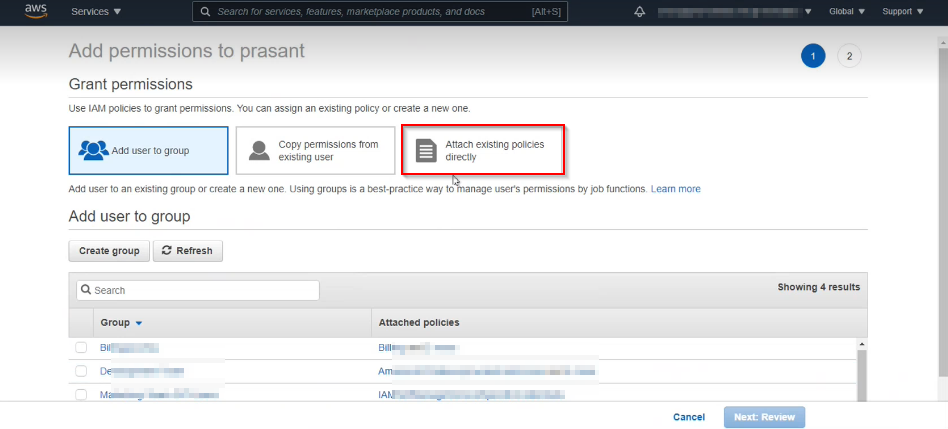
xiv. Search and select the policy created on step number iii and submit it.
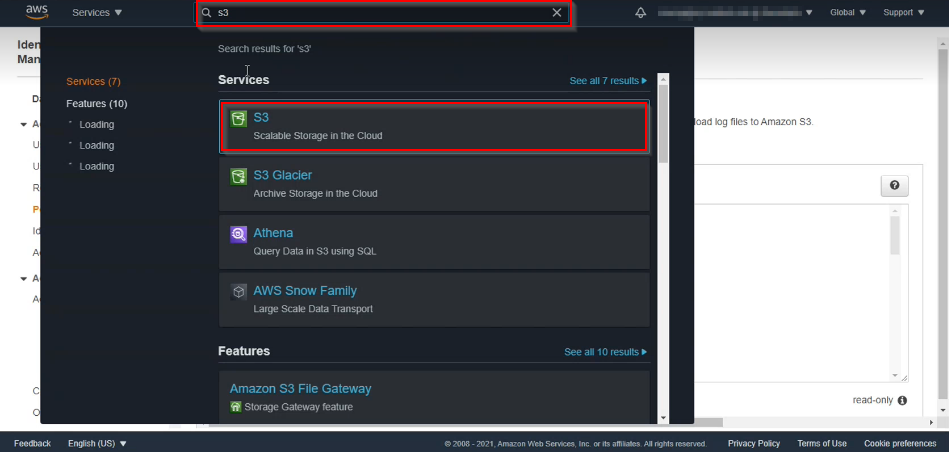
xv. Search S3 in the search bar and click on S3 to see if the bucket is private or public.
xvi. Use the search bar to find your bucket and then click on it.
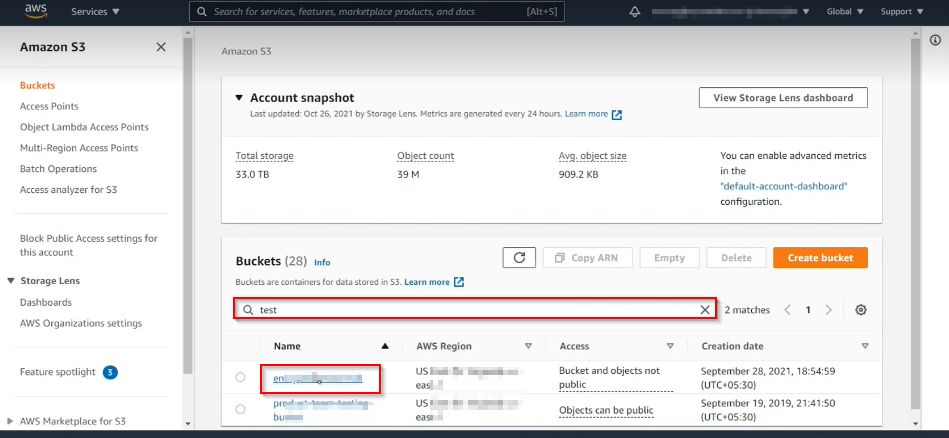
xvii. Click on Permissions.
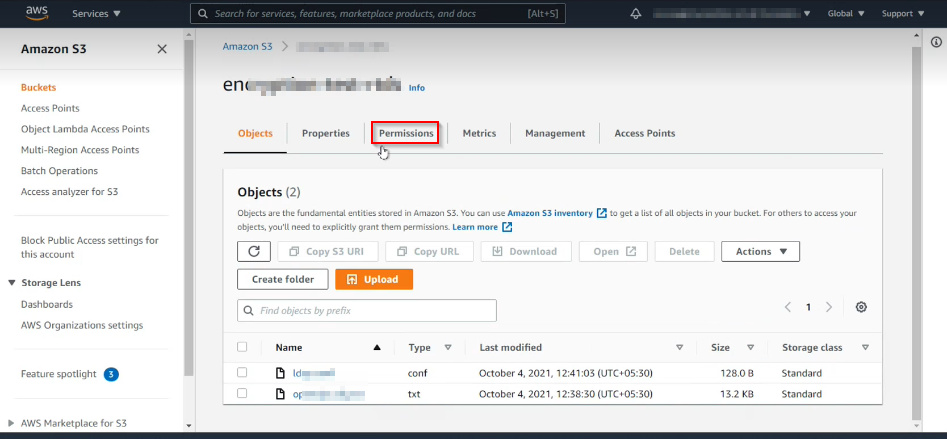
Note: By default the bucket is Public.
xviii. If the bucket has blocked all the public access, click on Edit and unblock the access.

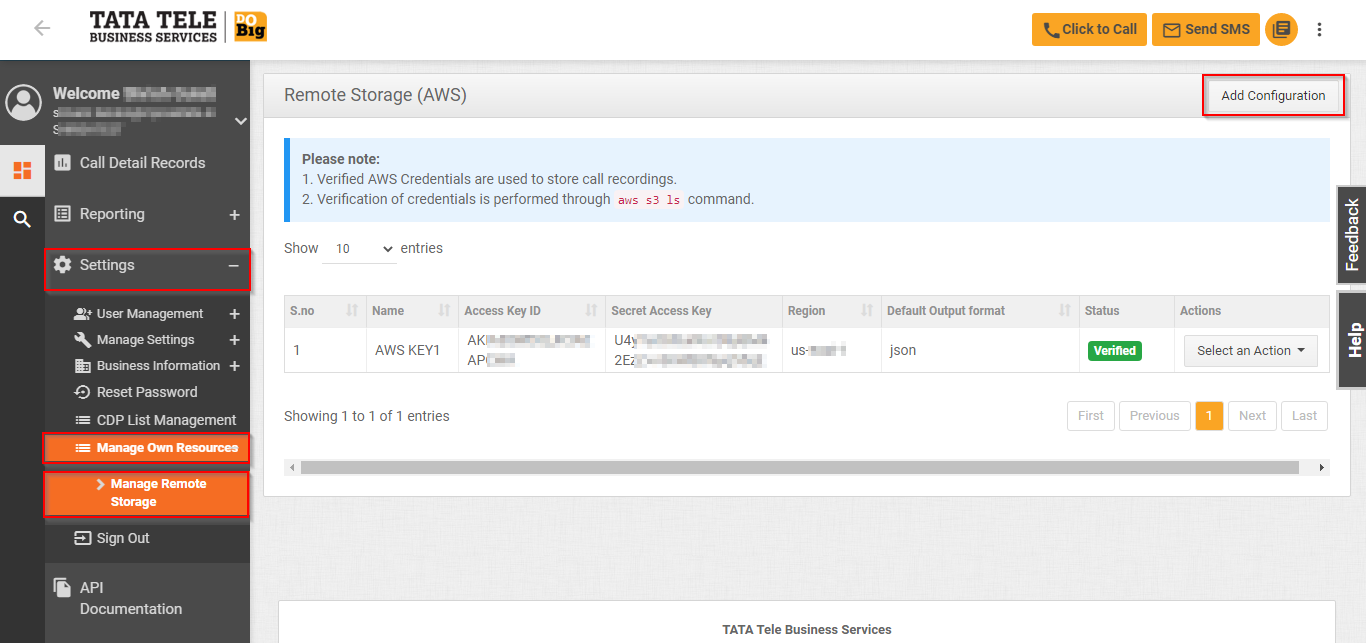
Step 2: Portal Settings
On successful completion of these steps, configure few simple settings on the Smartflo portal to complete the entire procedure.
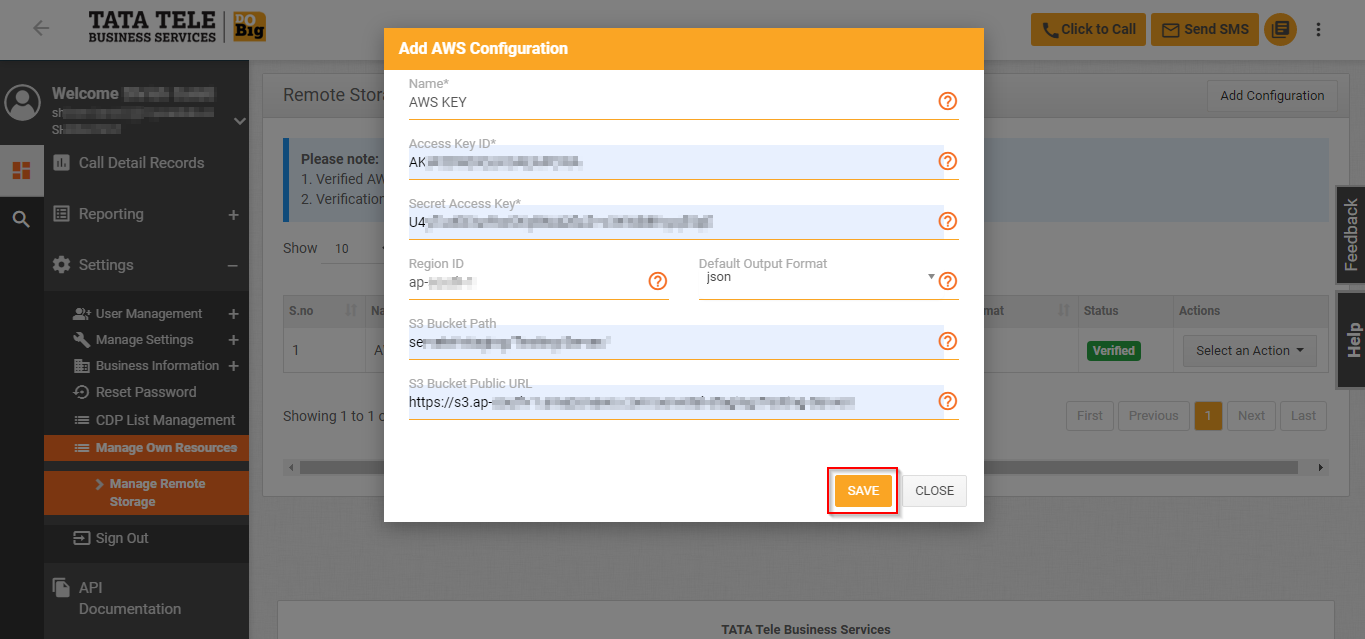
i. Click Settings > Manage Own Resources > Manage Remote Storage > Add Configuration.
ii. Enter the details and click Save. (The folder path must not contain any spaces or special characters.)