How to use LSQ CRM
🛠️ Steps to Use LSQ CRM
1. Log in to LSQ CRM
2. Navigate to the Dashboard Tab

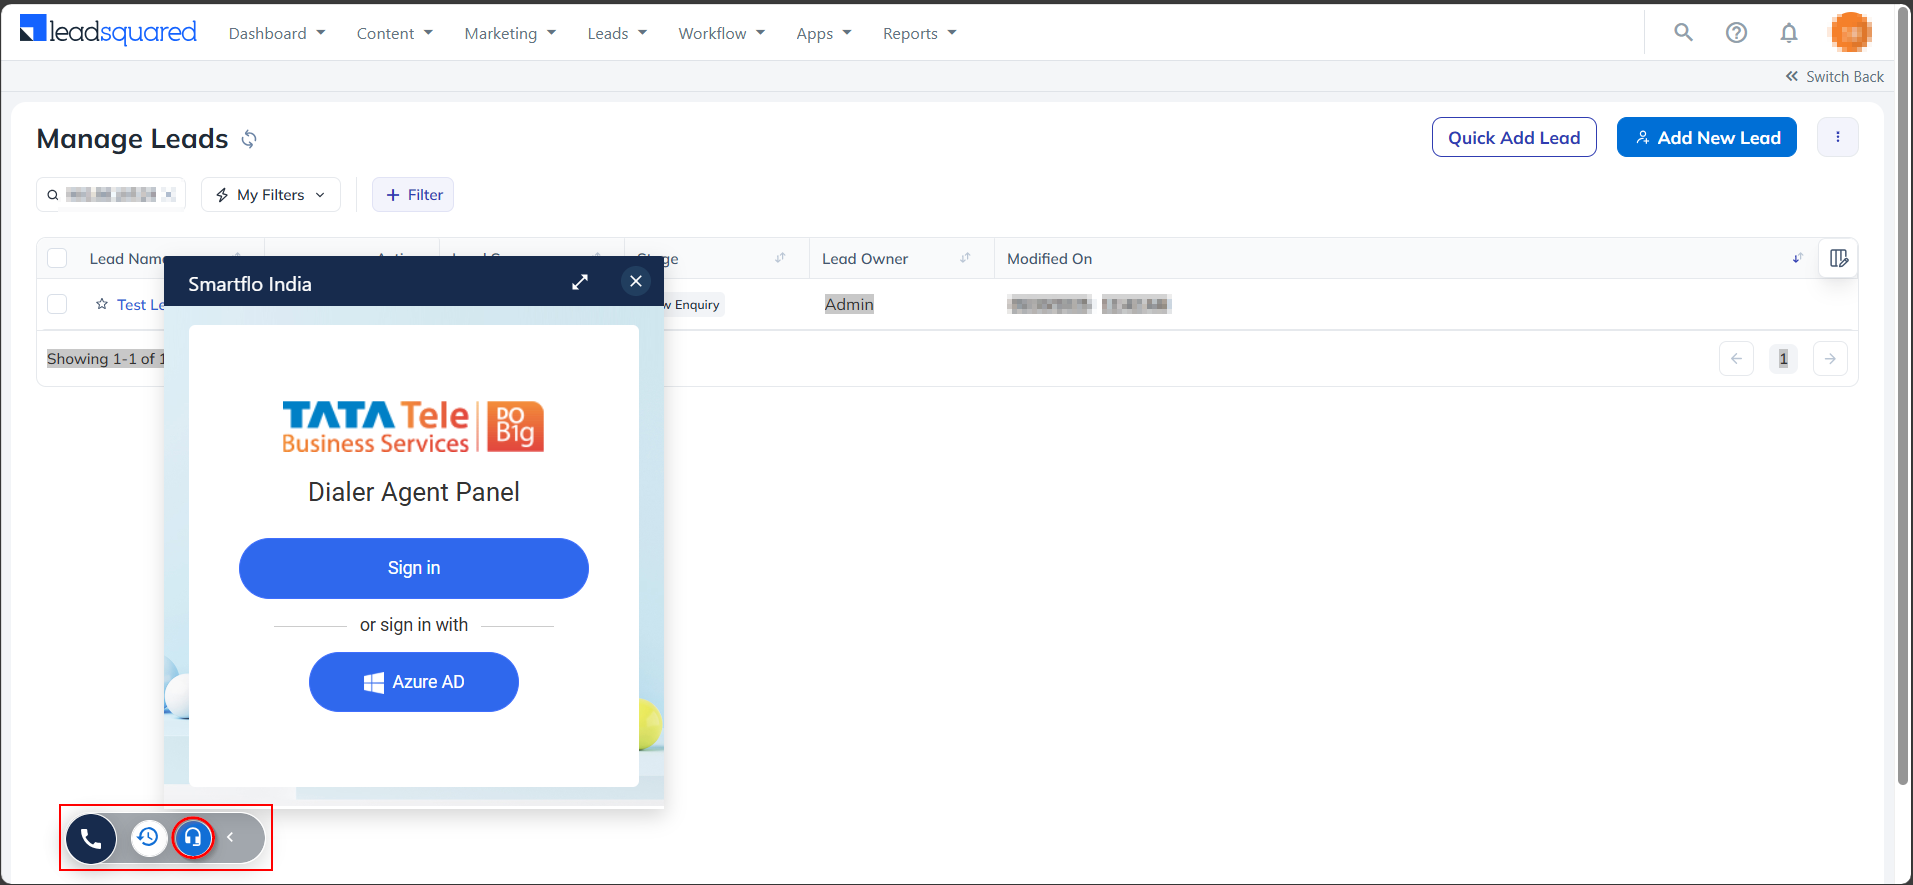
3. Open the Smartflo Dialer Agent Panel
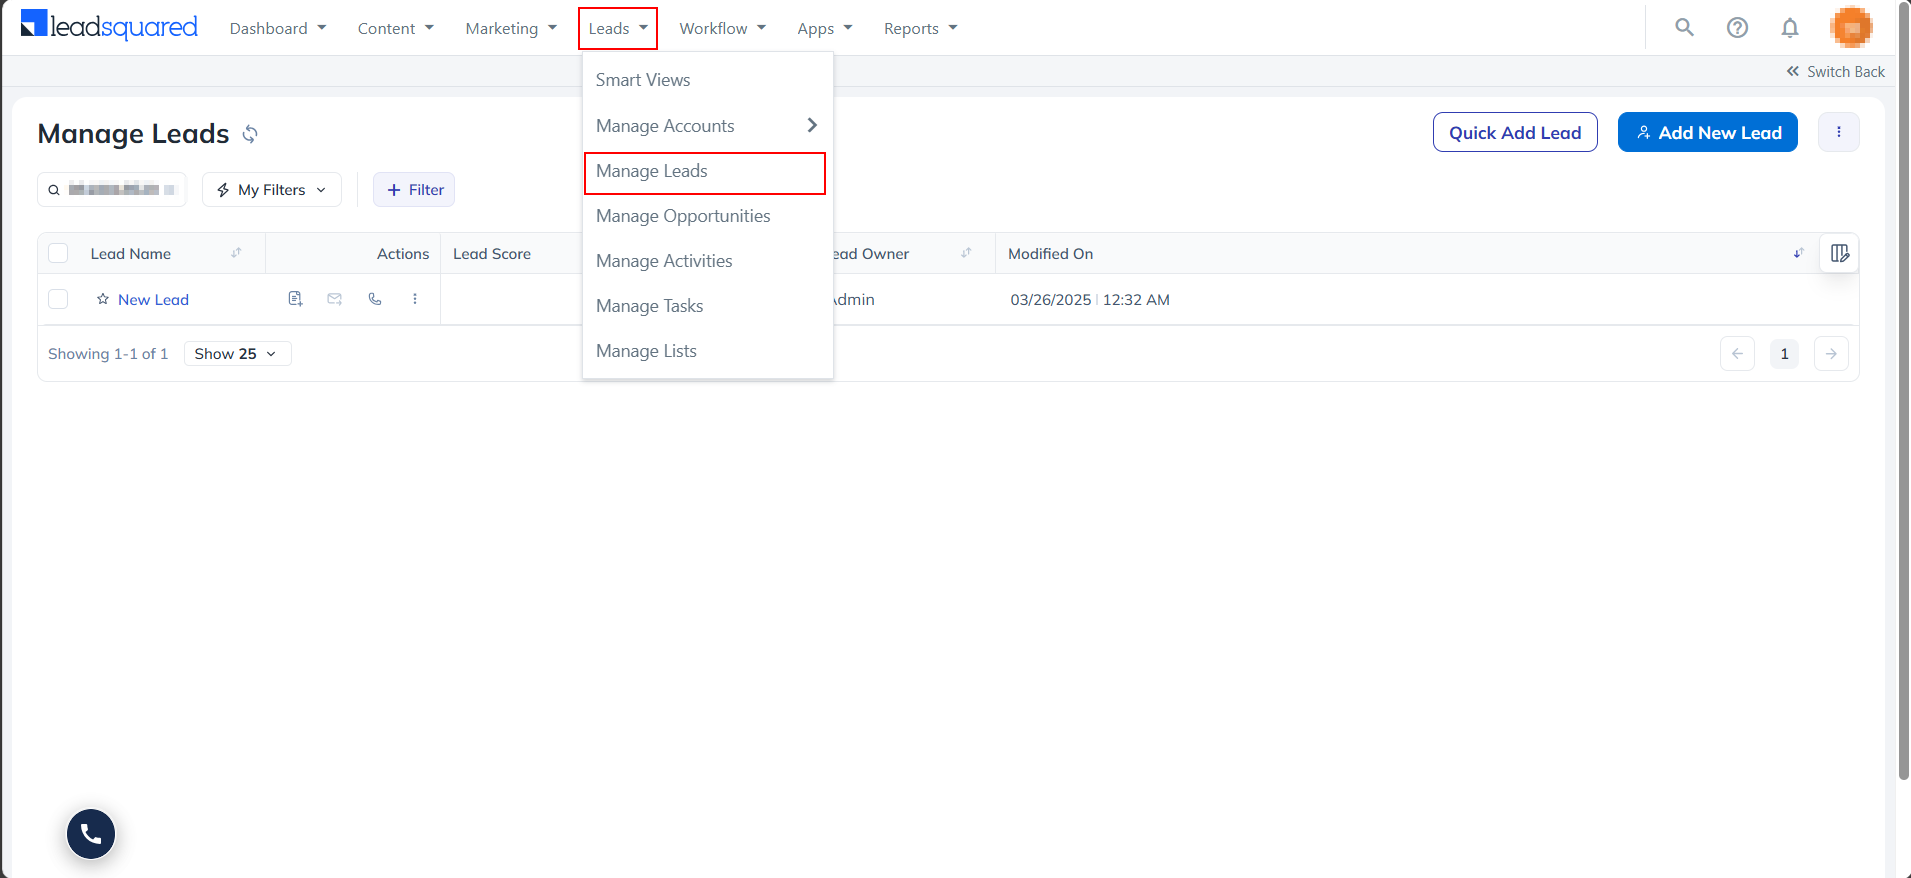
Access the Dialer Agent panel through the widget under Leads → Manage Leads, and sign in using your integrated agent credentials.
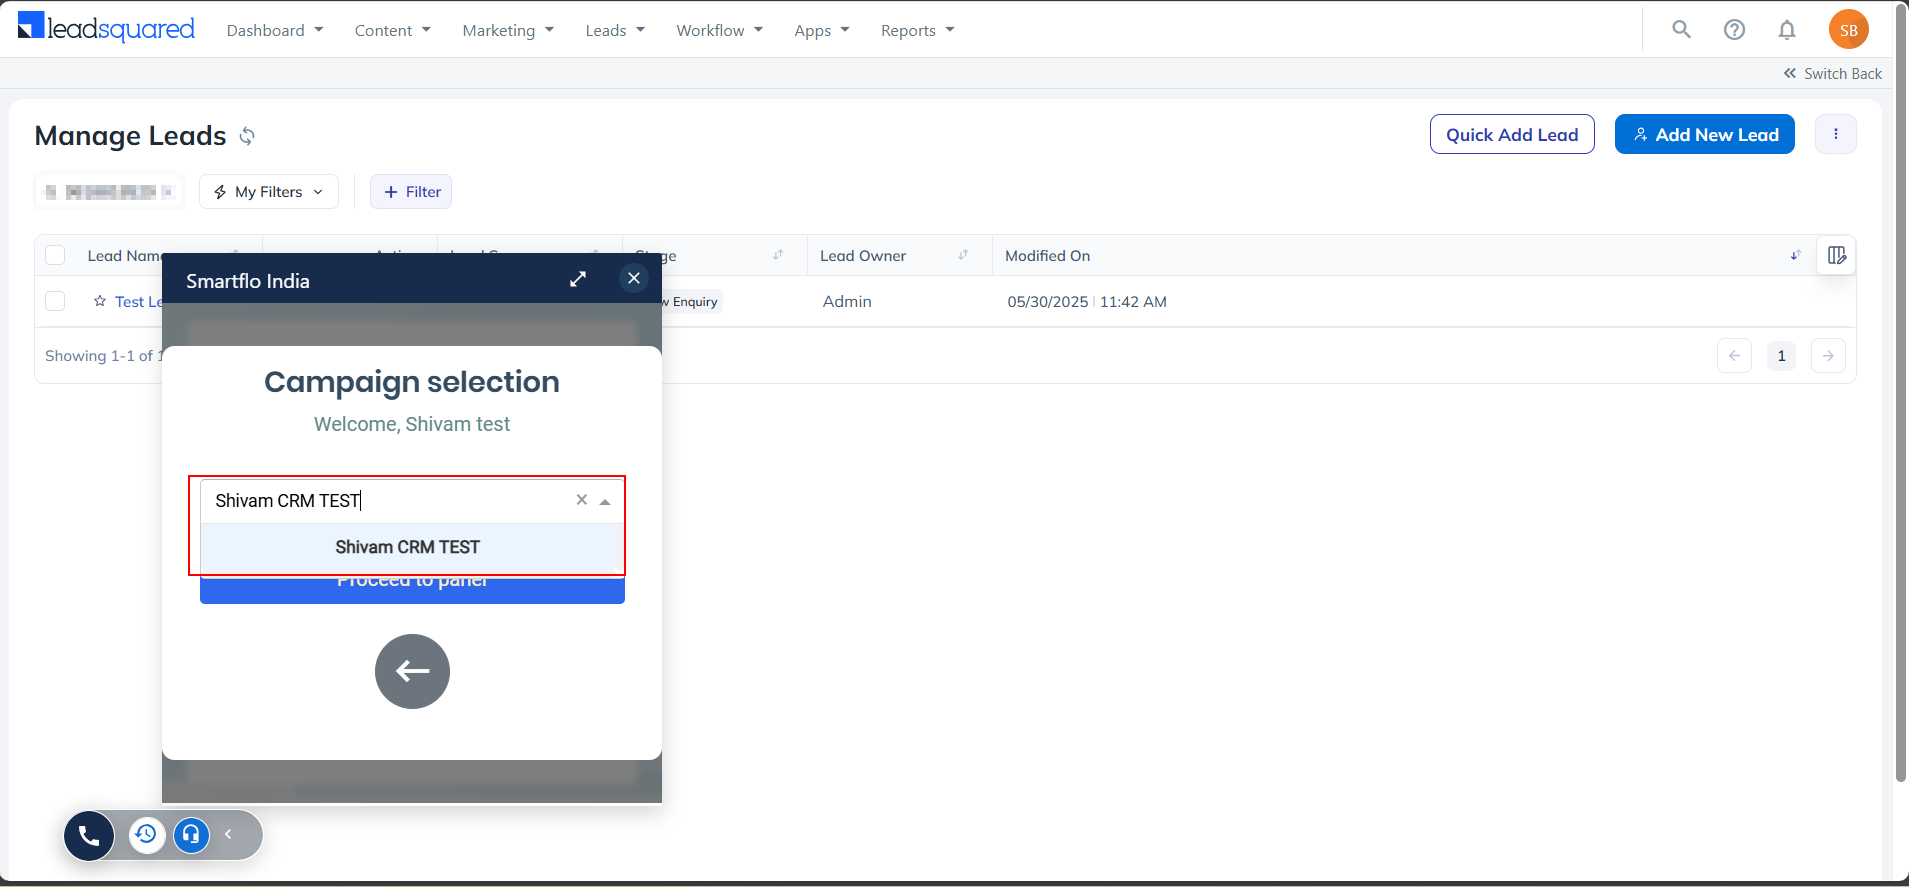
4. Select Campaign
Choose your campaign from the dropdown and click Proceed to panel.
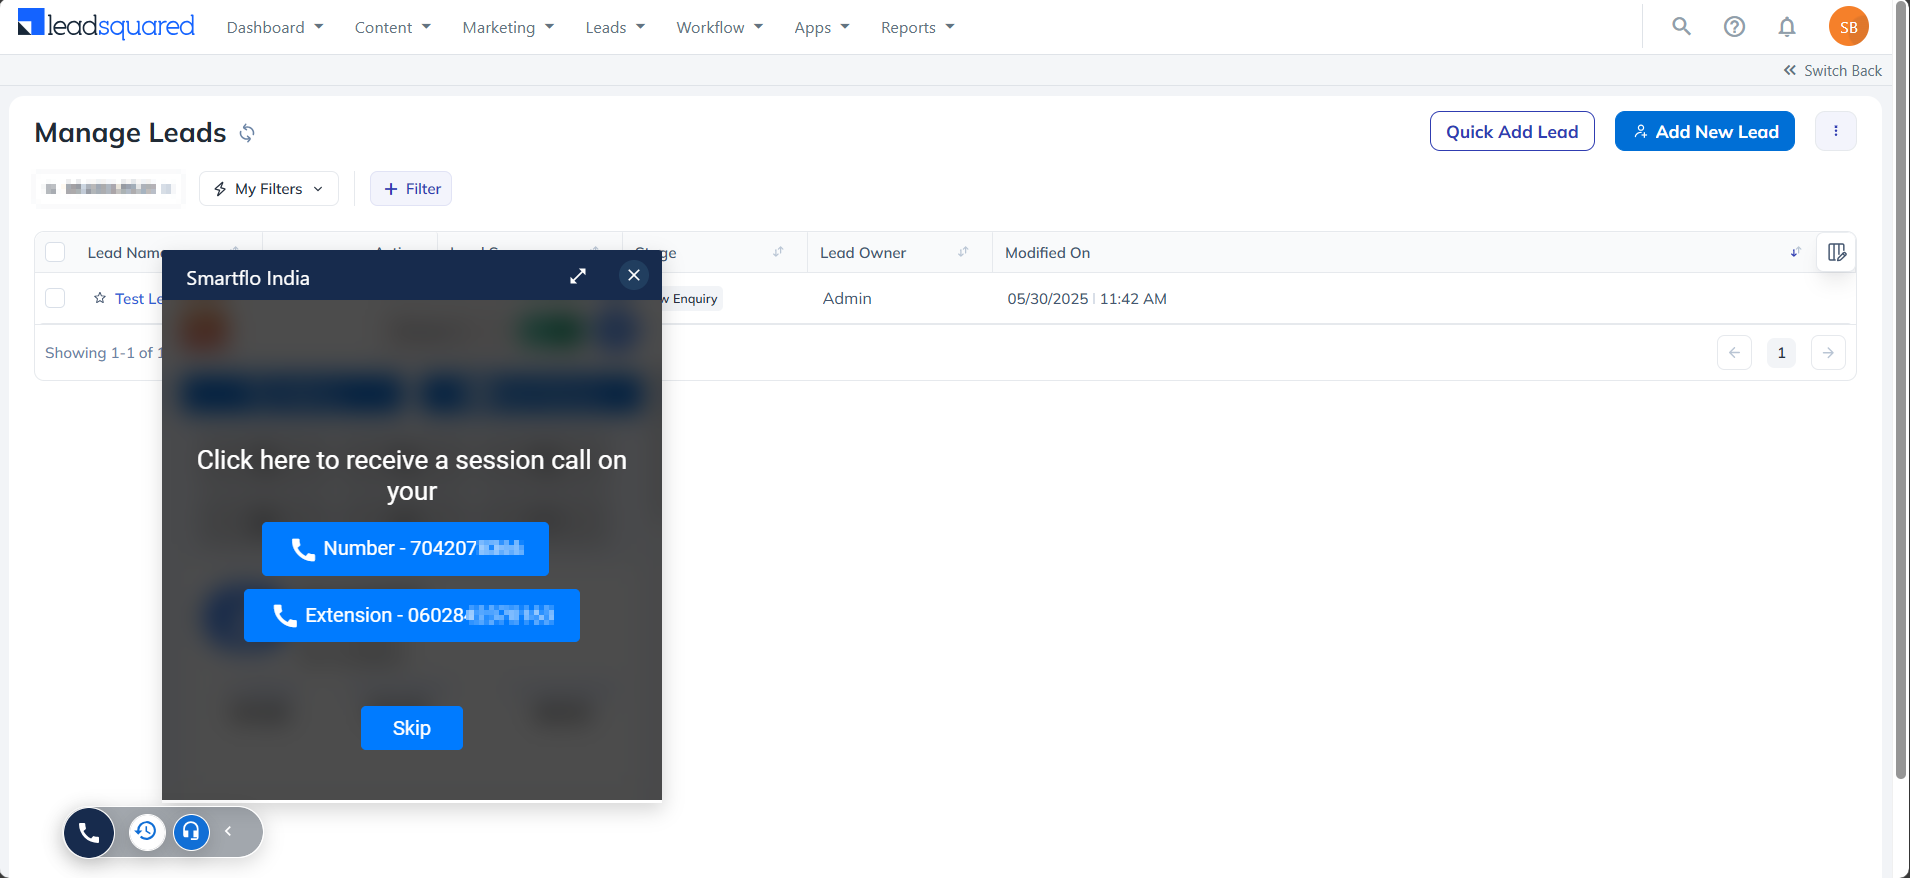
5. Choose Connection Method
Select Number or Extension to receive a session call, or click Skip.
The Agent Connection Method is determined by campaign configuration:
- Agent Connection Method = Dialout (Session)
- Connect Agent Through = Both
6. Session Initiation
The system will display "Dialing out to your number" once the session is starting.

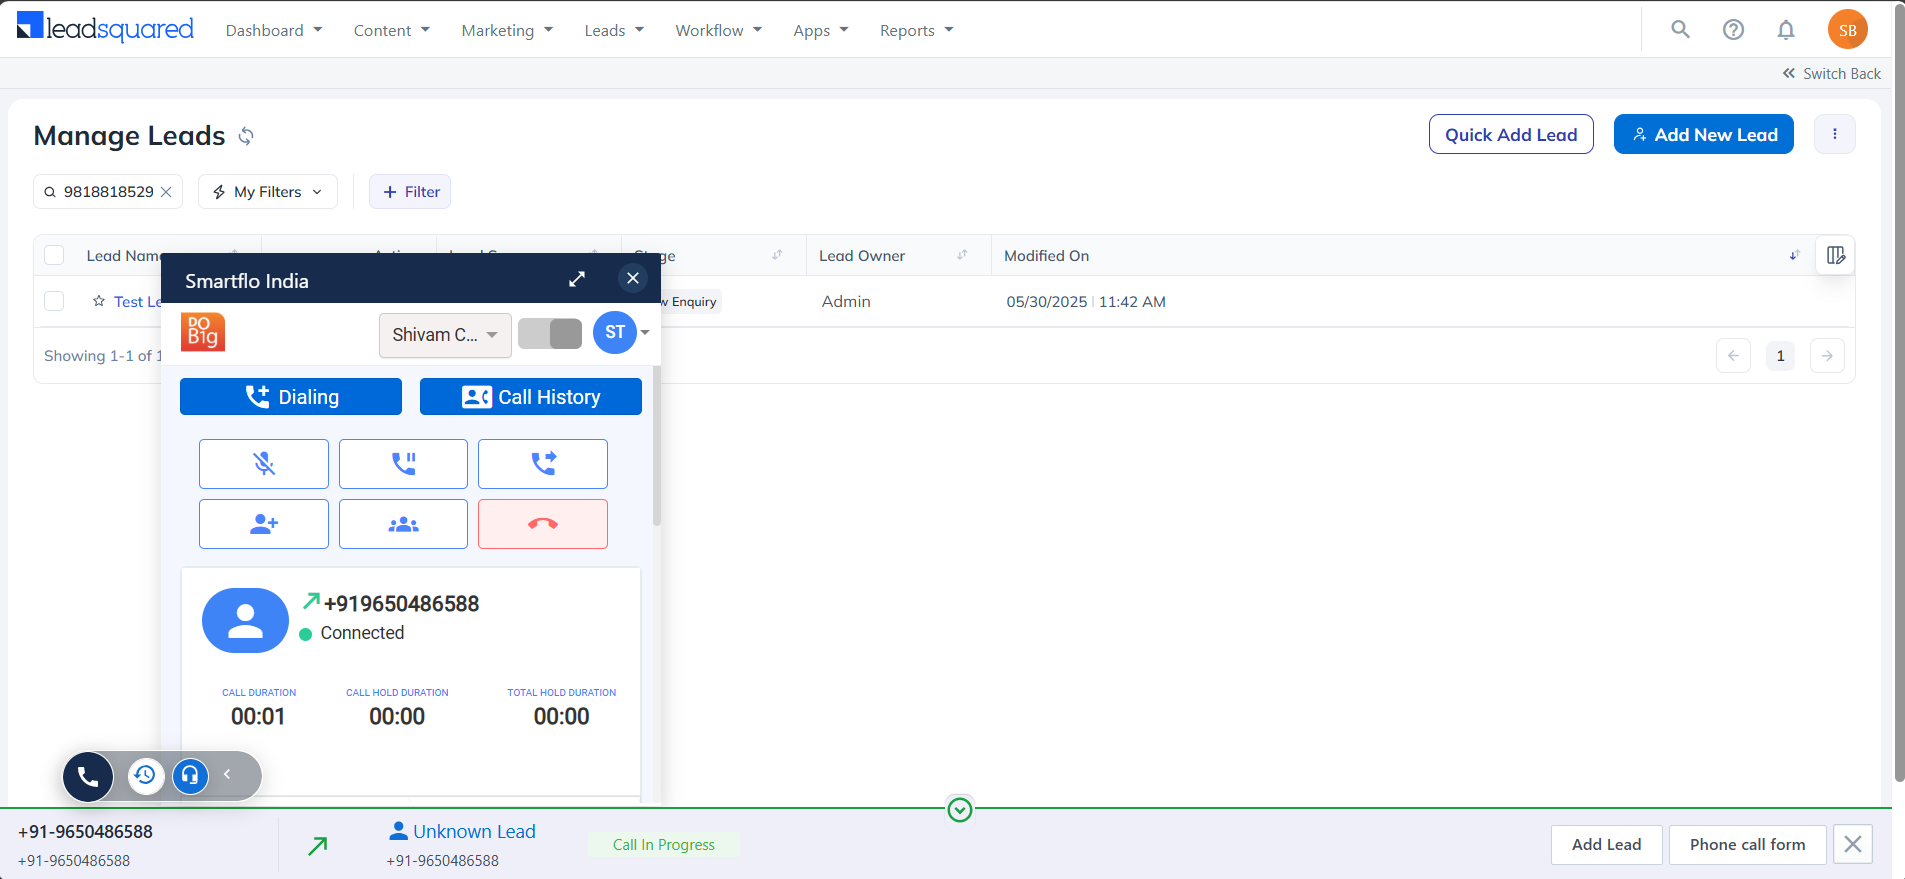
7. In-Call Interface
Use the dialer interface to manage the call, access lead details, and take call actions.
Click Hang Up when done.
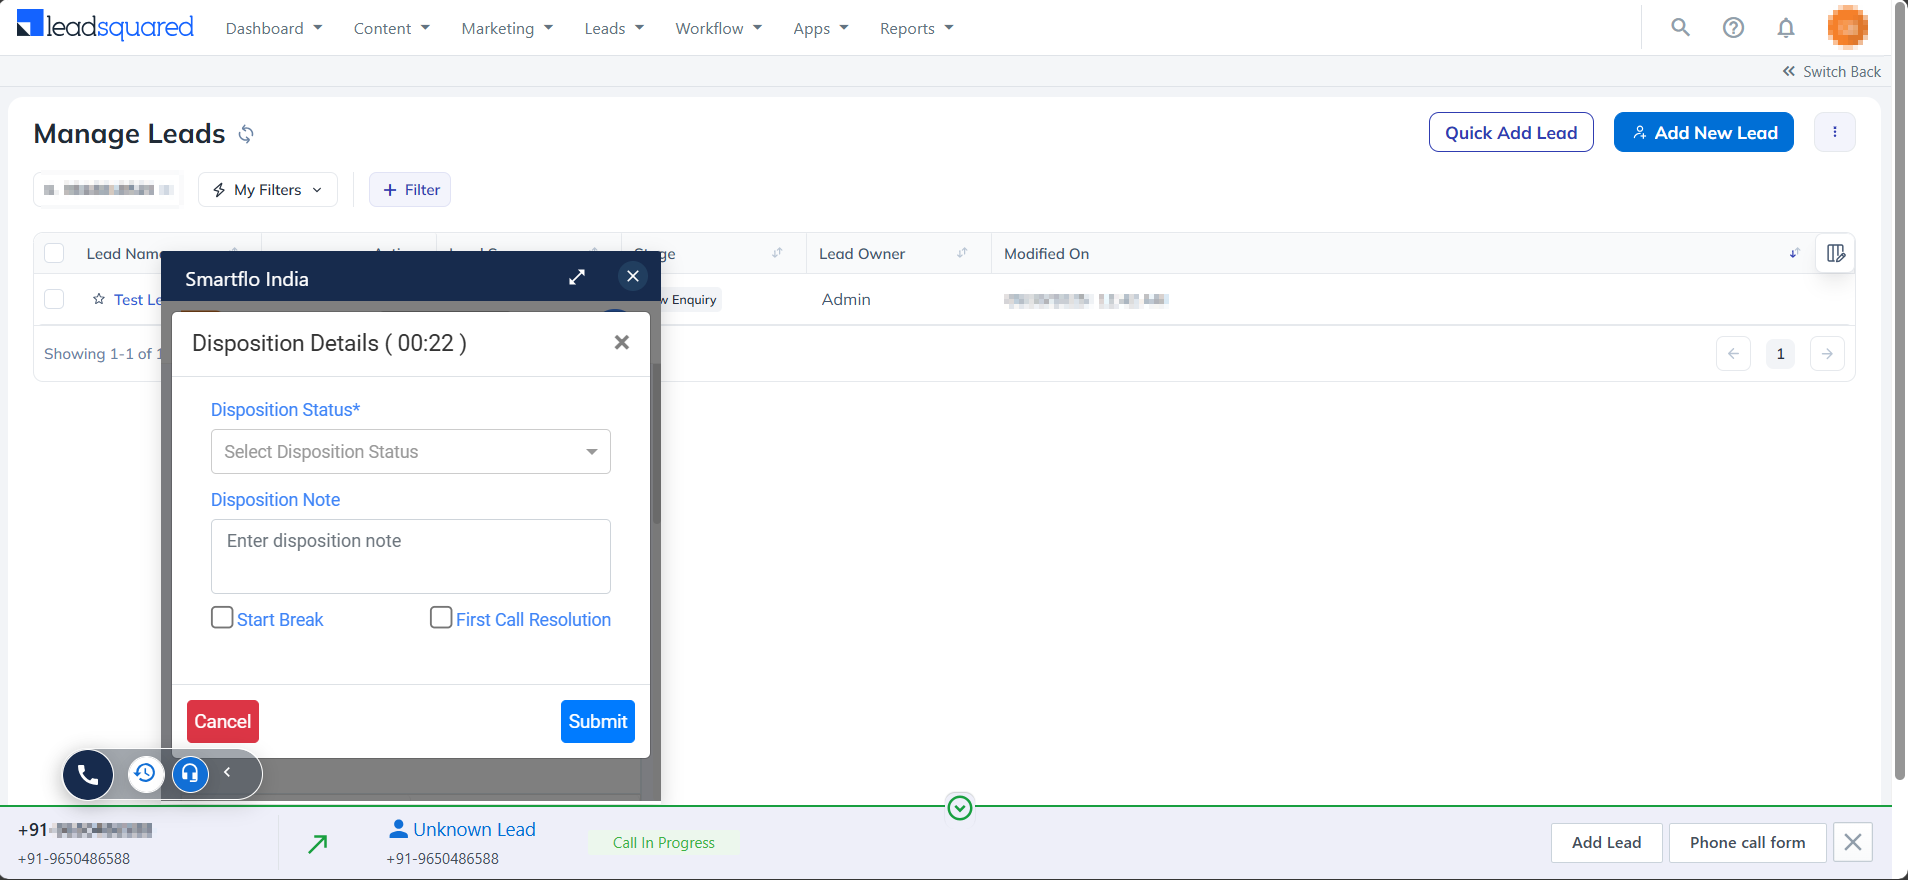
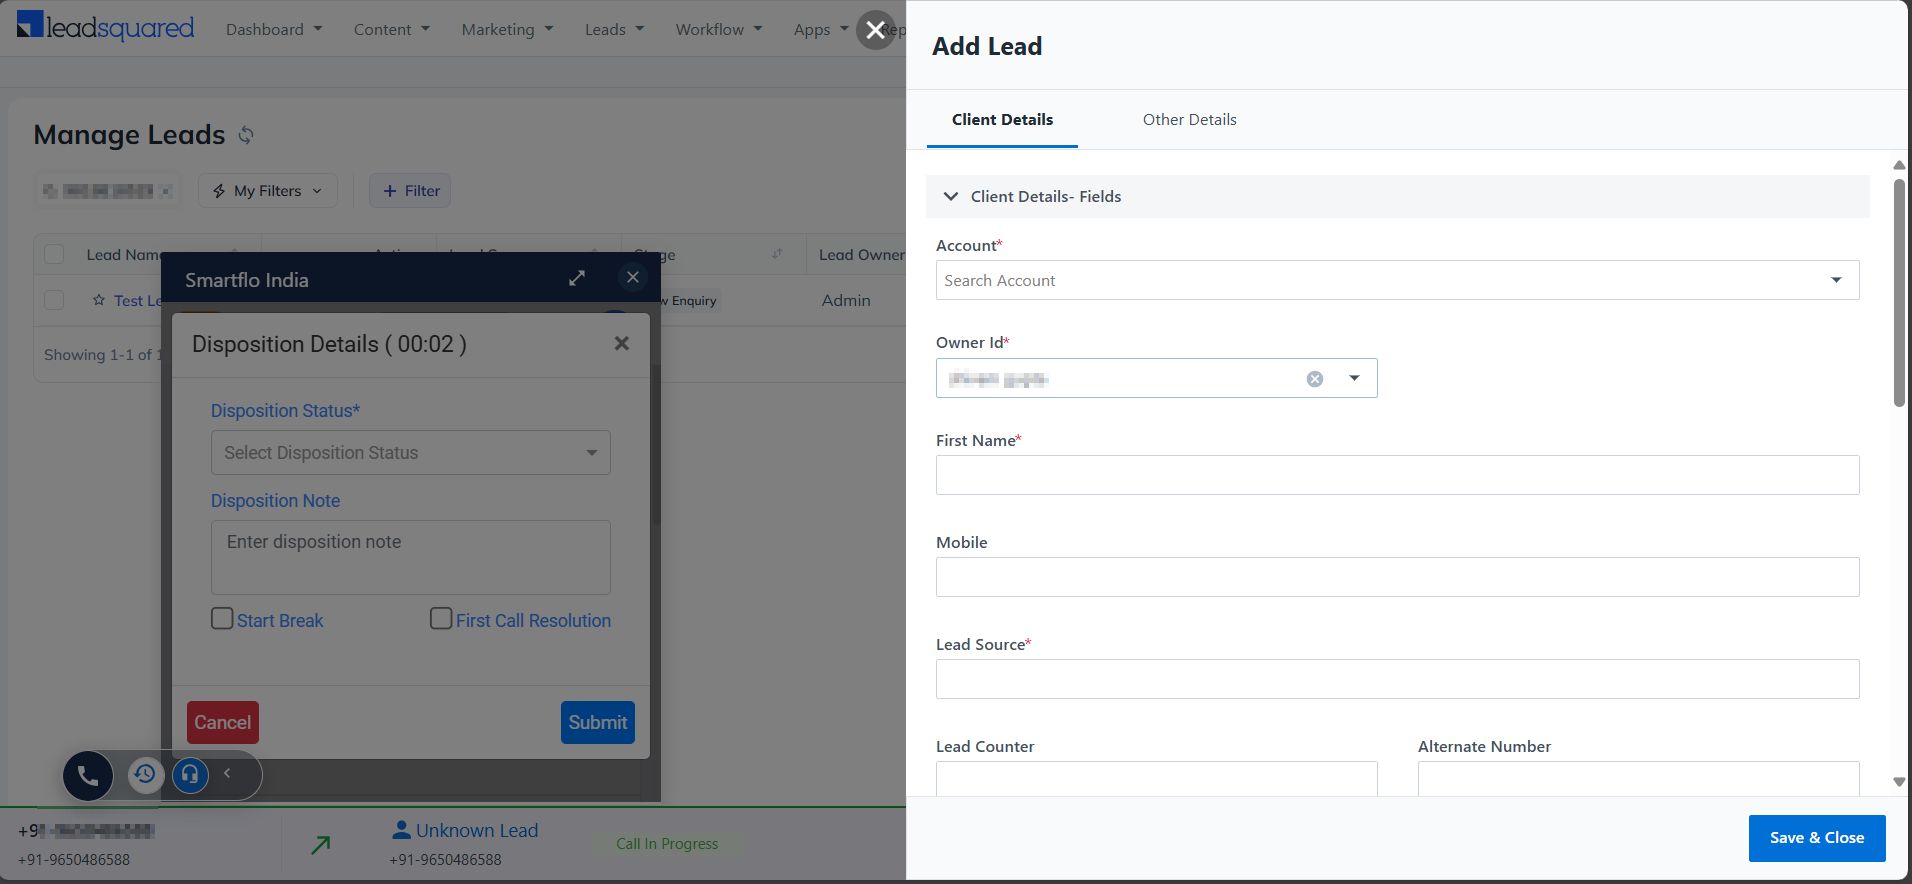
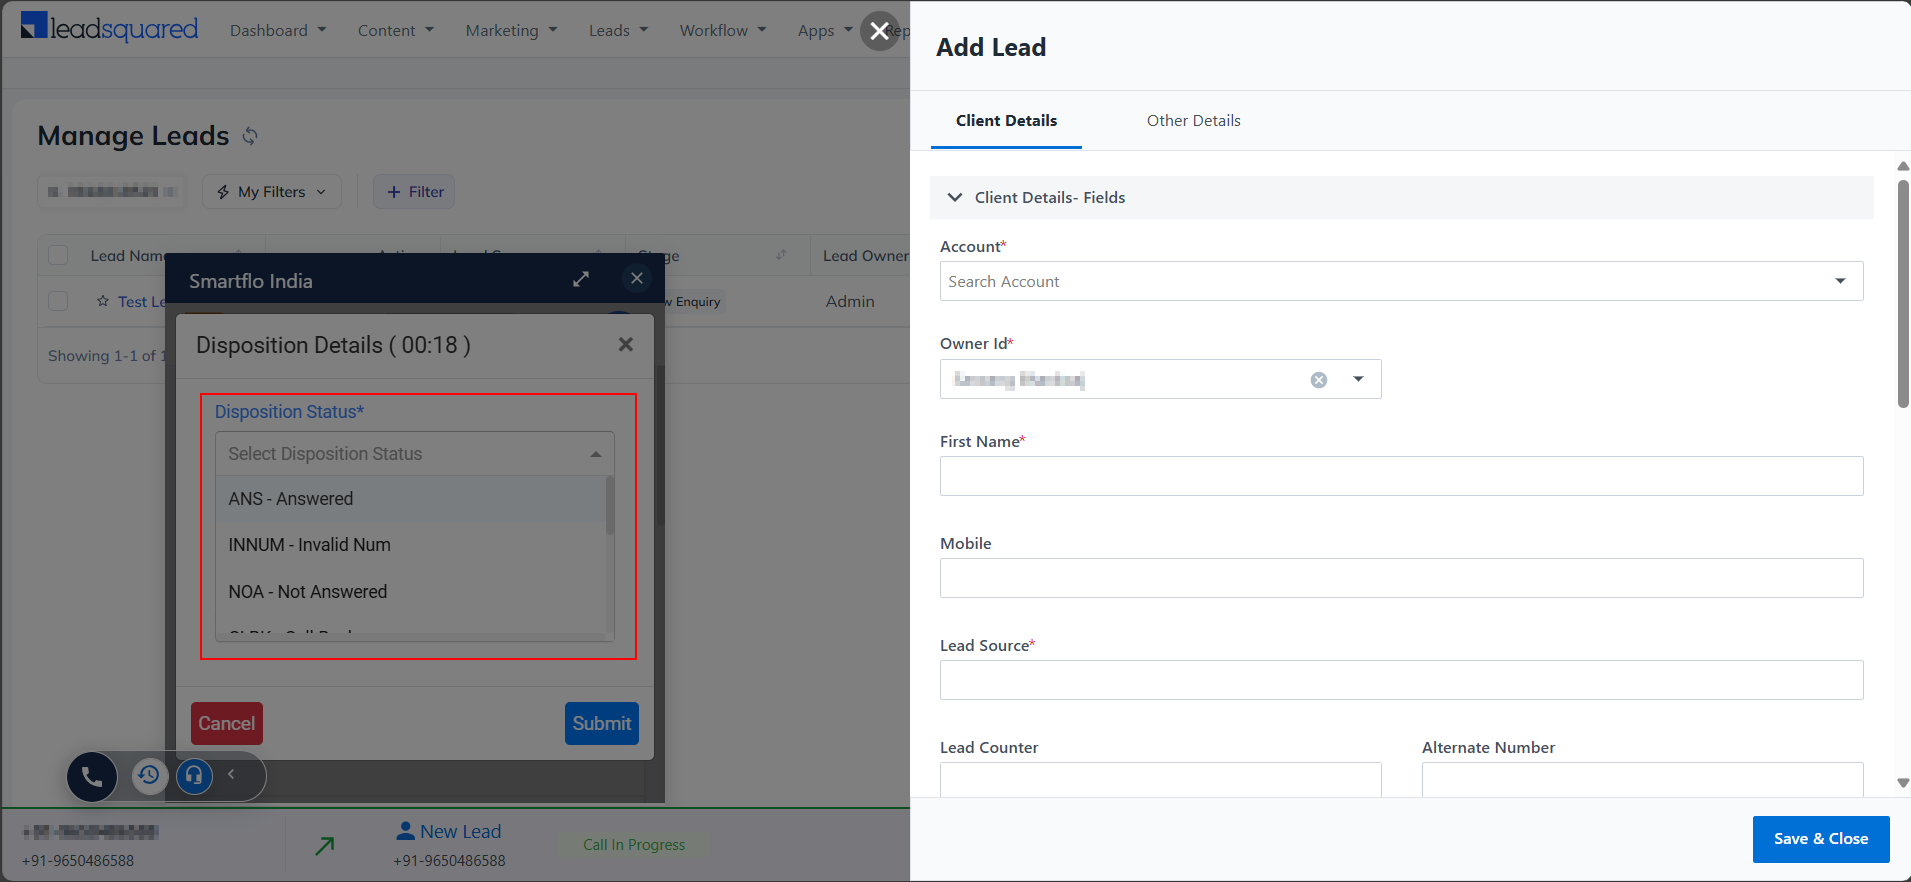
8. Log Disposition
After the call ends, enter the Disposition Status, Disposition Note, any optional notes, and lead data (Ticket), then click Submit or Save & Close.

9. Submit Disposition
Choose statuses like Answered, Callback, or DND, add notes, and click Submit.
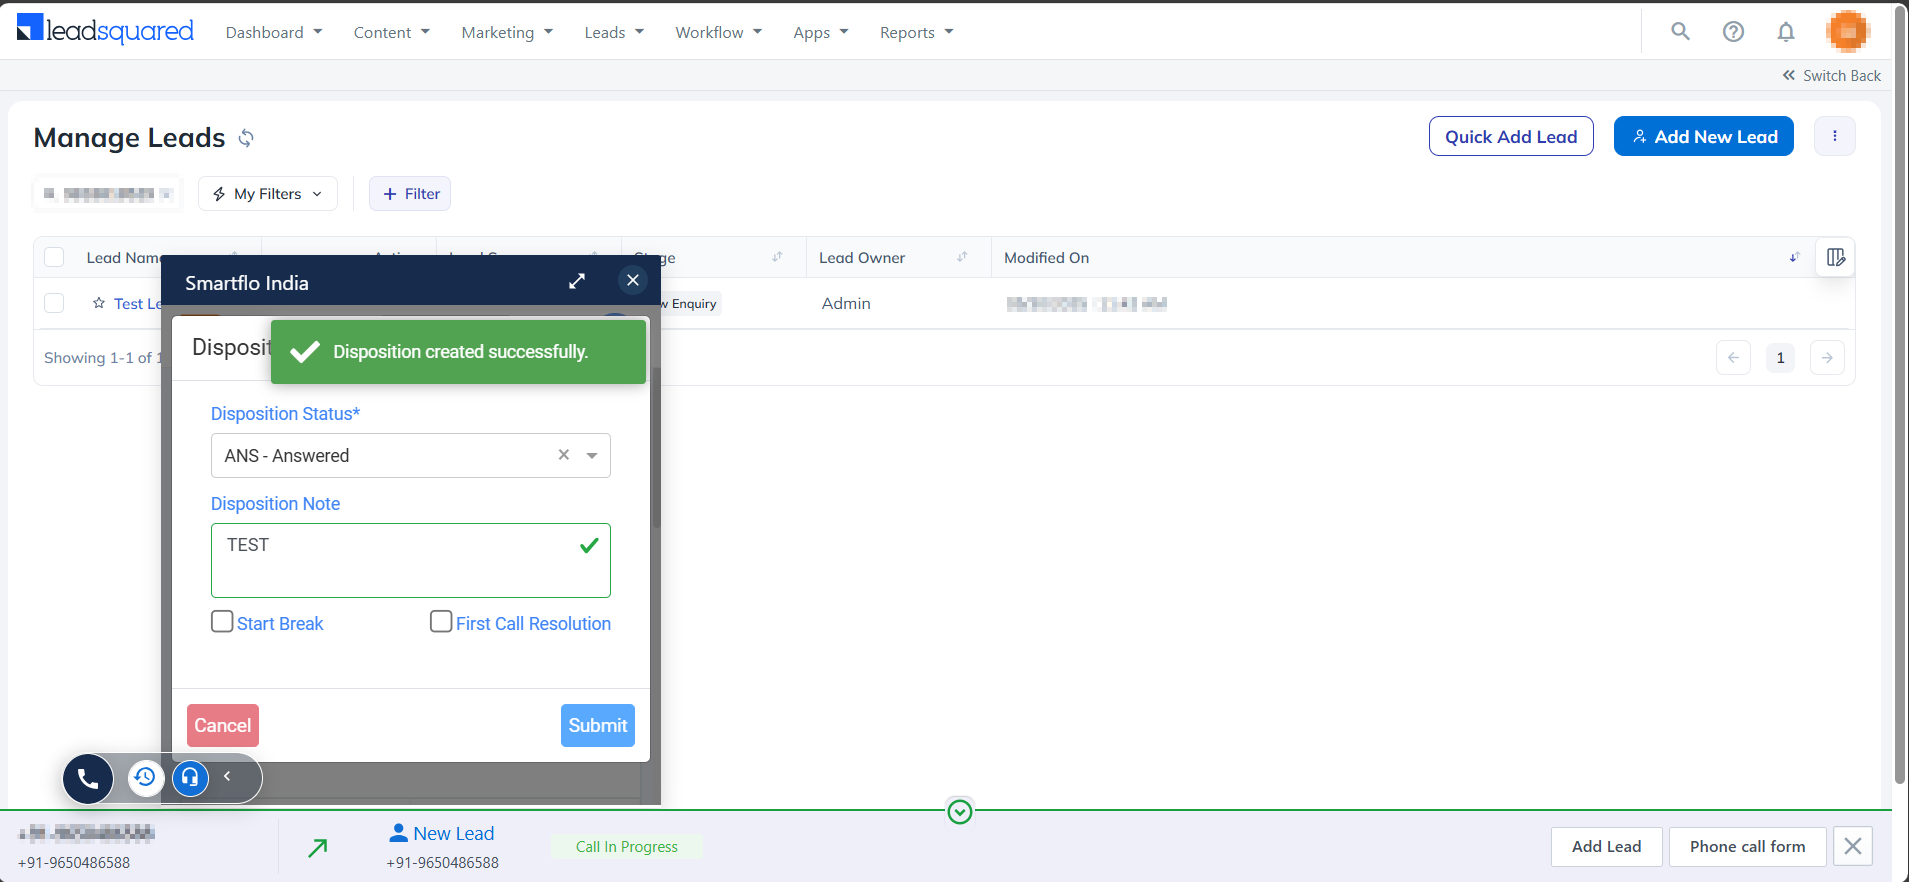
10. Confirmation
A green notification will confirm: "Disposition created successfully", and the dialer resets.

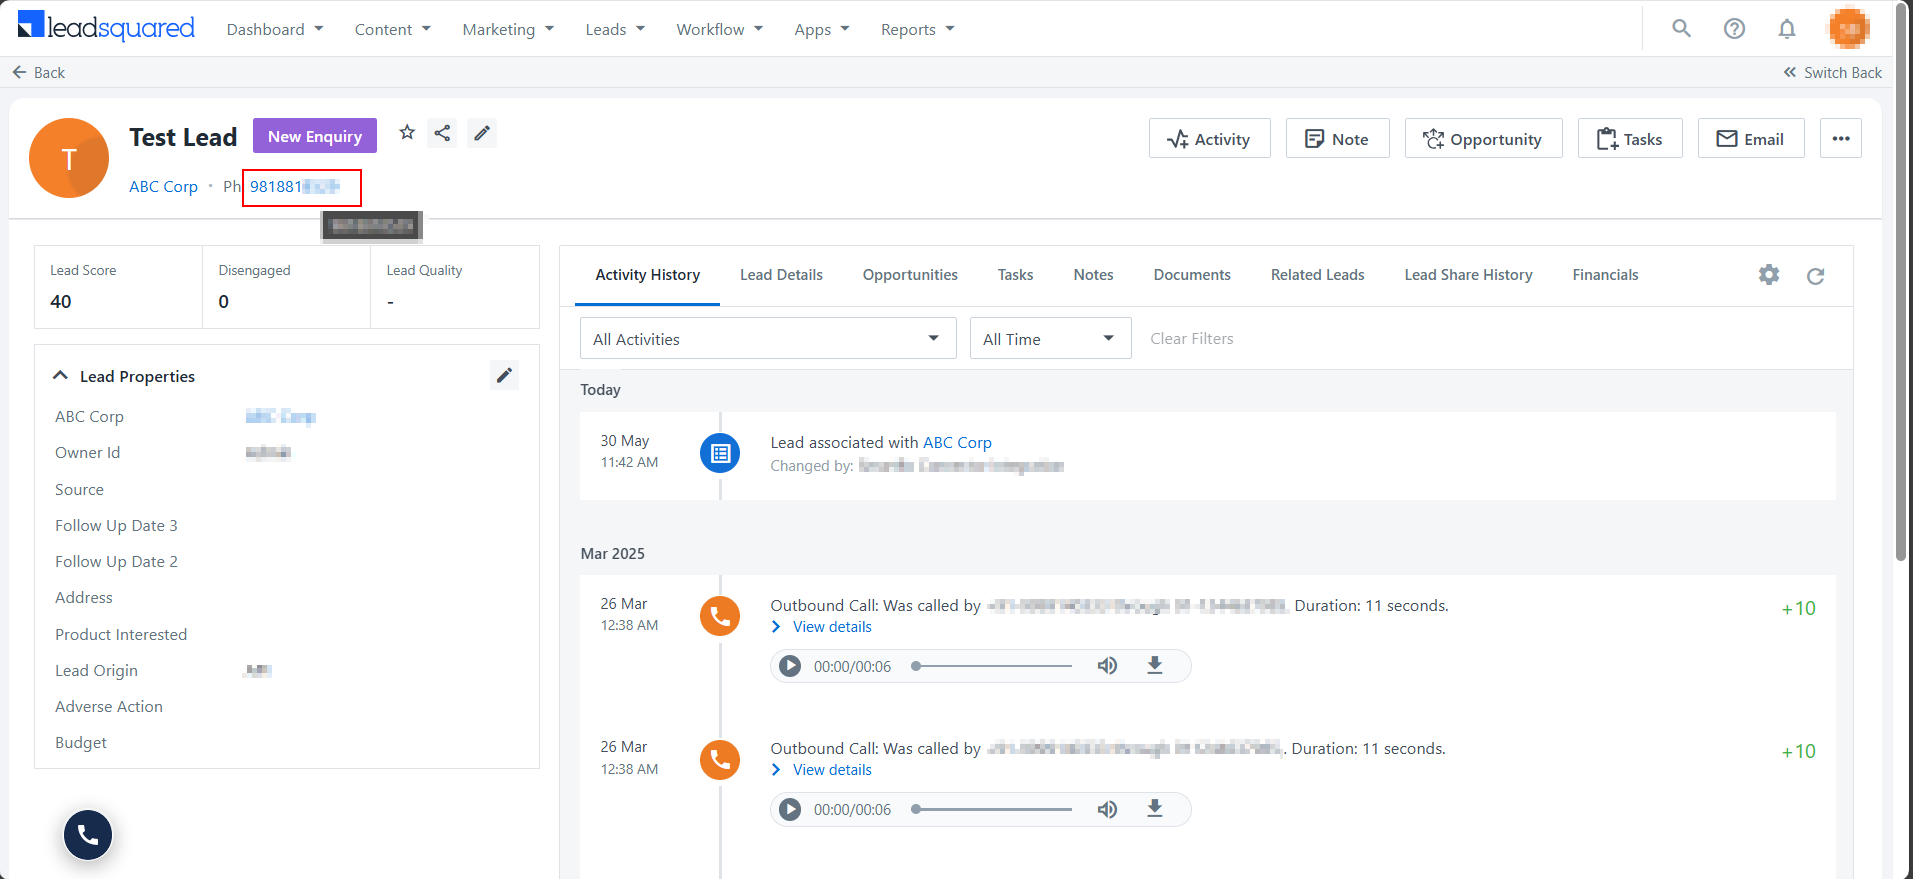
11. View Call Logs
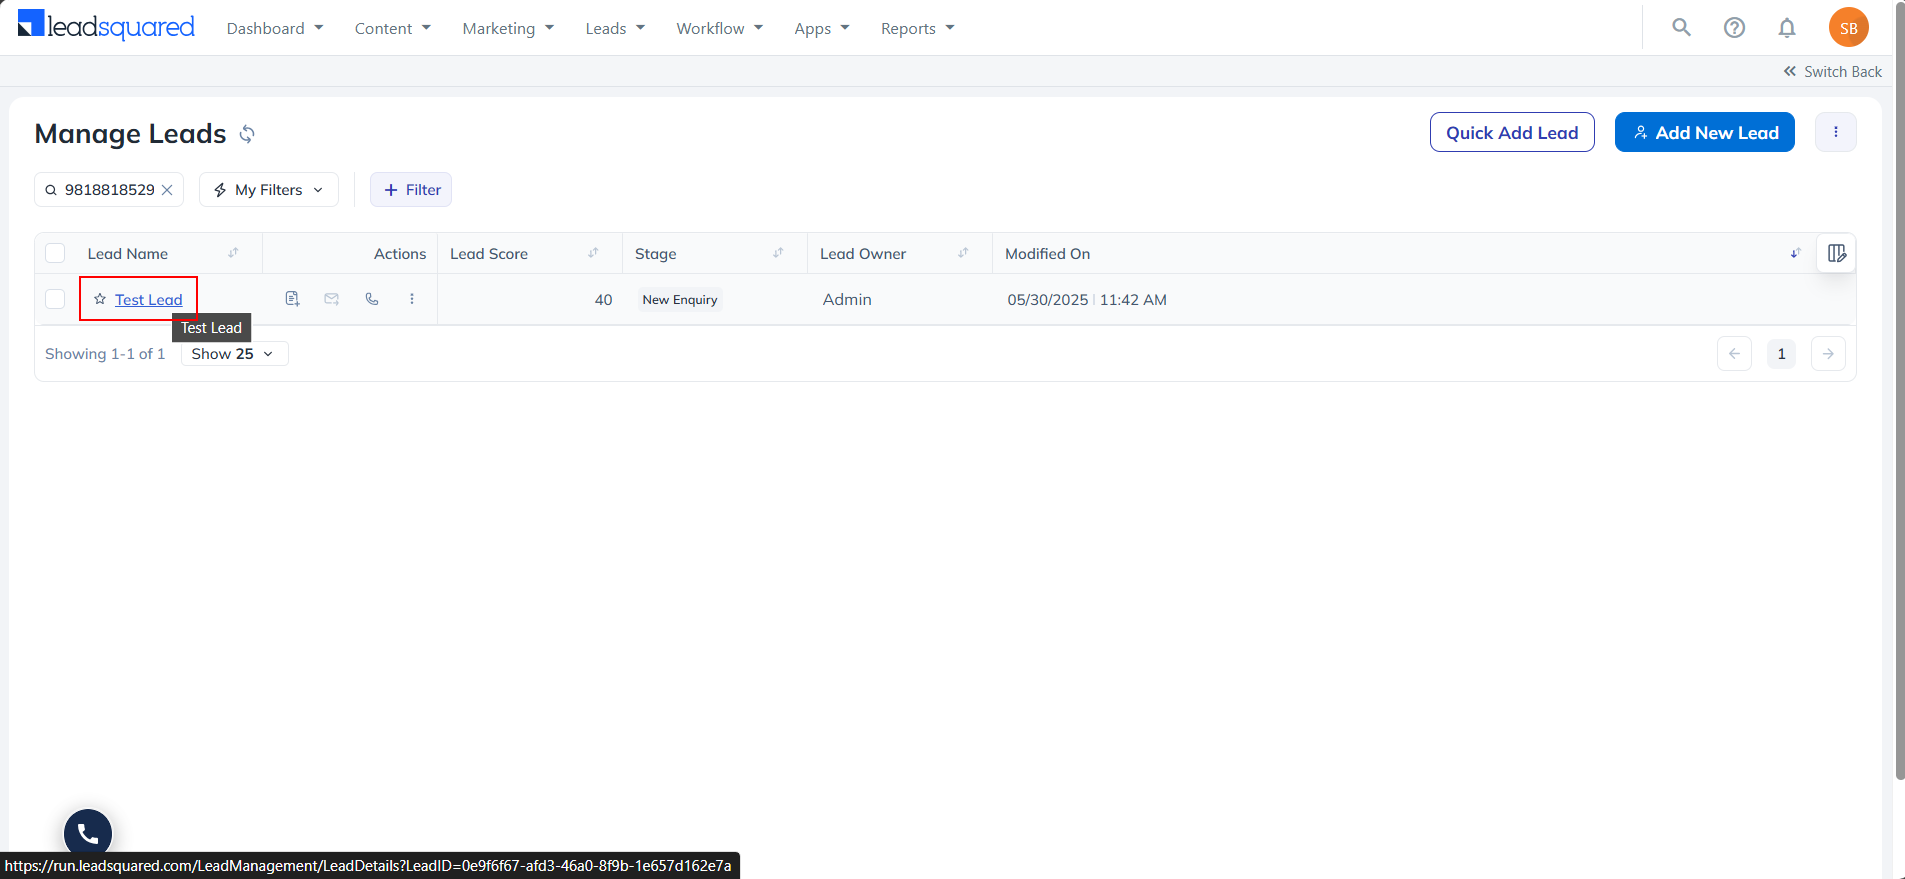
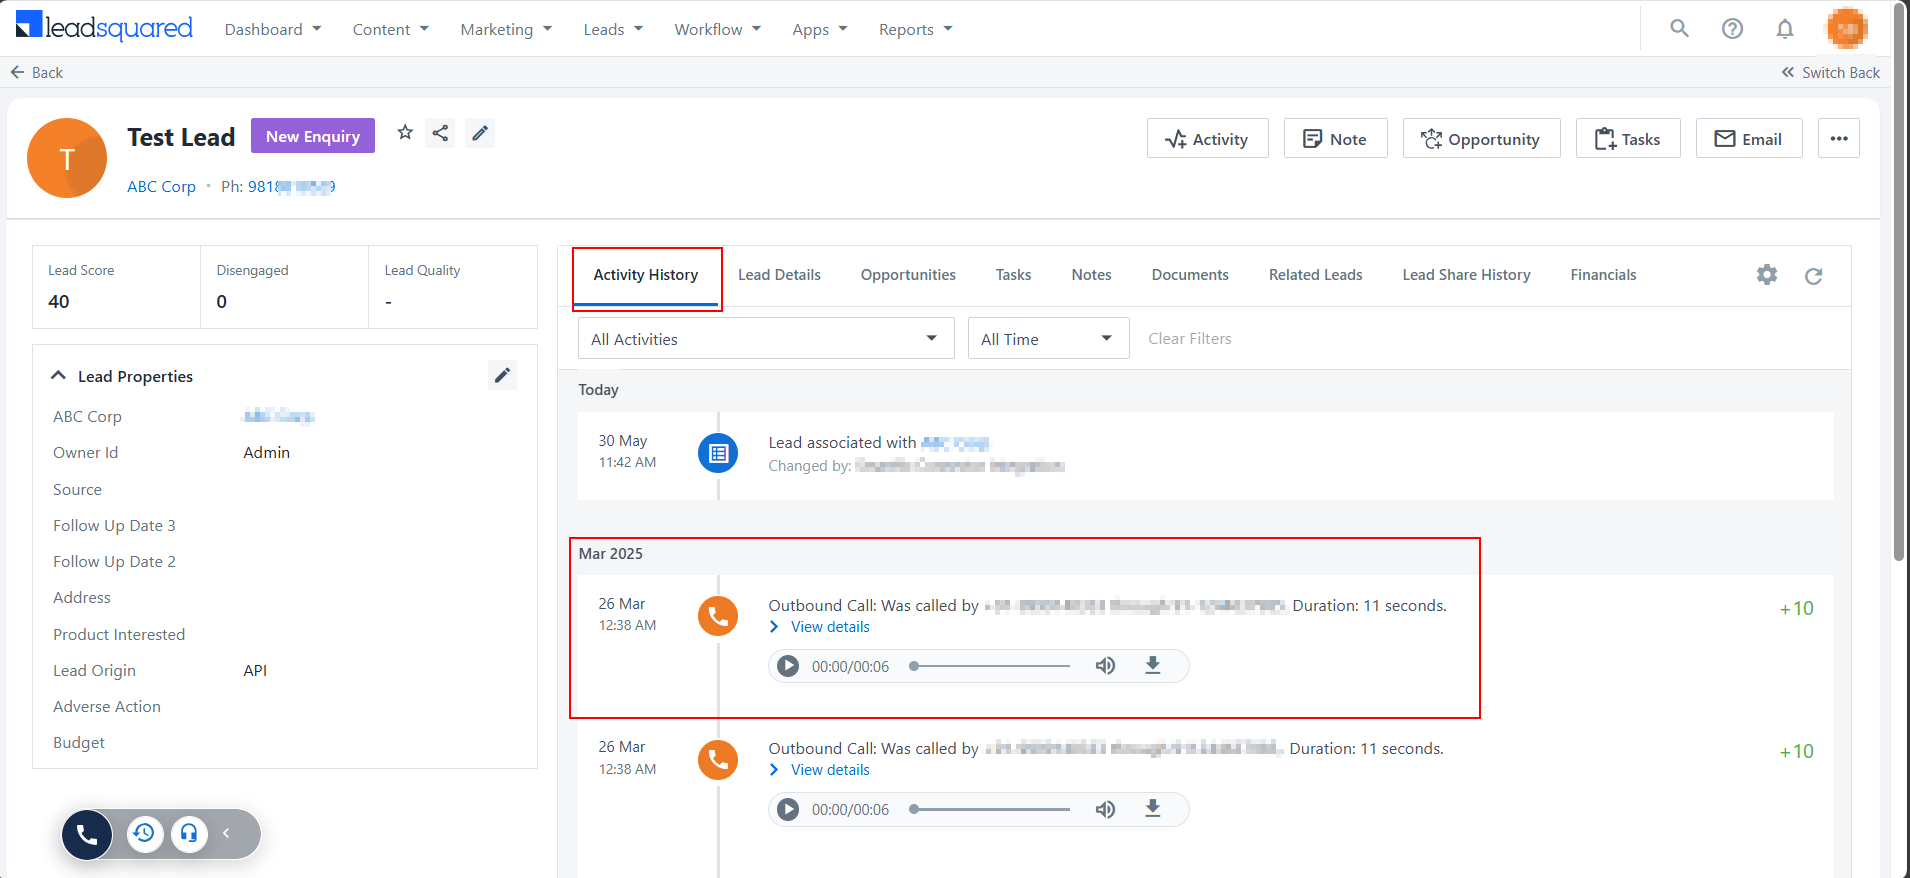
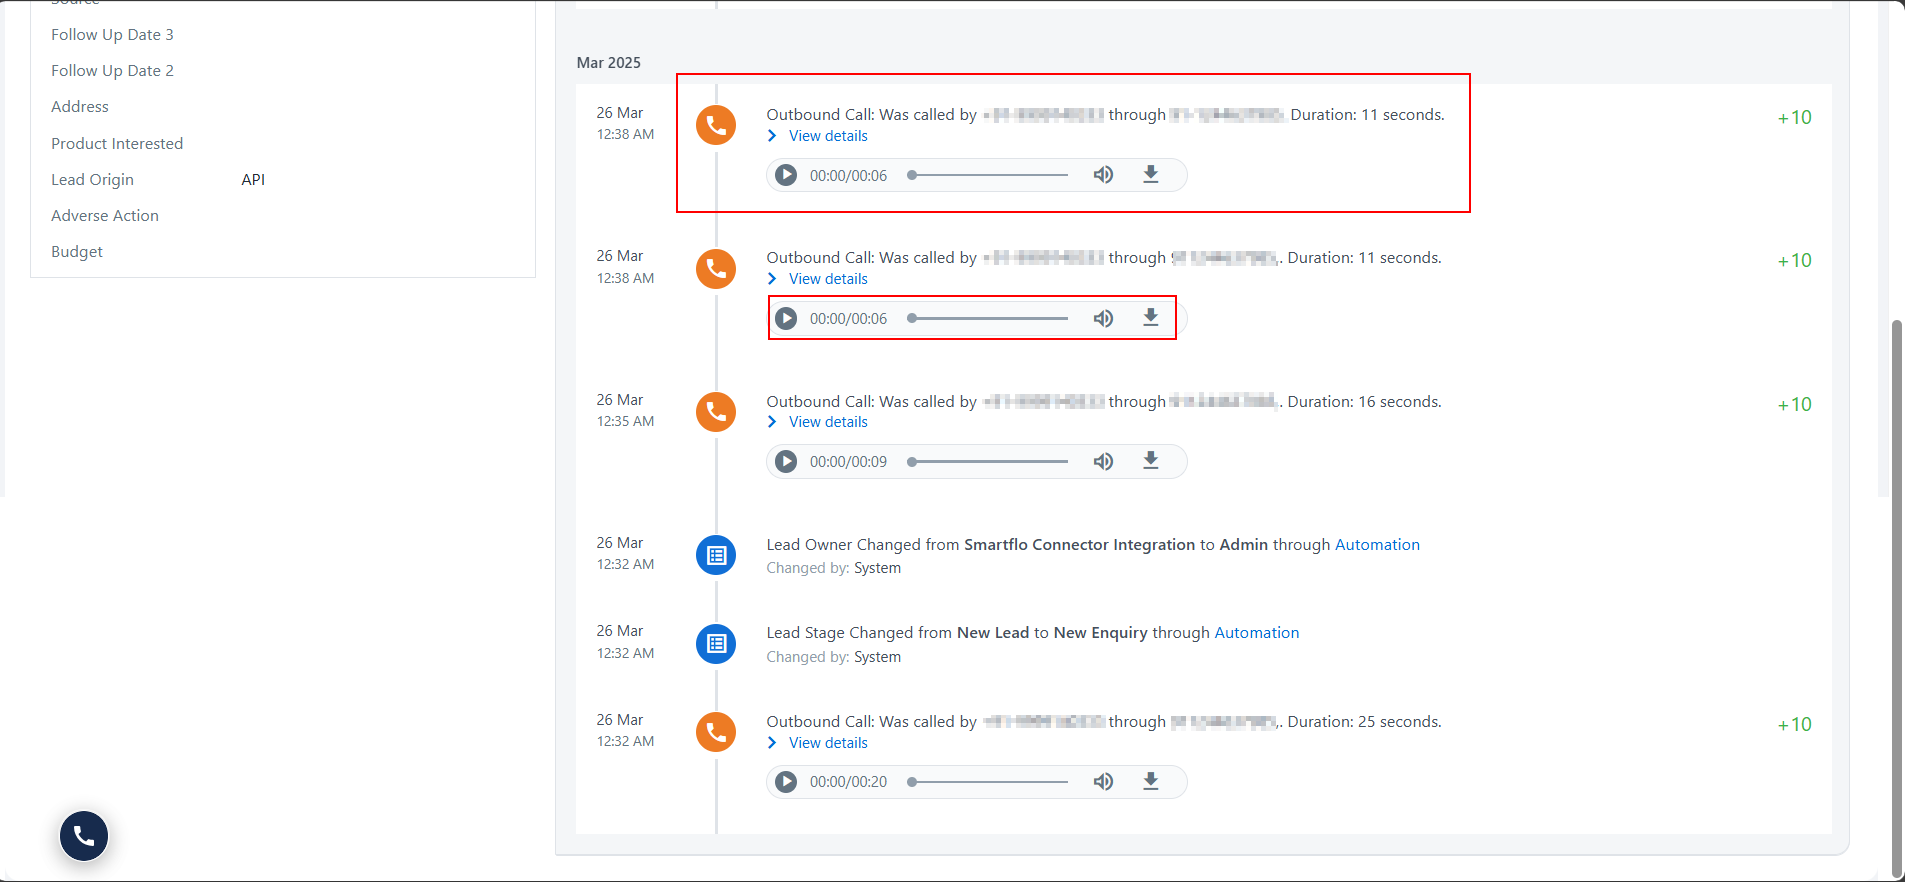
Go to the Leads module to view Leads and their call logs, with type, time, duration, call recording, and status.

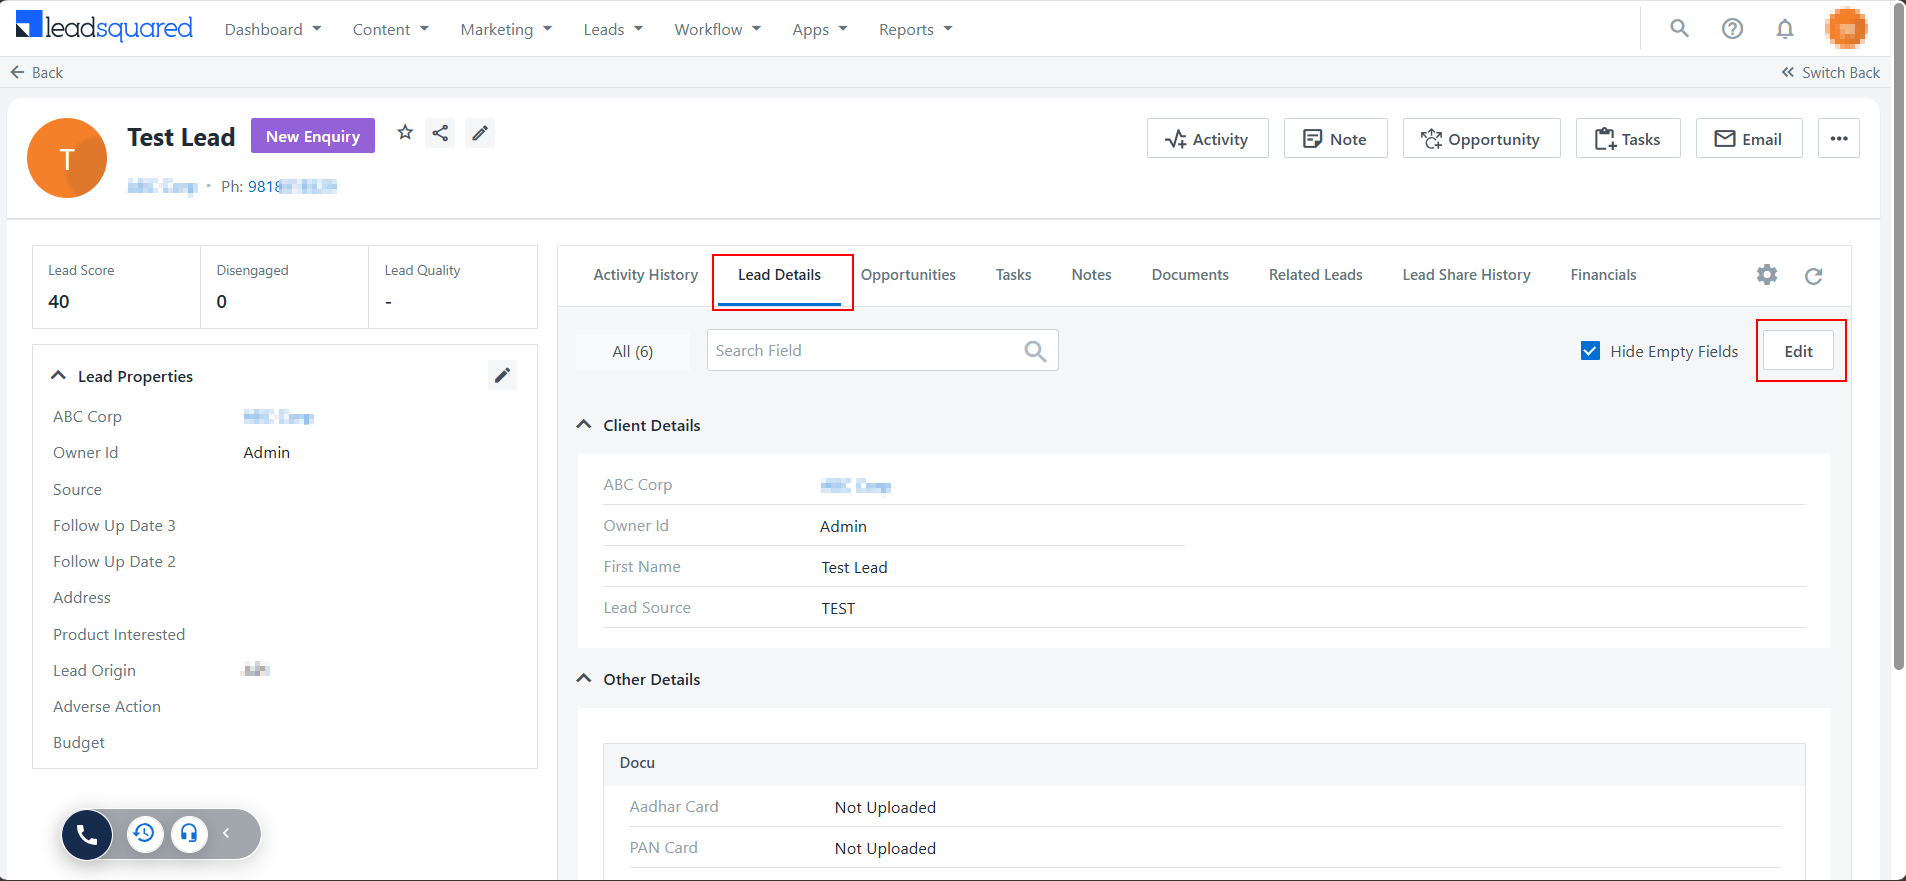
Click on the Lead Name

Call logs are visible under the Activity History section of the lead with type, time, duration, call recording, and status.

✅ Click to Dial
Click the Phone number of the lead to initiate a call.
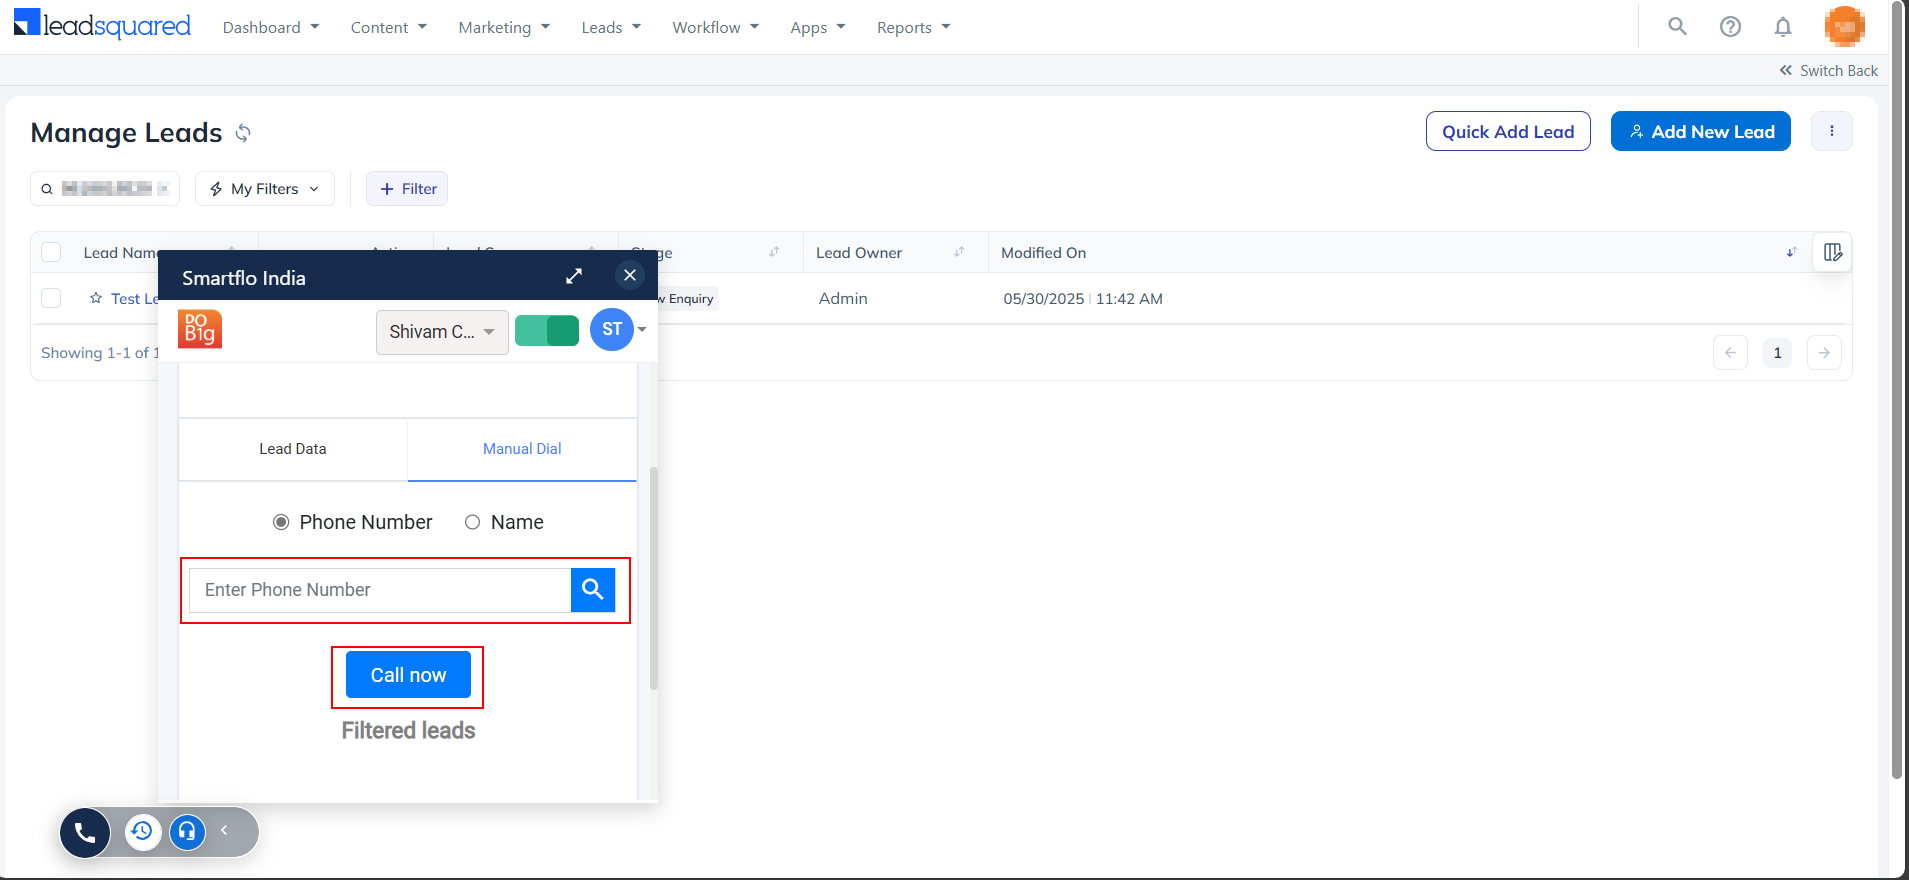
✅ Click to Call (Manual Dial)
To manually dial a number:
- Open the dialer pop-up (bottom left)
- Click the Manual Dial tab
- Enter the phone number
- Click Call now
This allows agents to call numbers not stored in CRM.
📝 Ticket Creation / Update
- Go to the Leads module --> Manage Leads
- Click on a lead name to view the details
- View all tickets and updates related to that lead
📊 Call Detail Records
To access Call Detail Records, navigate to the Leads module → Manage Leads → click on the desired Lead Name, then view the details under the Activity History section.
- Subject
- Call type
- Start time
- Duration
- Status
- Call Recording
🗒️ Call Notes / Description
After the call:
- Go to the Disposition Details section
- Select a Disposition Status
- Add your call notes or follow-up comments
This helps document important outcomes.