Configuring WhatsApp Voice and Messaging for Old Customers
This procedure applies to customers who are currently using an existing WhatsApp Business number and wish to migrate from the old setup to the new Channels Hub. Before enabling the new Interaction Hub and making other related changes, the old WhatsApp entry must be removed first to prevent conflicts.
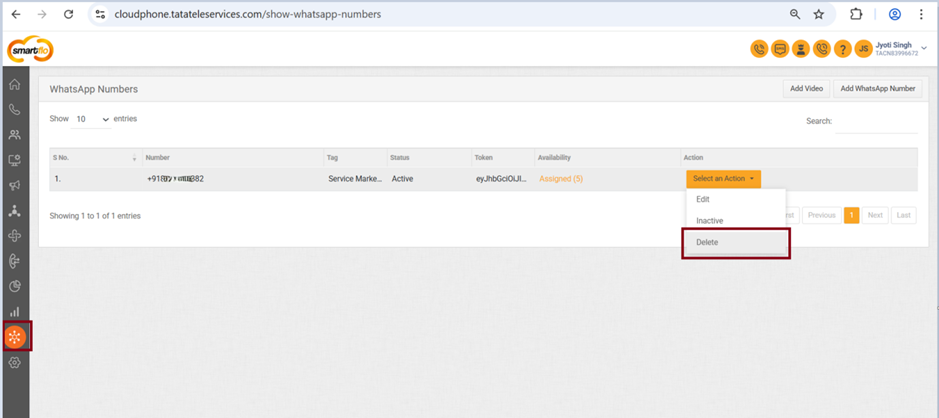
Remove Old WhatsApp Entry
- Log in to the Smartflo Panel.
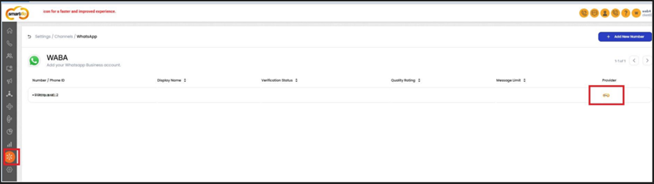
- Navigate to Settings → Channels.
- Locate the existing WhatsApp number under Channels.
- Delete the entry to avoid conflicts during reconfiguration.
Grant Required Permissions
You must log in as an administrator or provide the following permission access to the client account:
- Navigate to All Accounts → Search for the company or client → Select Action against the chosen company → Click Edit.
- Please enable the toggles listed below:
- Interactions Hub (Digital Channels) with channels as Voice, Whats App

- License of Interactions
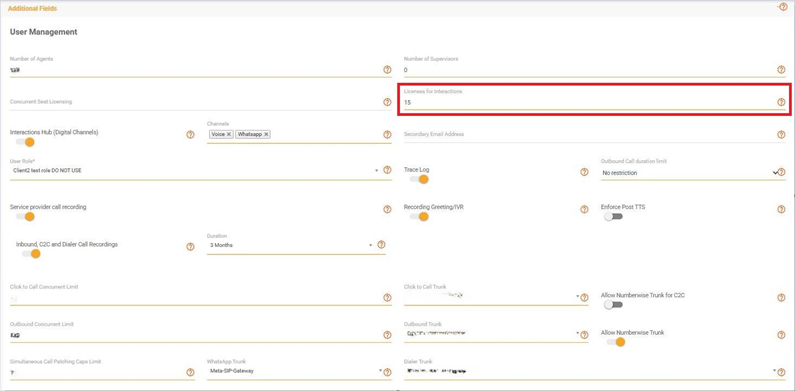
- WhatsApp Trunk selected as “Meta-SIP-Gateway”
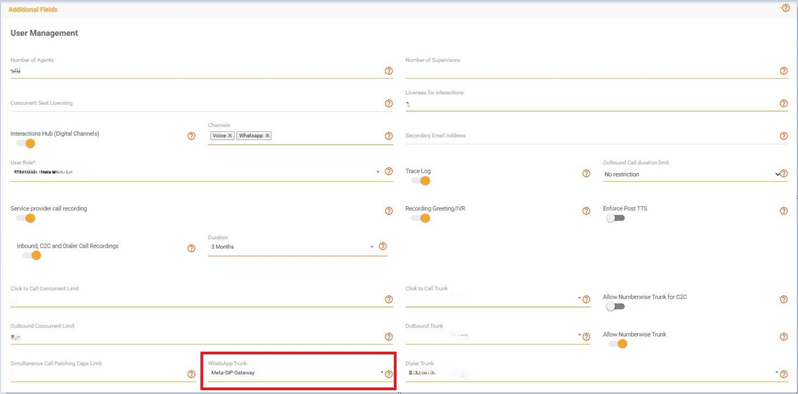
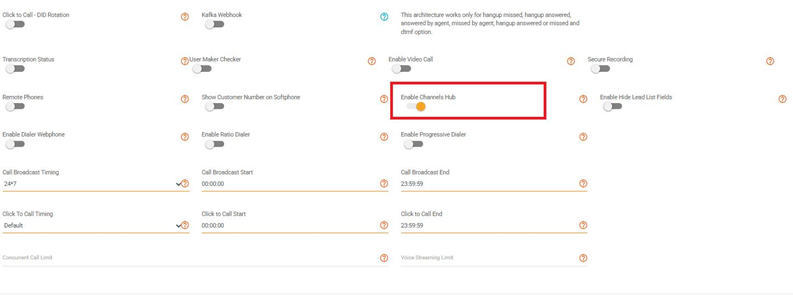
- Channels Hub
Continue Reconfiguration
The remaining process will follow the same steps (Step 1 to Step 7) as outlined previously, depending on the specific use case.
Step 1: Log in to the Omni Platform
- Open your preferred browser.
- Enter the URL: https://omni.tatatelebusiness.com/
- Login using your registered credentials.
- After successful login, the system redirects you to the Omni Dashboard, which serves as the control center for configuring channels, integrations, and settings.
The Omni platform is where WhatsApp numbers are registered and managed. Smartflo will pull WhatsApp configuration details from Omni.
Step 2: Retrieve the Access Token
This token allows Smartflo to authenticate securely with your WhatsApp Business account.
- On the Omni dashboard, click Settings in the left sidebar.
- Select Channels to view communication channels configured for your account.
- Click on WhatsApp --> Details.
- Under this page, you will see an Access Token generated for your WhatsApp setup.
- Copy this token securely.
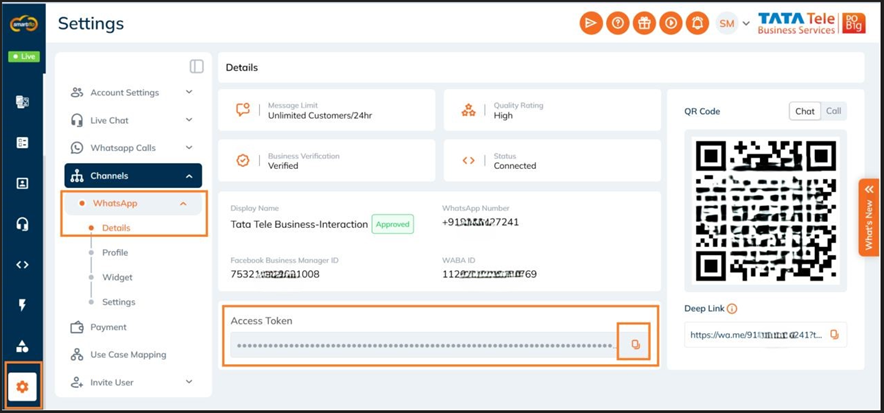
Smartflo uses this token as a secure identifier to fetch and send WhatsApp messages on your behalf. Without this token, Smartflo cannot link to your Omni WhatsApp configuration.
Security Note: The Access Token grants access to your WhatsApp account. Never share or expose this token.
Step 3: Configure WhatsApp Channel in Smartflo
This is where your WhatsApp number is added to Smartflo.
- Log in to your Smartflo Admin Panel.
- Go to Channels → WhatsApp Channel.
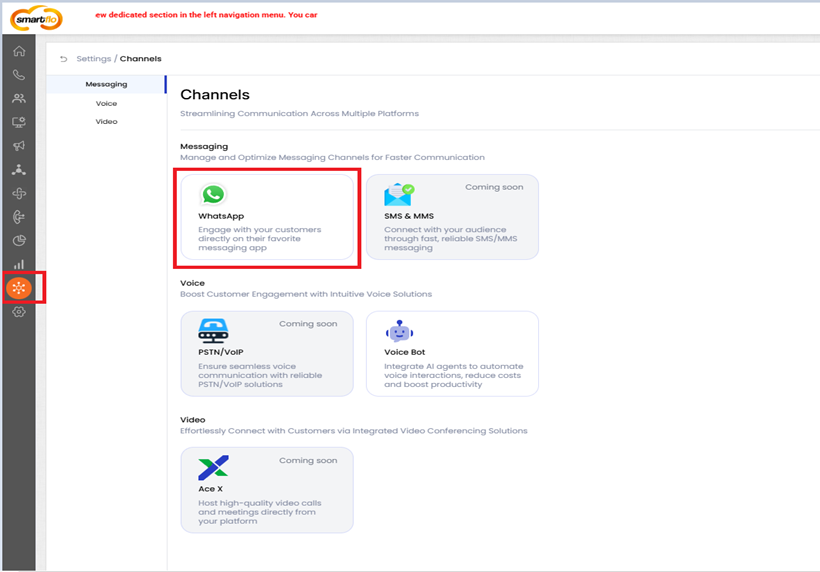
- Click Add New Number to start onboarding.
- Select the Omni icon because your number is managed through Omni.
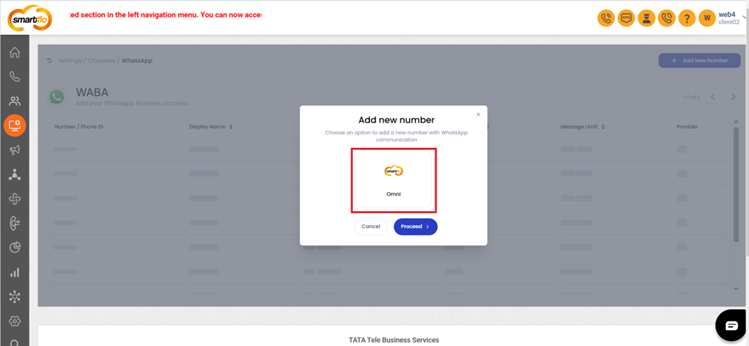
- Click Proceed.
- Enter the required fields:
- WhatsApp Number: Ensure correct country code (e.g., +91XXXXXXXXXX)
- Access Token: Paste the token copied from Omni (Step 2)
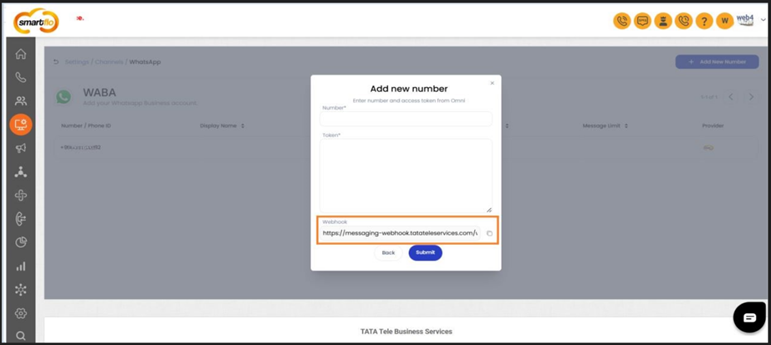
- The system will now generate a Webhook URL
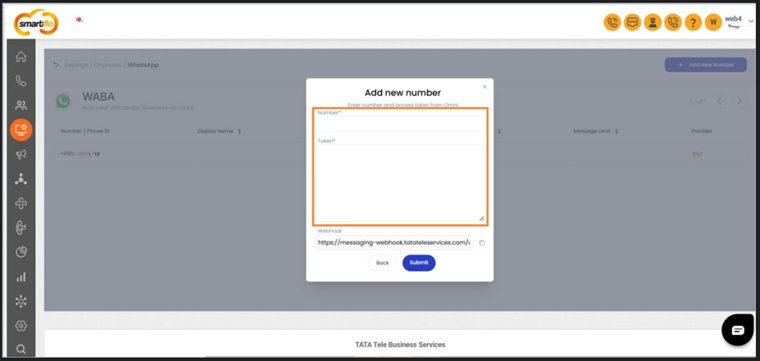
- Save this Webhook URL — you will need it in Step 4.
This connects your WhatsApp number from Omni to Smartflo so that Smartflo can send outgoing messages and receive incoming events.
Step 4: Configure Webhooks on Omni for Incoming Messages
Webhooks are required for receiving real-time message and status notifications in Smartflo.
- Copy the Webhook URL generated in Step 3.
- Return to the Omni Portal.
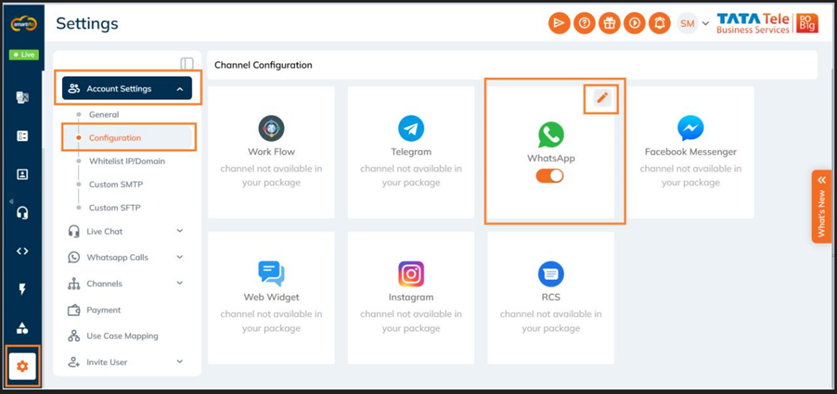
- Navigate to: Settings → Account Settings → Configuration
- Click on Edit WhatsApp Channel.
- Enable the following:
- Additional Callback URL
- Additional Status Callback URL
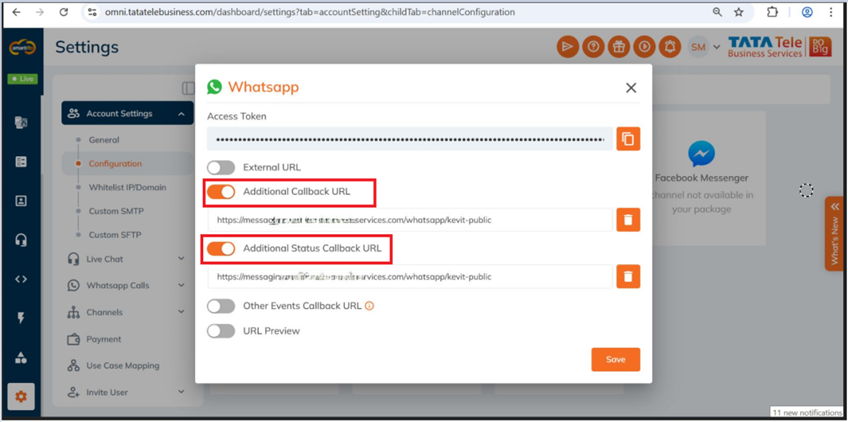
- Paste the Webhook URL into both fields.
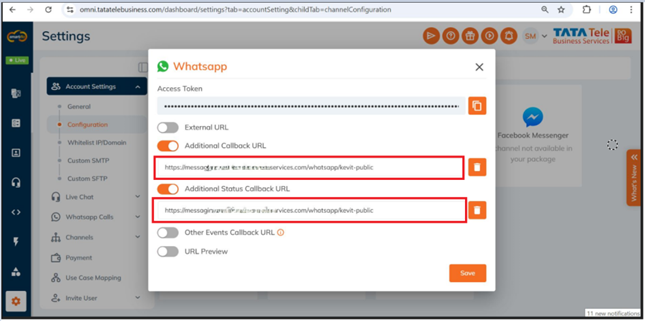
- Click Save.
Callback URL → forwards incoming user messages to Smartflo.
Status Callback URL → sends delivery/read status updates to Smartflo.
In addition to messaging, Smartflo can also handle WhatsApp voice calls using SIP configuration. Please follow the steps below specifically for handling voice calls.
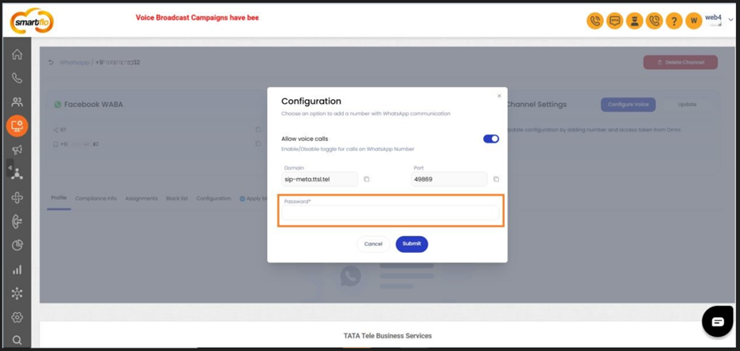
Step 5: Retrieve SIP Credentials from Omni
These credentials are required for enabling WhatsApp voice calling through Smartflo.
- Log in to the Omni Platform.
- Navigate to: Settings → WhatsApp Calls → Settings
- Add the following:
- SIP Host: sip-meta.ttsl.tel
- SIP Port: 49869
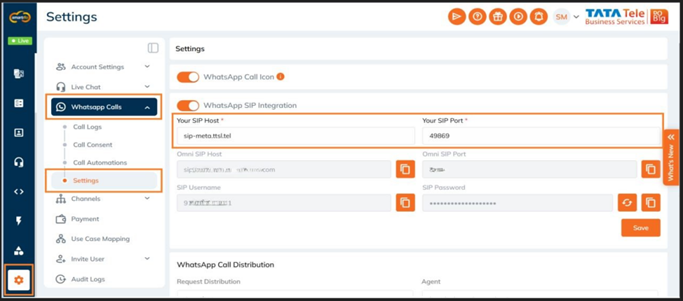
- Click Save.
- After saving, new fields will appear:
- Omni SIP Host
- Omni SIP Port
- SIP Username
- SIP Password (copy this)
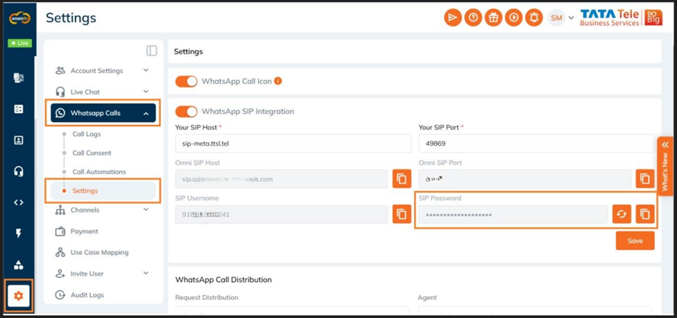
The SIP credentials connect WhatsApp’s voice infrastructure with Smartflo’s calling engine. The password specifically is needed for authentication.
Step 6: Configure WhatsApp Voice on Smartflo
- Log into Smartflo Admin Panel.
- Navigate to Channels → WhatsApp Channel.
- Find the WhatsApp number that was already configured in earlier steps.
- Click the Smartflo icon next to that number.
- Click Configure Voice.
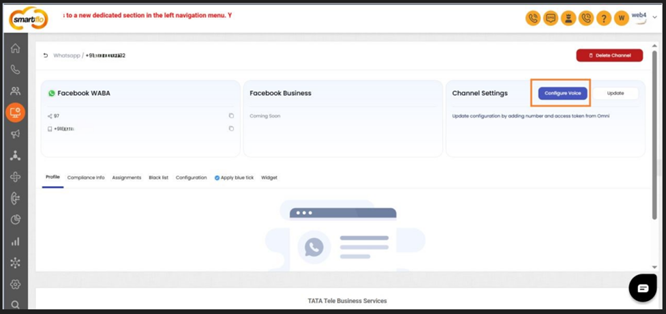
- Paste the SIP Password retrieved in Step 5.
- Click Submit to finalize.
Step 7: Verification and Testing on Smartflo for WhatsApp Voice and Messaging
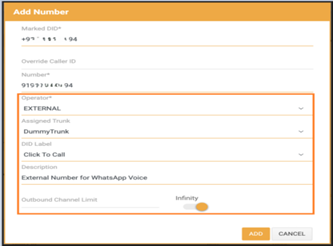
- Once the setup is complete, Login to smartflo page and navigate to the Smartflo inventory page. Add the WhatsApp number to the inventory and assign it to the customer account, following the existing process for DID addition and assignment.
- For the remaining sections, please use the details provided below.
- Log in to the Smartflo panel and add a new interaction user. If the user already exists, edit the account to ensure the following toggles and permissions are enabled:
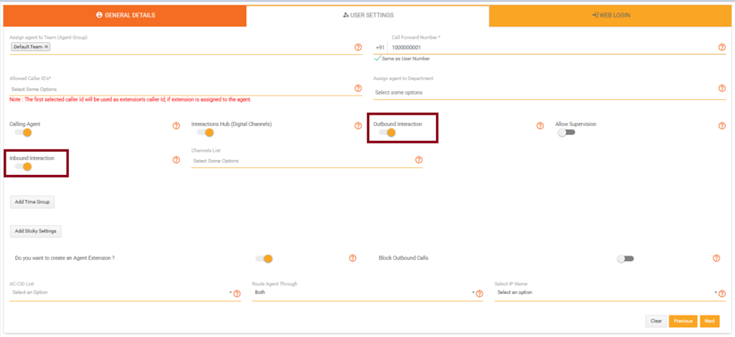
User Settings:
- Enable the Interactions Hub (Digital Channels) toggle.
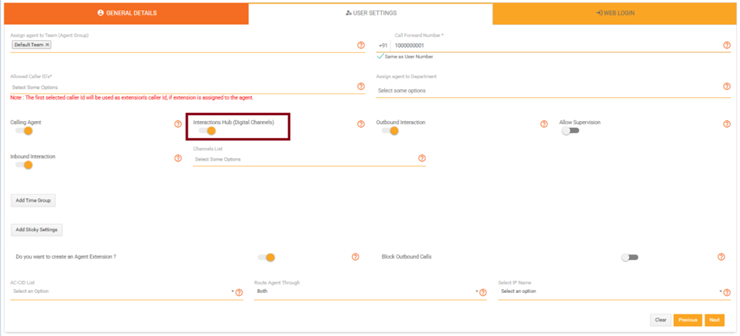
- Once enabled, activate Outbound Interaction and Inbound Interaction.
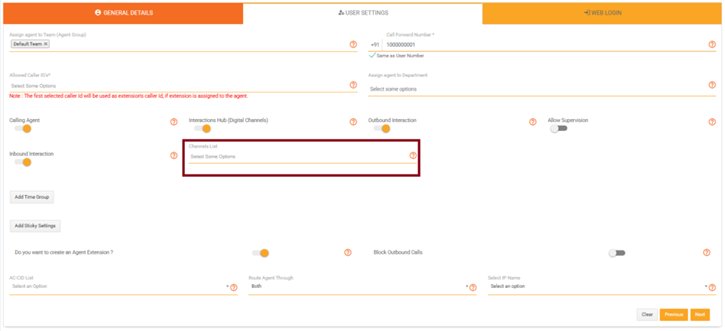
- In the Channel List, select the WhatsApp number.
- Grant the agent extension permission to the user.
Web Login: Ensure the user role has permission to add new contacts.