Salesforce CRM Integration Guide
📘 Integration Guide: Salesforce CRM with Smartflo Dialer
This document provides a step-by-step guide to integrating Salesforce CRM with Smartflo Dialer for seamless calling and call logging. The integration enables users to:
- 📞 Make calls directly from Salesforce
- 📝 Log call details automatically
- 🎧 Access call recordings for future reference
✅ Prerequisites
Before starting the integration, ensure you have the following:
1. Smartflo Requirements
- Smartflo Admin Account – For telephony integration setup
- Smartflo Agent Account – For making/receiving calls
- Dialer Campaigns Setup – At least one empty lead list assigned throughout the campaign
2. Salesforce Requirements
- Active Salesforce CRM Account with Telephony Integration
- API Permissions enabled (for telephony, leads, and marketplace)
- Marketplace Access to install the Open CTI Softphone package
🔧 Integration Steps
Step 1: Enable Salesforce Dialer Integration in Smartflo
-
Log in to the Smartflo Telephony Portal
-
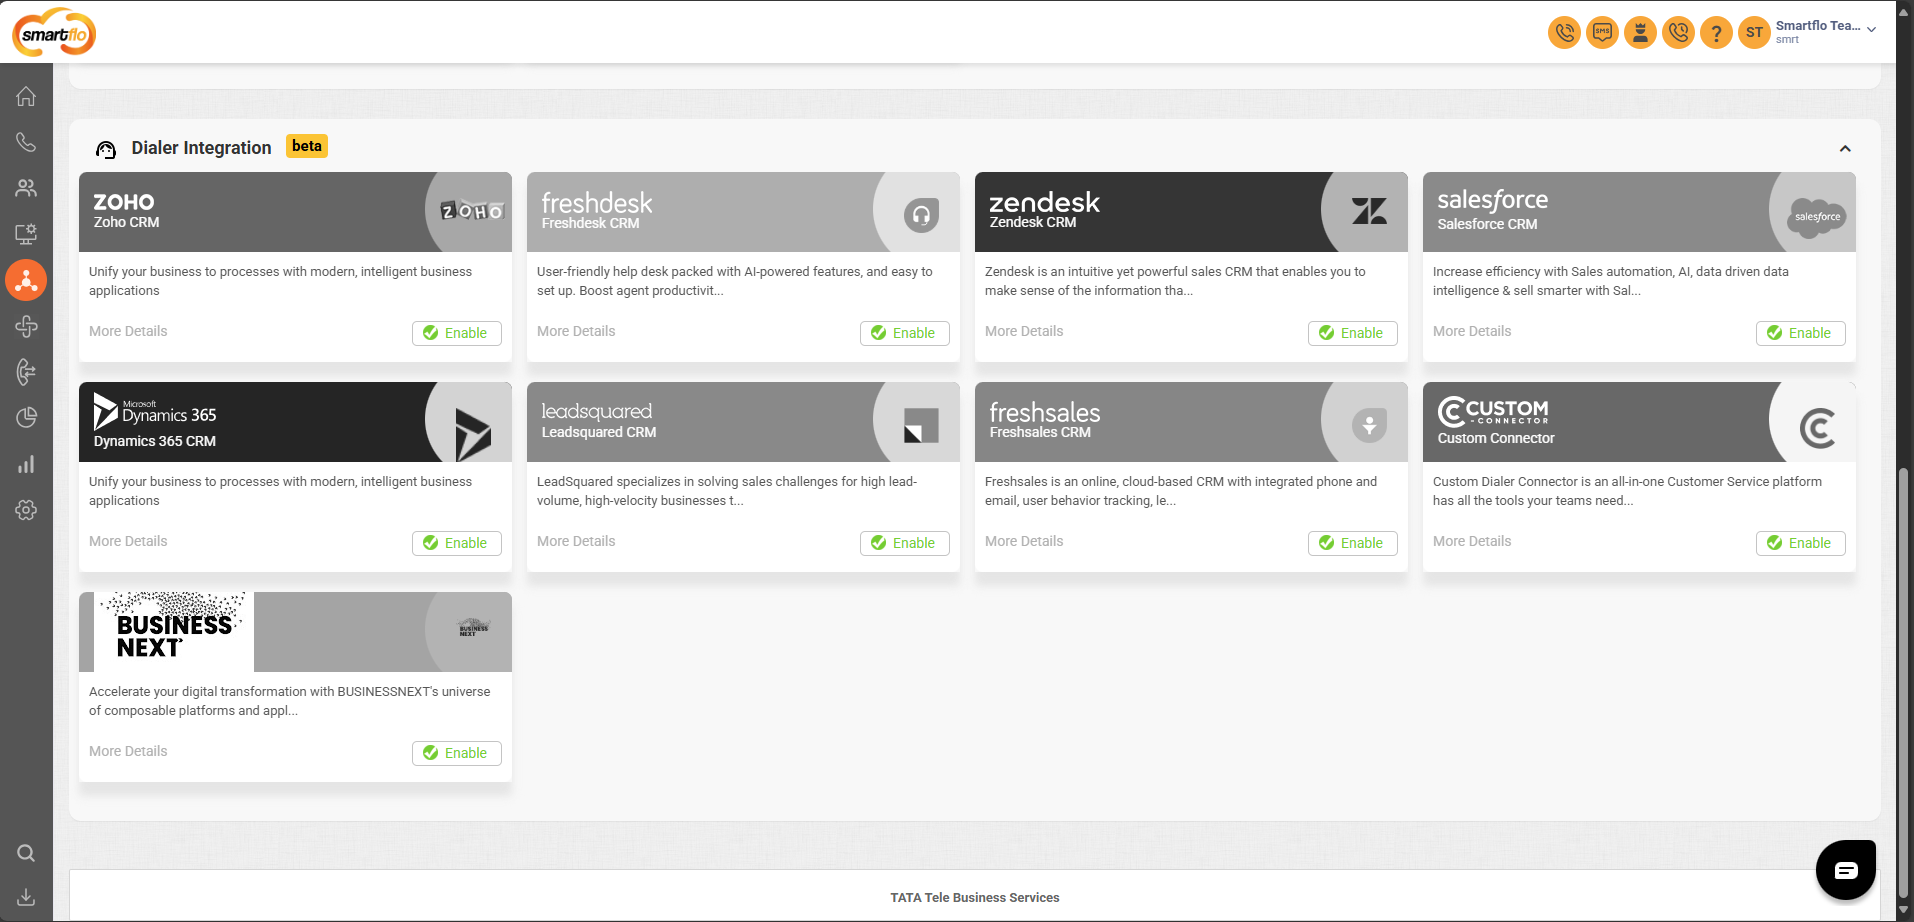
Navigate to the Integration tab
-
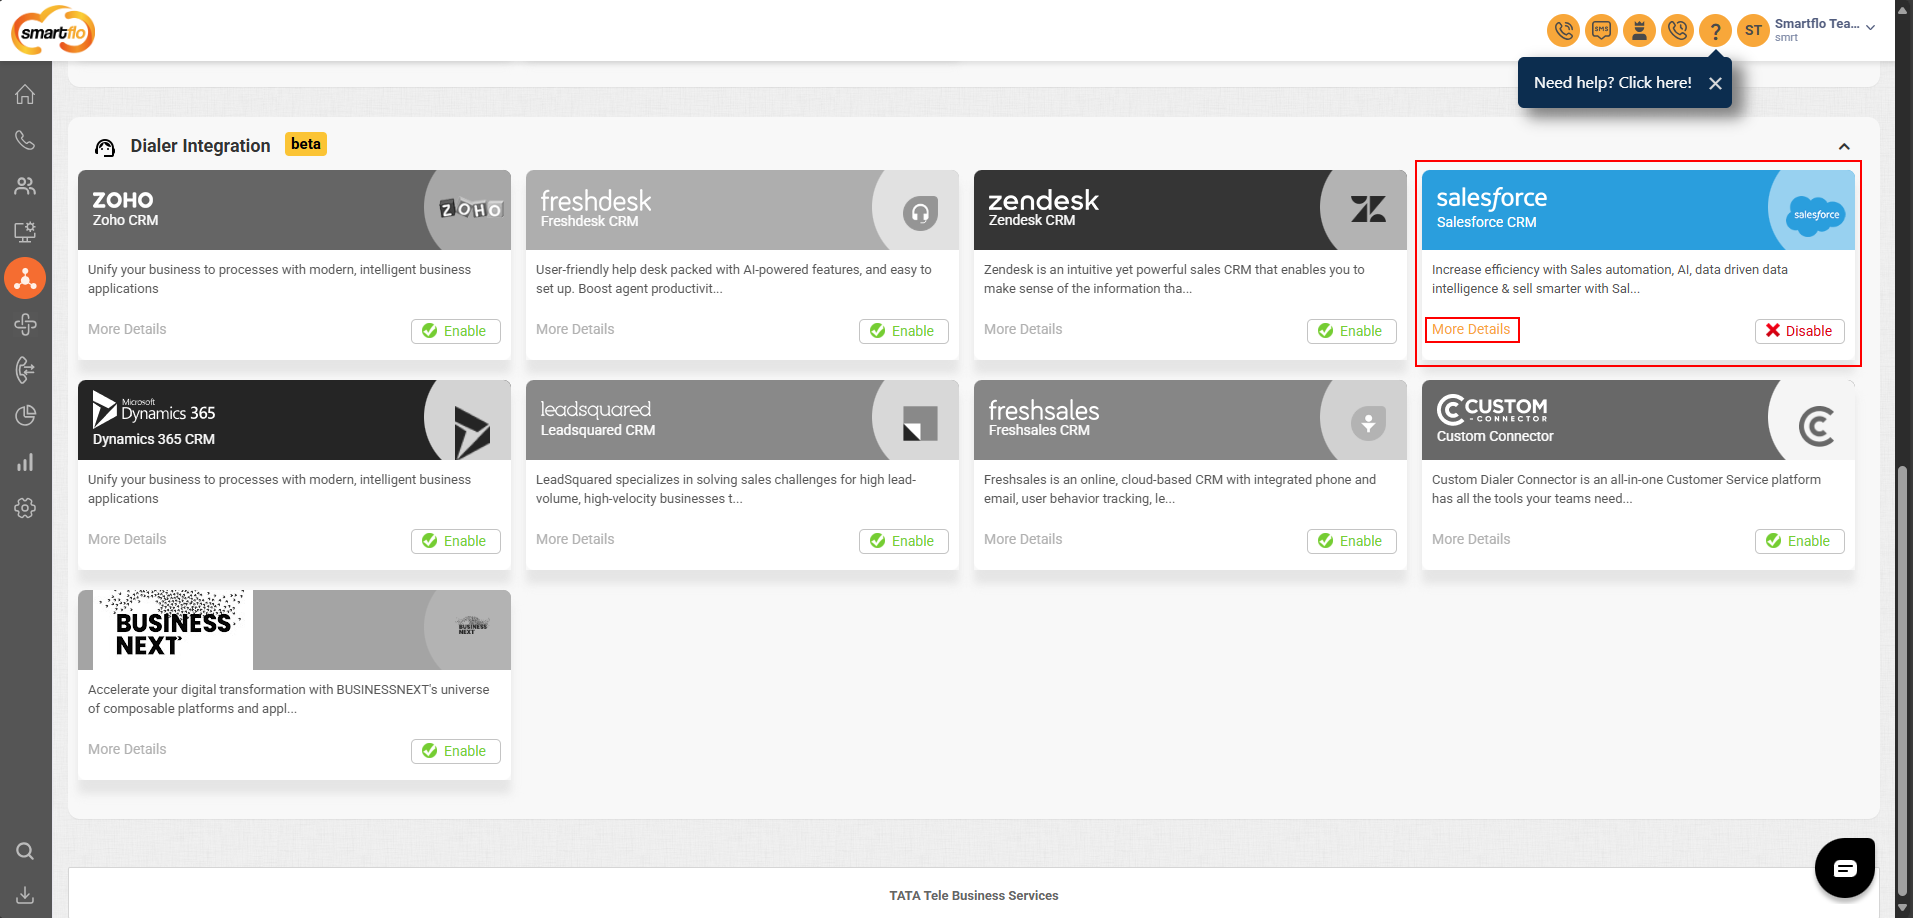
Click Enable for Salesforce CRM and then click More Details

-
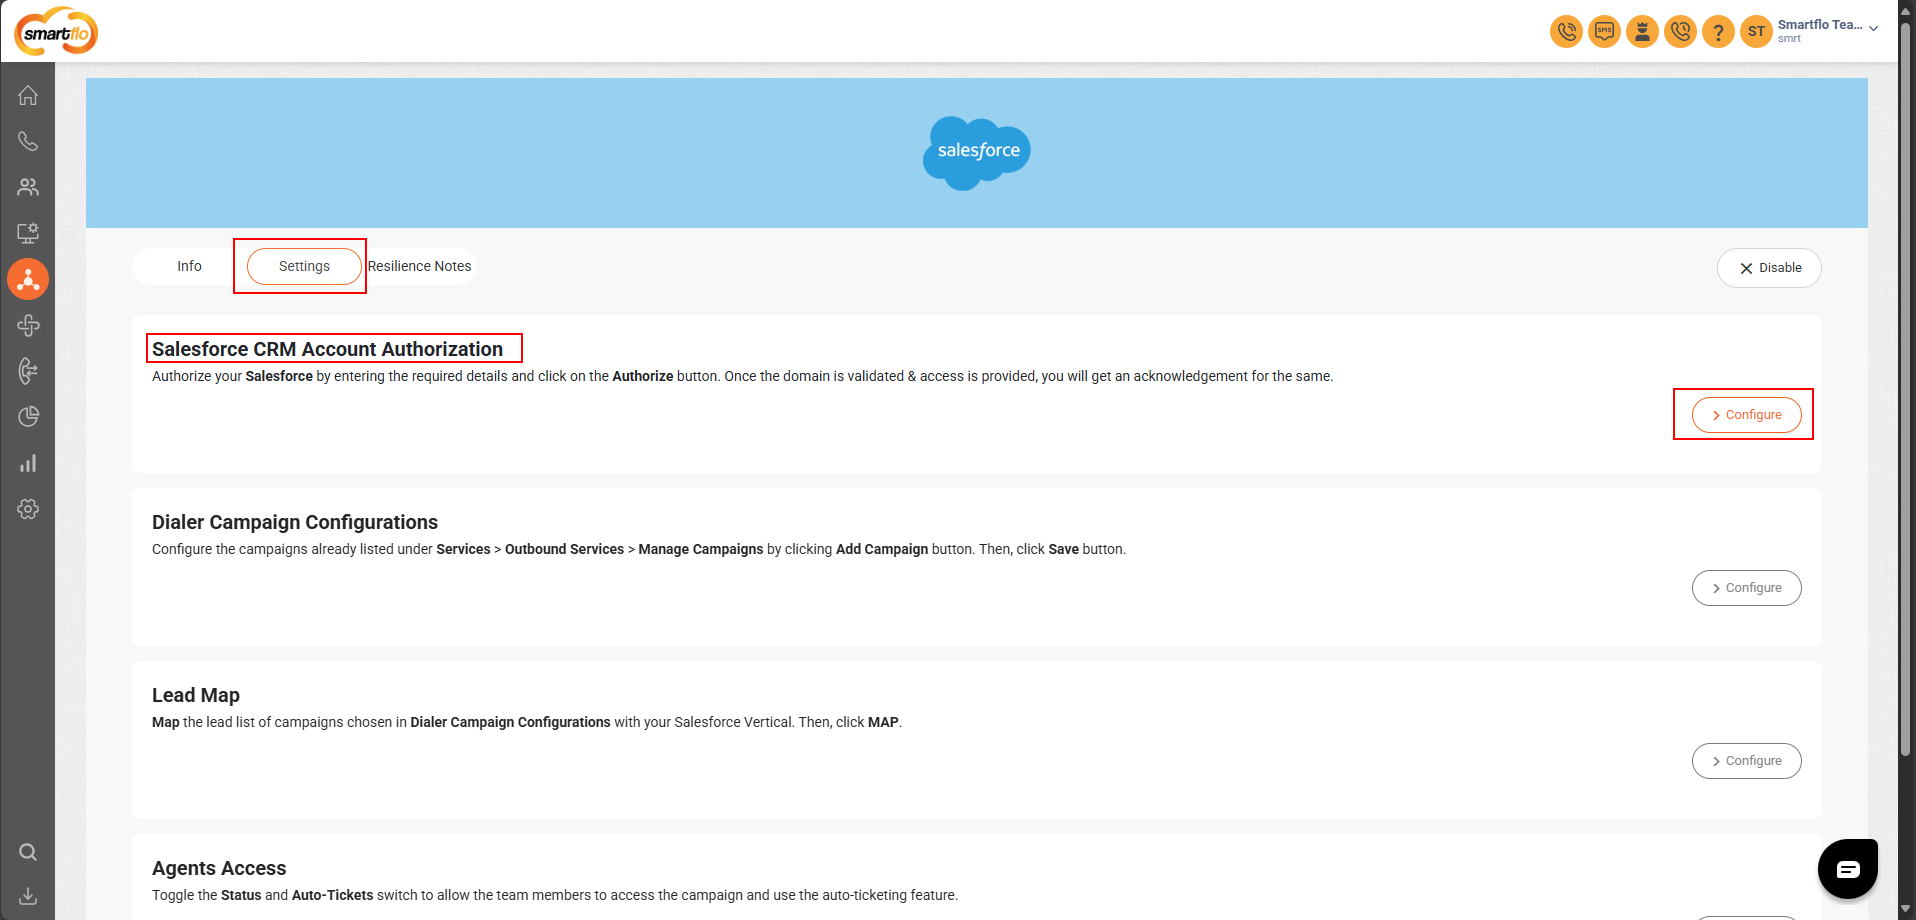
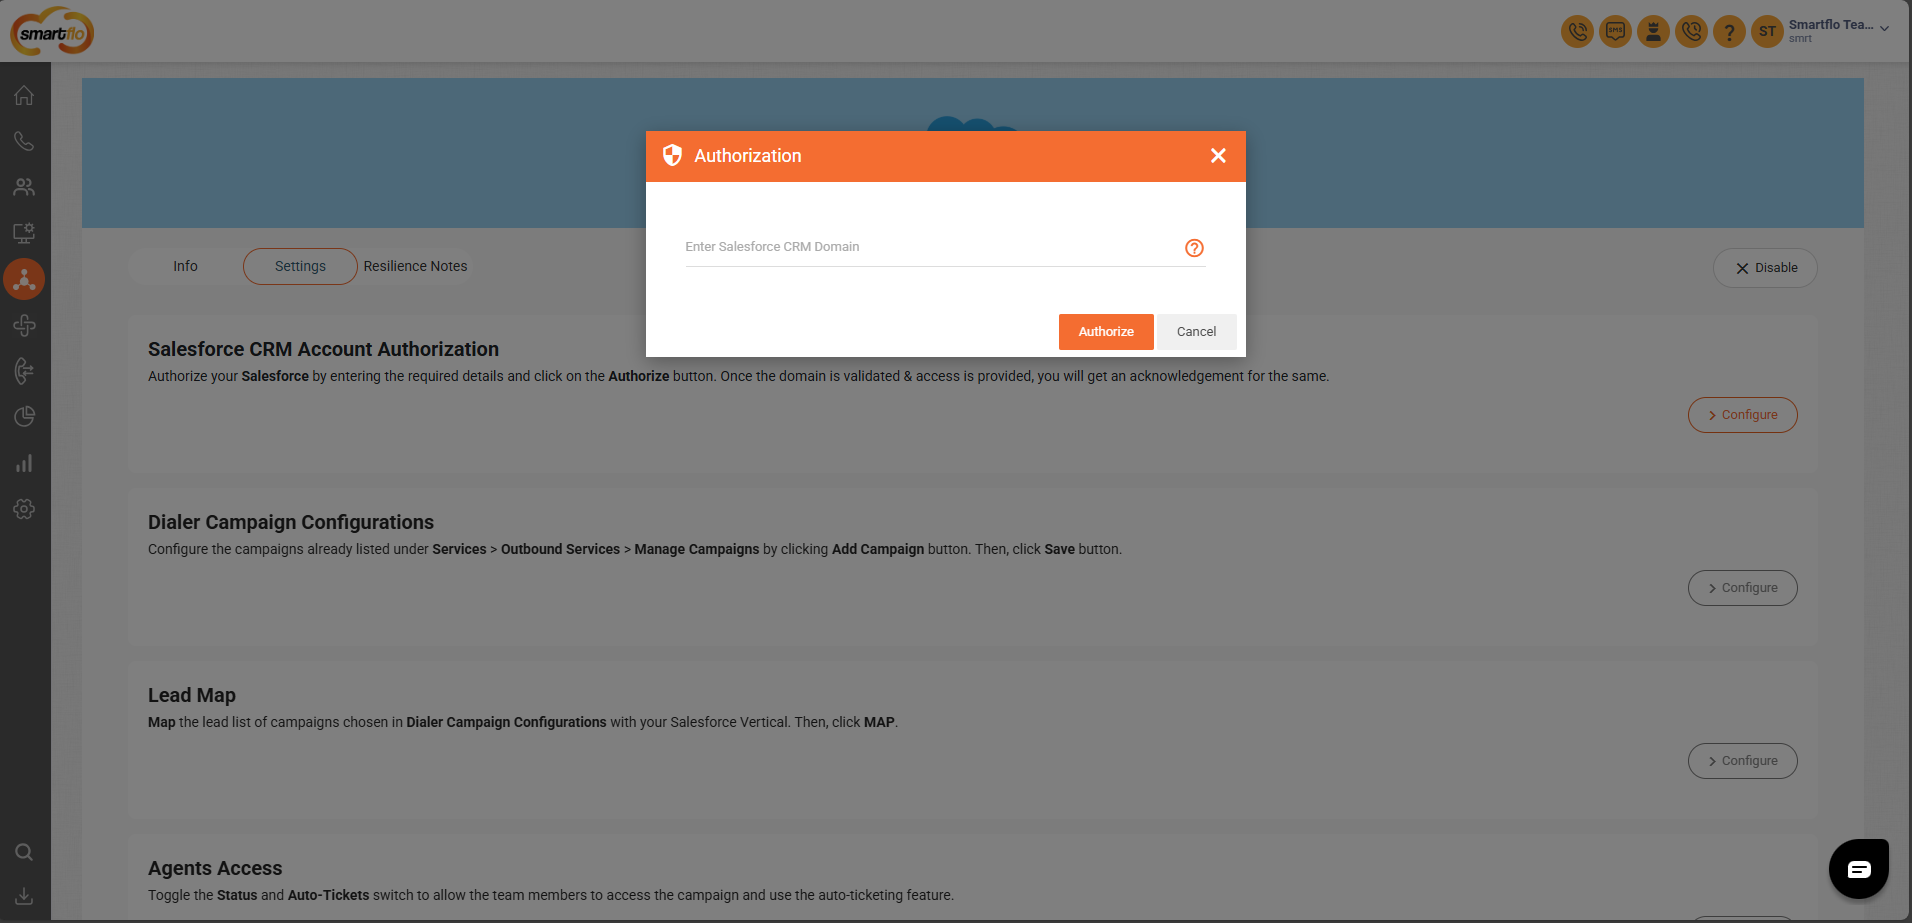
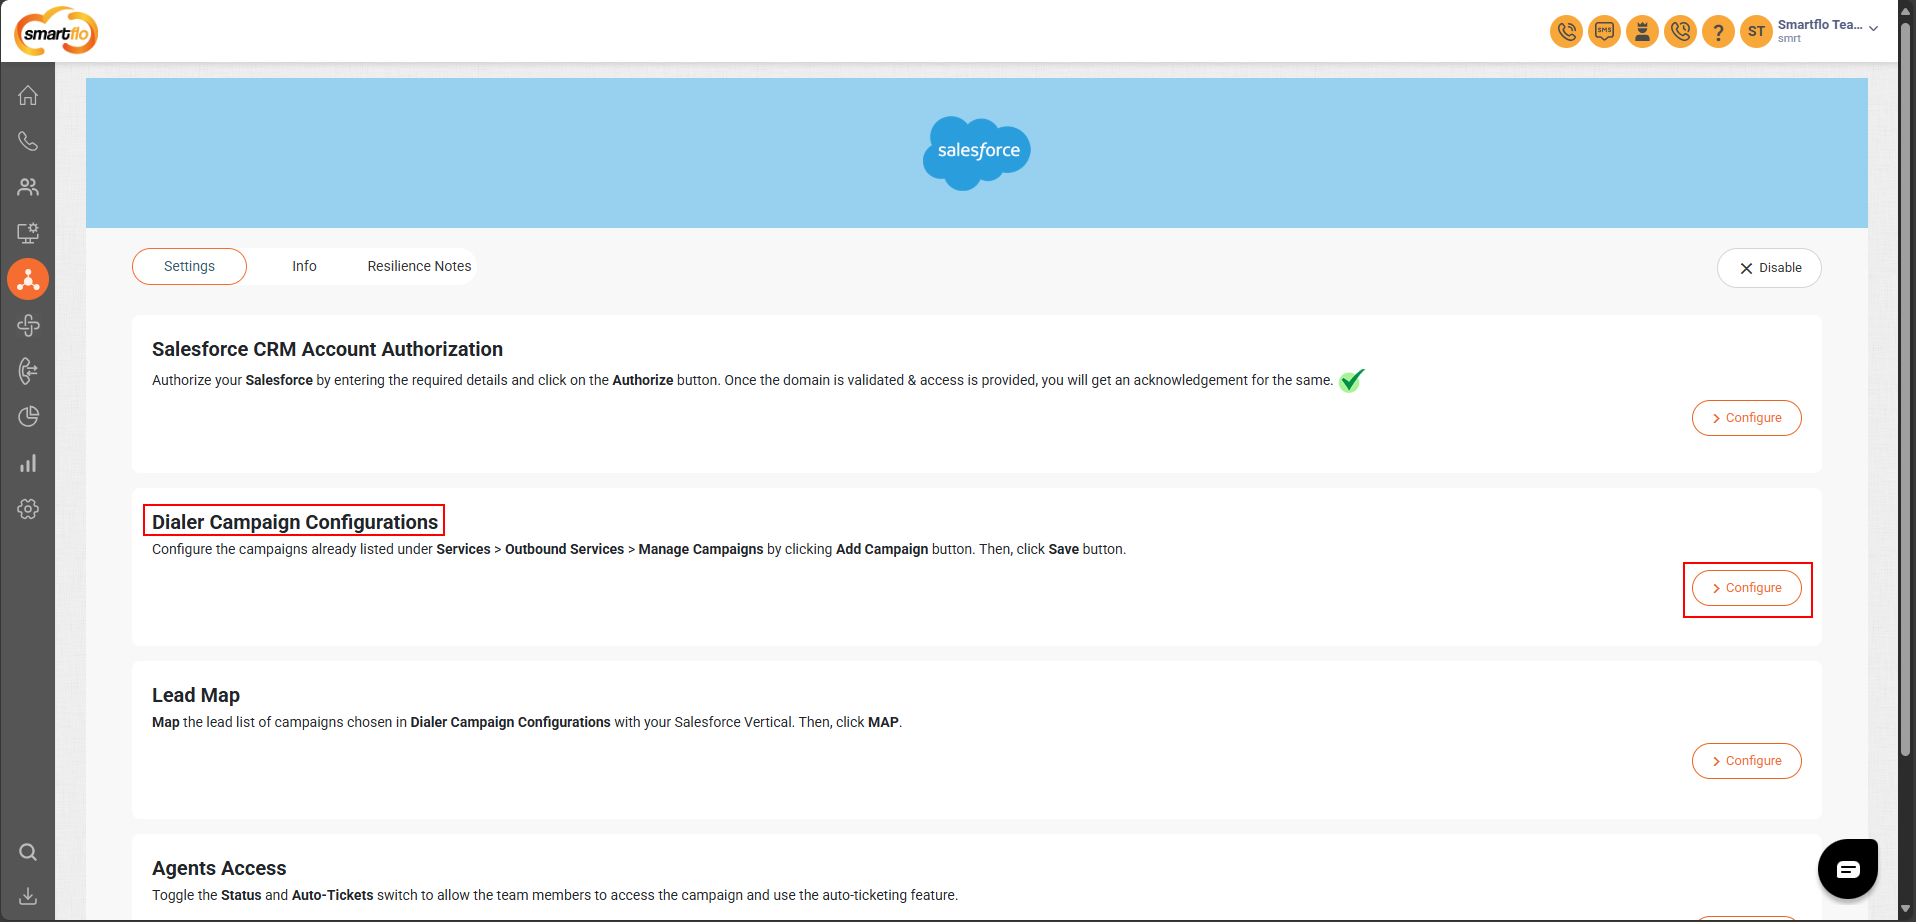
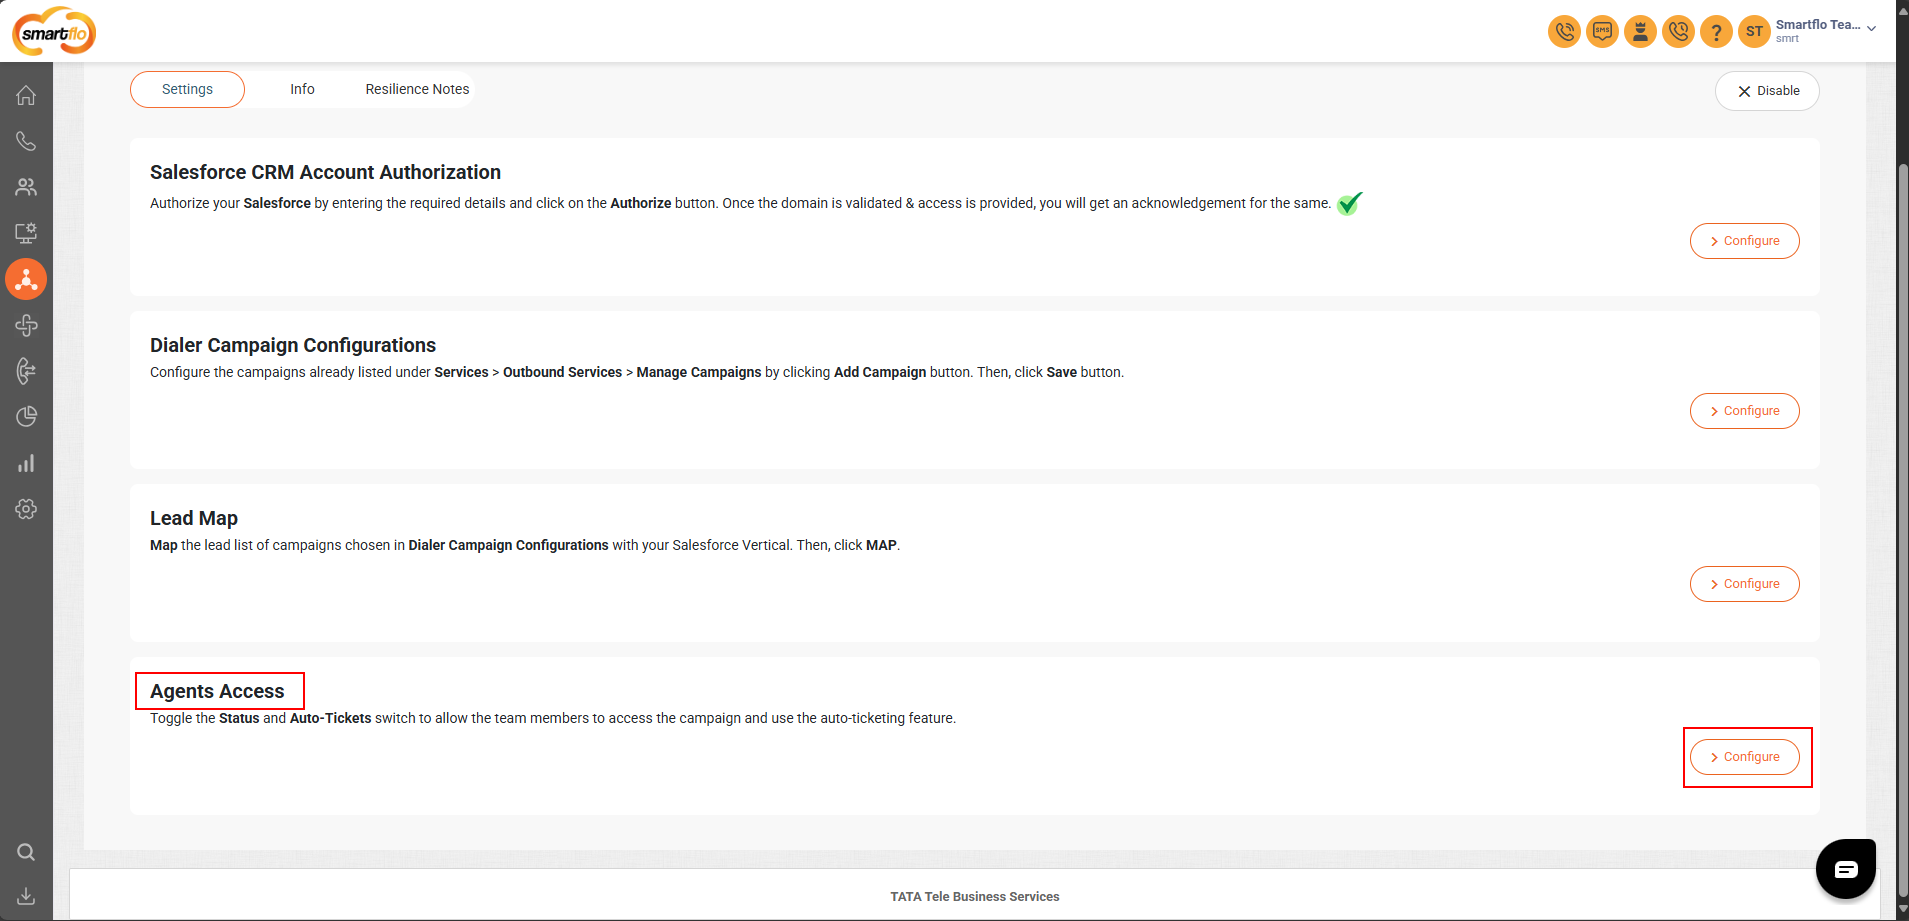
In the Settings tab, click Configure under Salesforce CRM Account Authorization
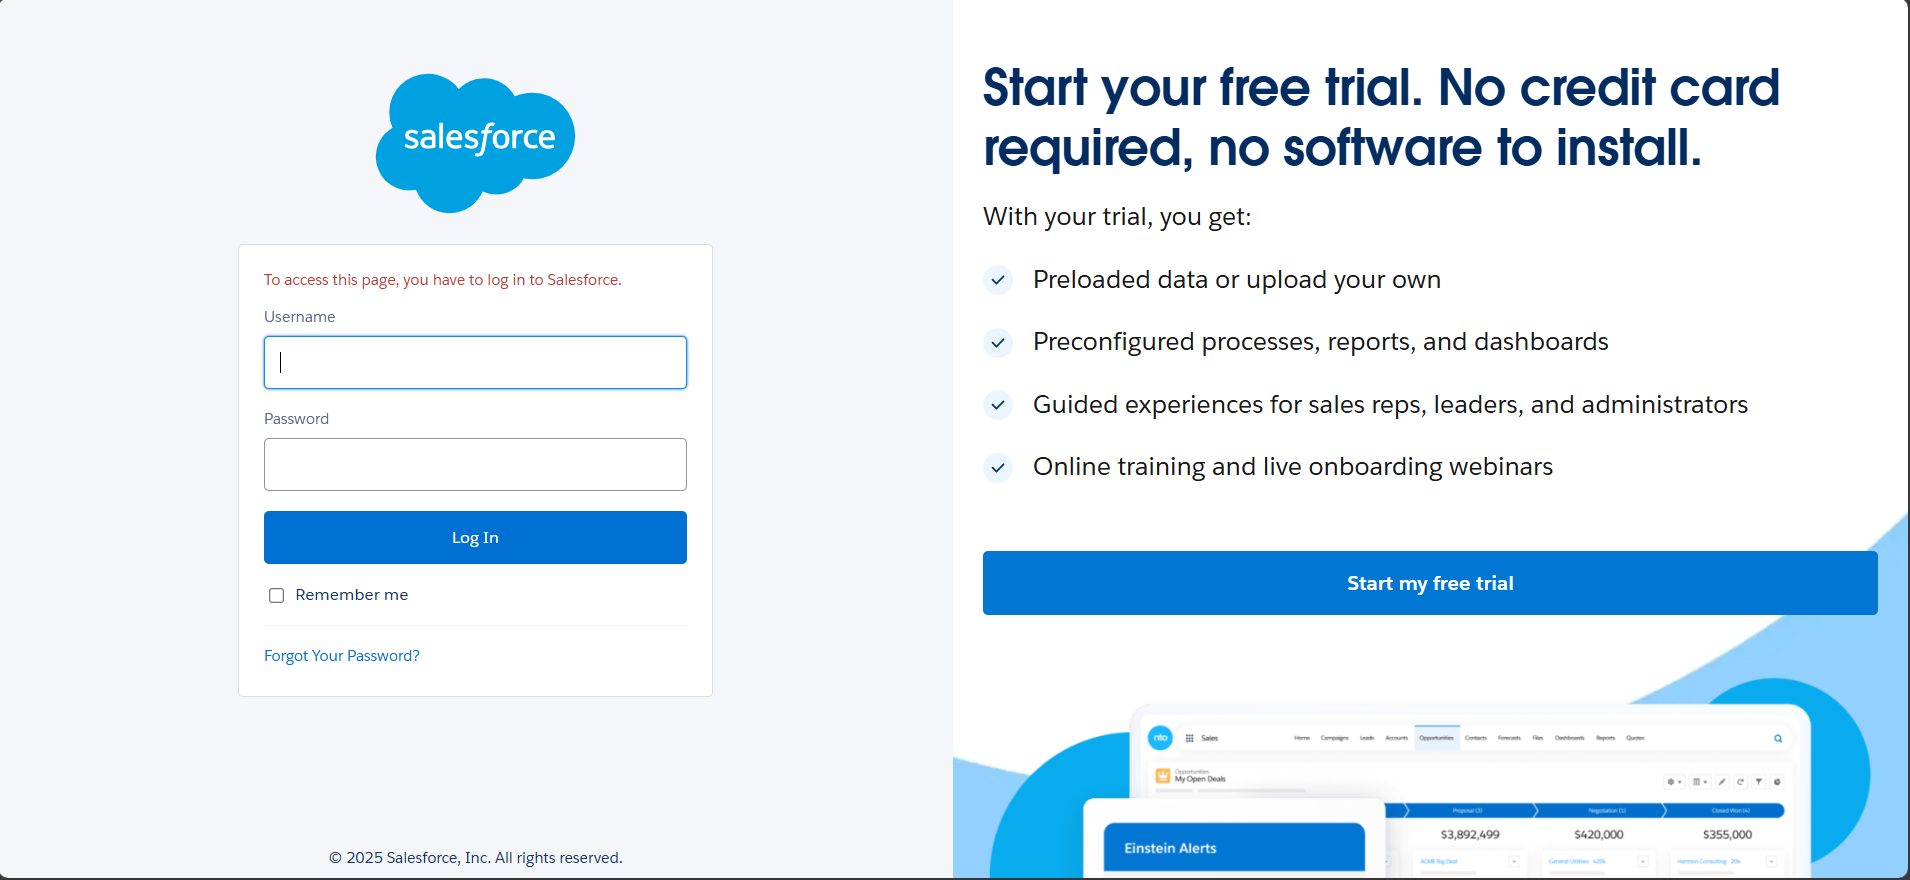
- Login to your Salesforce CRM.
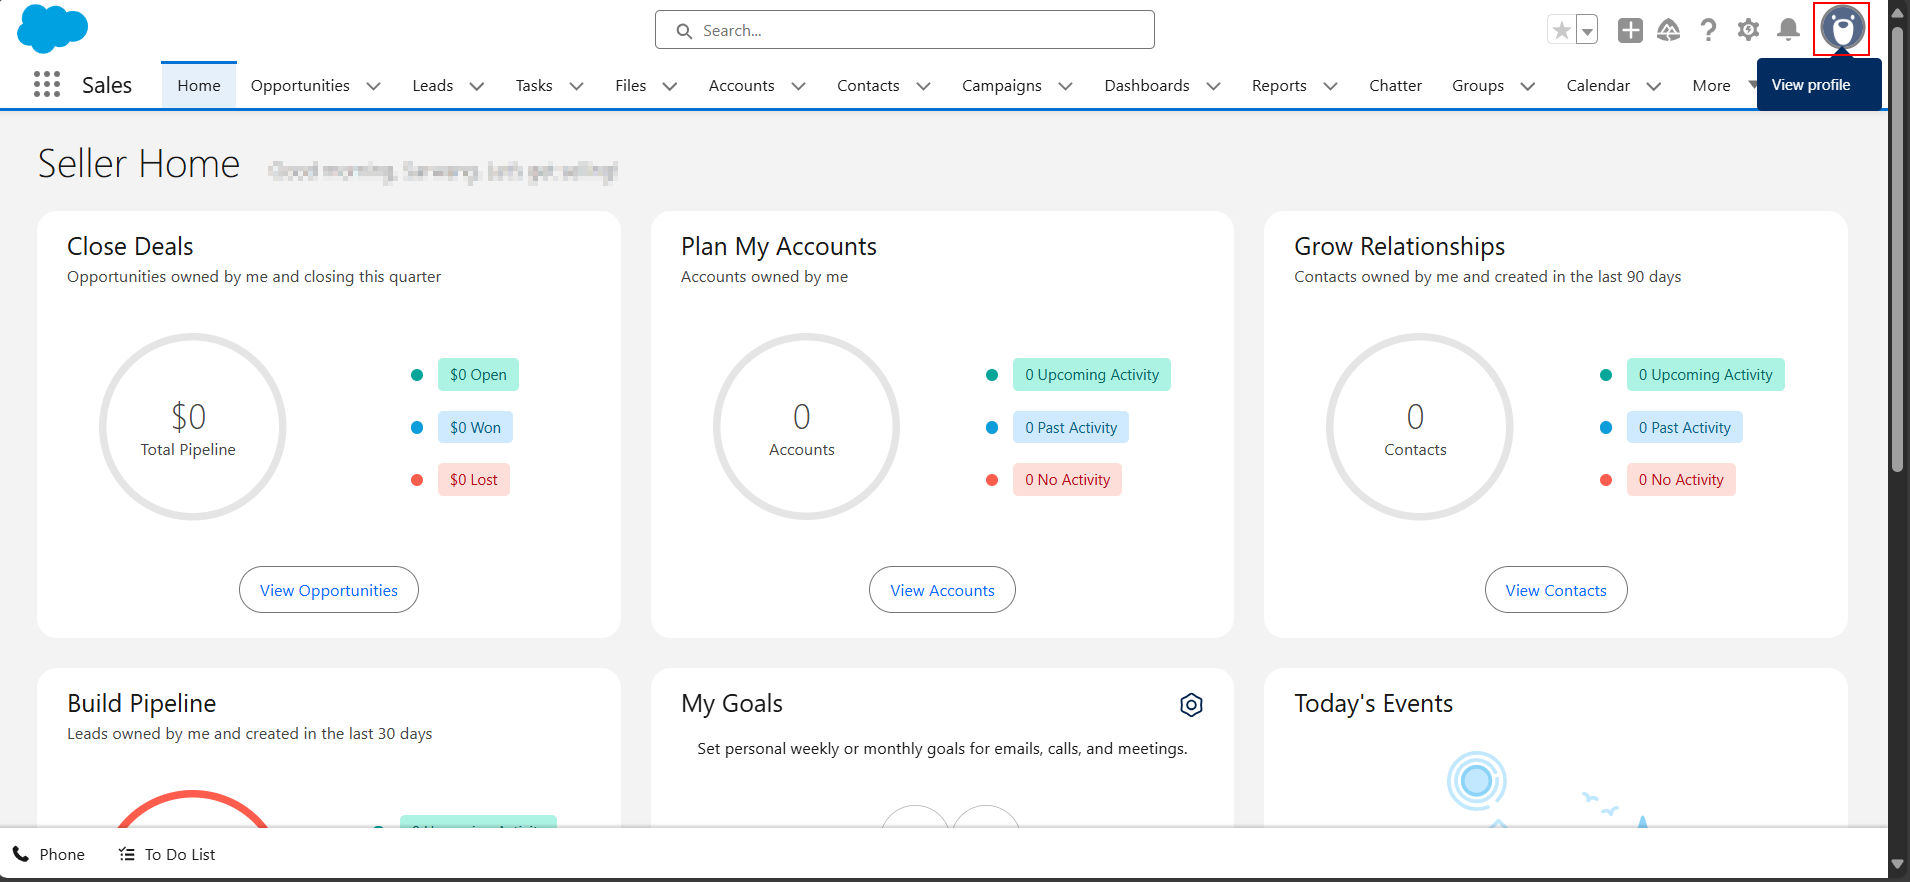
- Click on View profile.
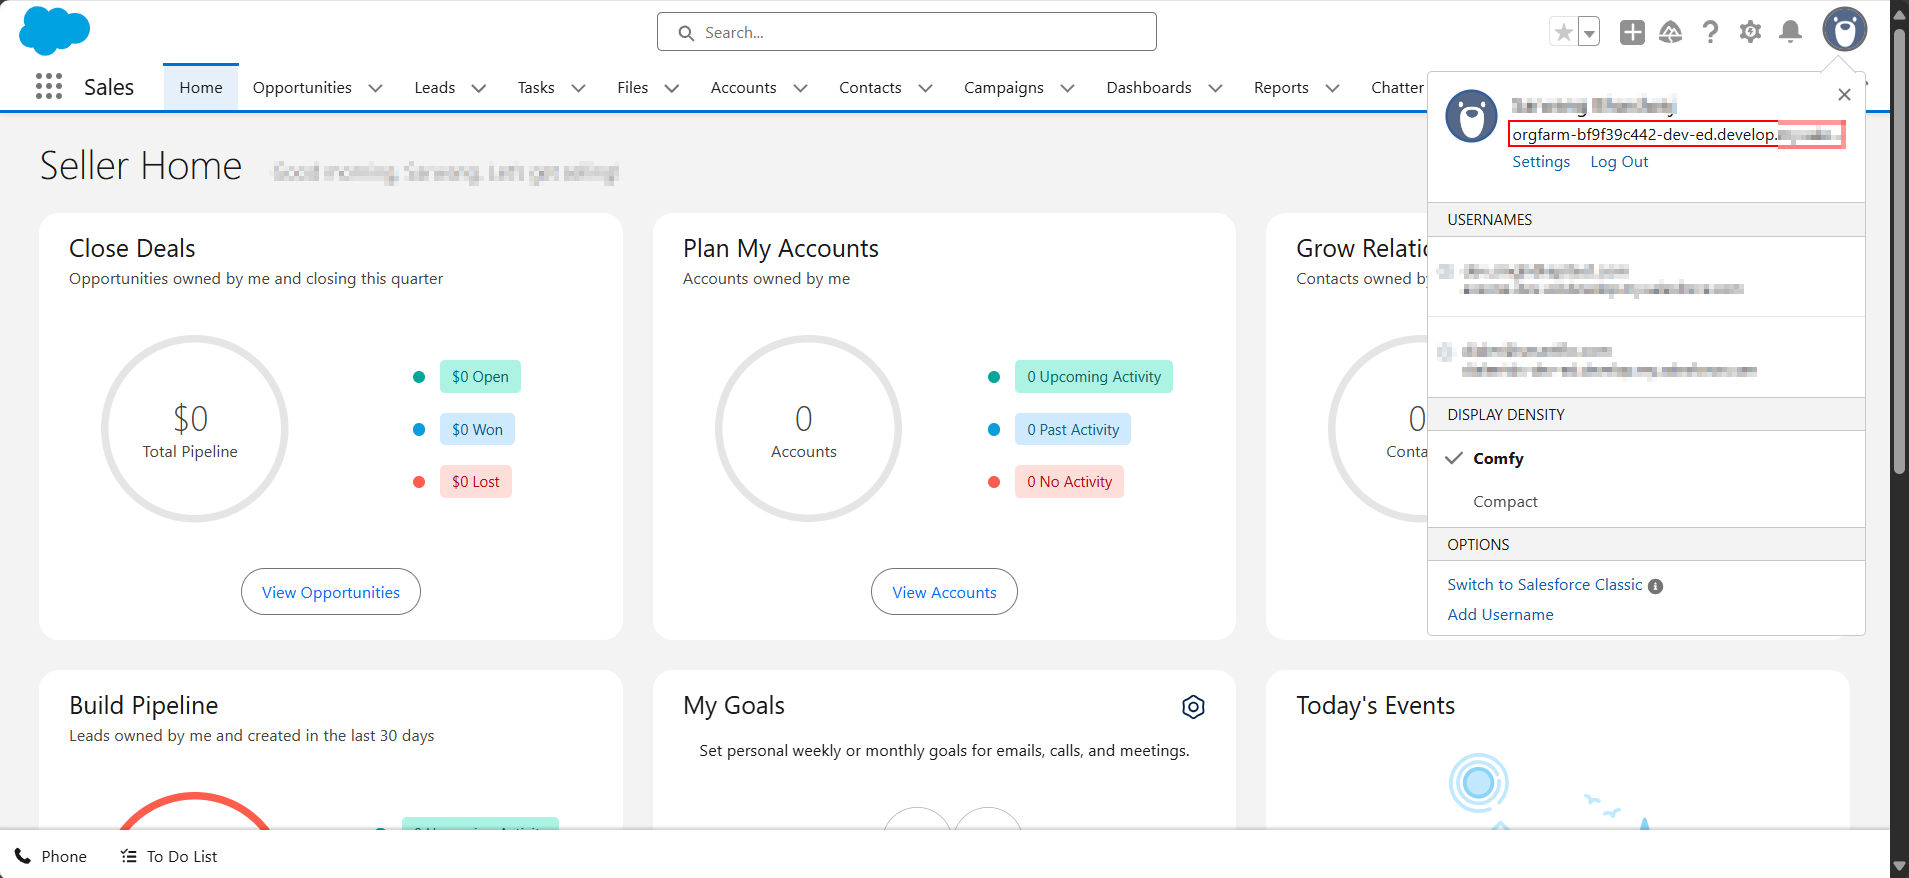
- Copy the CRM Domain and enter it in the Authorization tab within the Smartflo portal.
- Format:
Add https:// before your Salesforce instance domain, for example: https://<your-instance>.salesforce.com
Step 2: Dialer Campaign Configuration
- Go to Dialer Campaign Configuration, choose or Add Campaign
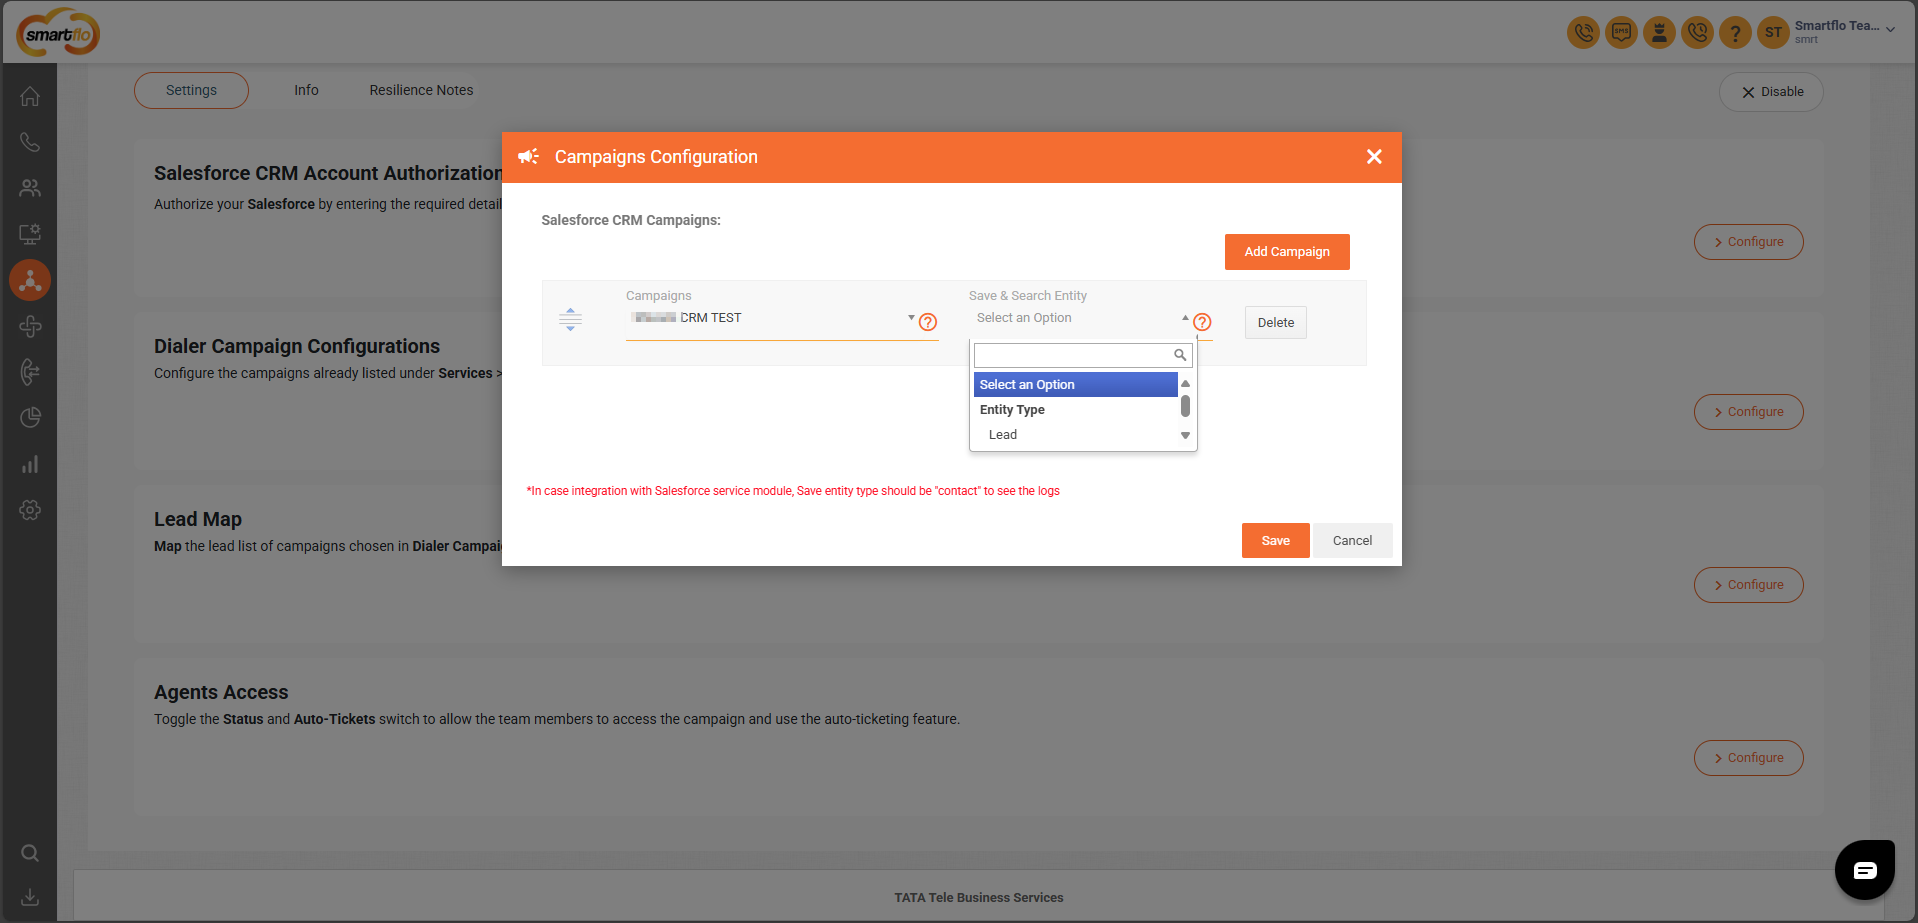
Note:In the Save and Search Entity setting, select Lead,Contact,Opportunity,Task or Case based on how your customer numbers are being stored.
If customer numbers are saved as Leads, select Lead.
If customer numbers are stored as Contacts, select Contact.
If customer numbers are stored as Opportunity, select Opportunity.
If customer numbers are stored as Task, select Task.
If customer numbers are stored as Case, select Case.
Important Note:
- Assign an empty Lead List during integration to ensure smooth data synchronization and prevent any error
- Only one Lead List should be assigned per campaign.
- The system supports two entity types: Lead and Contact only.
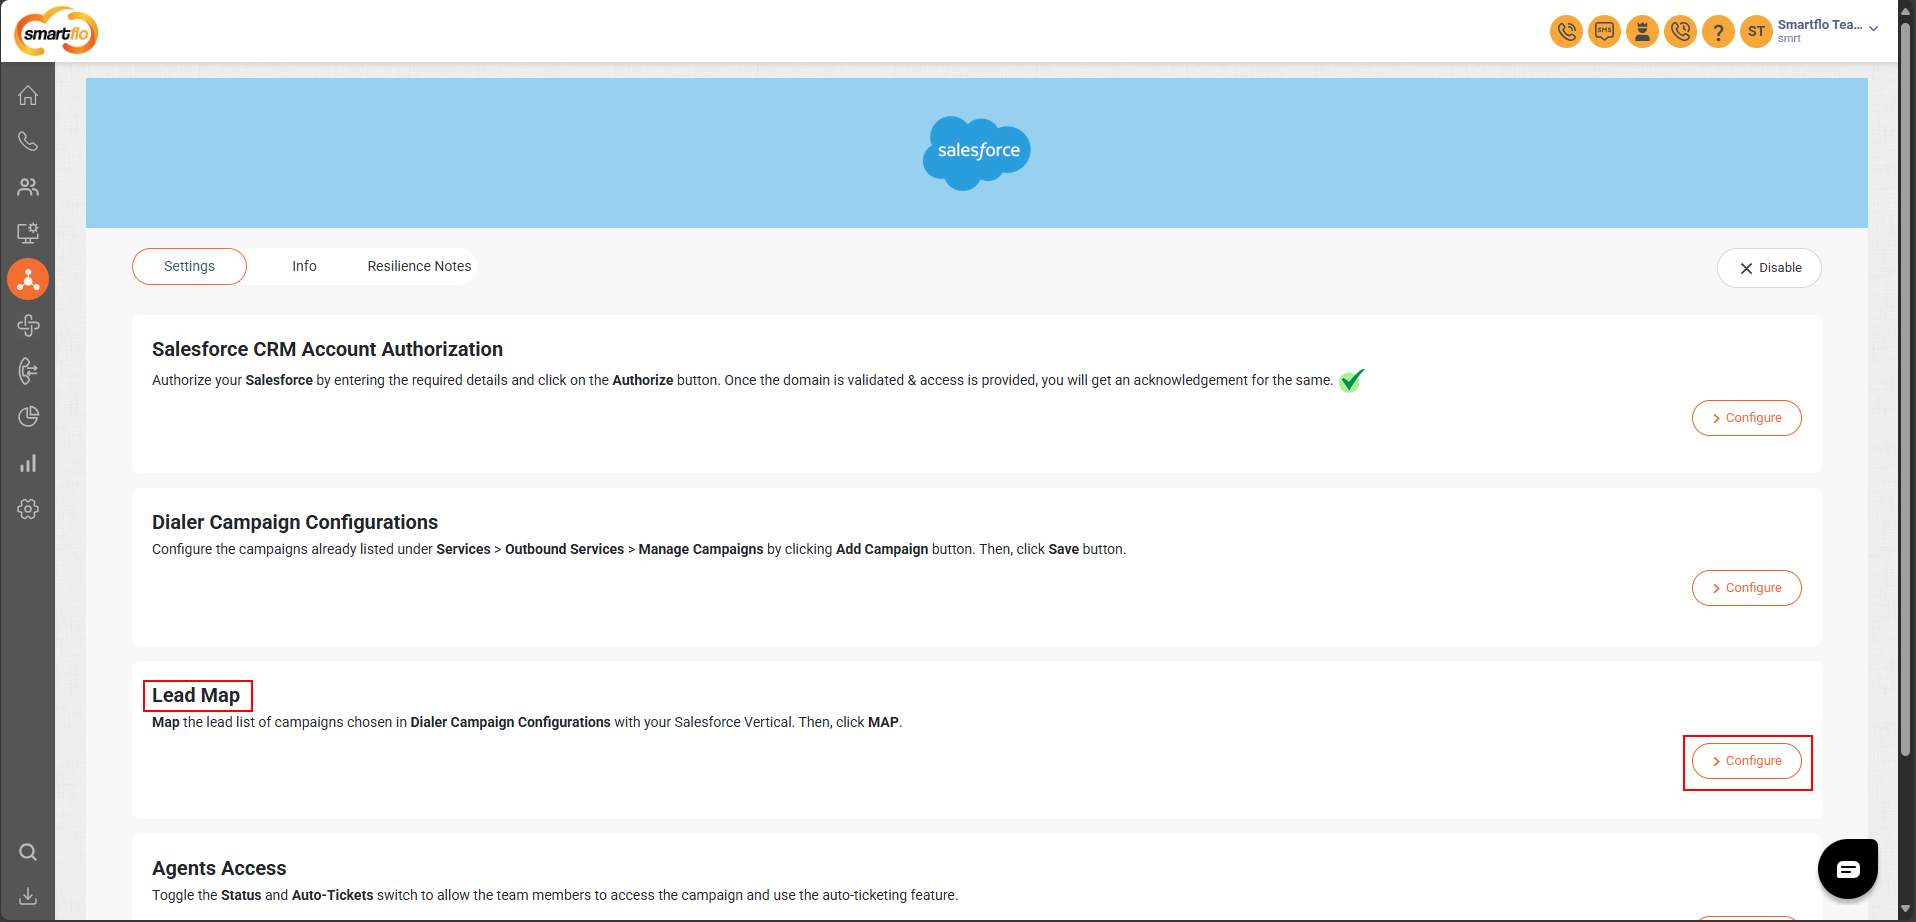
Step 3: Lead Map Configuration
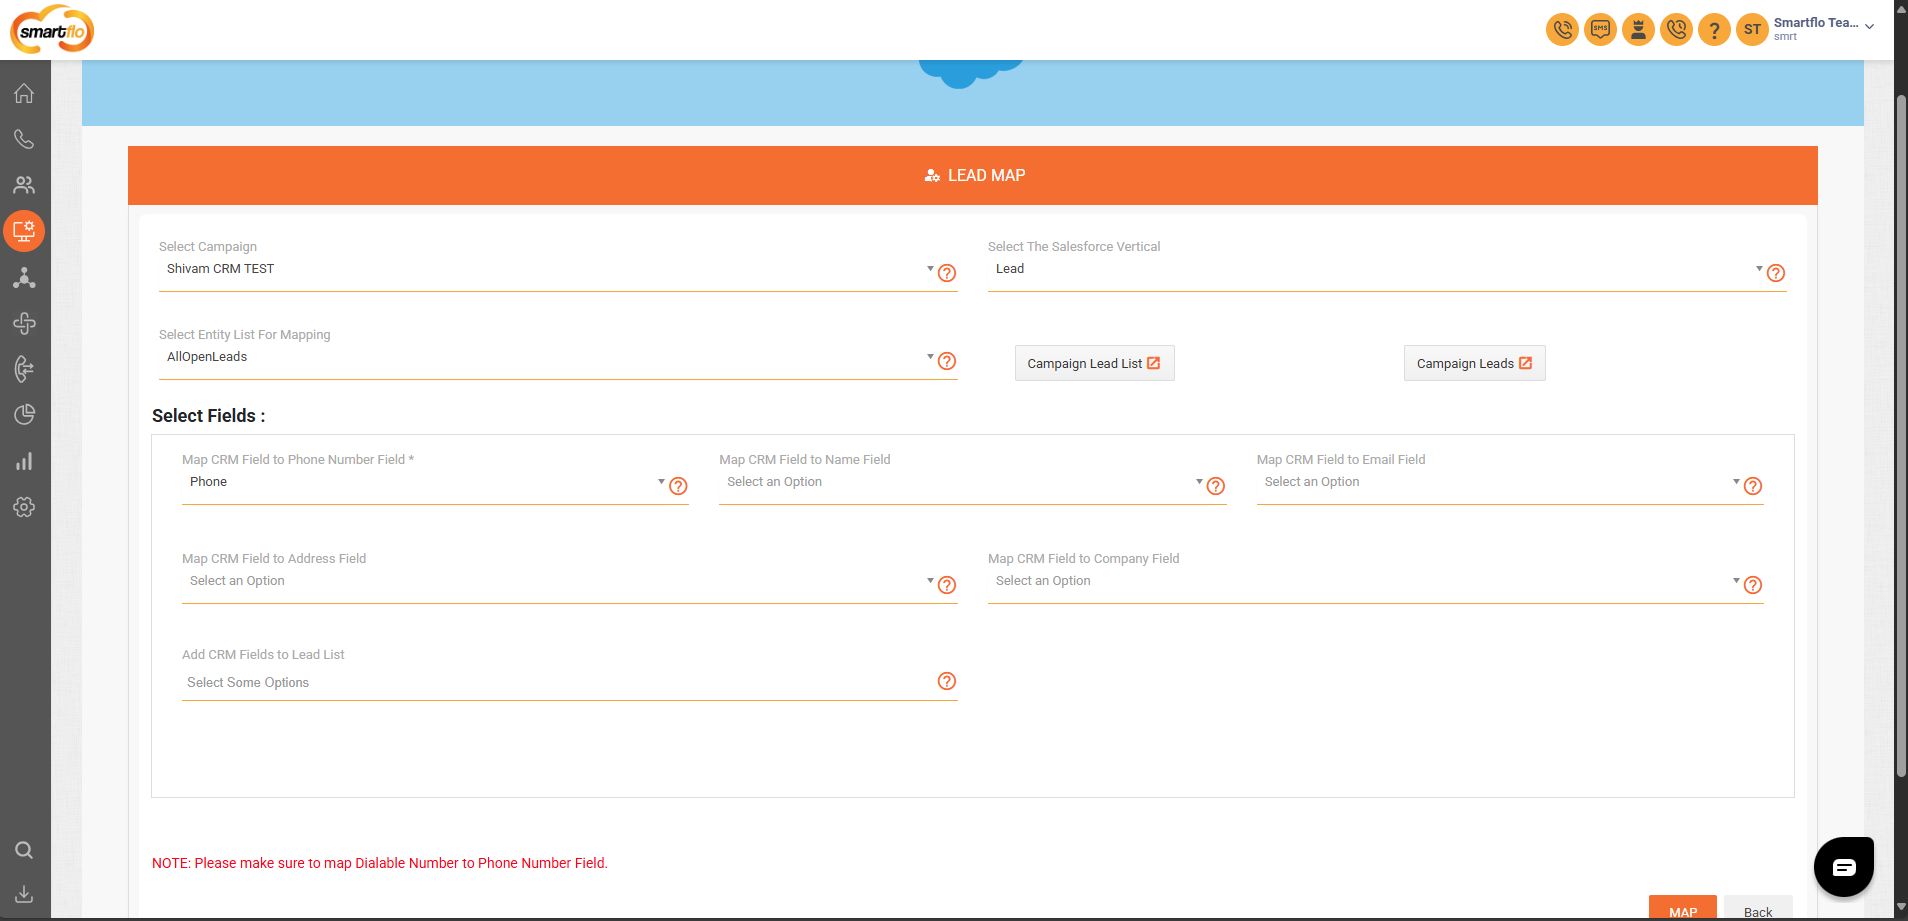
- Go to Lead Map, Select Configure
- Under Lead Mapping, map the Dialer campaign’s lead list with CRM

Ensure the dialable number is mapped to the Phone Number Field
Step 4: Agent Access Configuration
- Go to Agents Access, Select Configure
- In Agents Access, toggle Status and Auto-Ticket for each team member
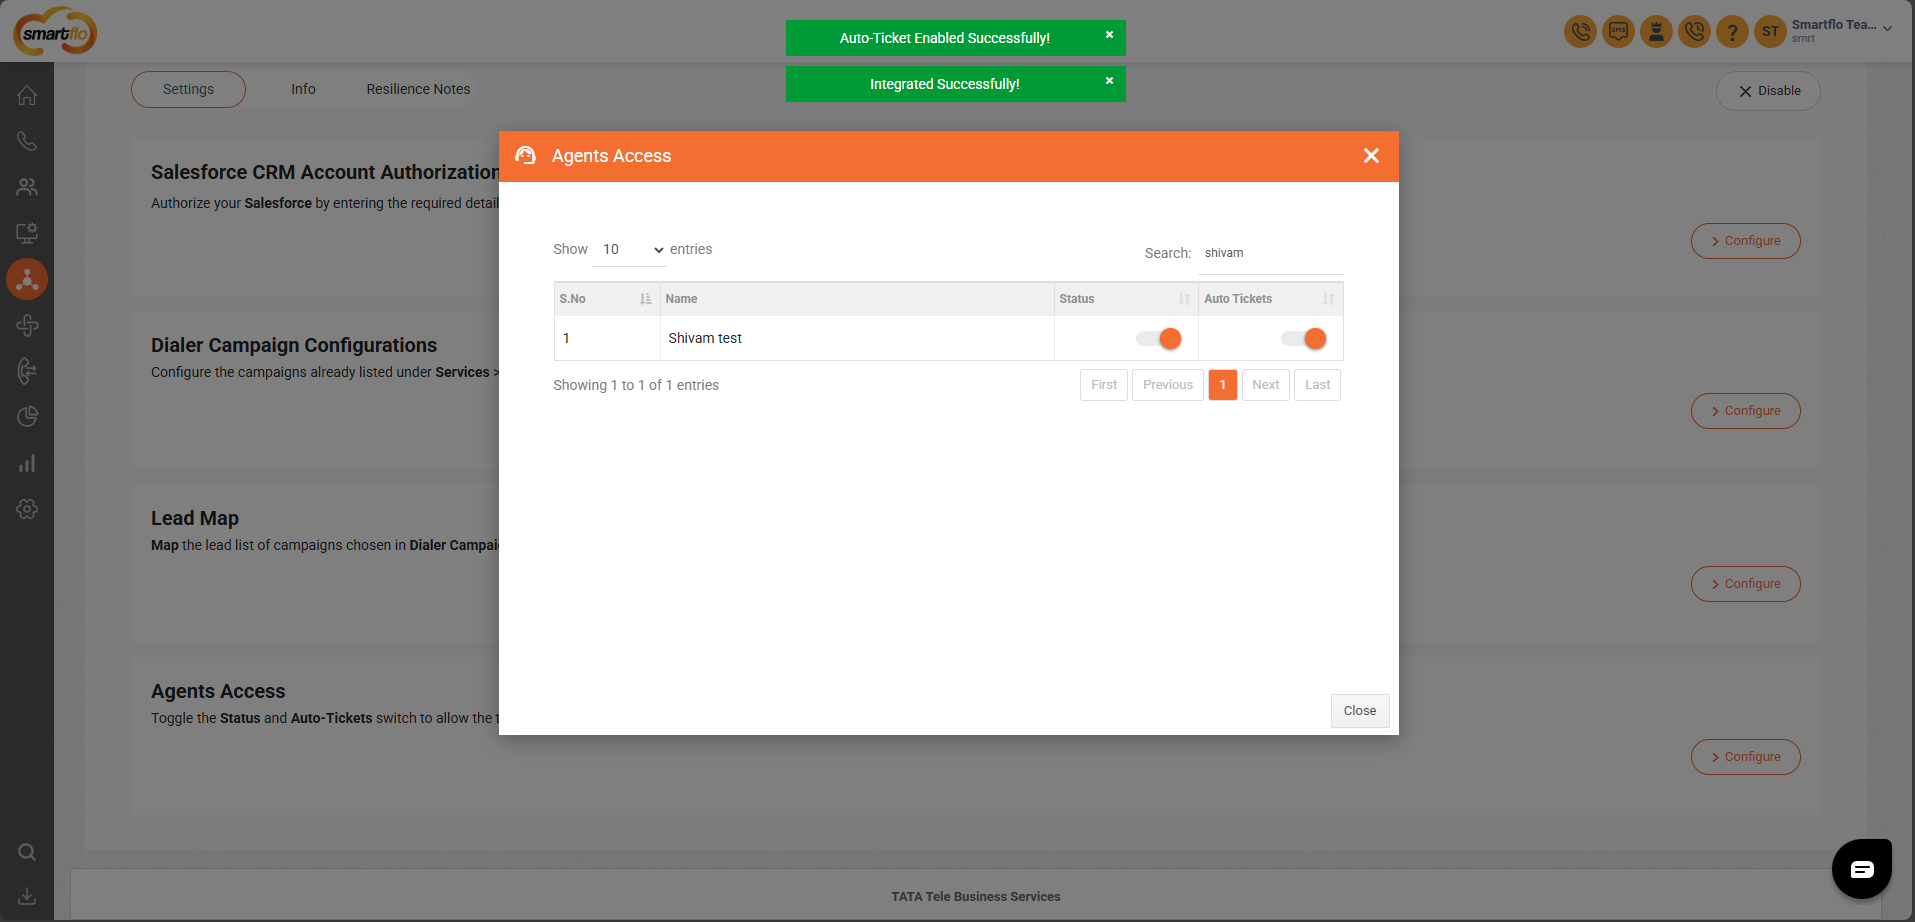
Agent Access Settings:
- Status: Enables Salesforce integration for the agent
- Auto-Tickets:
- ON: Ticket is auto-created after each call
- OFF: Agent must manually submit disposition
Step 4: Install Salesforce Package & Configure CTI
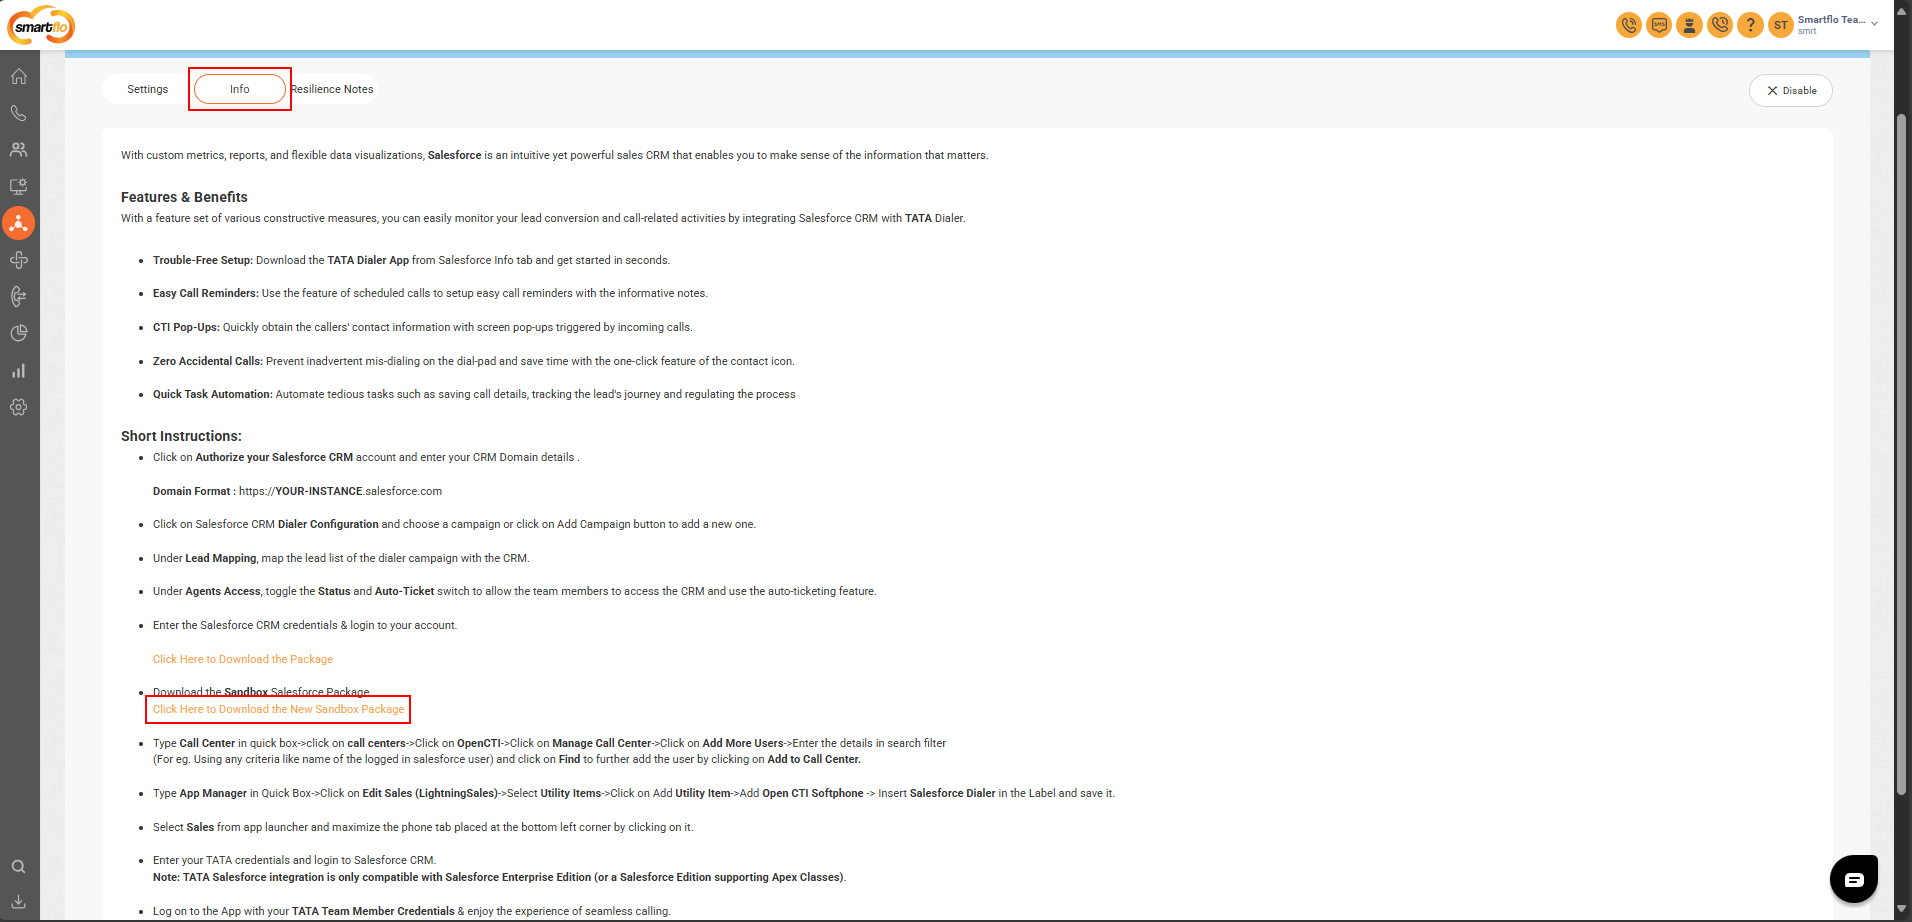
- Under Info tab, click Click Here to Download the Package

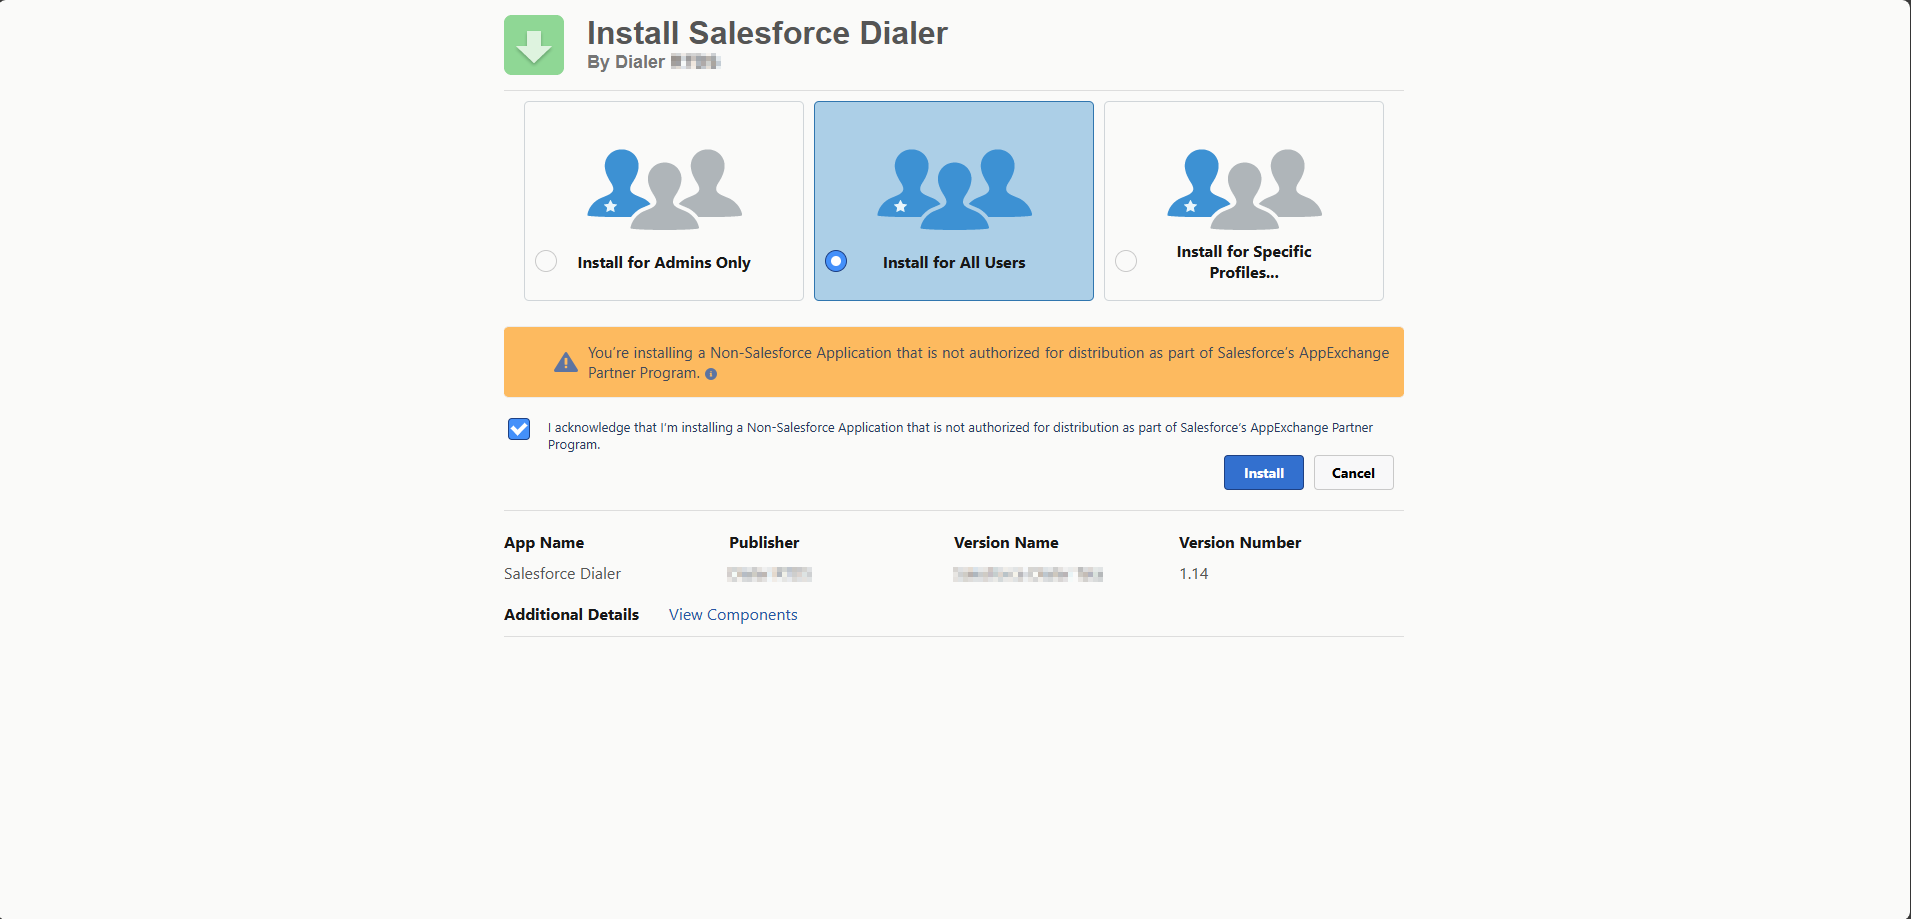
- Optionally, install the Sandbox Package. (Optional for testing only)
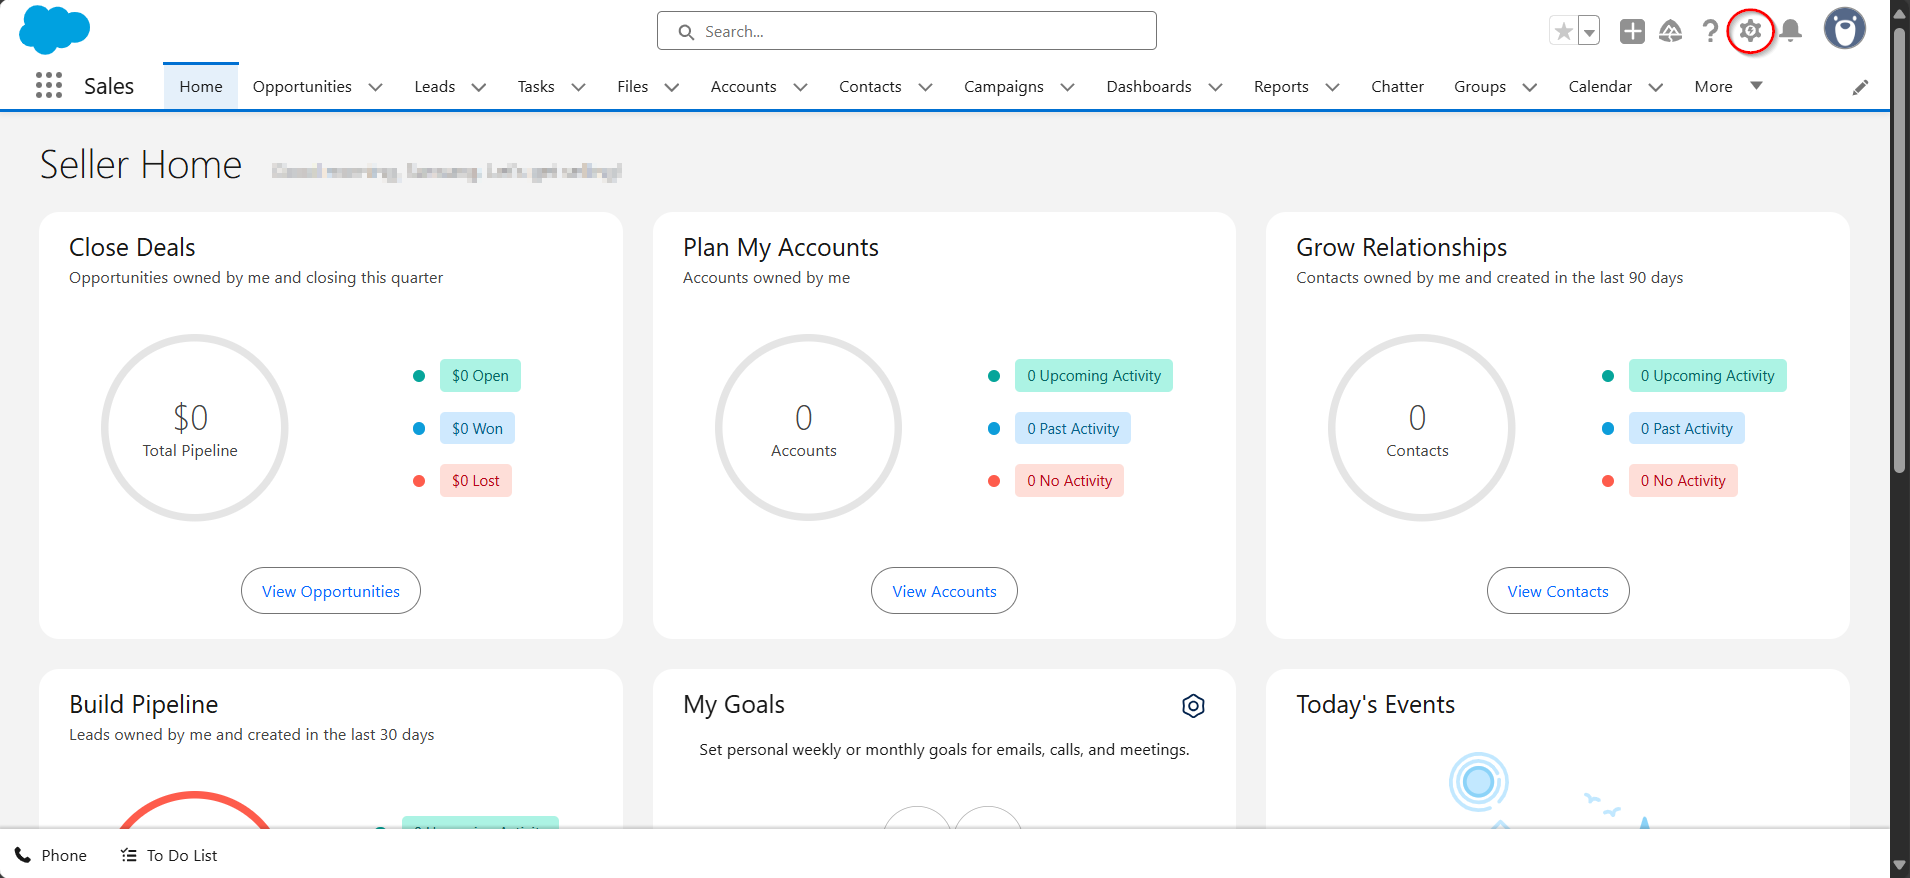
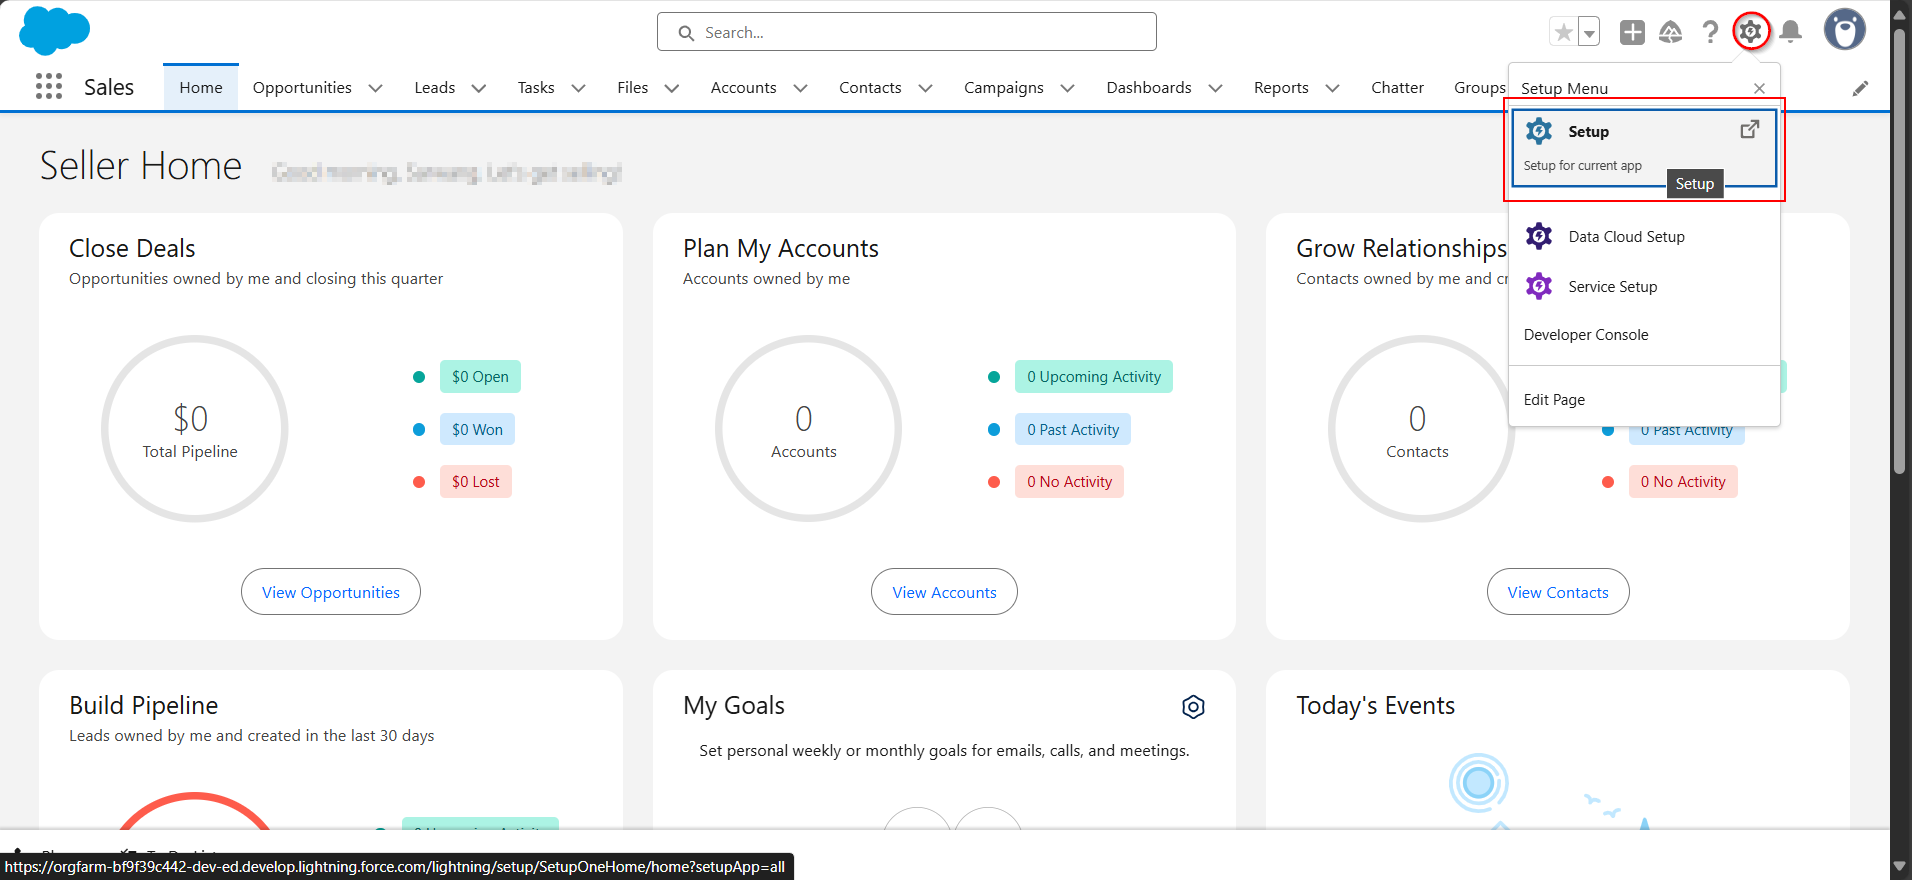
- Open Salesforce portal and Click on setup.
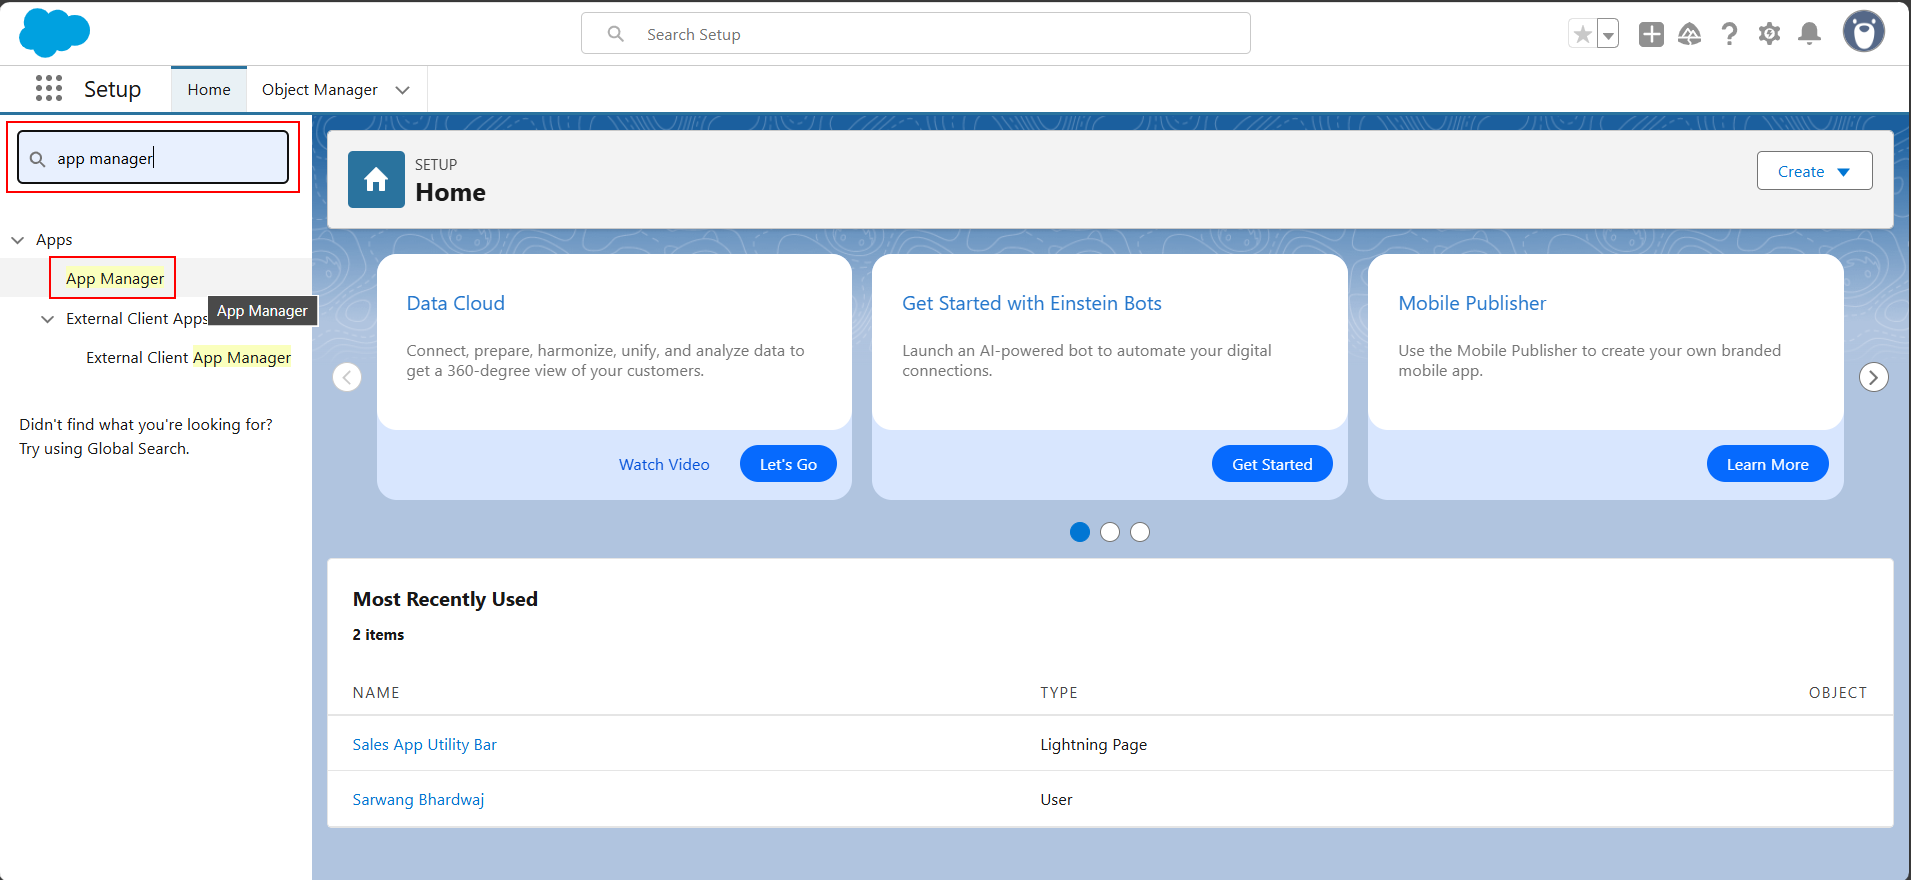
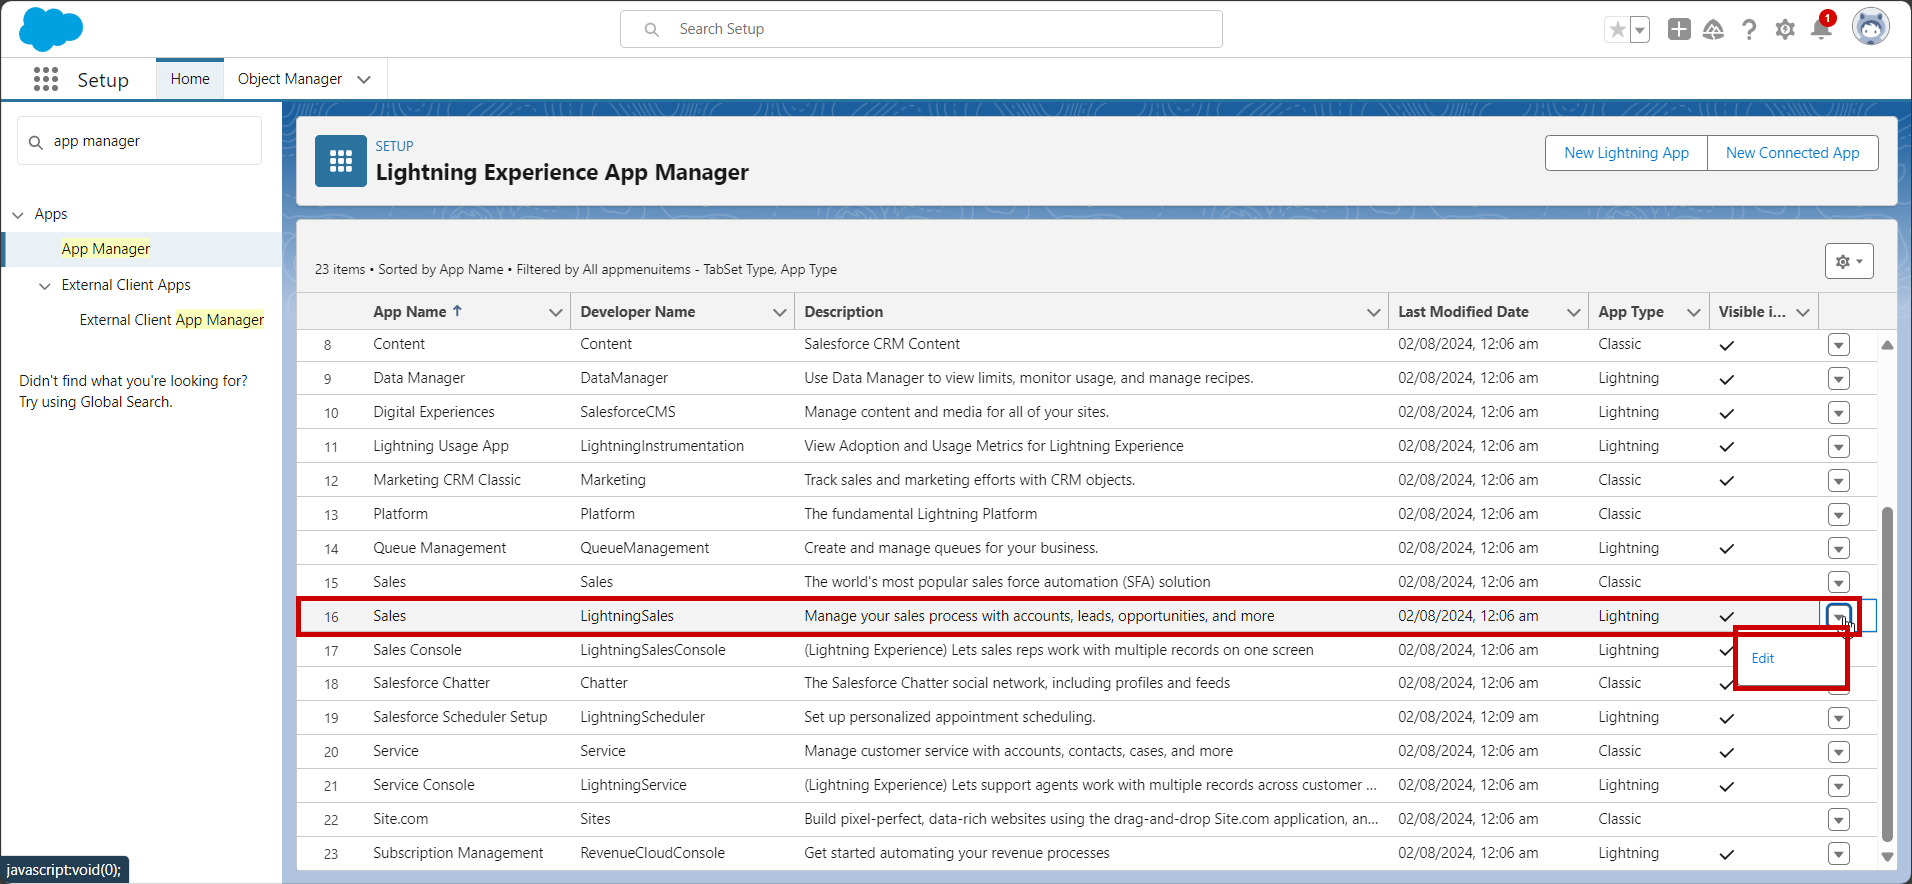
- In Salesforce, Search App Manager
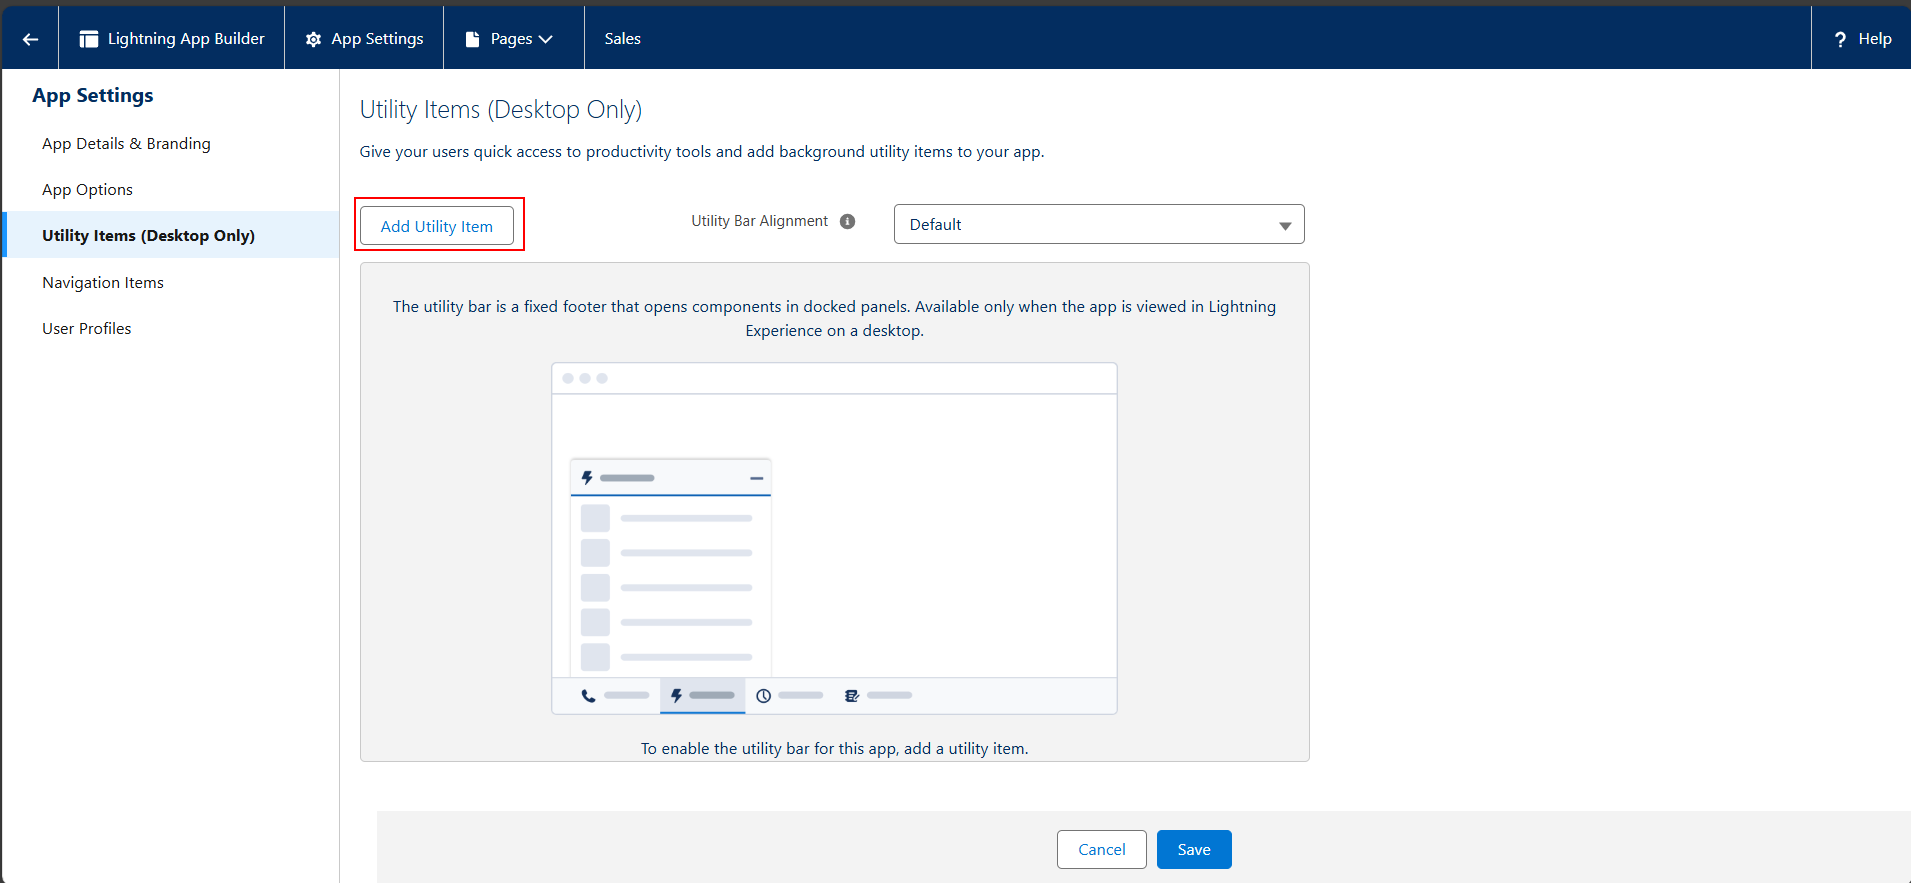
- Click on Edit Sales (Lightning Sales)
- Click on Add Utility Item.
- Search Open CTI Softphone and Choose Open CTI Softphone
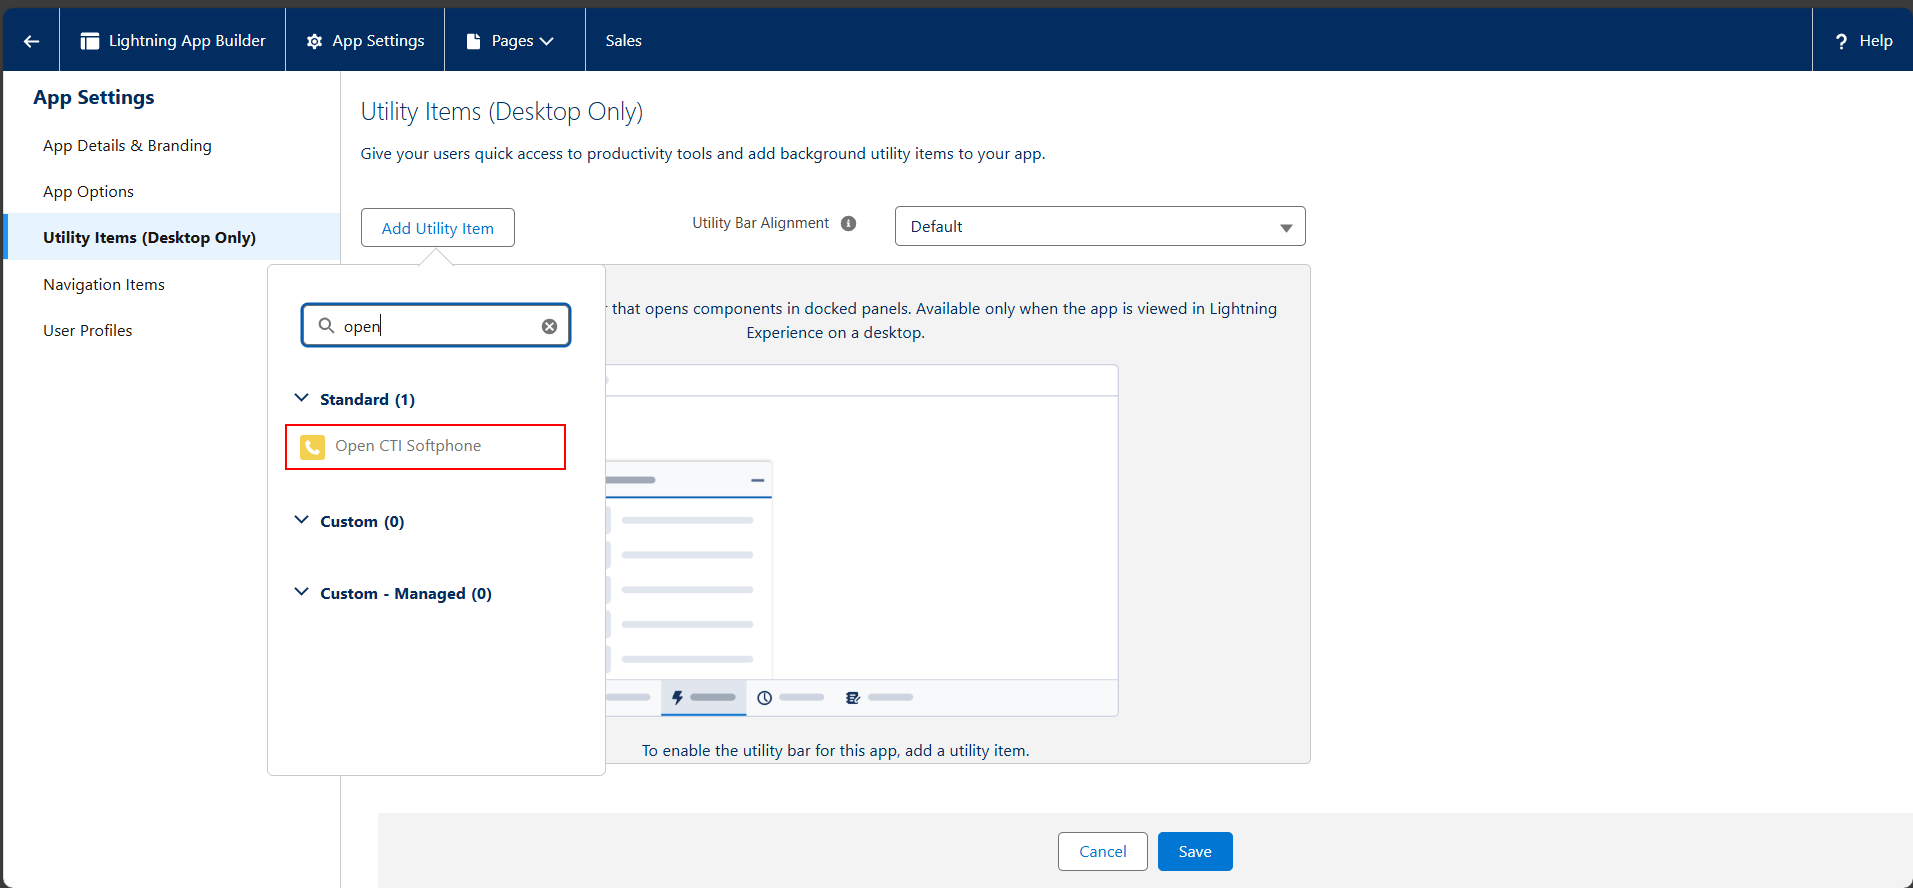
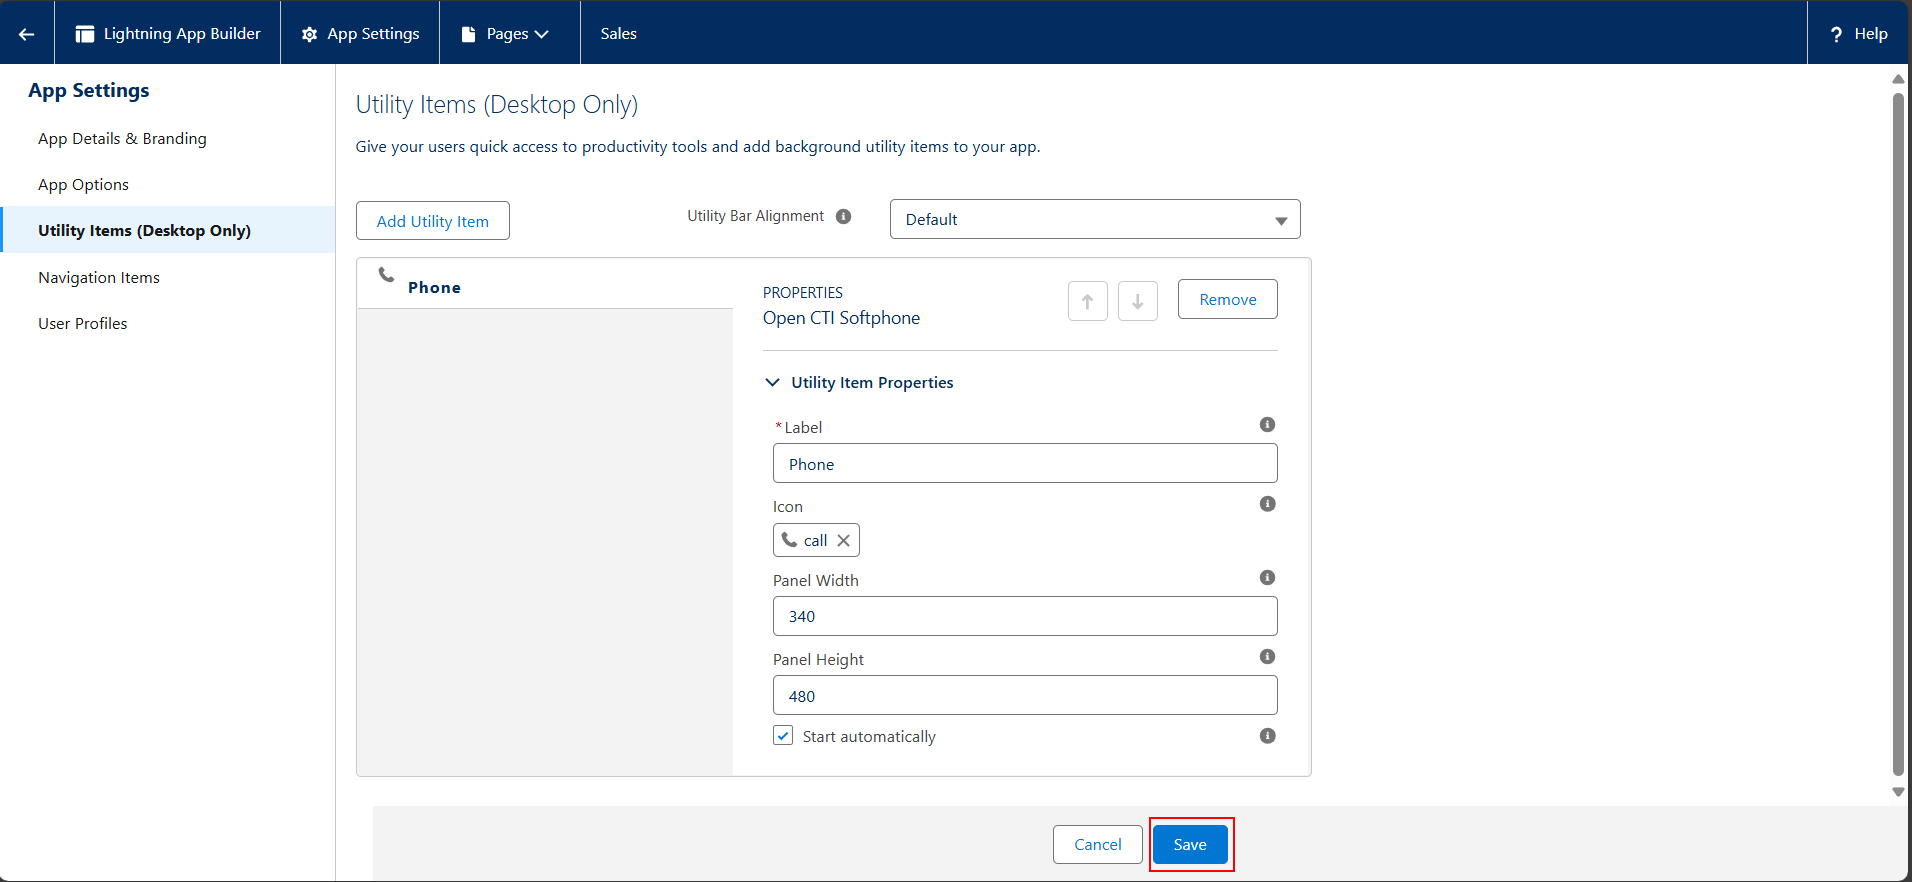
- Set label to
Salesforce Dialer or Phone - Click on Save
- In Salesforce, Search Call Centre and open Call Centers
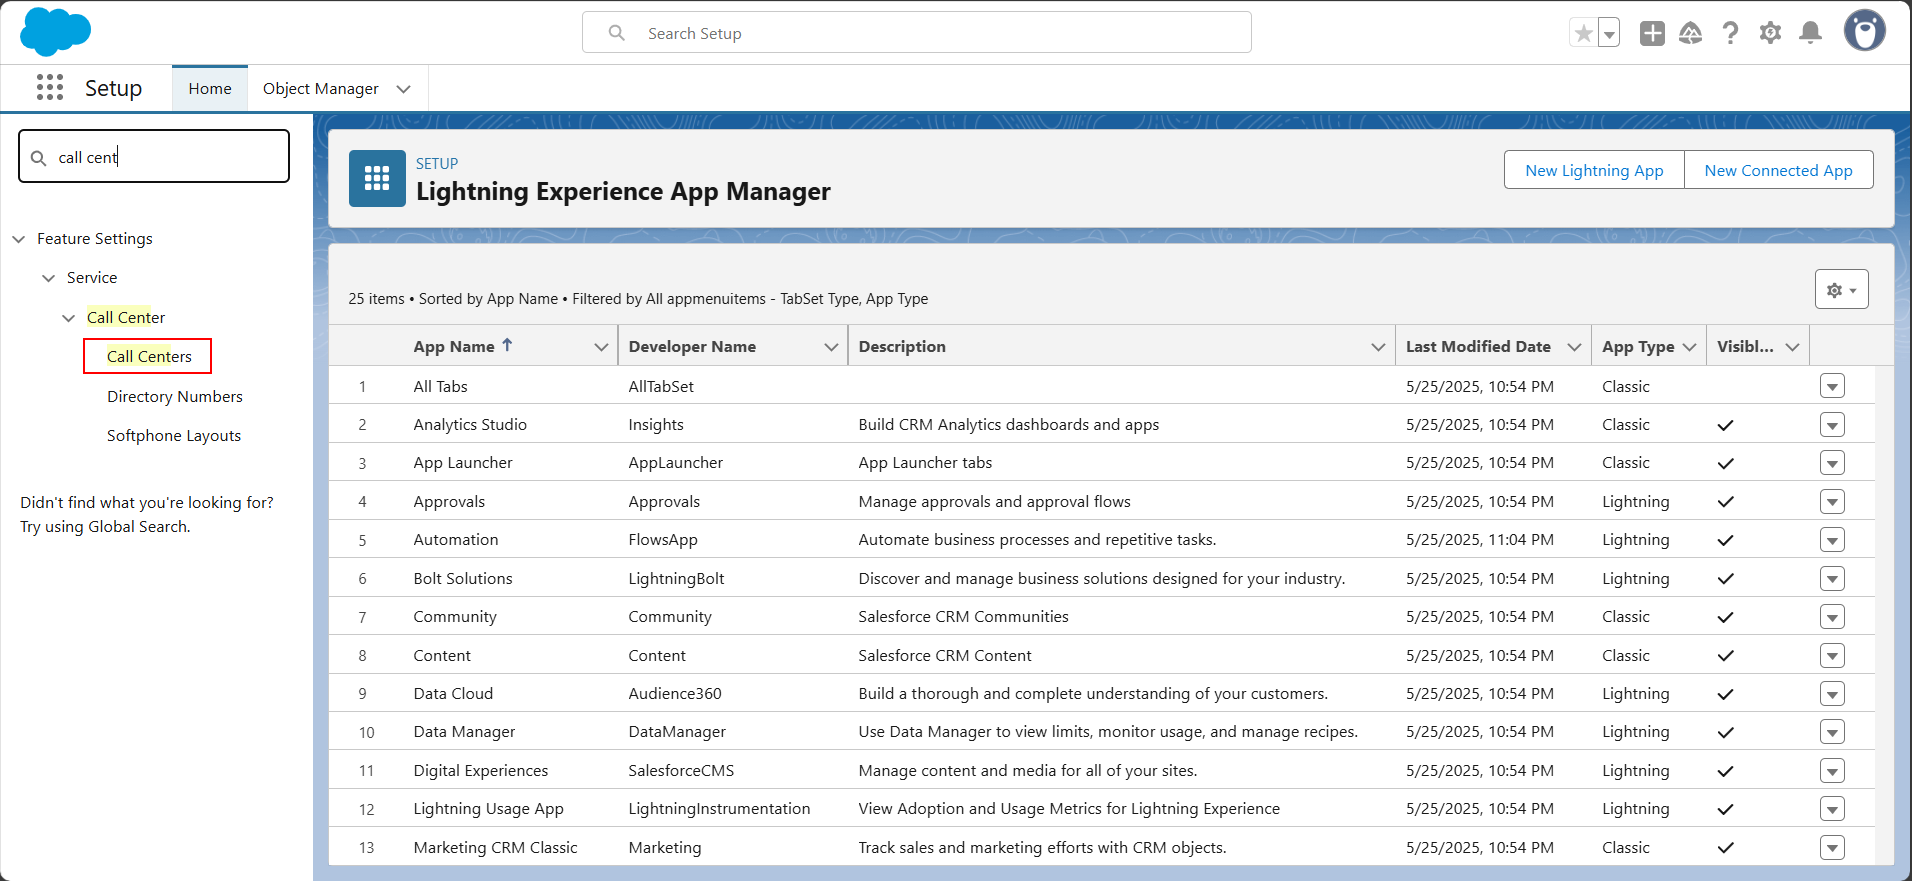
- Select OpenCTI
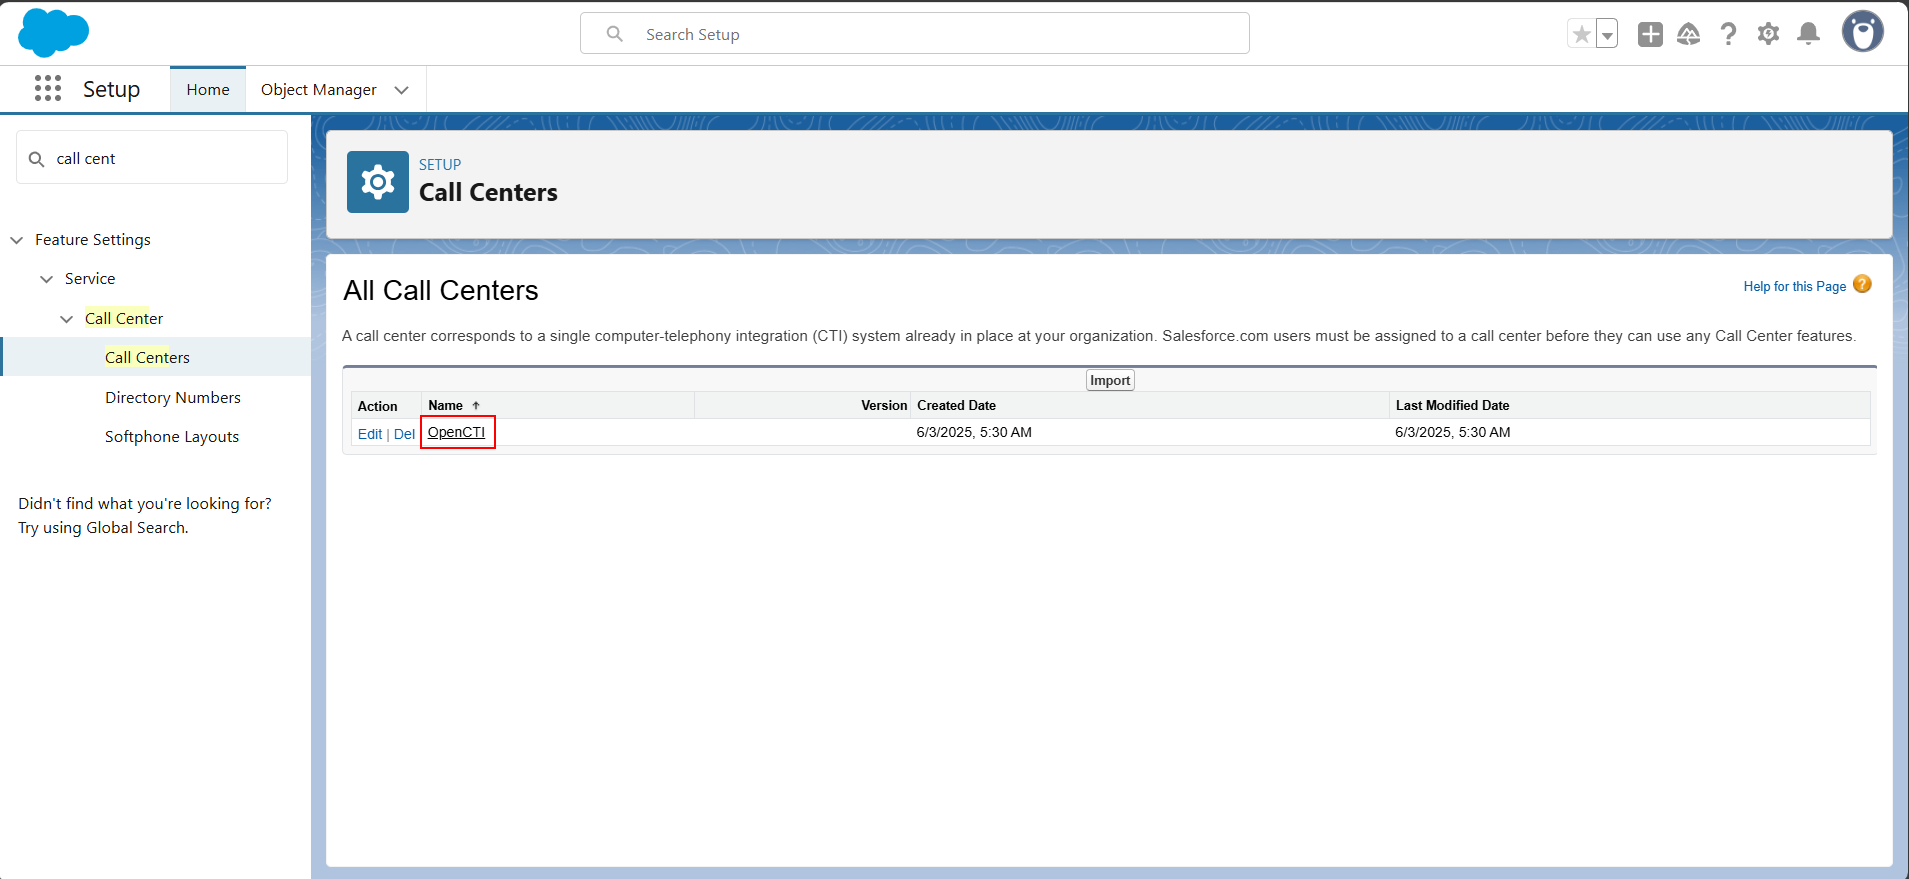
- Click Manage Call Center Users
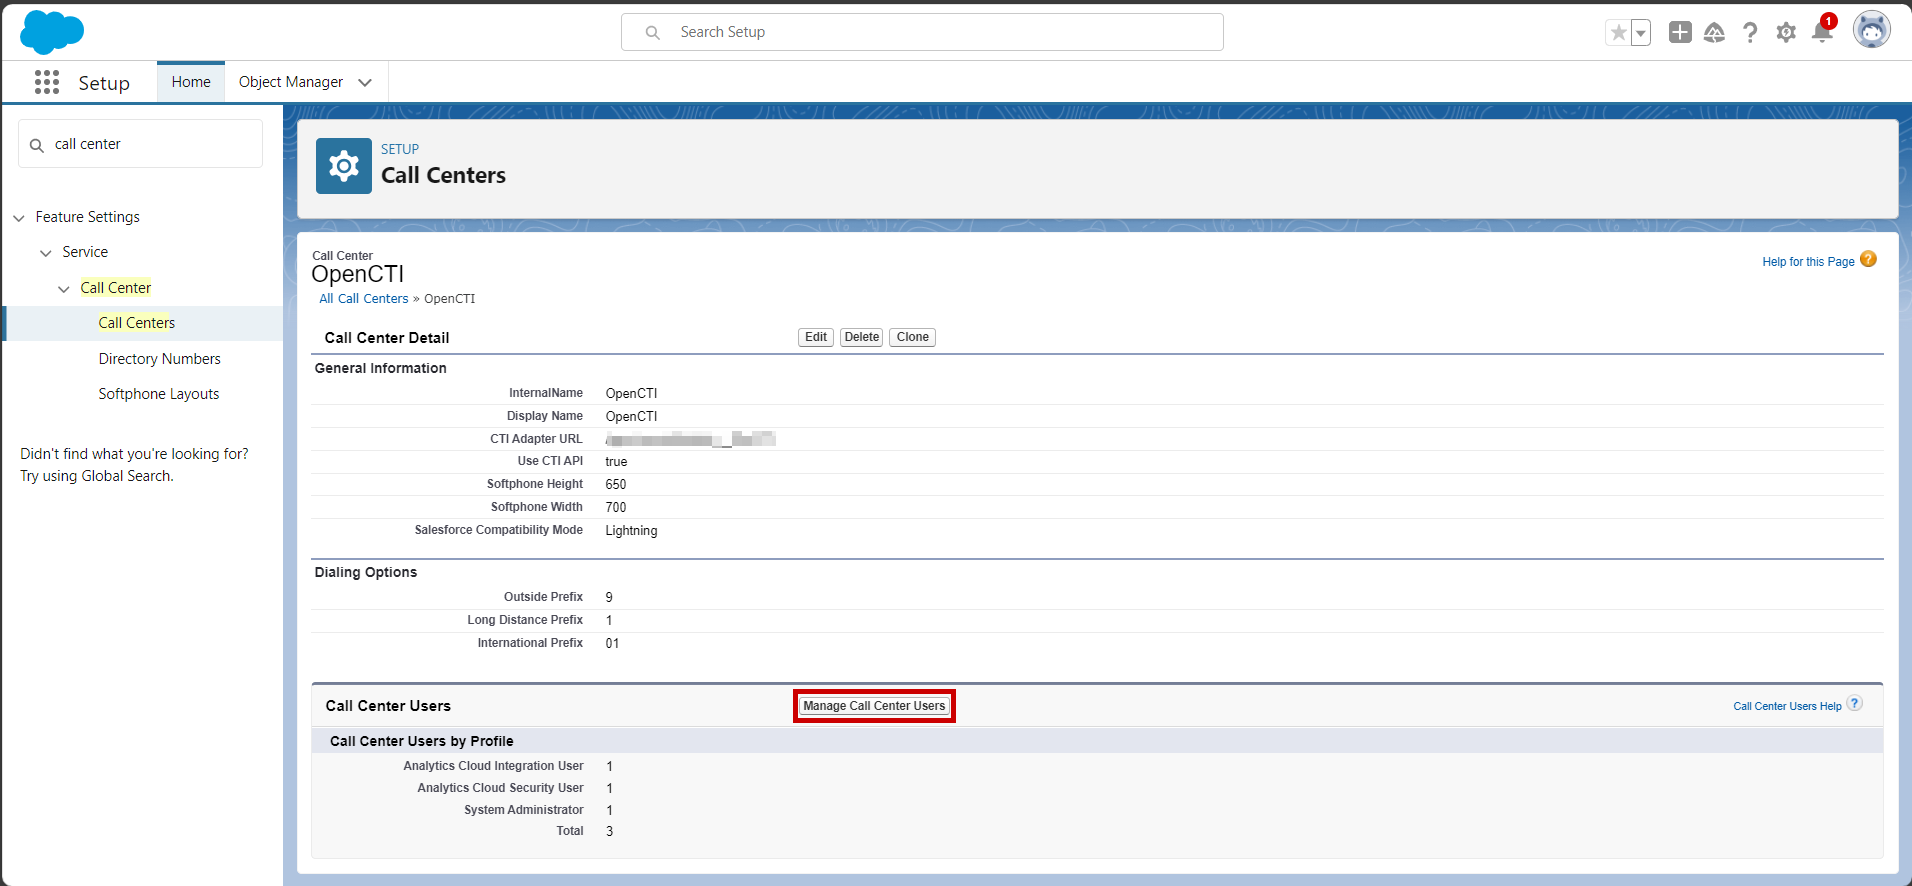
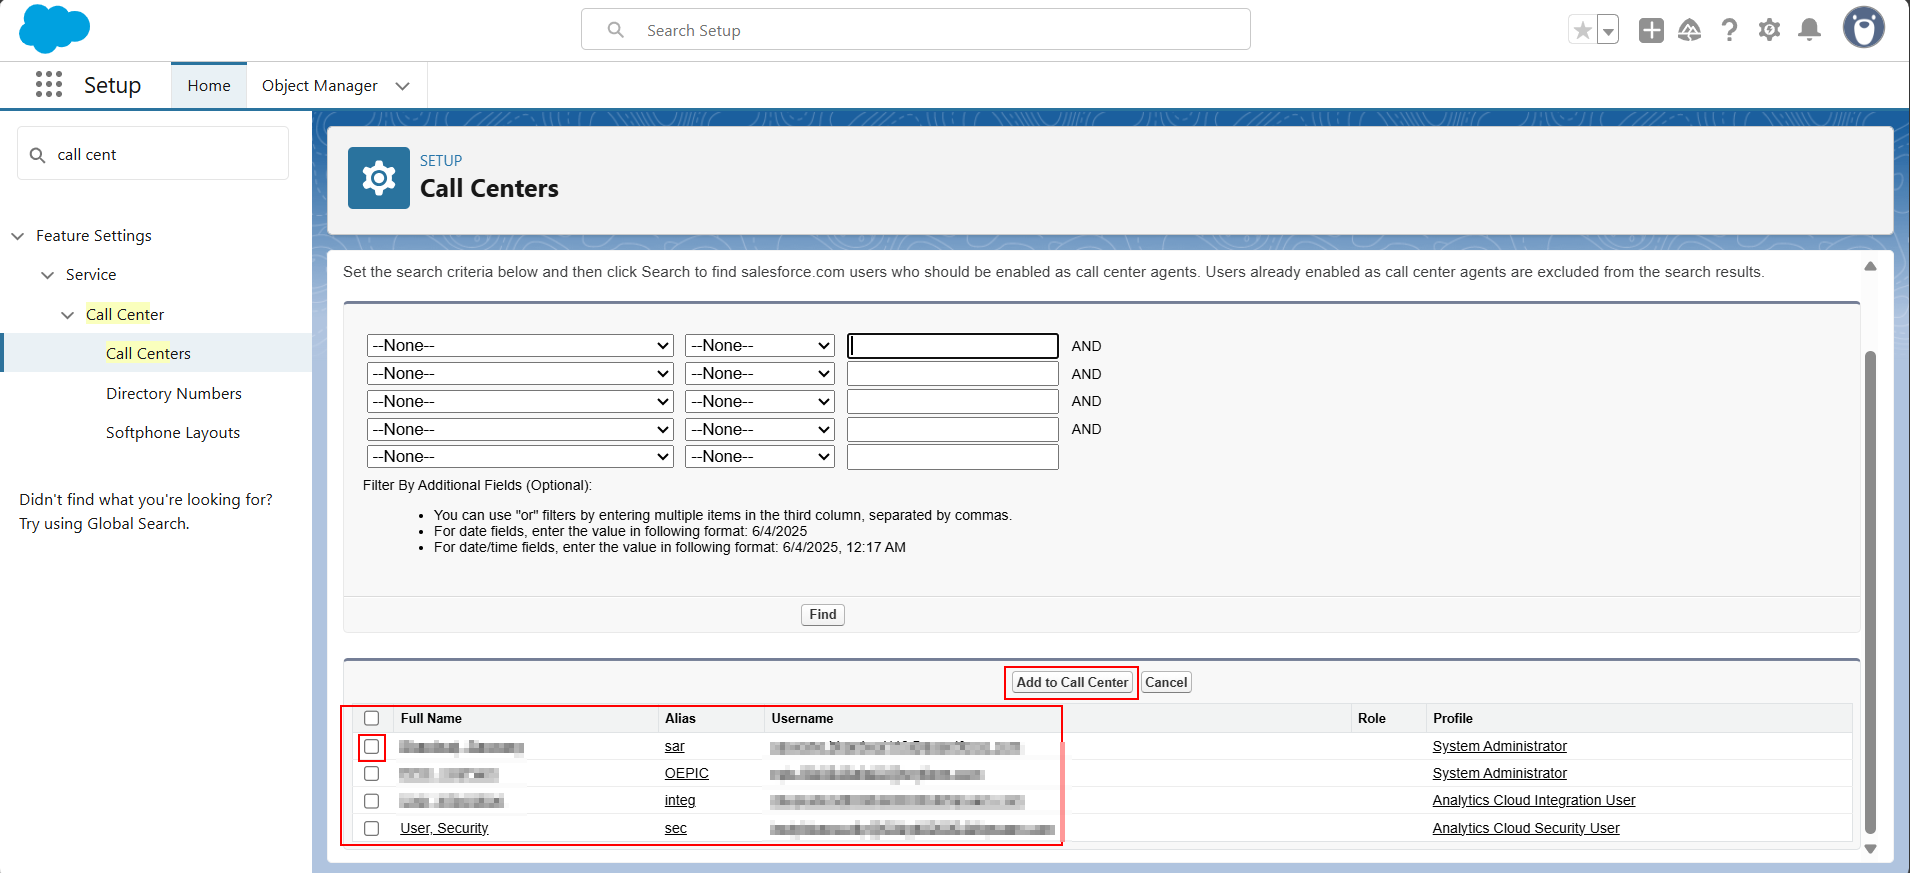
- Click on Add More Users.
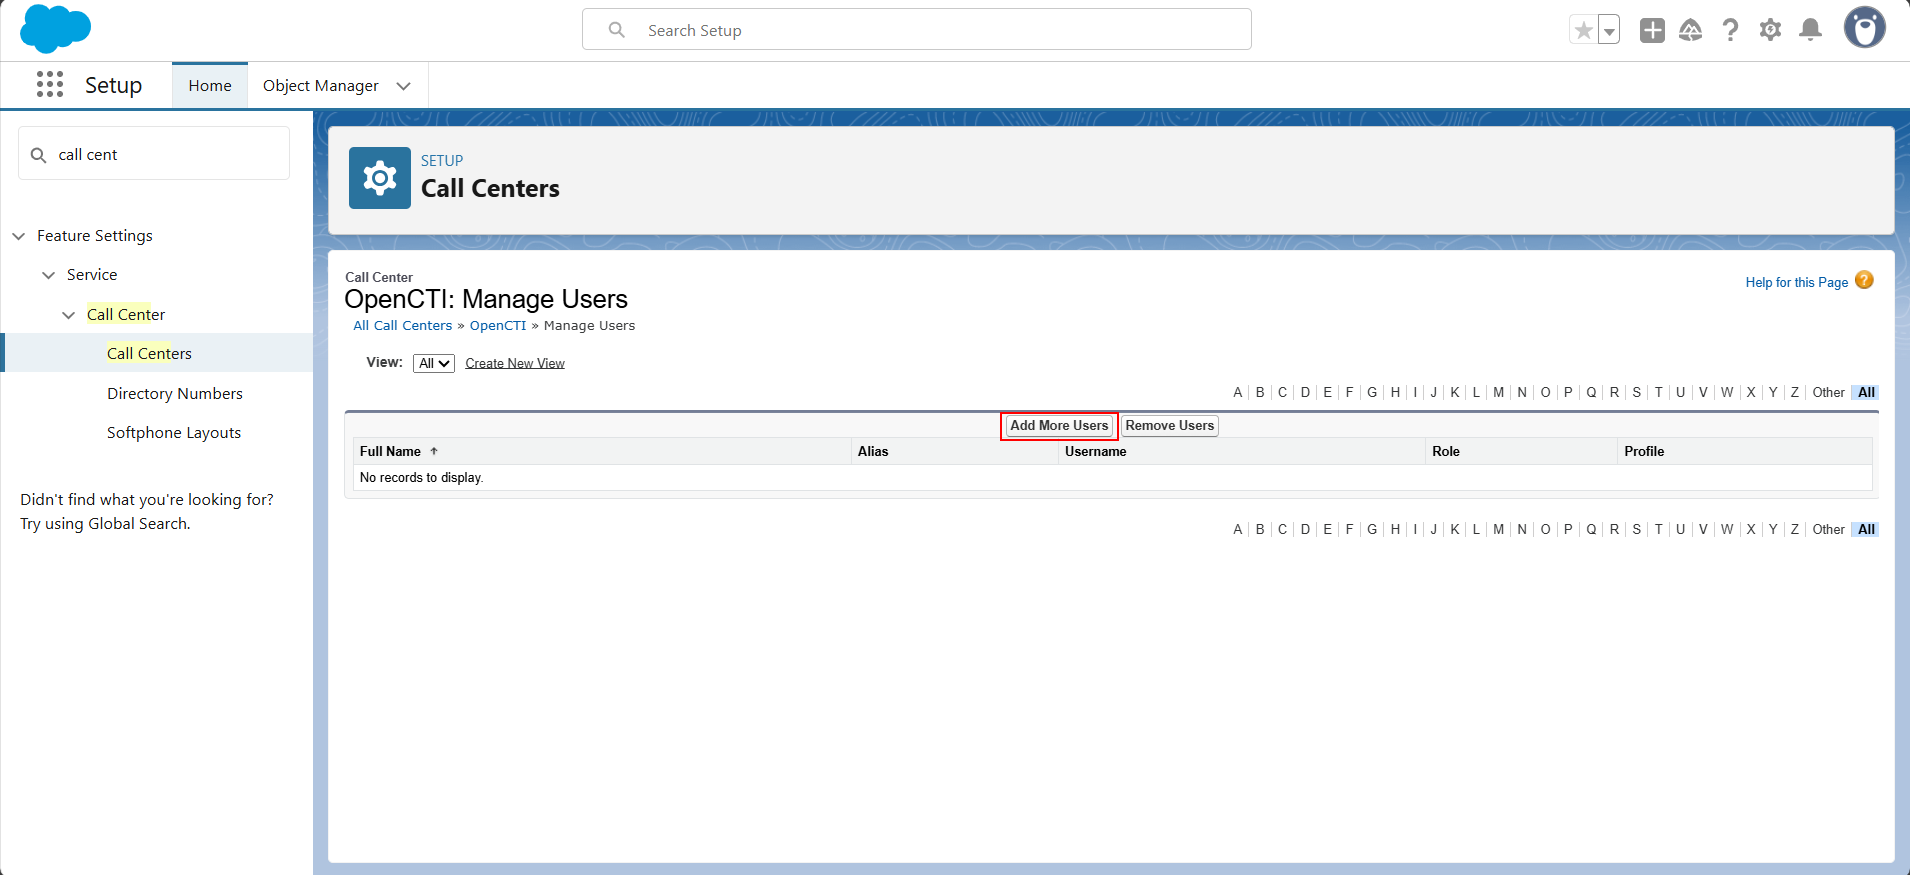
- Click on Find.
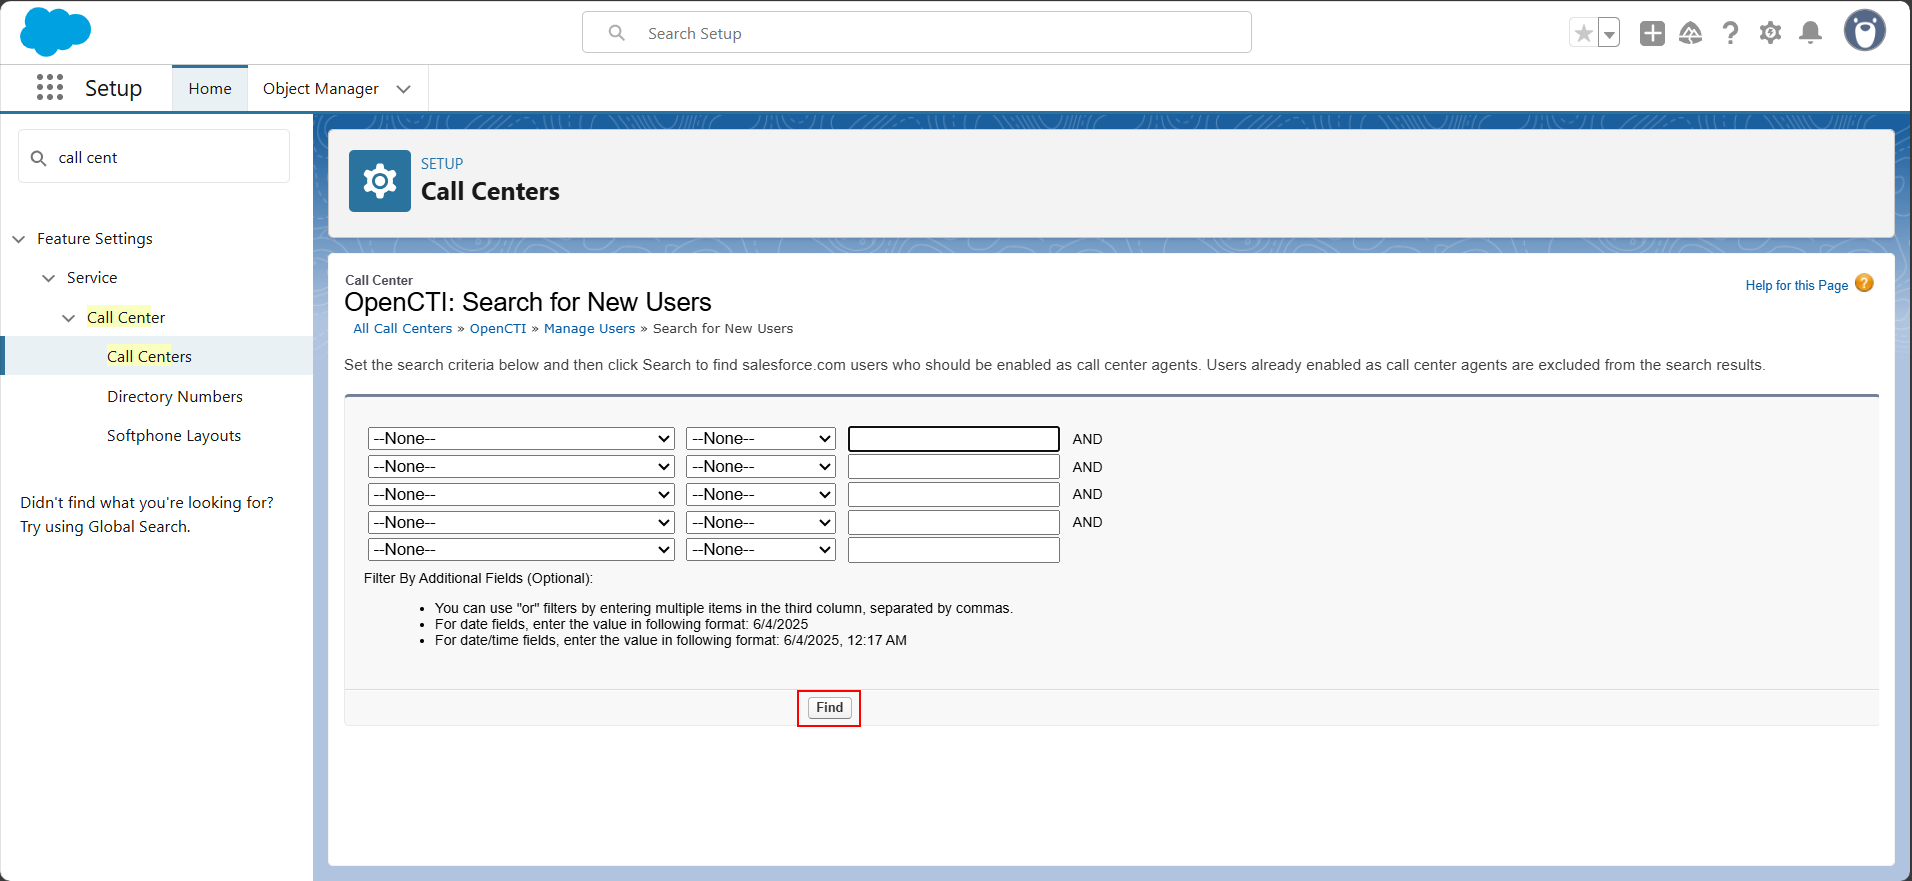
- Select the User and click on Add to Call Center.
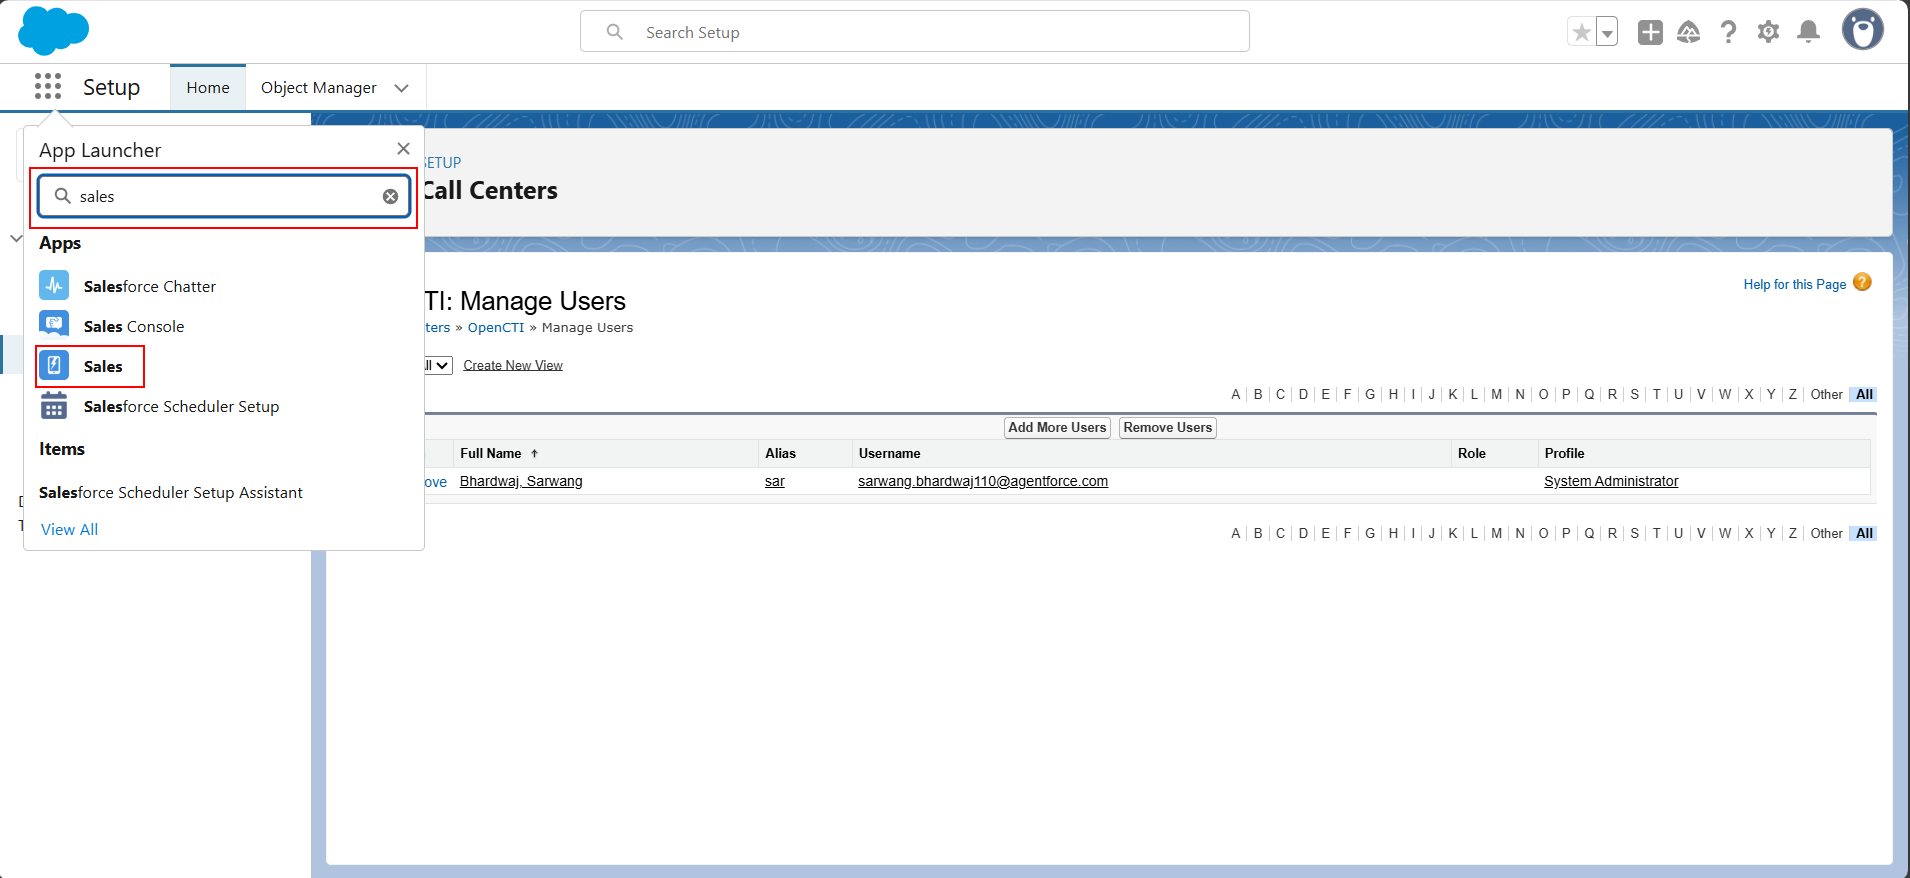
- Open the Sales App by searching for "Sales" in the search bar and selecting the Sales application.
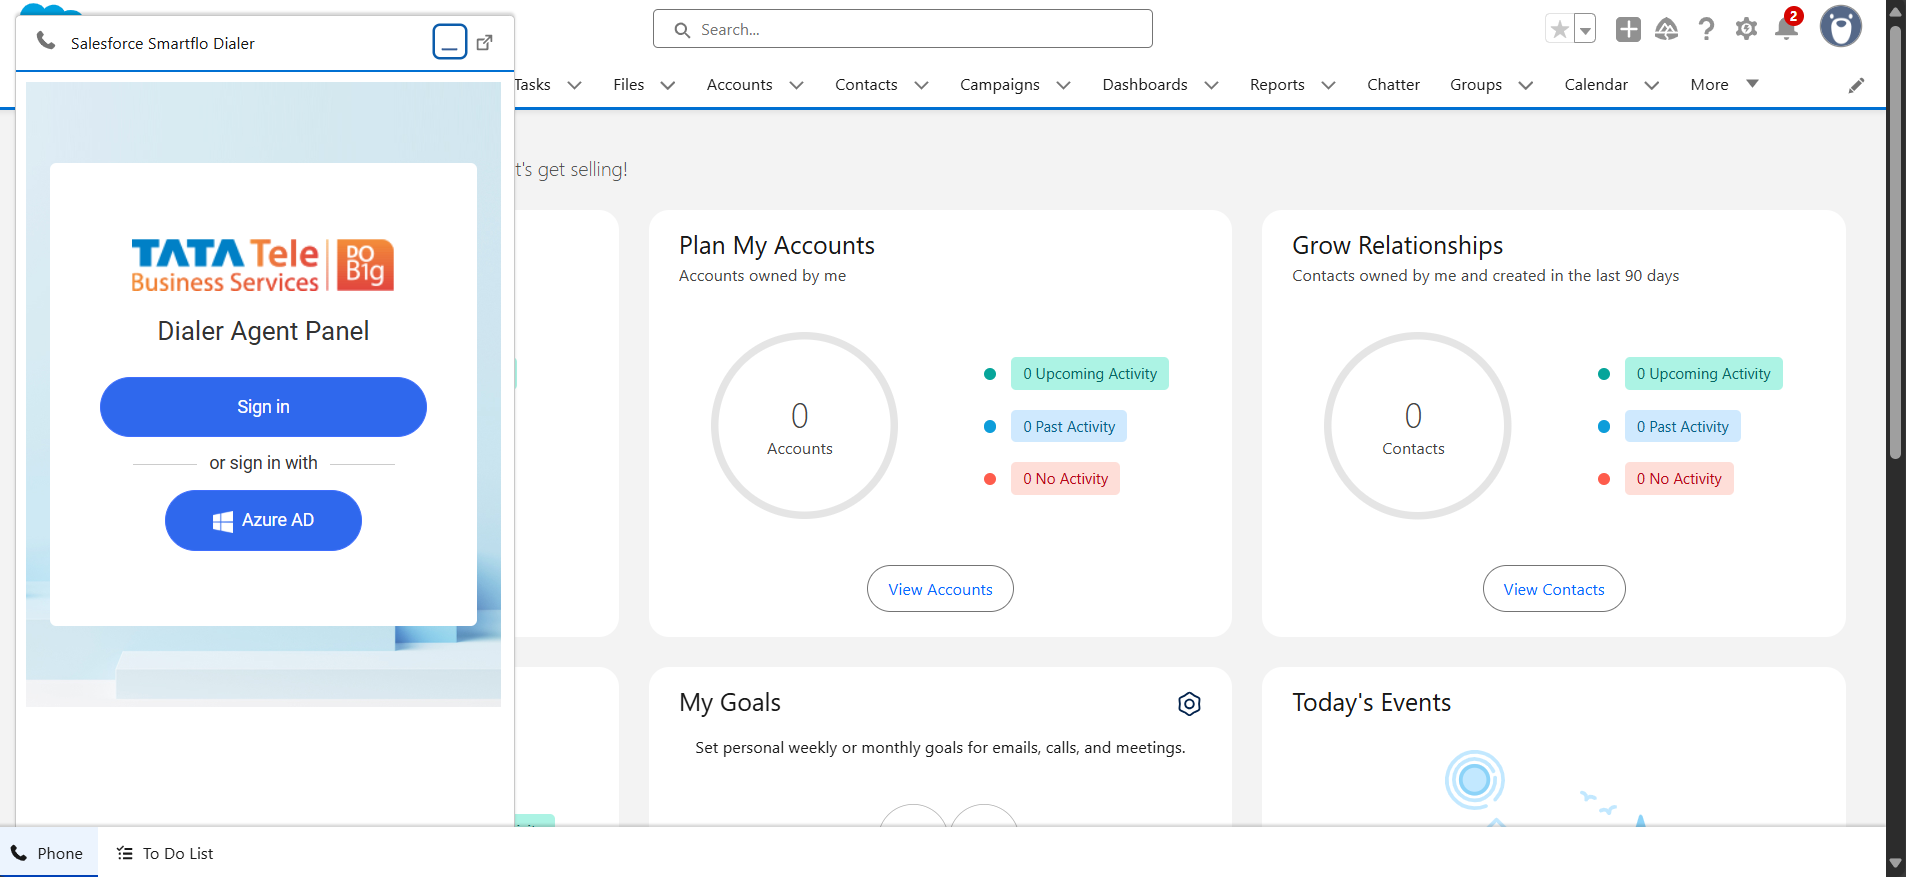
- Click on Phone icon on the bottom left to open Smartflo dialer.
Compatibility Note:Salesforce integration is only supported with Enterprise Edition or editions supporting Apex Classes
🎉 You’ve successfully integrated Smartflo with Salesforce CRM. Happy calling!
Updated about 1 year ago