My Numbers
The My Numbers section allows you to manage all purchased numbers linked to your account. You can update number details, set call destinations, allocate sticky agents for consistent customer-agent interactions, and assign SMS templates based on call outcomes.
Getting Started with My Numbers
To go to My Numbers to your Smartflo account, first log in using your unique User ID and Password. Once logged in, you will be directed to the main dashboard. From there, locate the navigation menu on the left-hand side of the screen and click on "Services." A set of options opens up. One of these options is the "My Numbers".
- List of My Numbers
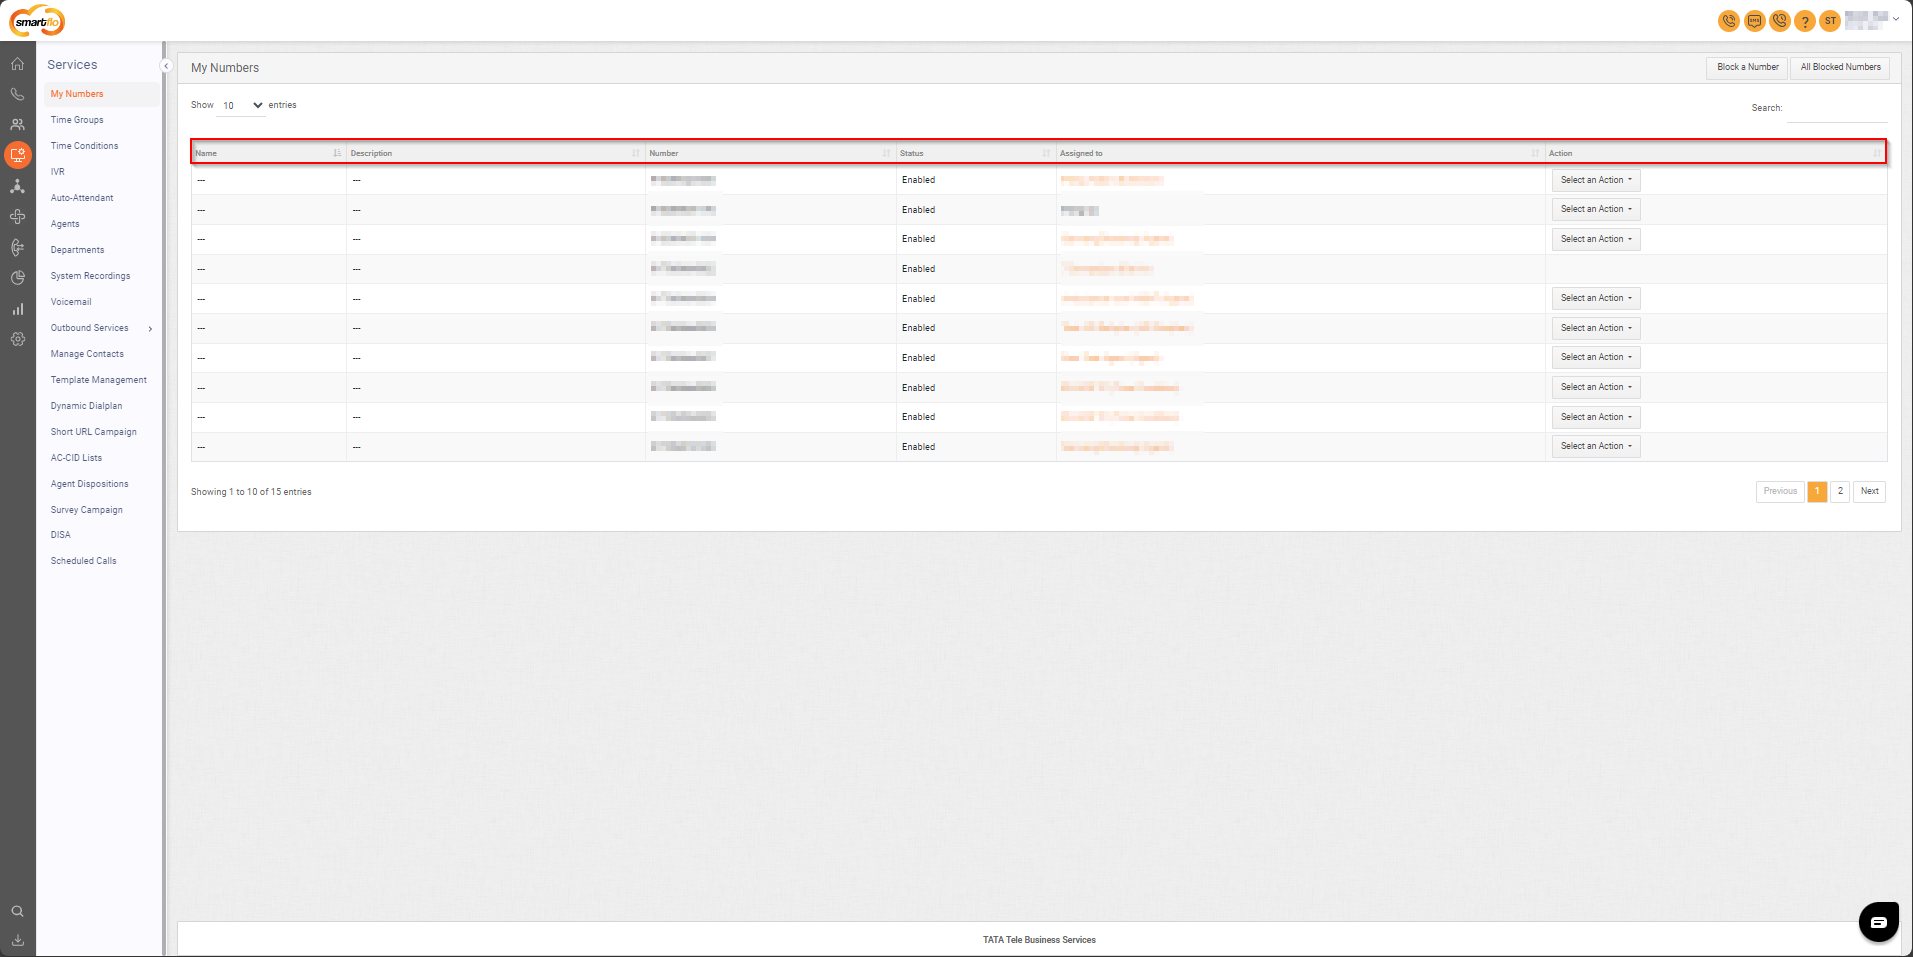
The table displays a list with the following information:
| Field | Description |
|---|---|
| Name | Displays the name associated with the number. |
| Description | Displays the description associated with the number. |
| Number | Displays DID number. |
| Status | Shows whether the number is enabled or disabled. |
| Assigned to | Shows the number assigned to which destination( IVR/Agent/Department…etc. ) |
| Action | Provides options to edit the number. |
2. Edit a Number
To edit a number, follow the below steps:
- Click on the Services tab on the side navigation.
- Click on My Numbers.
- A list of all numbers is displayed along with the relevant details.
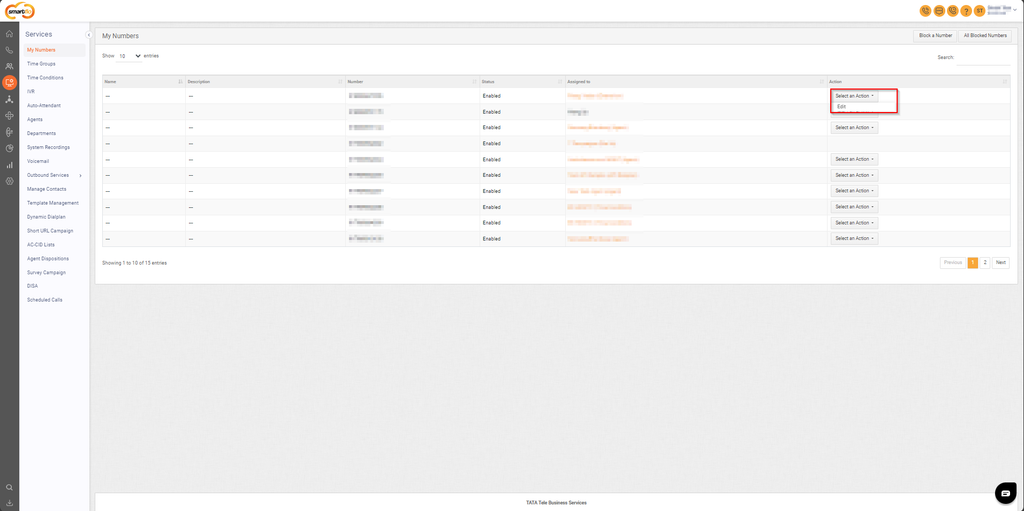
- Click on Select an Action and select Edit from the dropdown.
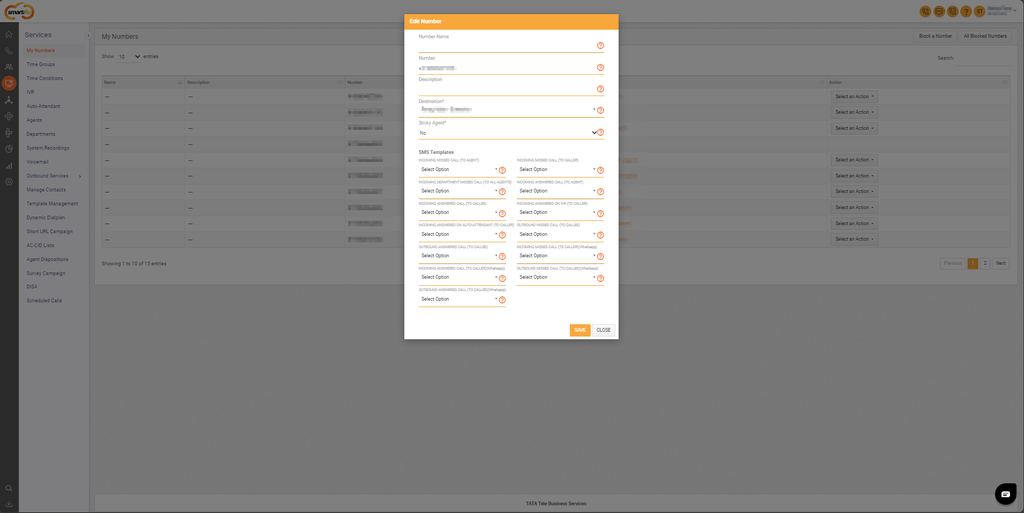
- Enter the basic details and set the appropriate destination for the number. For instance, if you are creating an IVR, you need to select the Time Condition (created in step 7 of IVR creation) as the destination here.
- Select the Sticky Agent as Yes or No from the dropdown.
If Yes, fill in the required fields that appear on the panel. The fields enable to map of the callers to the same agent for all future interactions.
- Sticky Agent Time: If you want the customer call to be routed to the same agent with whom he/she connected in the last three days, enter 3.
- Sticky Agent Time Format: Select the format (either days or hours) from the dropdown. In the above-quoted example, choose Days.
The maximum refresh period for the Sticky Agent is 10 days.
- Fill in the required fields in the SMS templates.
| Field | Description |
|---|---|
| INCOMING MISSED CALL (TO AGENT) | Choose the SMS template to be sent to the agent if the incoming call is missed. |
| INCOMING MISSED CALL (TO CALLER) | Choose the SMS template to be sent to the caller if the incoming call is missed. |
| INCOMING DEPARTMENT MISSED CALL (TO ALL AGENTS) | Choose the SMS template to be sent to all agents in the department when an incoming call to the department is missed. |
| INCOMING ANSWERED CALL (TO AGENT) | Choose the SMS template to be sent to the agent when the incoming call is answered. |
| INCOMING ANSWERED CALL (TO CALLER) | Choose the SMS template to be sent to the caller when the incoming call is answered. |
| INCOMING ANSWERED ON IVR (TO CALLER) | Choose the SMS template to be sent to the caller when the incoming call is answered on IVR. |
| INCOMING ANSWERED ON AUTO-ATTENDANT (TO CALLER) | Choose the SMS template to be sent to the caller when the incoming call is answered on Auto-Attendant. |
| OUTBOUND MISSED CALL (TO CALLEE) | Choose the SMS template to be sent to the callee (Customer) if the outbound call is missed. |
| OUTBOUND ANSWERED CALL (TO CALLEE) | Choose the SMS template to be sent to the callee (Customer) if the outbound call is answered. |
| INCOMING MISSED CALL (TO CALLER)(Whatsapp) | Choose the WhatsApp template to be sent to the caller if the incoming call is missed. |
| INCOMING ANSWERED CALL (TO CALLER)(Whatsapp) | Choose the WhatsApp template to be sent to the caller if the incoming call is answered. |
| OUTBOUND MISSED CALL (TO CALLEE)(Whatsapp) | Choose the WhatsApp template to be sent to the callee (Customer) if the outbound call is missed. |
| OUTBOUND ANSWERED CALL (TO CALLEE)(Whatsapp) | Choose the WhatsApp template to be sent to the callee (Customer) if the outbound call is answered. |
- Block a Number
To Block a number, follow the below steps:
- Click on the Services tab on the side navigation.
- Click on My Numbers.
- A list of all numbers is displayed along with the relevant details.
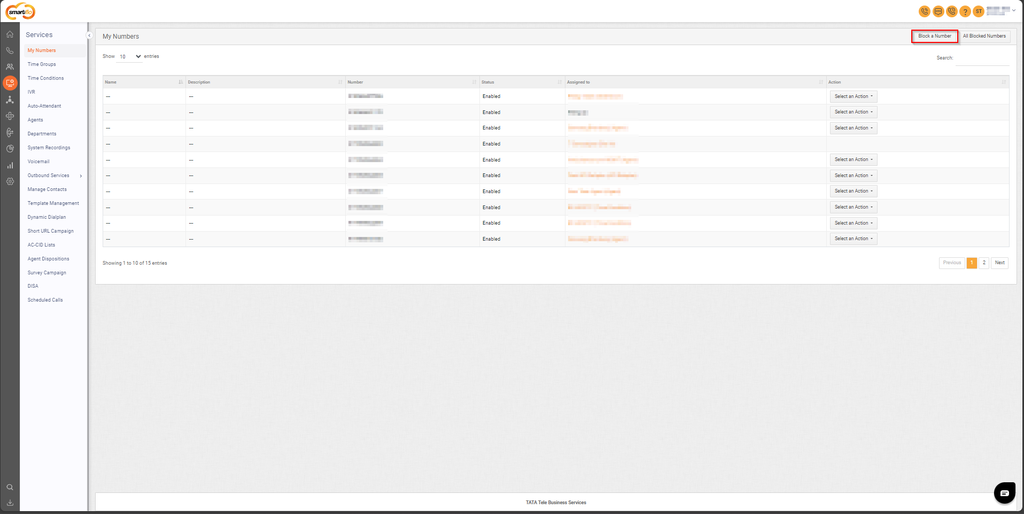
- Click on Block a Number.
- A new window will appear after selecting the block option.
- From the dropdown menu, choose whether to block against either the account or the number.
Block Against Account: This applies to all the DID numbers associated with the account.
Block Against Number: Applies to a specific DID. The source number (customer's number) will be restricted only to the selected DID.
- Enter the source number (Customer number) you wish to block.
- Click on Save to proceed or Cancel if you do not wish to continue with the action.
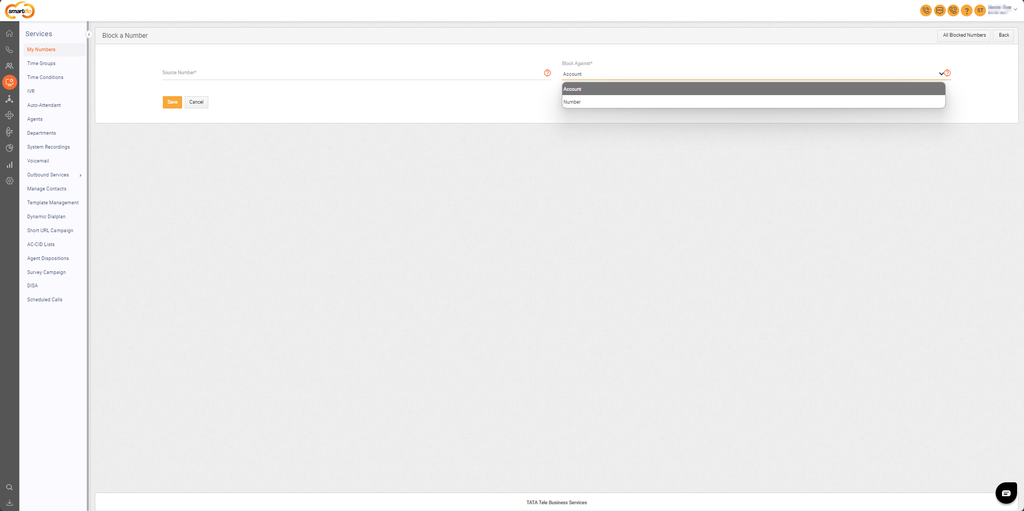
-
All Blocked Numbers
To view all blocked numbers, follow the below steps:
-
Click on the Services tab on the side navigation.
-
Click on My Numbers.
-
A list of all numbers is displayed along with the relevant details.
-
Click on All Blocked Numbers.
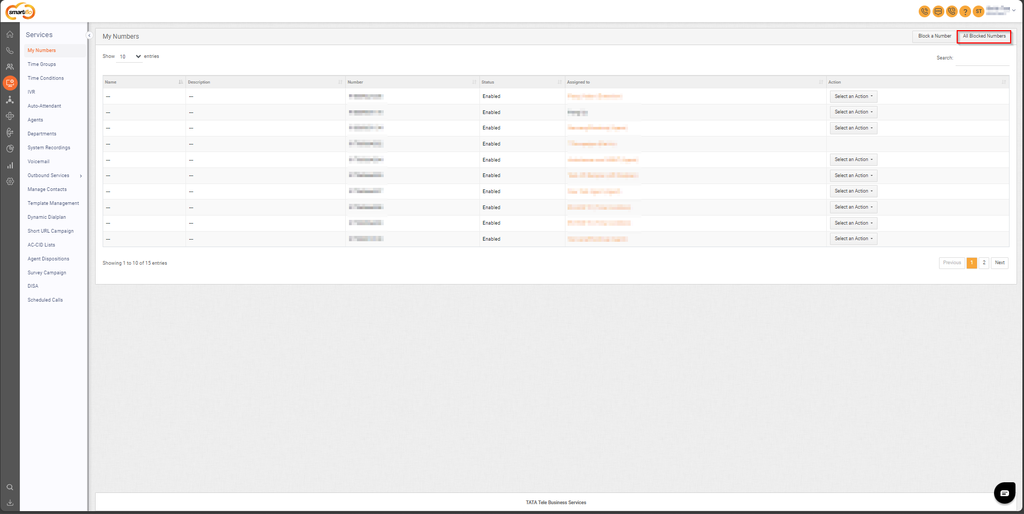
- A new window will appear after selecting the block option.
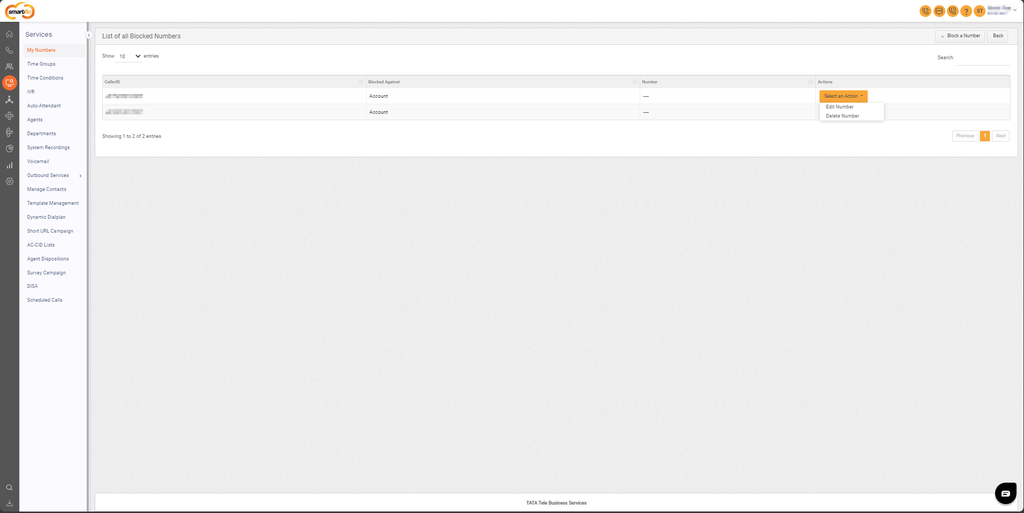
The table displays a list with the following information:
| Field | Description |
|---|---|
| CallerID | Displays the blocked caller number. |
| Blocked Against | Displays whether blocked against the account or to the DID number. |
| Number | Displays DID number. |
| Actions | Provides options to edit or delete the blocked number. |
FAQs
- User/Agent/Employee was already on a call, and he got another call was attempted for him.
- In case of a sticky agent system doesn’t check the availability of the user (Active/Busy) and attempts the call. This behaviour is known and made intentionally as sticky agent logic has the highest priority while attempting the call.
Updated 11 months ago