TTS
Text to Speech (TTS) Overview
- Text-to-Speech (TTS) enables you to set a unique voice for your brand by converting written text into spoken audio. By inputting text into the TTS field, you can create recordings that reflect your brand’s tone and use them in call broadcasts. This feature allows for consistent messaging, enhances customer experience, and saves time by automating voice recordings for various communications.
Dynamic TTS messages for broadcast automated calls, like:
"Hello [Name], this is an automated broadcast call."Example:
"Hello Kajal, this is an automated broadcast call."Here, [Name] is a dynamic variable that will be replaced with the recipient's name.

Getting Started with TTS
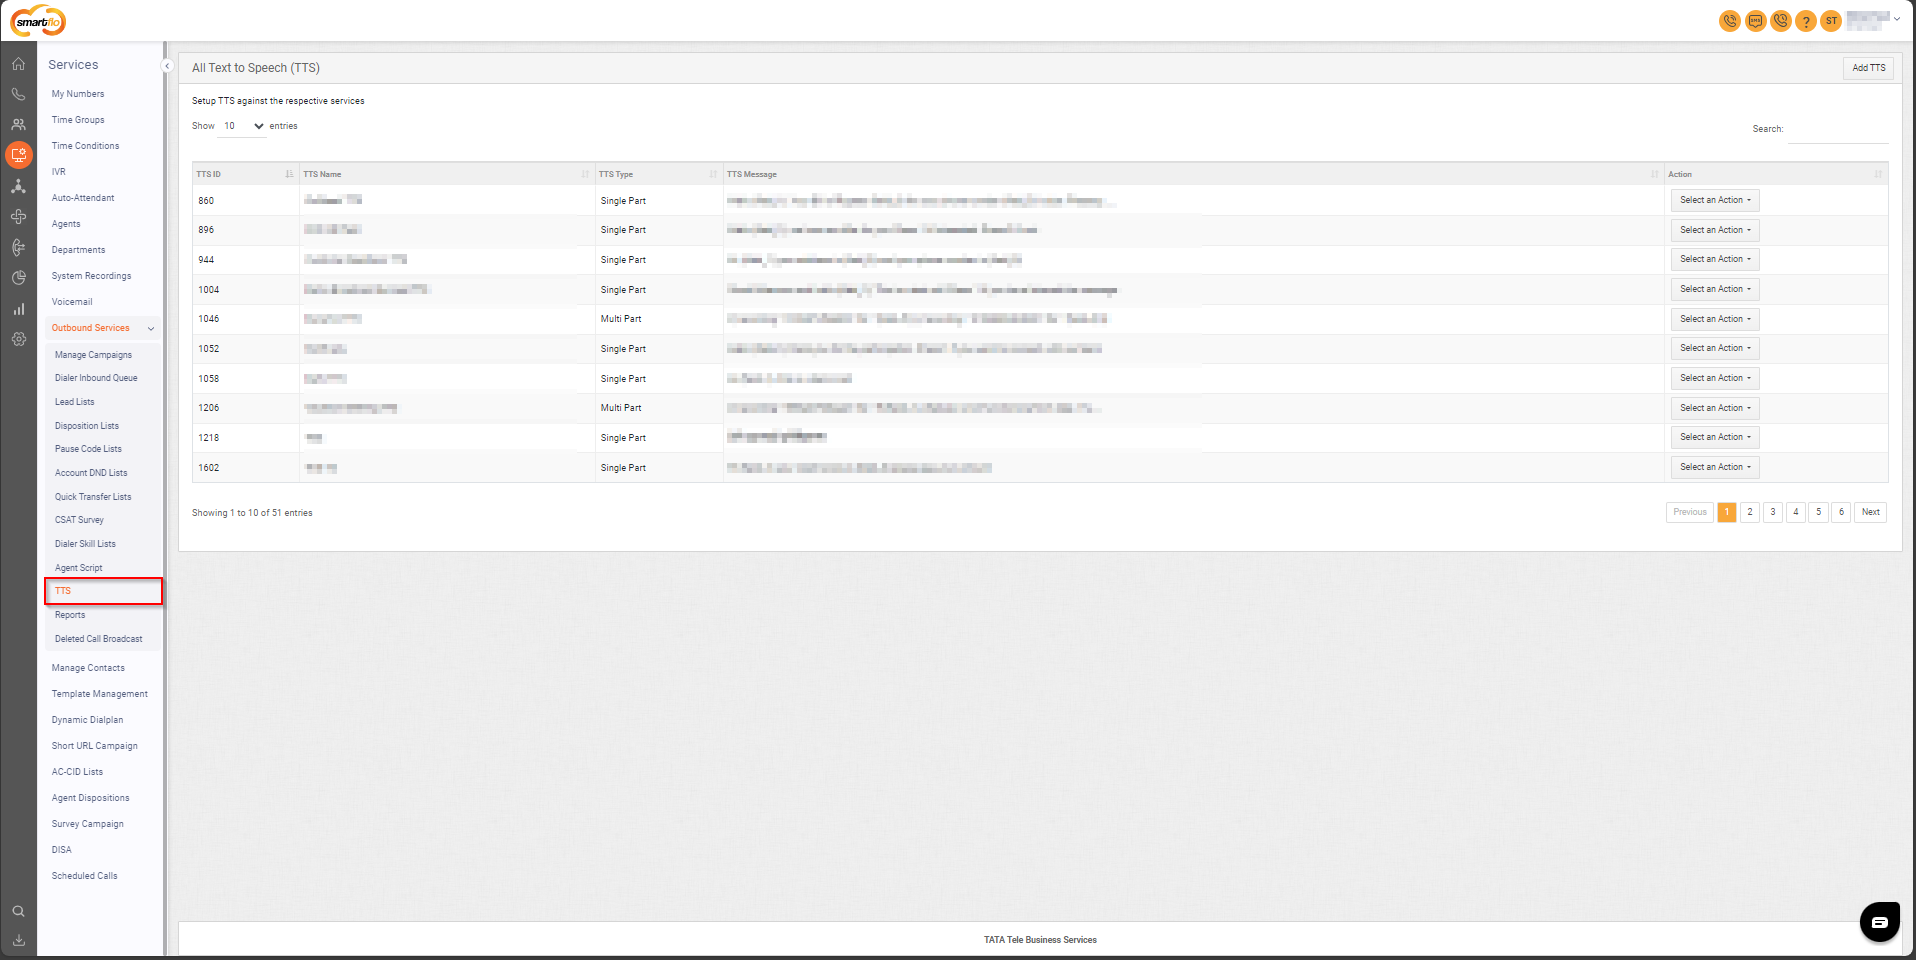
- To go to TTS in your Smartflo account, first log in using your unique User ID and Password. Once logged in, you will be directed to the main dashboard. From there, locate the navigation menu on the left-hand side of the screen and click on "Services" then “Outbound Services”. A set of options opens up. One of these options is the “TTS".
1. List of TTS

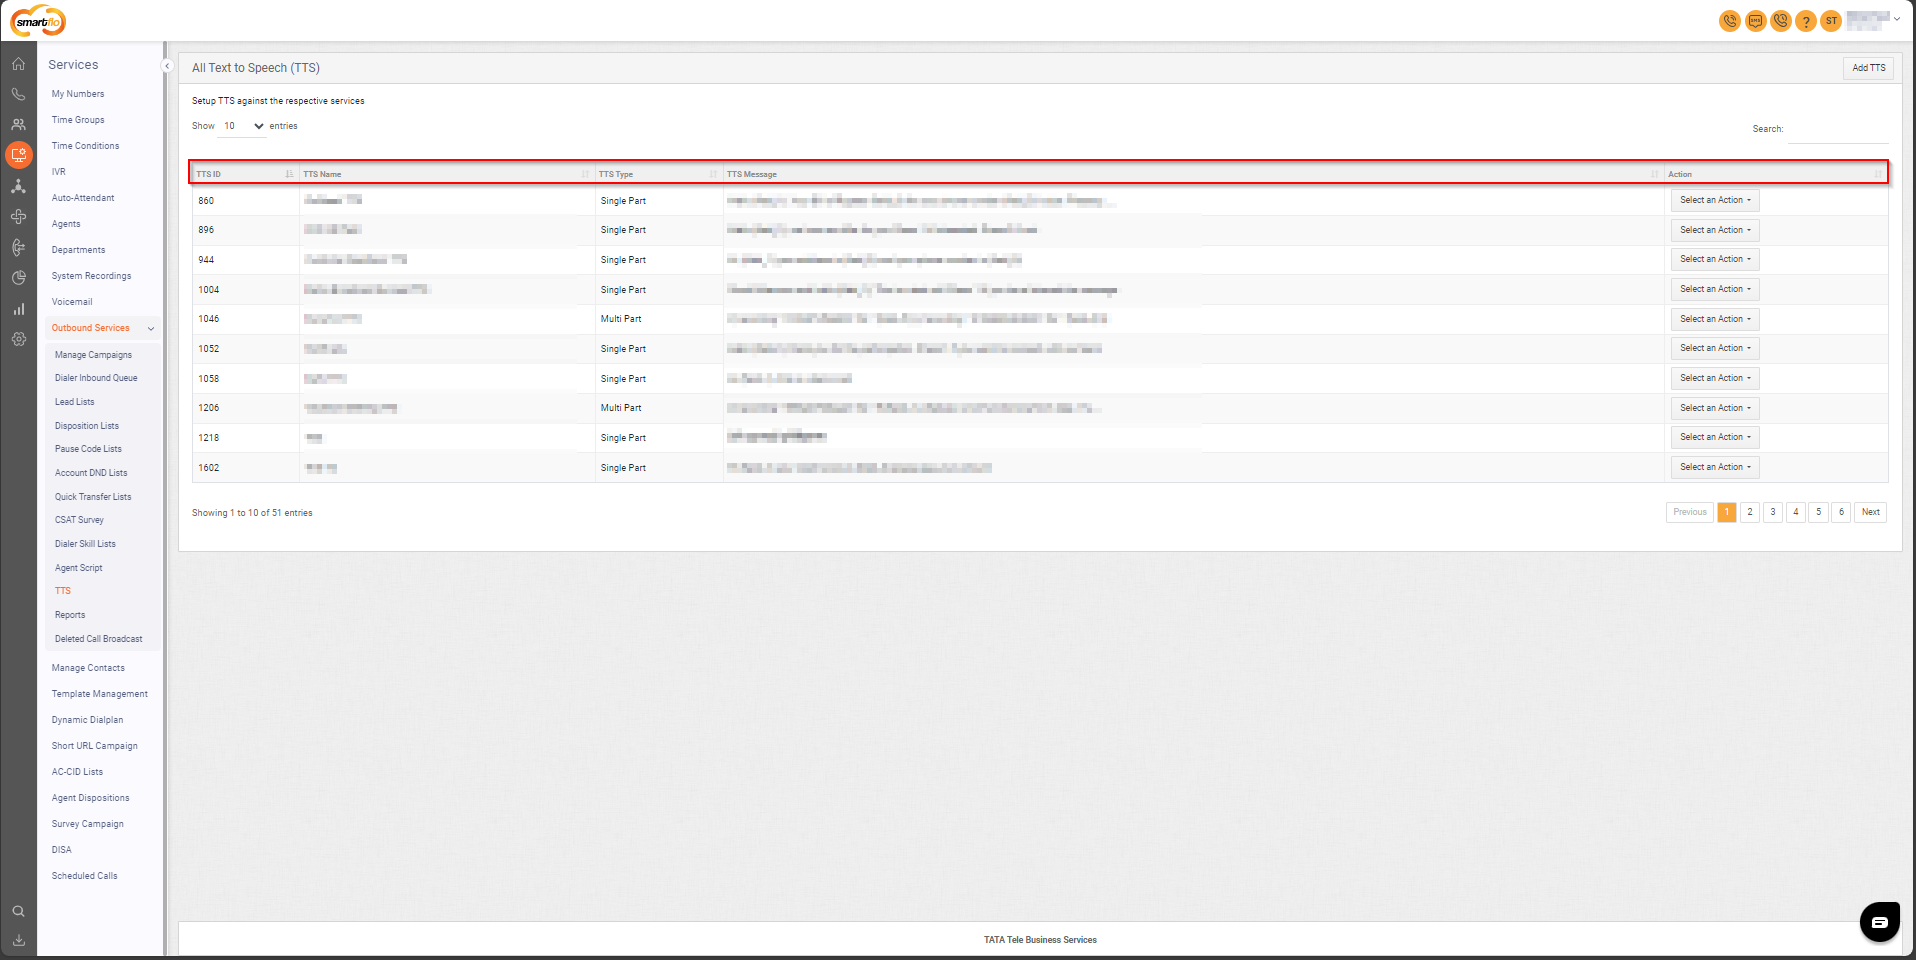
- The table displays a list of all TTS with the following information:
| Field | Description |
|---|---|
| TTS ID | A unique identifier assigned to each TTS entry for easy reference and management. |
| TTS Name | The name given to the TTS entry often reflects its purpose. |
| TTS Type | Specifies the type or category of the TTS entry, such as Single-Part TTS or Multi-Part TTS. |
| TTS Message | The text content that will be converted into speech for the broadcast campaign. |
| Action (Edit/Delete) | Provides options to modify the TTS entry or delete it if it's no longer needed. |
2. Add TTS
- To add a TTS, follow the below steps:
- Click on the Services tab on the side navigation.
- Click Outbound Services and select TTS.
- A list of all the TTS appears along with the relevant details.
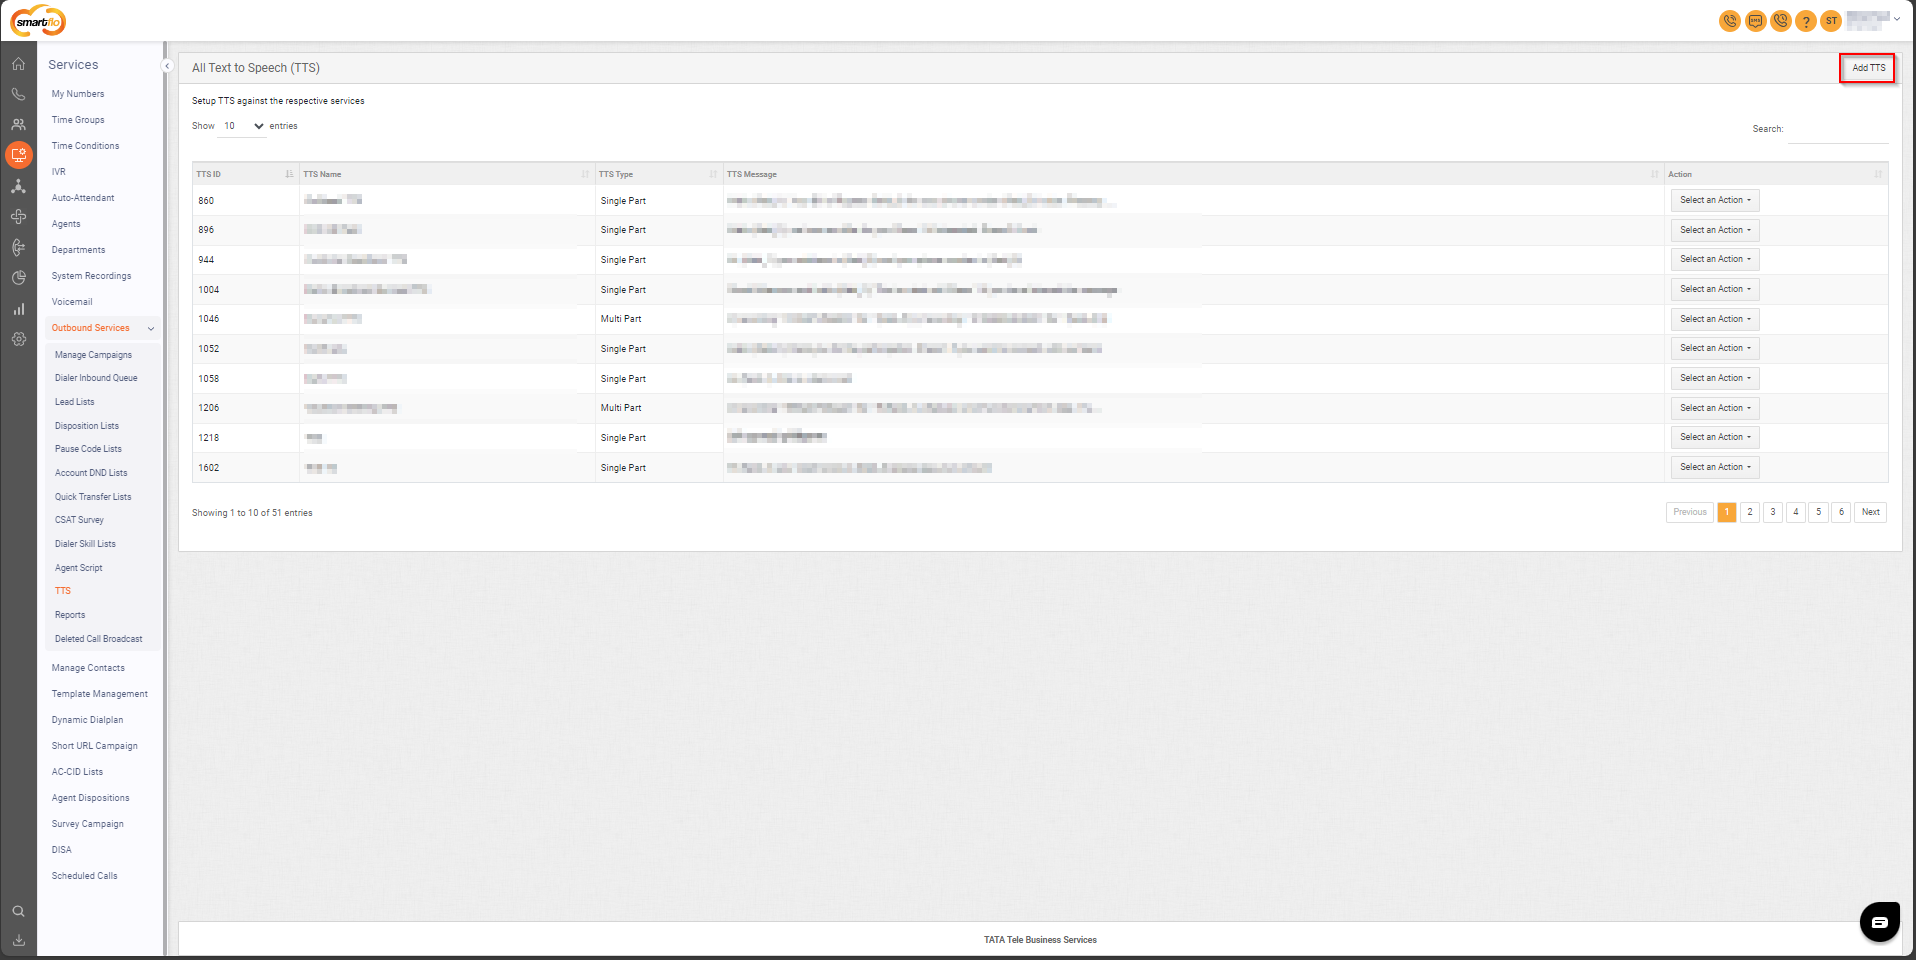
- Click on Add TTS.

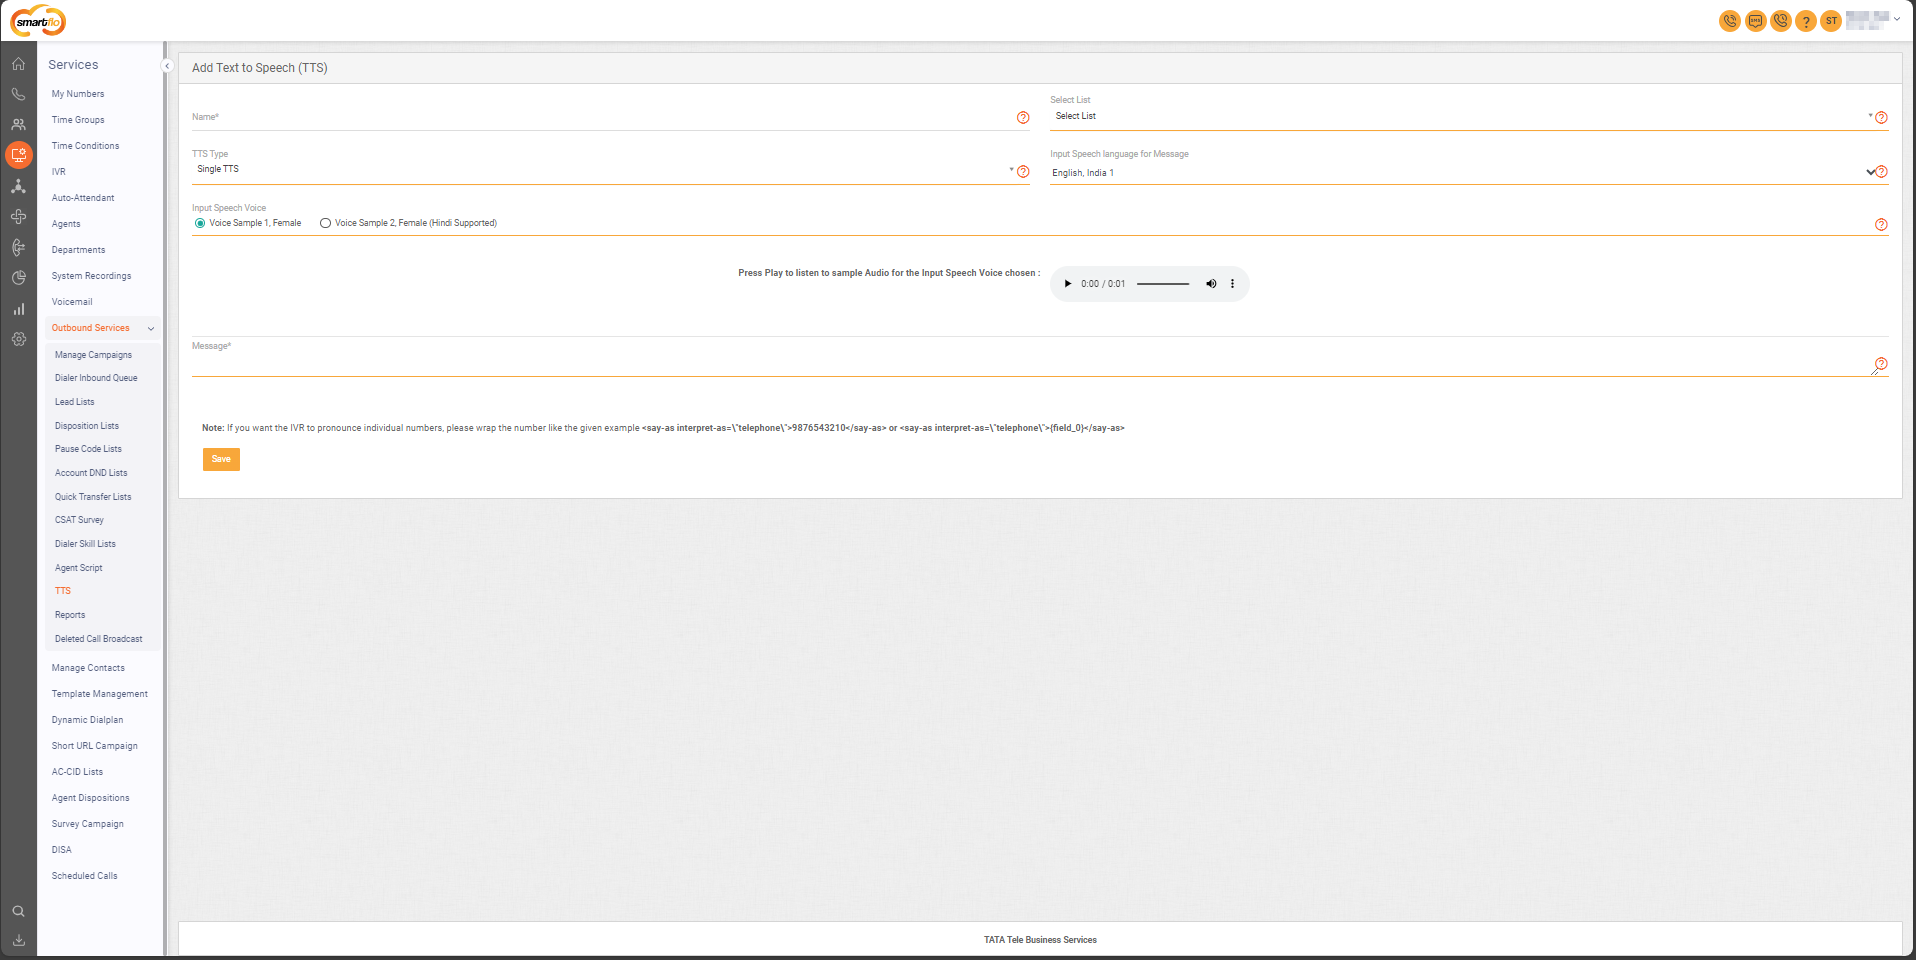
- The following screen will appear, prompting you to complete the necessary fields as shown in the screenshot below.

- Enter the Details and click Save.
| Field | Description | Options/Examples |
|---|---|---|
| Name | Enter the name of TTS. | Example: "Greeting TTS" |
| Select List | Select the lead list. | Example: "Test Lead List" |
| TTS Type | Specifies the type of TTS entry. | 1. Single TTS |
- Multi-Part TTS | | Single TTS | A simple TTS type where the account admin can input text that is converted into speech. It also supports dynamic fields for personalized messages. | Example: "Hello [Name], your appointment is at [Time]." | | Multi-Part TTS | A complex TTS type where multiple recordings are linked to dynamic fields, allowing the creation of personalized messages. | Example: "Hello Shivam, this is an automated broadcast message." | | Input Speech Language | Choose the language and country type for recording. | Example: English India 1, English India 2, Hindi India | | Input Speech Voice | Choose the speech voice for the recording. | Example: Voice Sample 1: Female, Voice Sample 2: Female (Hindi supported) |
Note: If you want the IVR to pronounce individual numbers, please wrap the number like the given example:
<say-as interpret-as="telephone">9876543210</say-as>or<say-as interpret-as="telephone">{field_0}</say-as>
Updated about 1 year ago