Pending Users
Pending User(s) Overview
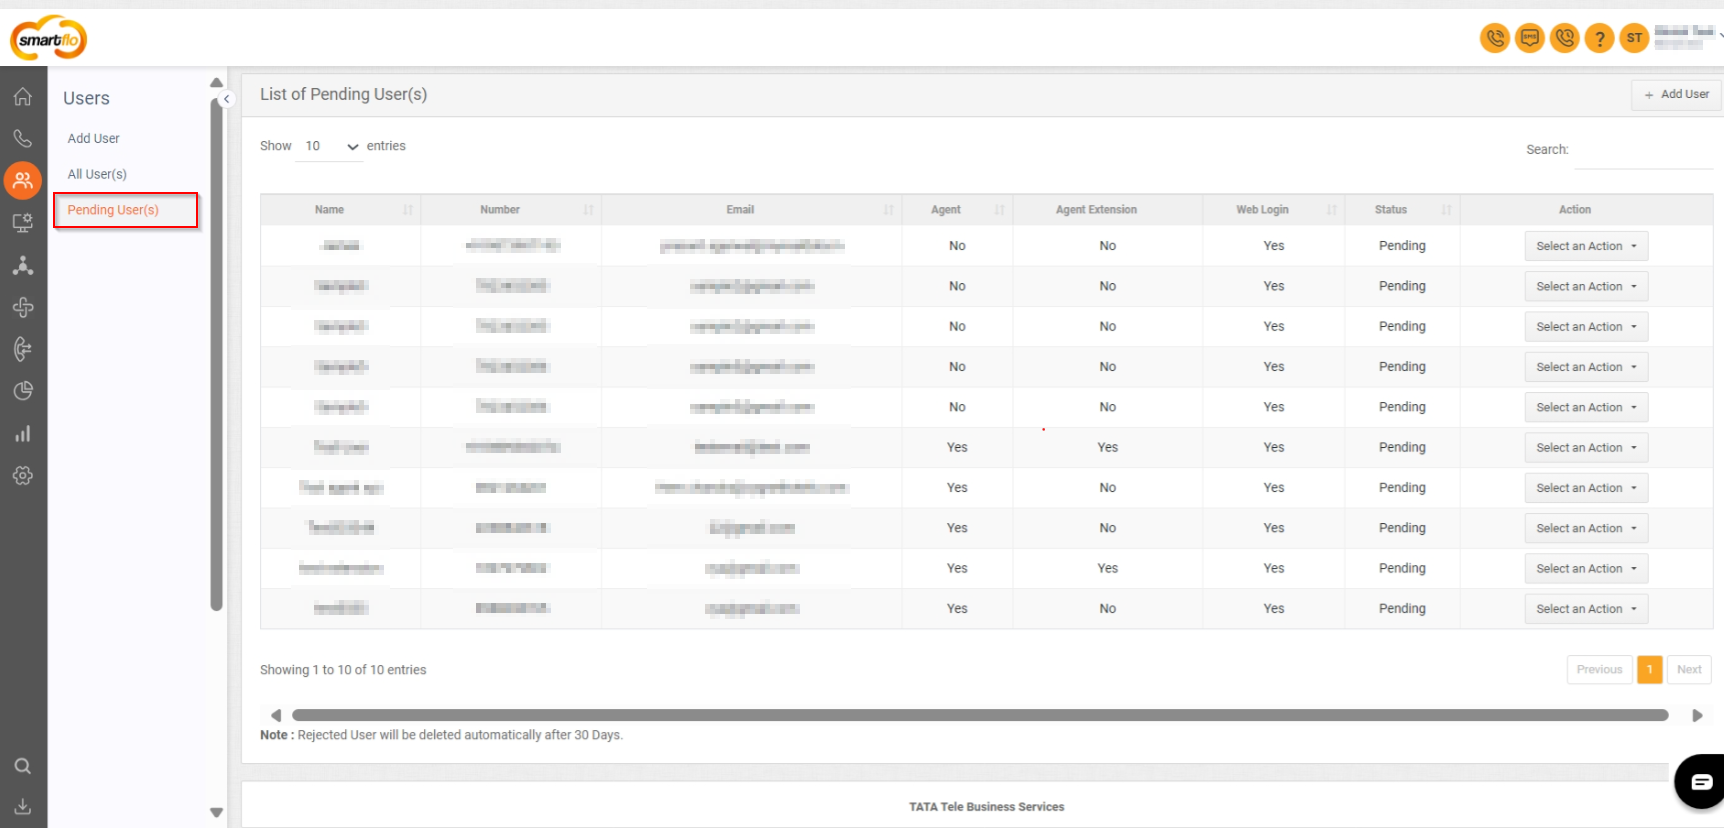
The "Pending Users" section allows you to manage users who are yet to be fully onboarded or activated. This section provides a comprehensive list and several actions that can be performed on pending users.

Getting Started with Pending User(s)
To go to Pending User(s) to your Smartflo account, first log in using your unique User ID and Password. Once logged in, you will be directed to the main dashboard. From there, locate the navigation menu on the left-hand side of the screen and click on "Users." A set of options opens up. One of these options is the "Pending User(s)".
- List of Pending User(s)

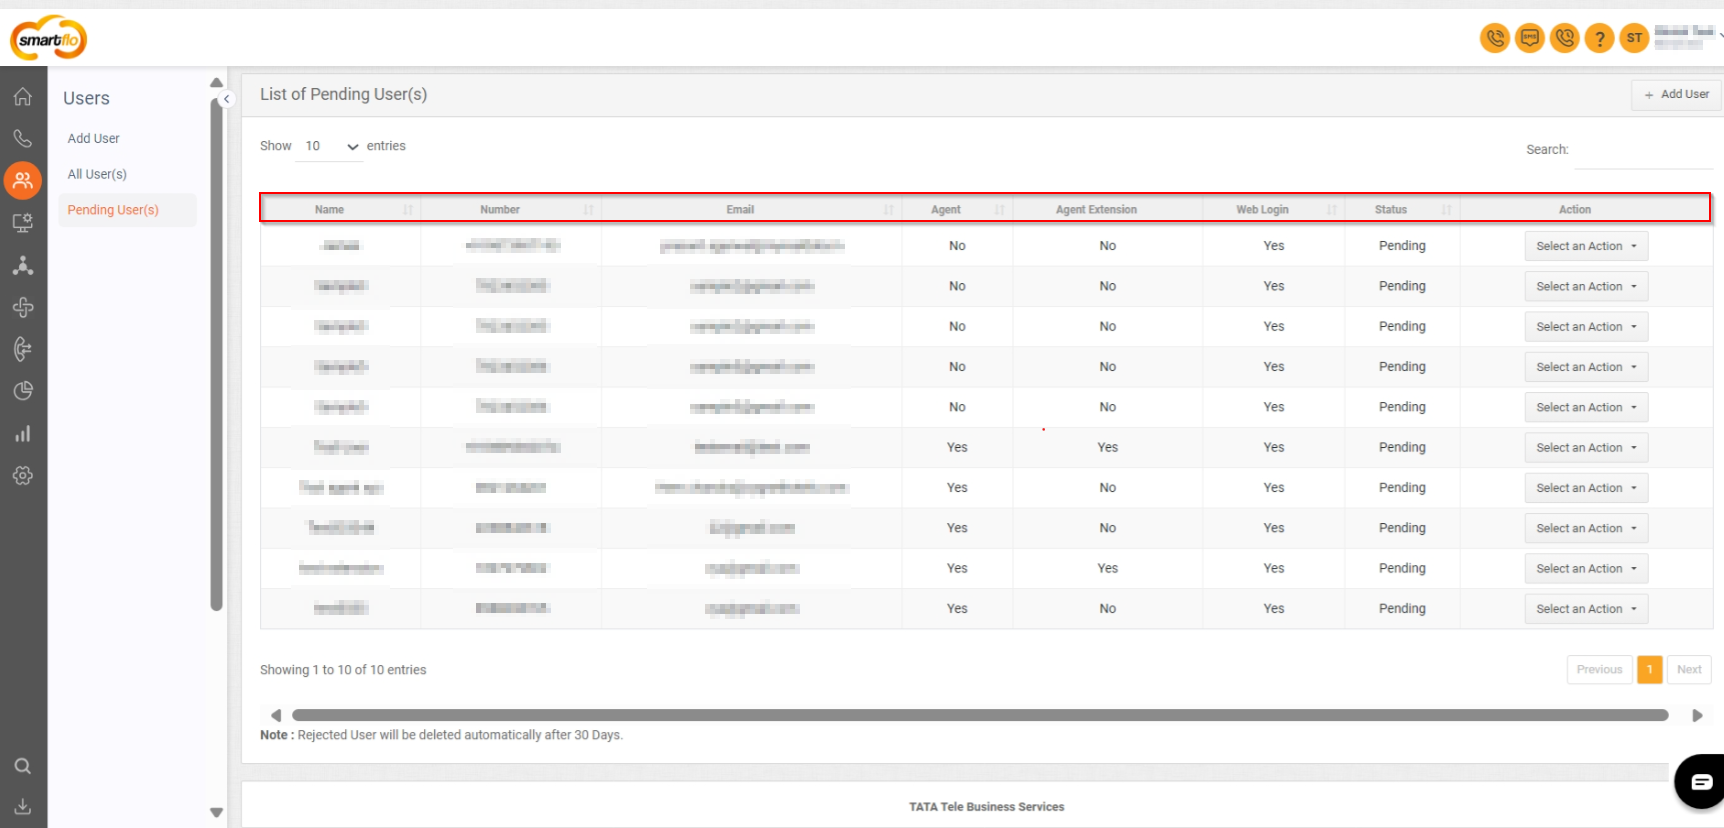
- Displays the following details for each pending user:
| Field | Description |
|---|---|
| Name | The user's name. |
| Number | The user's phone number. |
| The user's email address. | |
| Agent | Indicates if the user is an agent (Yes/No). |
| Agent Extension | Indicates if the user has an agent extension (Yes/No). |
| Web Login | Indicates if web login is enabled for the user (Yes/No). |
| Status | Shows the current status (Pending). |
| Action | To perform multiple actions such as Edit user, Delete user, Approve user and Reject User |
Note: At the bottom of the list, there is a note stating that rejected users will be deleted automatically after 30 days.
Detailed Explanation of Actions
When you click on the "Select an Action" dropdown for a pending user, you can perform the following actions:
In the "Pending Users" section, the "Select an Action" dropdown provides several options for managing pending user accounts. Here's what each action entails:
- Edit User:
- This option allows you to modify the details of the pending user. You can update information such as the user's name, email, phone number, designation, and other relevant details before approving the account.
- Delete User:
- This option allows you to remove the pending user from the system. Deleting a user will remove their pending status and associated data, preventing them from being added as a user.
- Approve User:
- This option allows you to approve the pending user, granting them access to the system. Once approved, the user will be added to the list of active users and can start using the services provided by the platform.
- Reject User:
- This option allows you to reject the pending user, denying them access to the system. Rejected users will not be able to use the platform, and their status will be marked as rejected. Rejected users will be automatically deleted after 30 days.
These actions provide administrators with control over the management of pending user accounts, ensuring that only authorized users gain access to the system.
Updated about 1 year ago