
Create & Configure an API Dialplan
This section explains how to create and configure an API Dialplan using the Smartflo Portal. Once configured, Smartflo invokes your API whenever a call is received on a DID associated with the API Dialplan. Based on your application's response, Smartflo dynamically routes the call to the appropriate destination.
Prerequisites
Before creating an API Dialplan, ensure that:
- You have Administrator access to the Smartflo Portal.
- Your application exposes a publicly accessible HTTPS endpoint.
- Your API supports either GET or POST requests over HTTPS.
- Your application returns a valid Smartflo API Dialplan response or uses Custom Mapping to transform its existing response format.
- The routing destinations (Agents, IVRs, Departments, Voice Bots, Queues, etc.) are already configured in your Smartflo account.
Step 1: Navigate to the API Dialplan Page
Log in to the Smartflo Portal and navigate to:
API Connect / Flows → API Dialplan
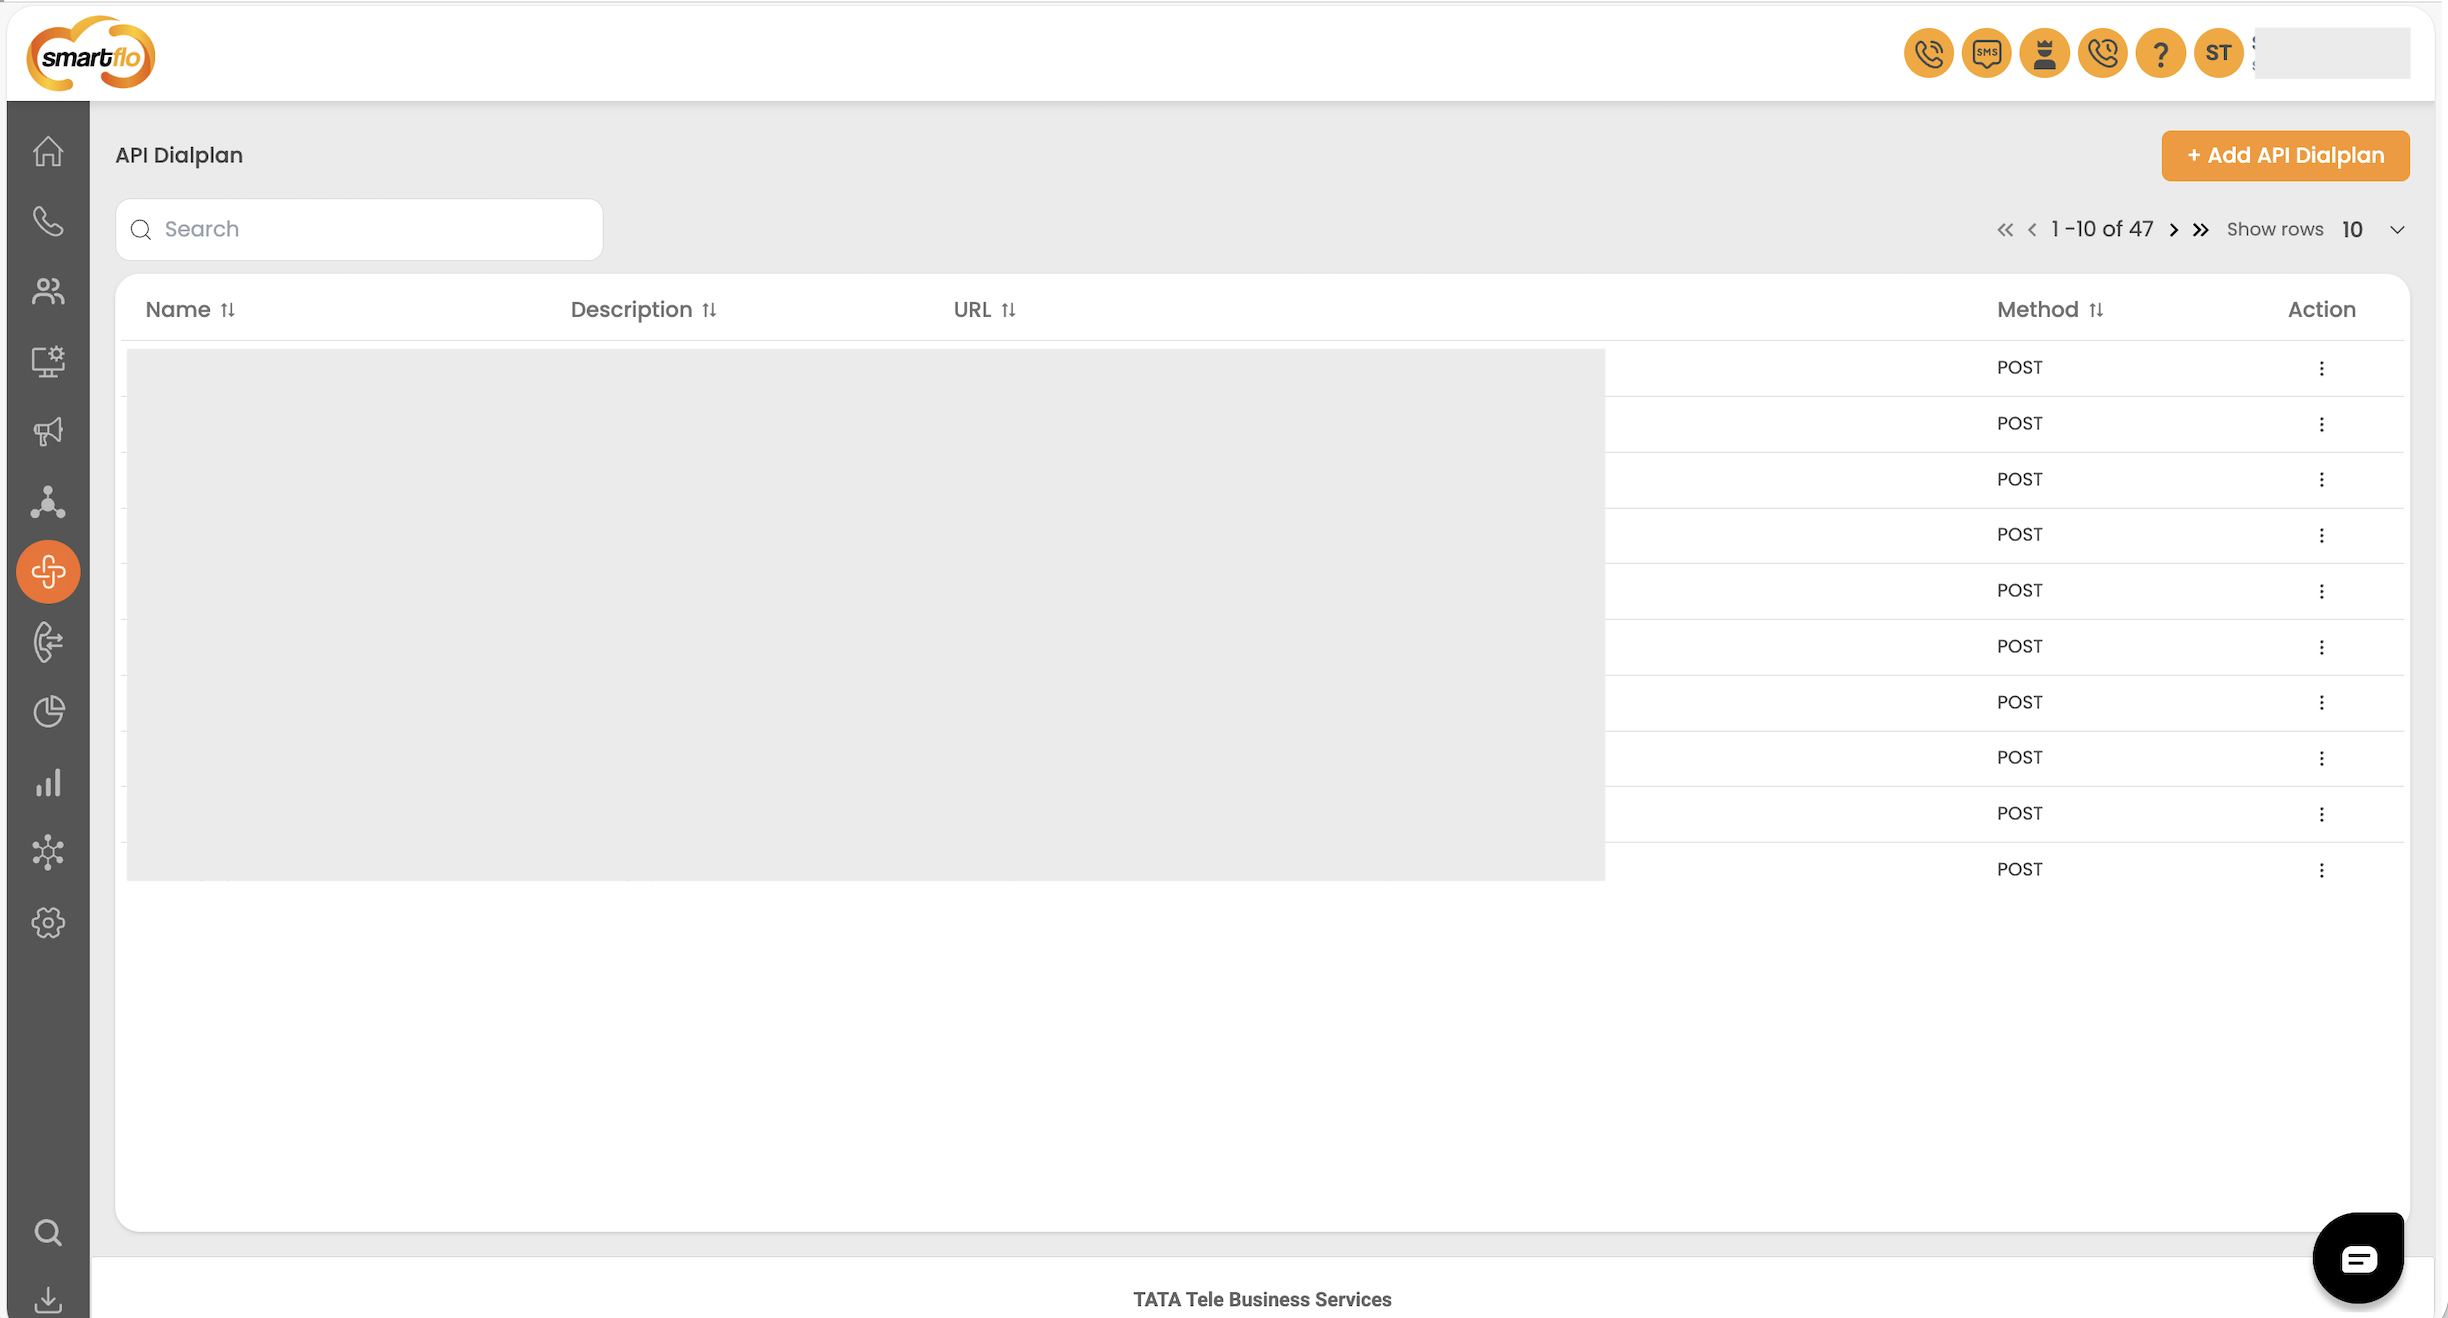
The API Dialplan page displays all the API Dialplans configured for your account along with details such as the Name, Description, Endpoint URL, and HTTP Method. From this page, you can:
- View all existing API Dialplans.
- Search for a specific API Dialplan.
- Edit or delete an existing configuration.
- Create a new API Dialplan.
Step 2: Create a New API Dialplan
Click + Add API Dialplan.
This opens the API Dialplan configuration page, where you can define your API endpoint and configure how Smartflo communicates with your application.
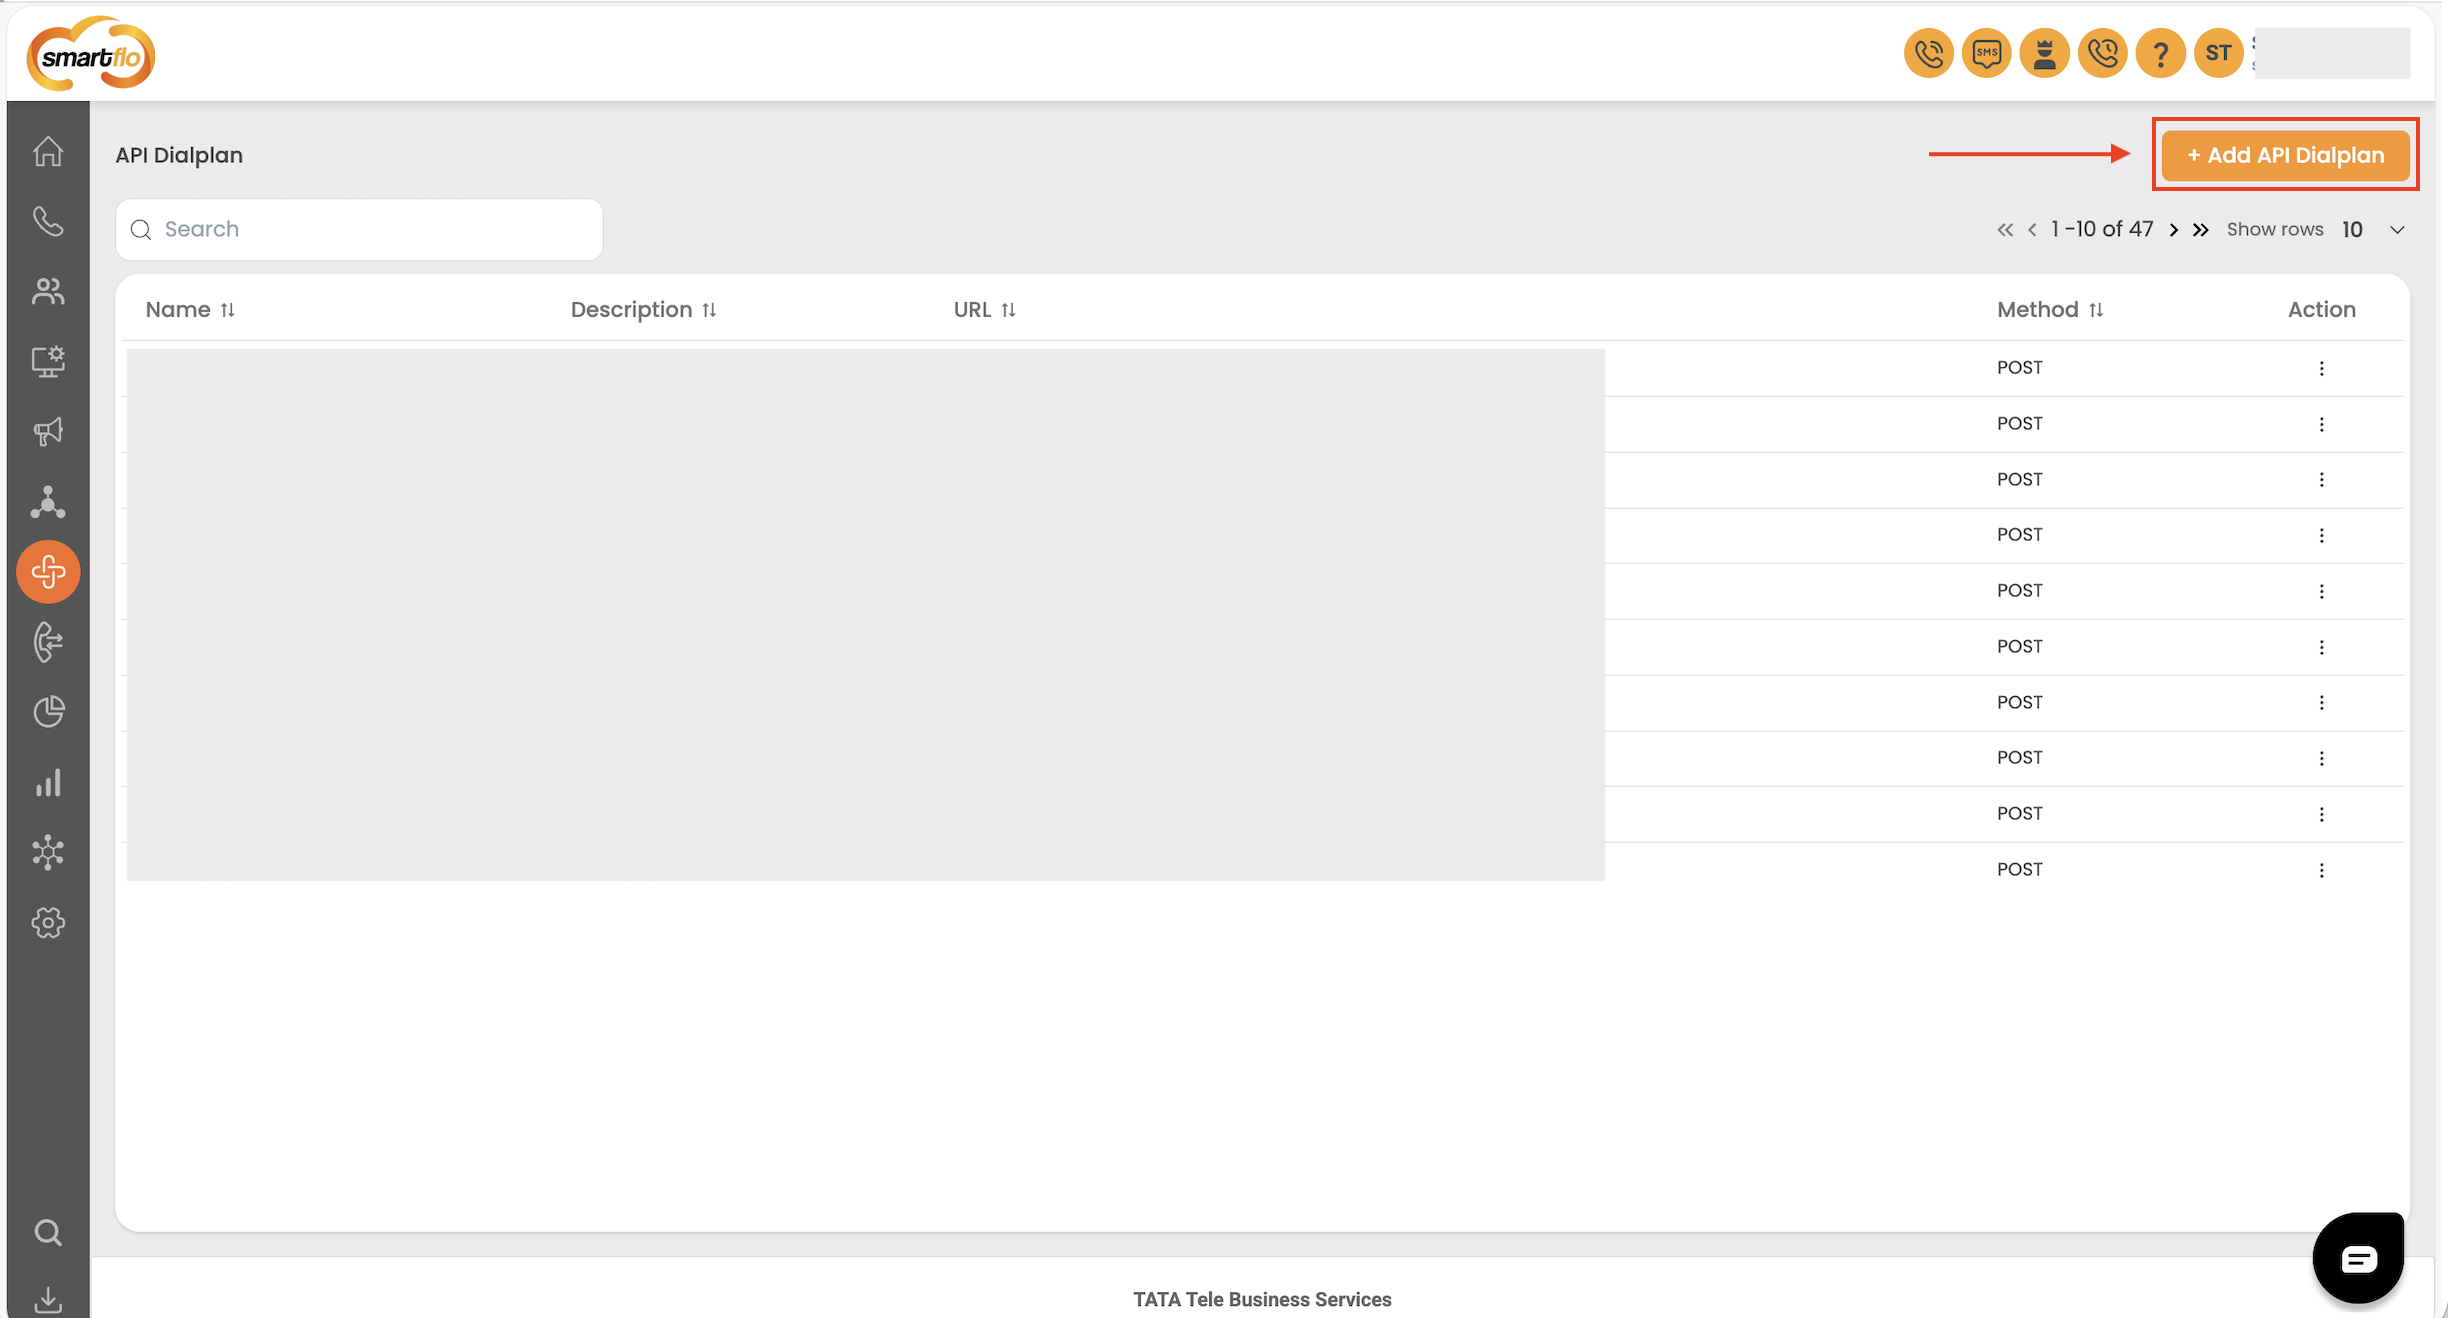
Provide the following details:
| Field | Description |
|---|---|
| Name | A unique name to identify the API Dialplan within Smartflo. |
| Description | An optional description to help administrators understand the purpose of the API Dialplan. |
| HTTP Method | Select the HTTP method to invoke your endpoint. Smartflo supports both GET and POST methods. |
| Endpoint URL | Enter the publicly accessible HTTPS endpoint that Smartflo should invoke when a call is received. |
Note: Only HTTPS endpoints are supported. Ensure that your endpoint is publicly accessible and capable of responding within the configured timeout.
Step 3: Configure API Request Settings
The Configurations tab allows you to configure how Smartflo communicates with your API and how it handles failures.
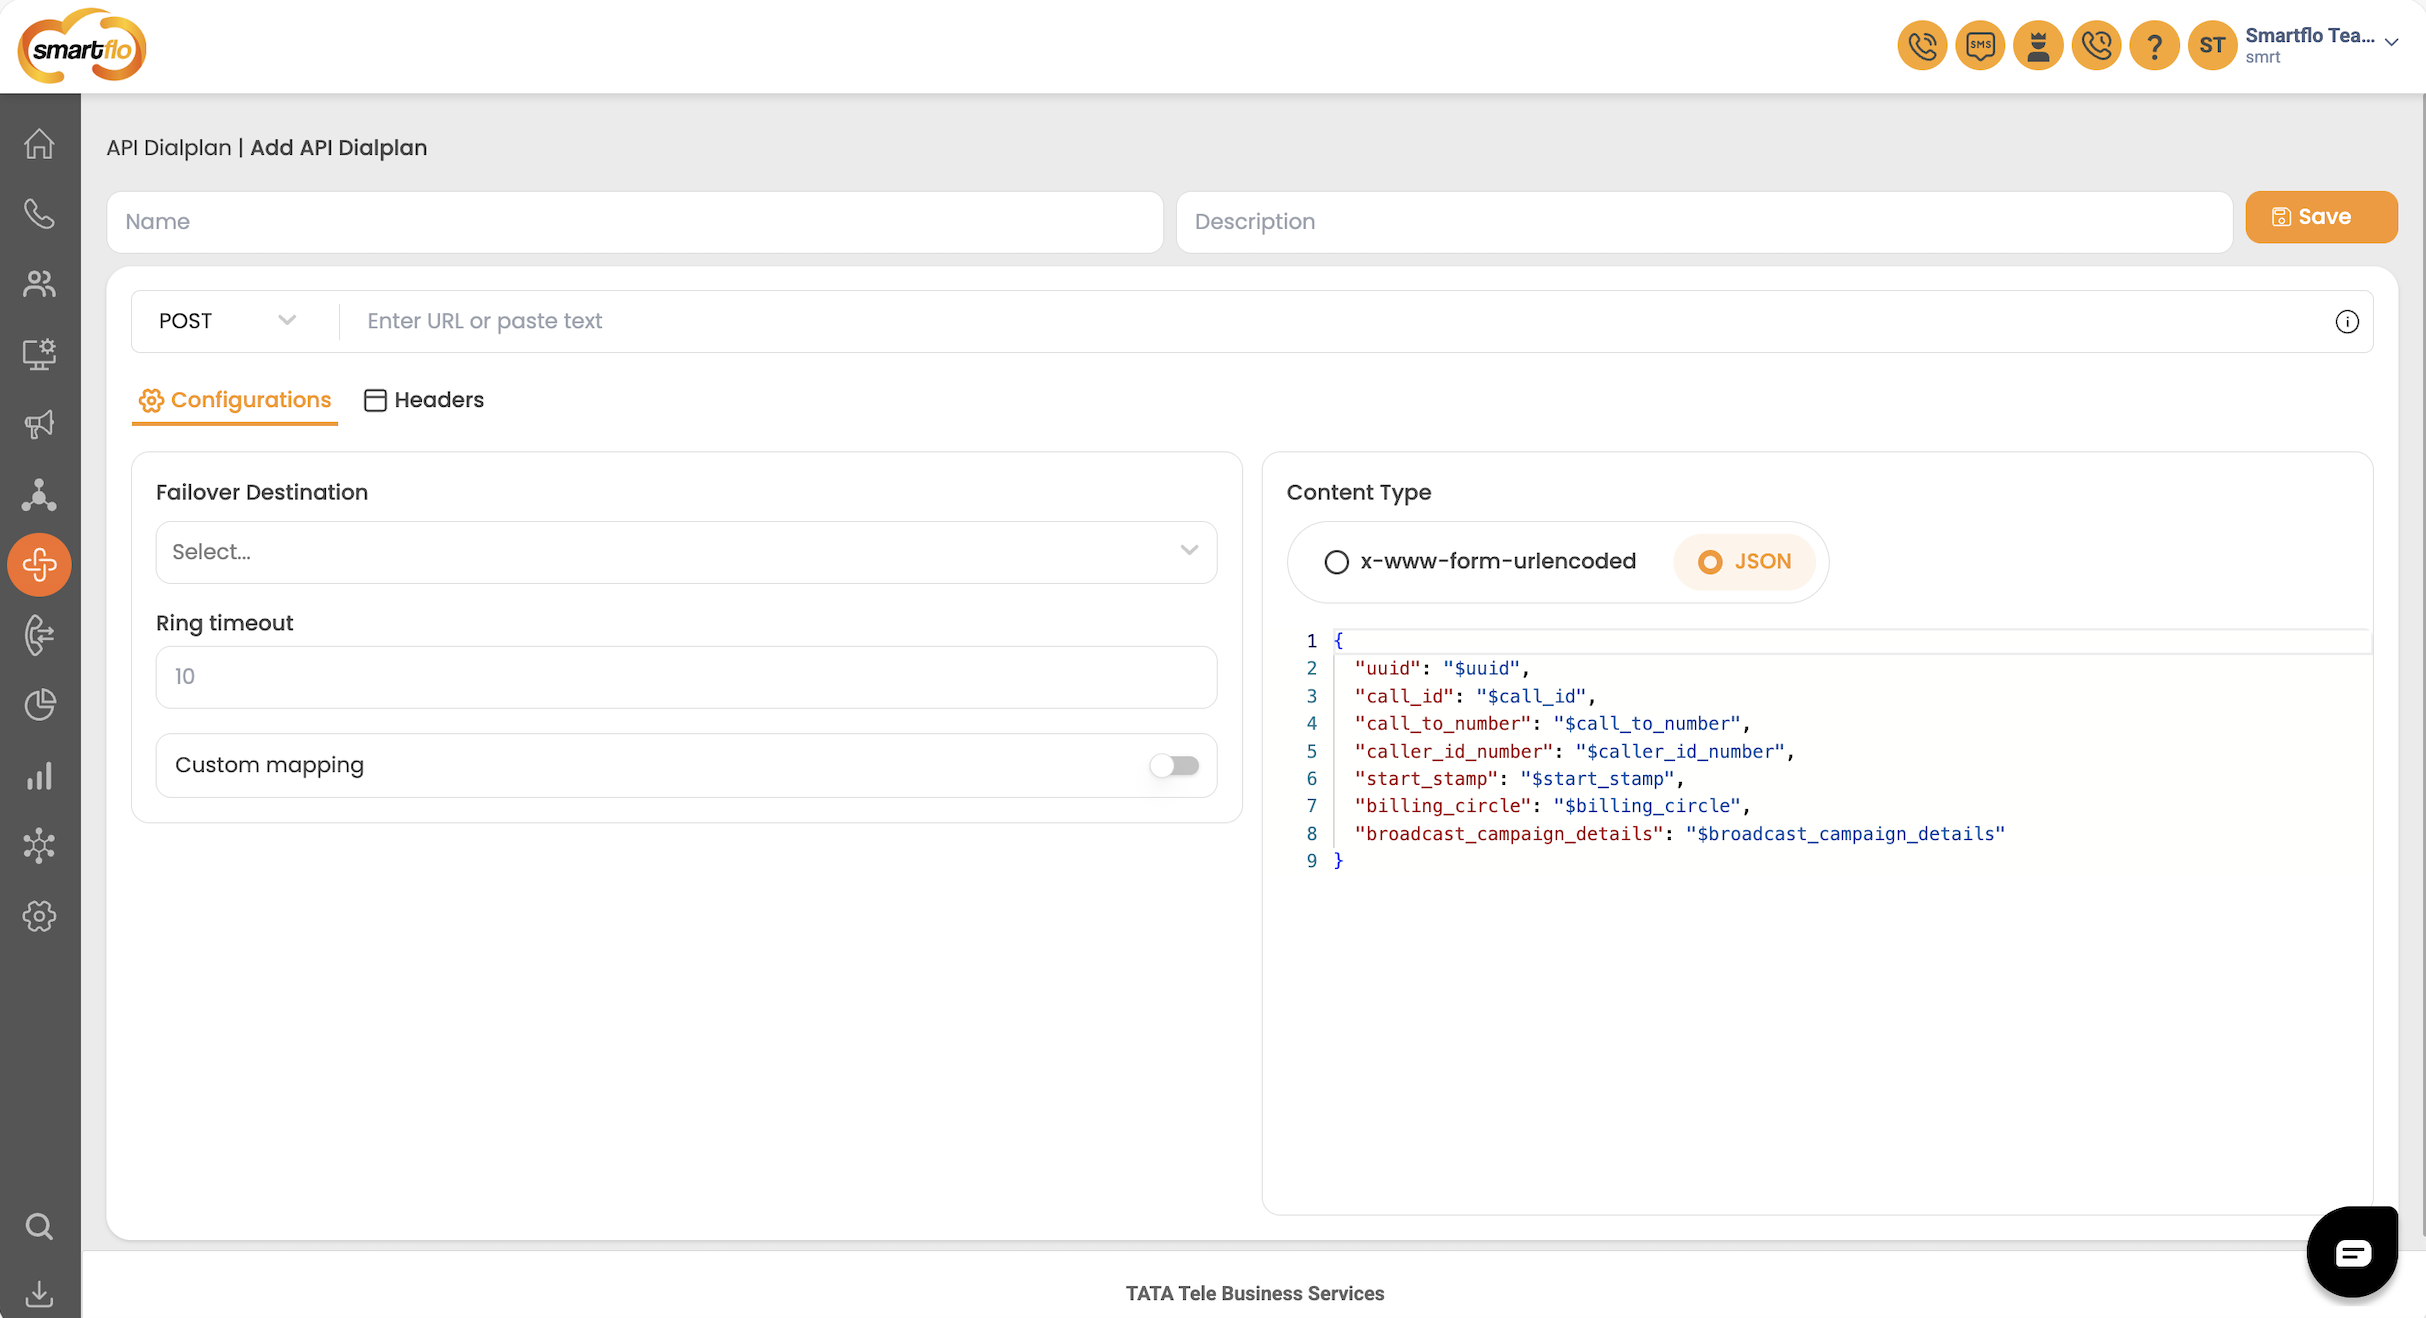
Failover Destination
The Failover Destination acts as a backup routing option if Smartflo is unable to successfully process your API request.
Smartflo transfers the call to the configured Failover Destination when:
- The API endpoint is unreachable.
- The API response exceeds the configured Ring Timeout.
- The API returns an invalid or unsupported response.
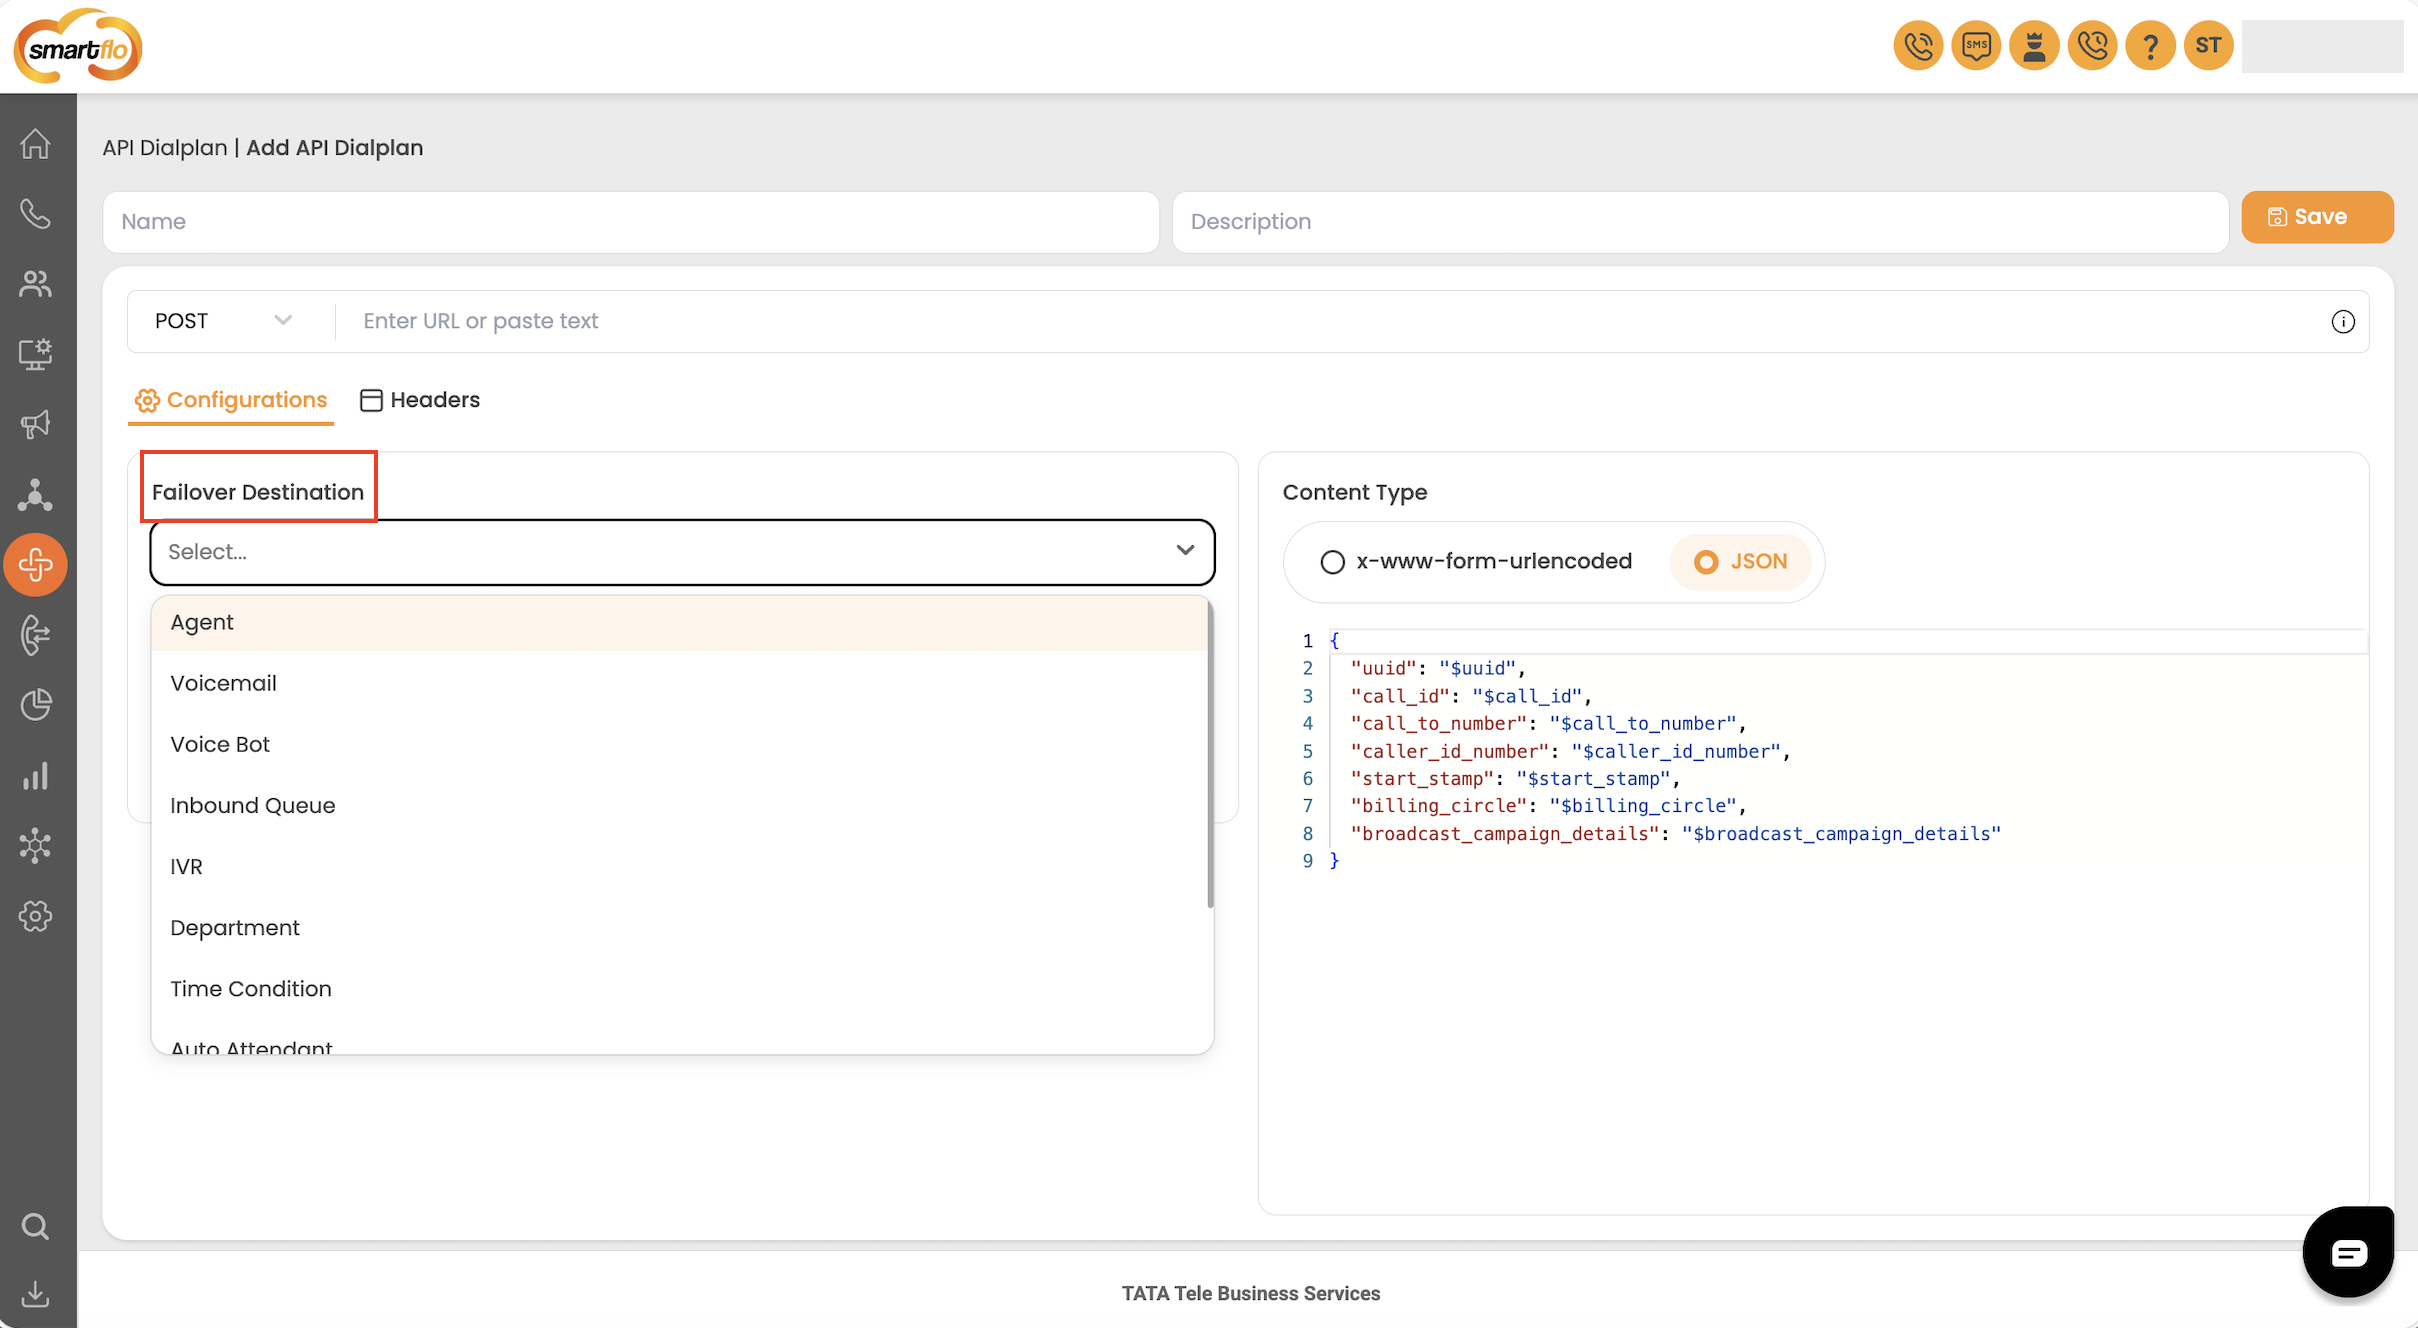
Supported Failover Destinations include:
- Agent
- Voicemail
- Voice Bot
- Inbound Queue
- IVR
- Department
- Time Condition
- Auto Attendant
- Custom Dialplan
- API Dialplan
- Hangup
Ring Timeout
Specify the maximum duration (in seconds) that Smartflo should wait for your API to return a response.
If a valid response is not received within the configured timeout, Smartflo automatically routes the call to the configured Failover Destination. Choose an appropriate timeout based on the average response time of your application.
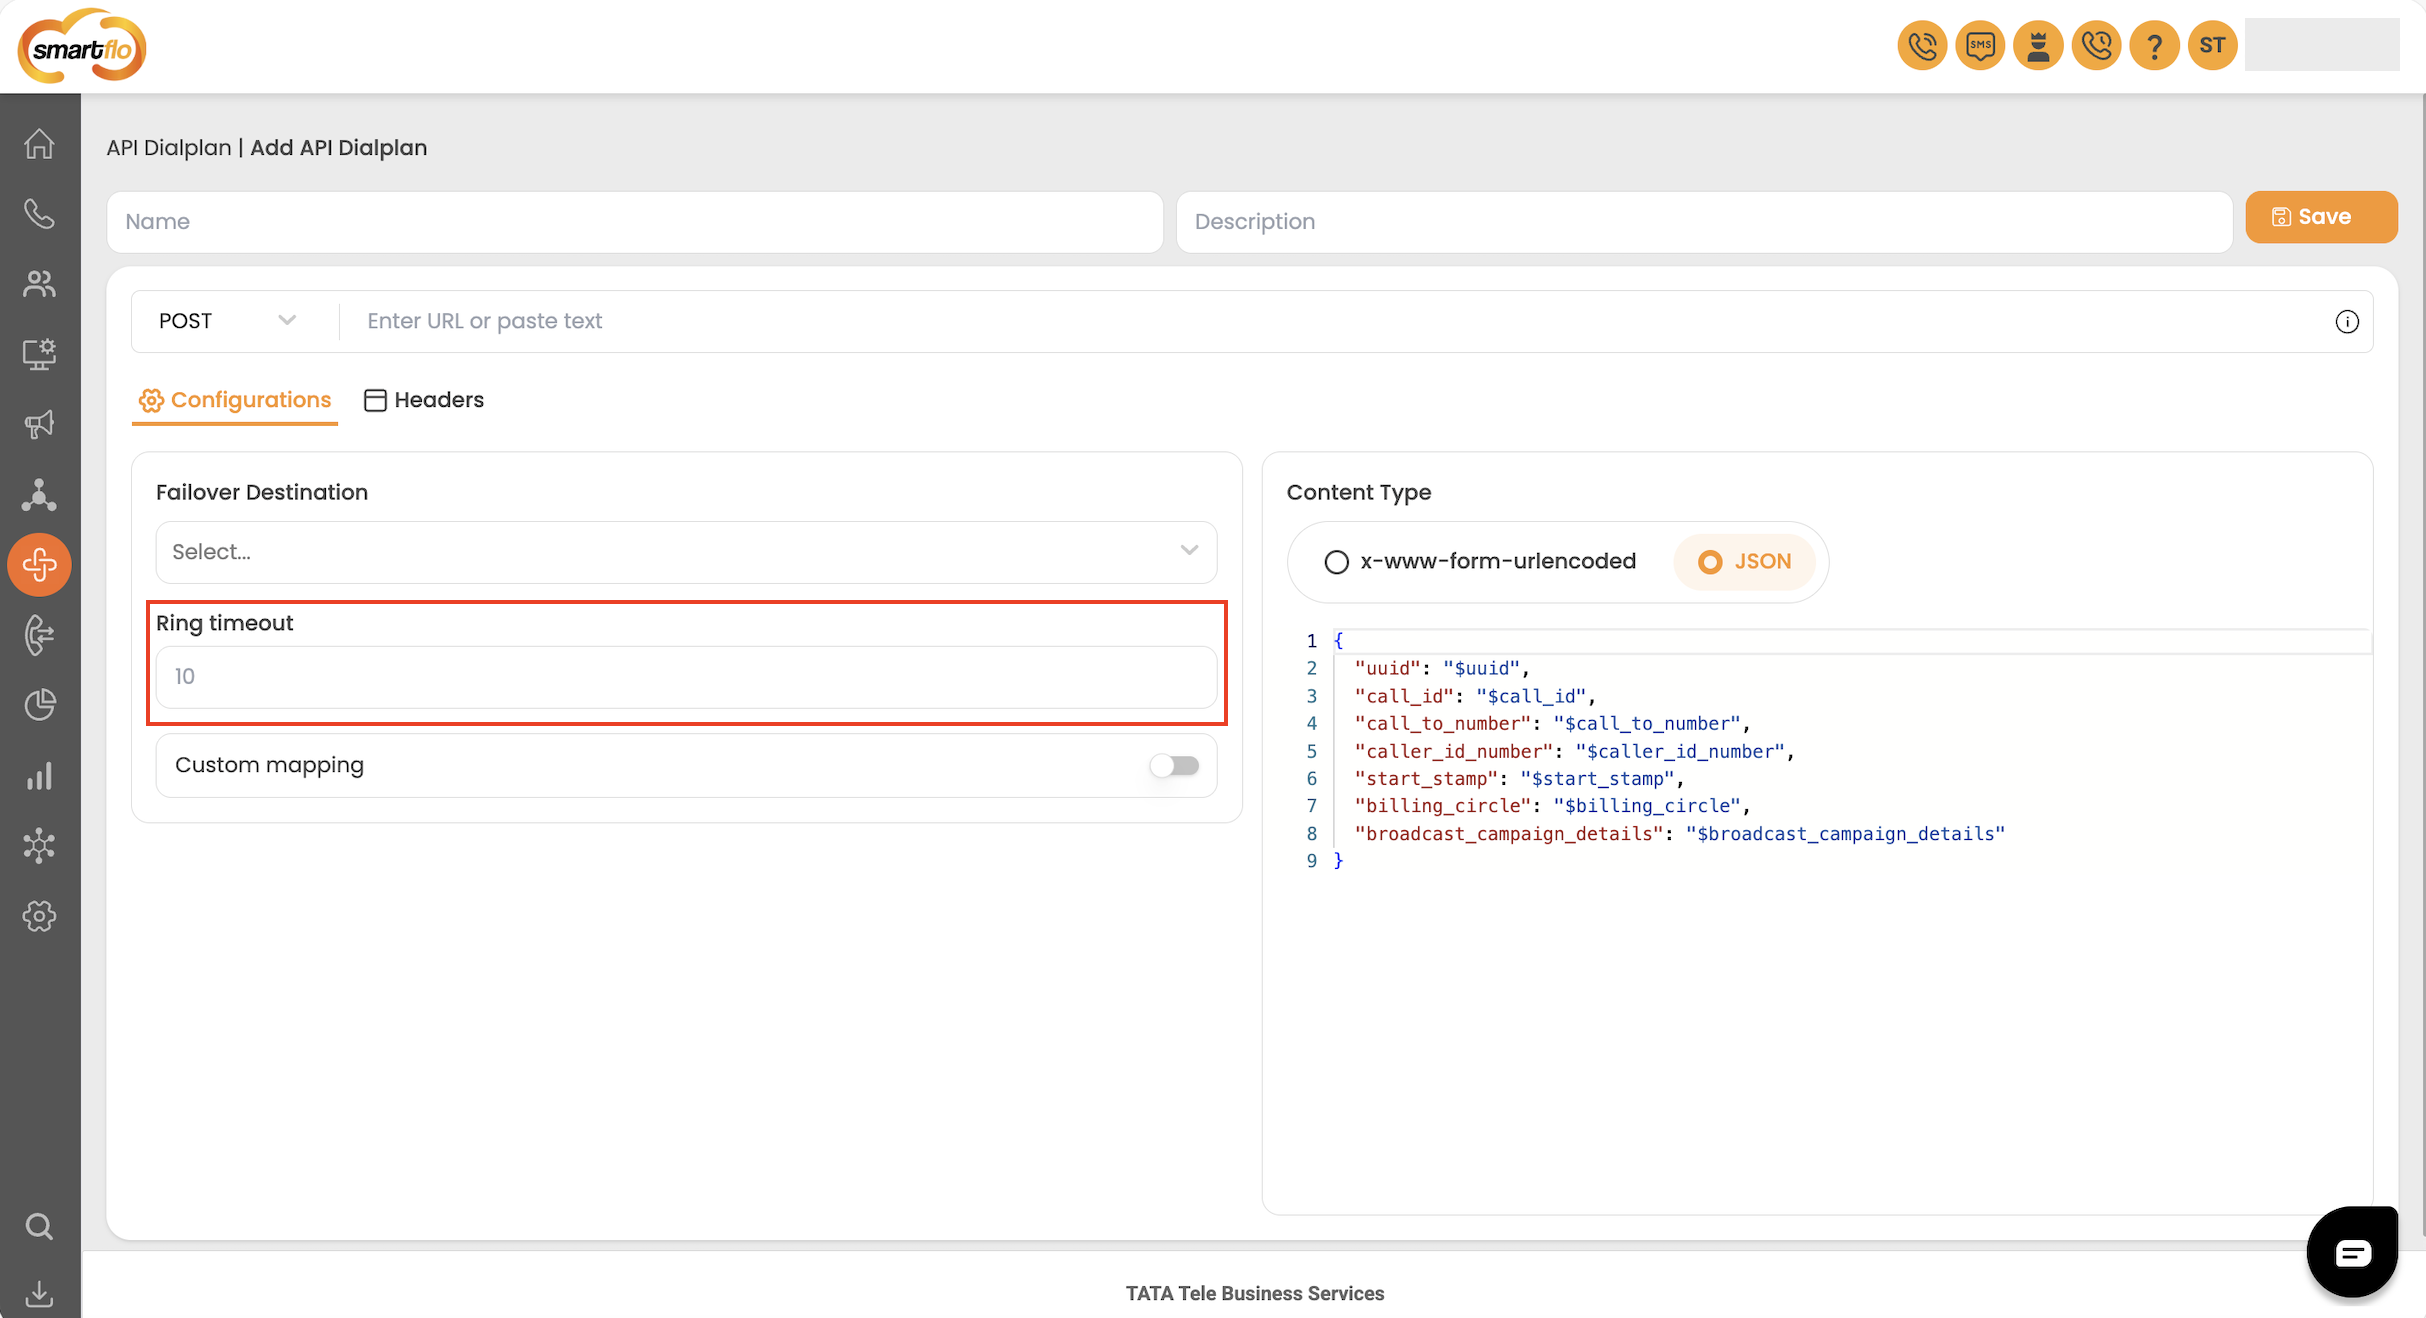
Content Type
Select the content type that Smartflo should use when sending the API request. Supported formats include:
application/jsonapplication/x-www-form-urlencoded
The request payload editor displays the default variables sent by Smartflo. You can customize the payload based on your application's requirements.
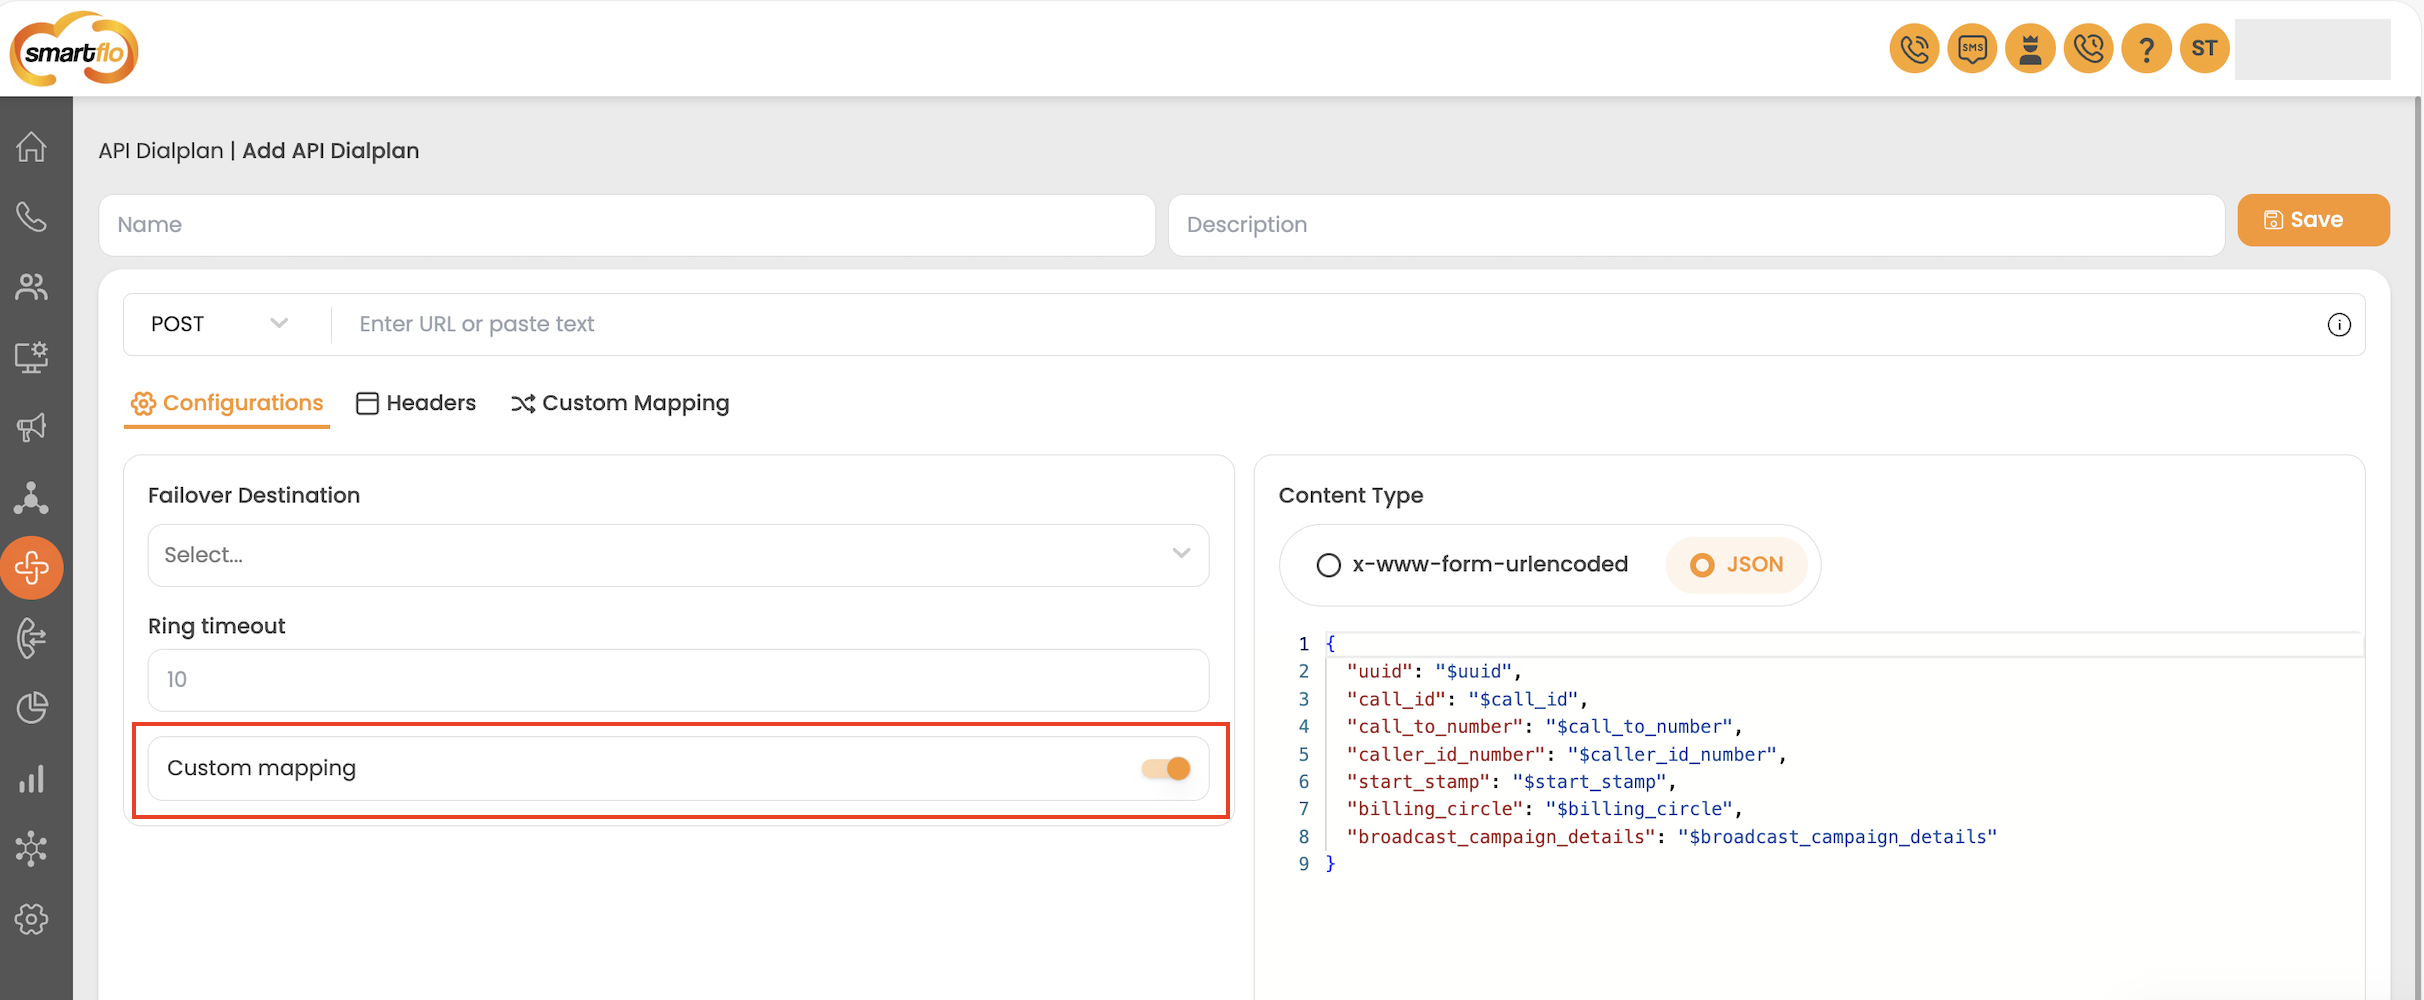
Custom Mapping (Optional)
Enable Custom Mapping if your application already returns a response in its own predefined format and you do not want to modify your existing API to comply with the Smartflo response structure.
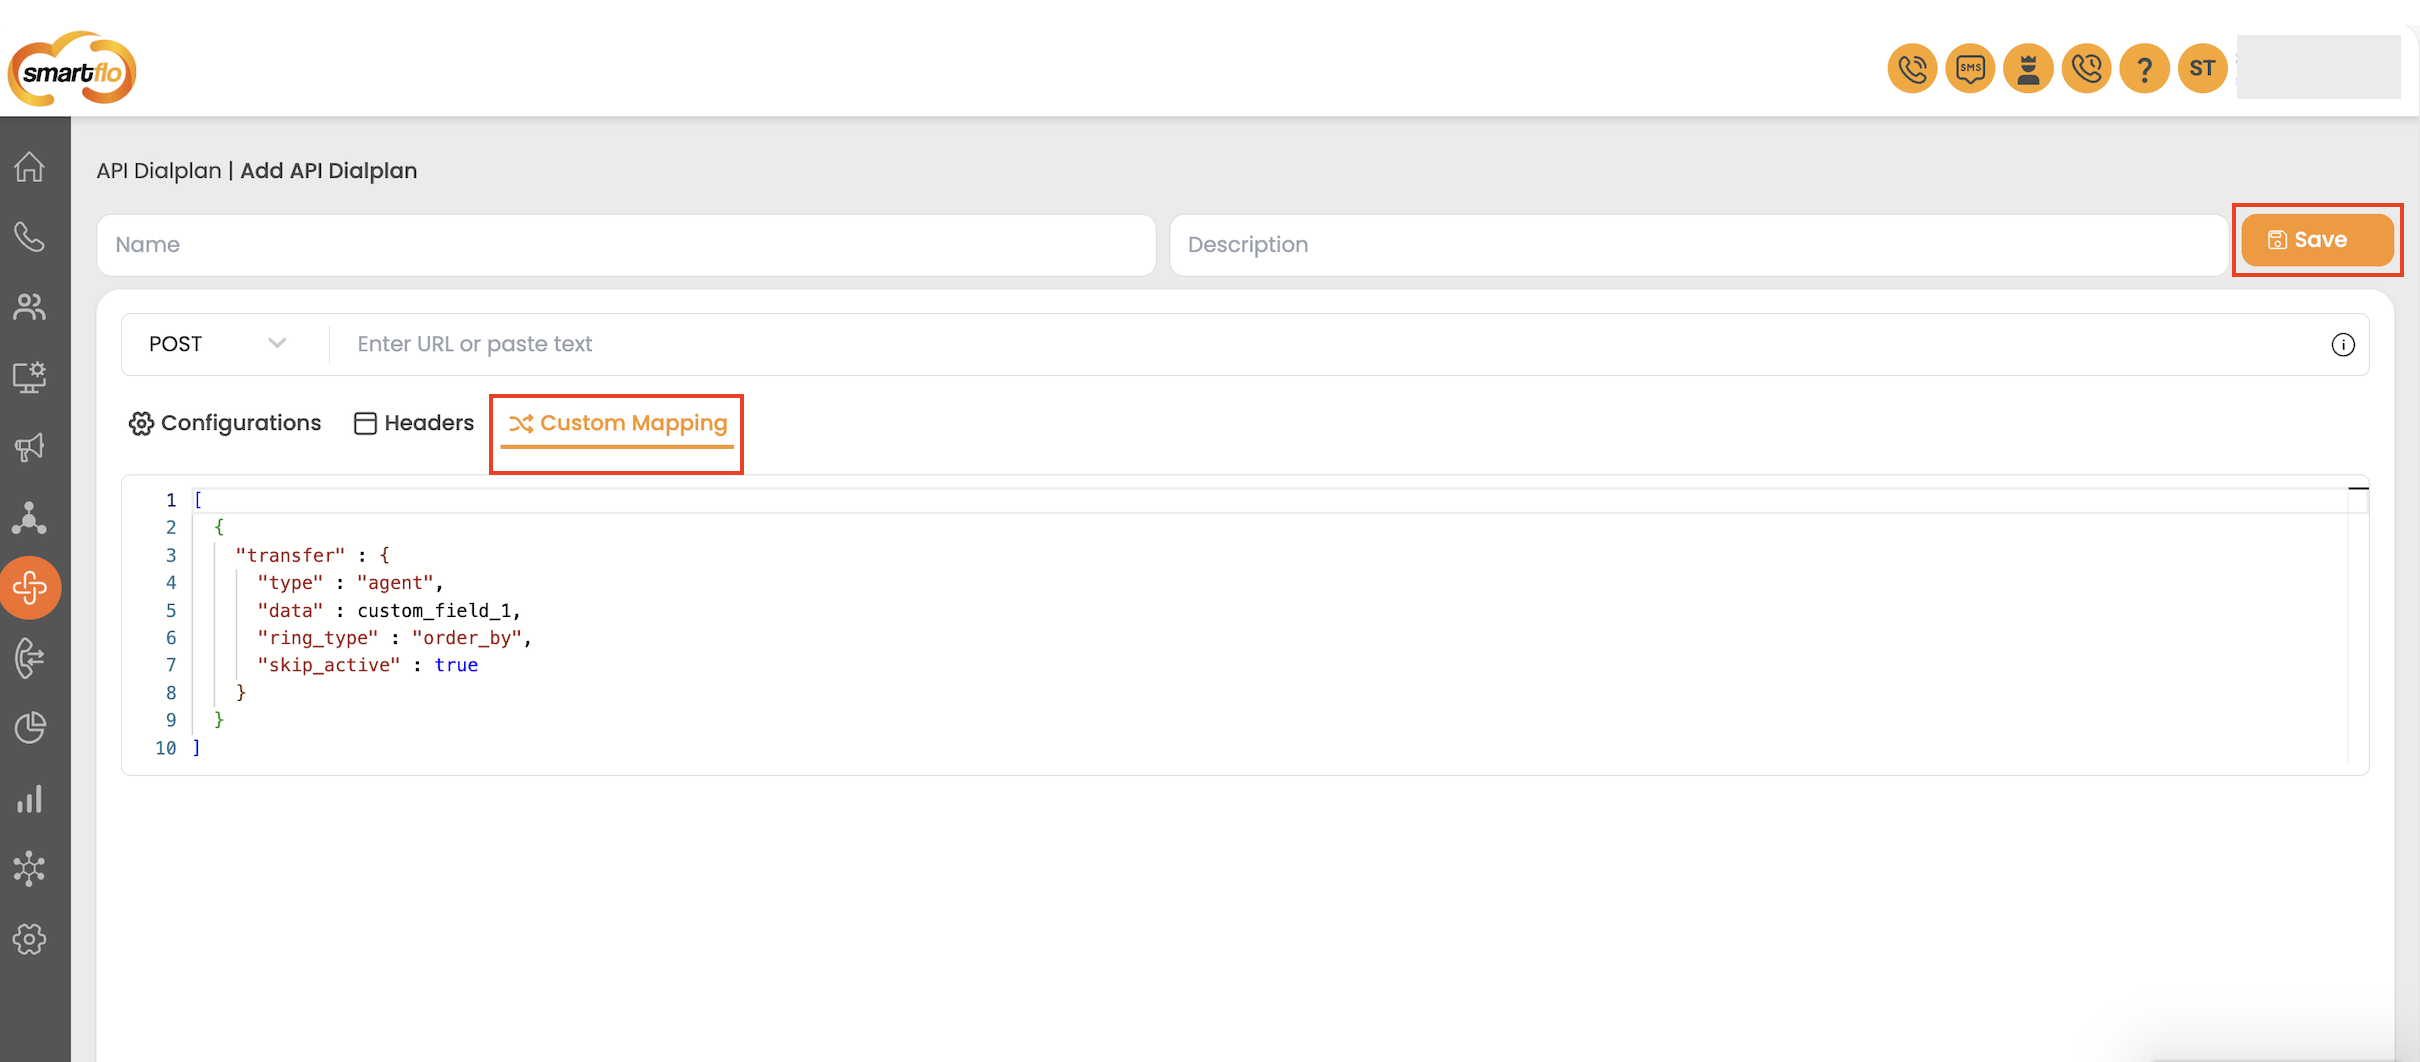
When enabled, Smartflo exposes a dedicated Custom Mapping tab where you can define transformation rules. Instead of requiring your application to return the Smartflo response format directly, Custom Mapping acts as a response transformer. It maps the fields from your application's existing response into the Smartflo API Dialplan response format before the routing decision is processed.
This allows you to integrate existing applications with minimal or no backend changes.
Step 4: Configure Request Headers
If your API requires authentication or additional HTTP headers, switch to the Headers tab.
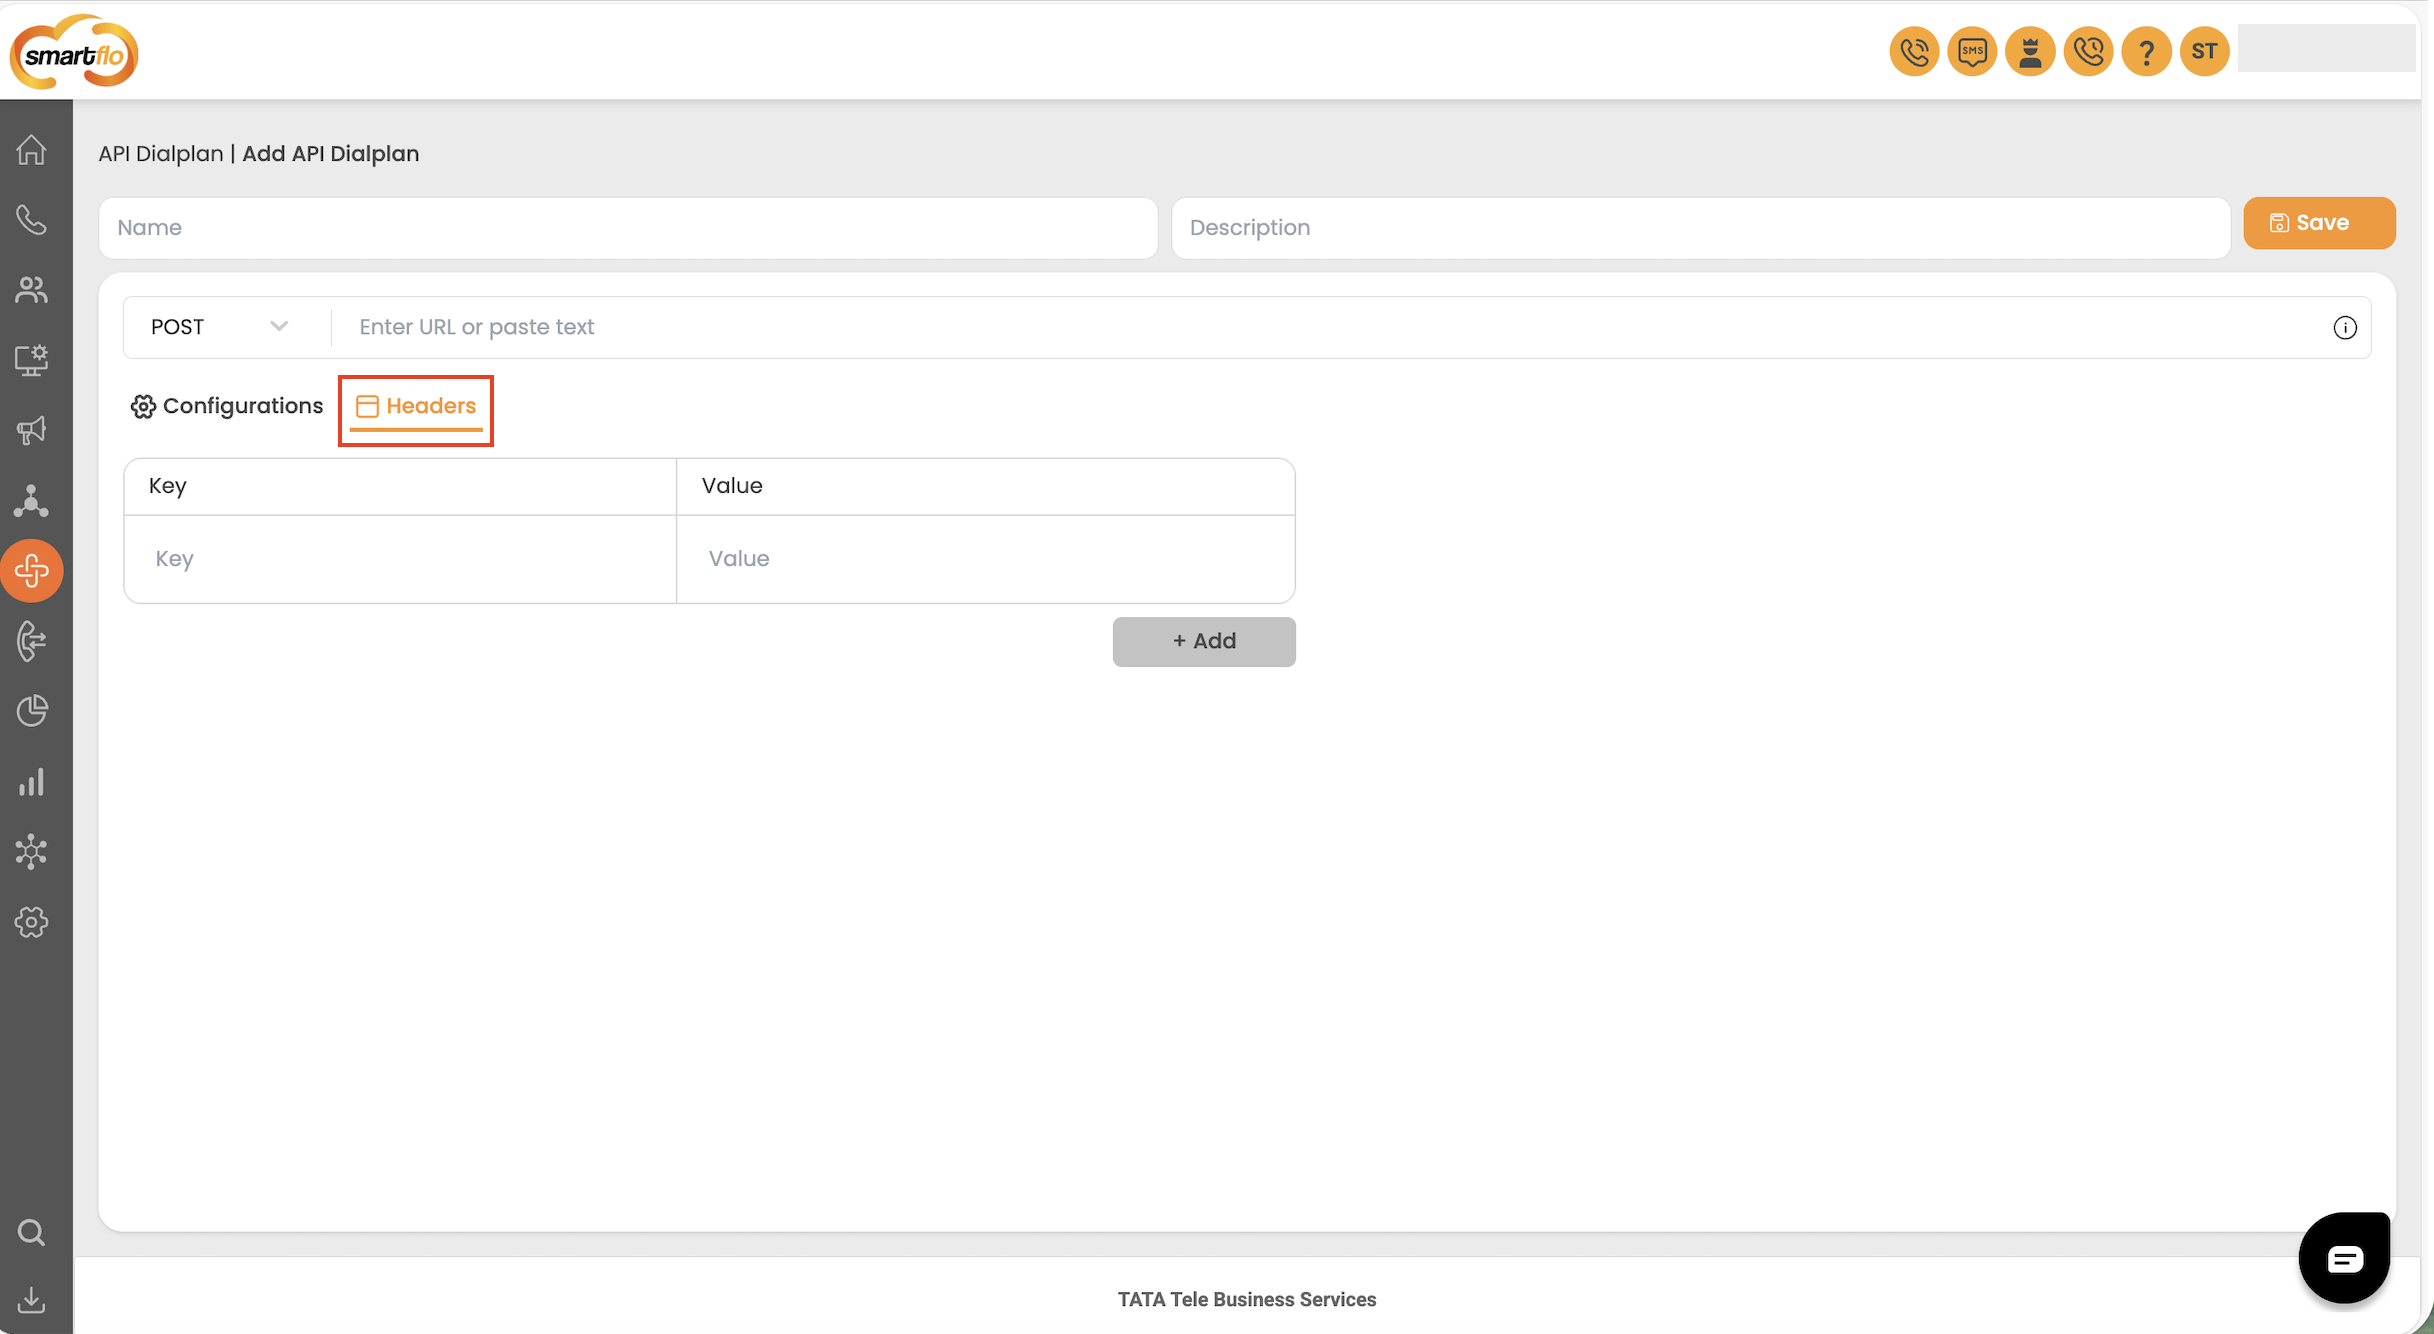
Headers allow Smartflo to include additional information with every API request. Common examples include:
| Header | Example |
|---|---|
| Authorization | Bearer xxxxxxxxx |
| X-API-Key | abcXXXX3 |
| X-Client-ID | clieXXXXX3 |
Click Add to configure multiple headers.
Tip: Use request headers to securely pass authentication tokens, API keys, or any other metadata required by your application.
Step 6: Save the API Dialplan
After completing the configuration:
- Verify the HTTPS endpoint URL.
- Select the request method (GET or POST).
- Configure the Failover Destination.
- Set the Ring Timeout.
- Add any required request headers.
- Configure Custom Mapping, if applicable.
Click Save to create the API Dialplan.
Updated 2 months ago