
Create & Configure an API Token
Portal-generated API Tokens can be created from the API Connect → API Tokens section of the Smartflo portal. The token creation process allows you to define the token's purpose, validity period, and optional access restrictions before the token is generated.
Before creating a token, identify the application or integration that will use it and determine the level of API access it requires. This helps you configure the token with the appropriate expiry, IP restrictions, and API scopes.
The Generate Token window allows you to configure the token before it is created. The following fields are available:
| Field | Description | Required |
|---|---|---|
| Token Name | A descriptive name used to identify the application, integration, or purpose for which the token is being created. | Yes |
| Token Expiry | Defines how long the token remains valid. | Yes |
| Access Control | Allows you to apply additional restrictions to control how the token can be used. | No |
| IP Restriction | Restricts token usage to configured IP addresses. | No |
| Scope Restriction | Restricts the token to selected Smartflo APIs. | No |
Step 1: Open API Tokens
- Log in to your Smartflo account.
- From the left navigation menu, go to API Connect.
- Select API Tokens.
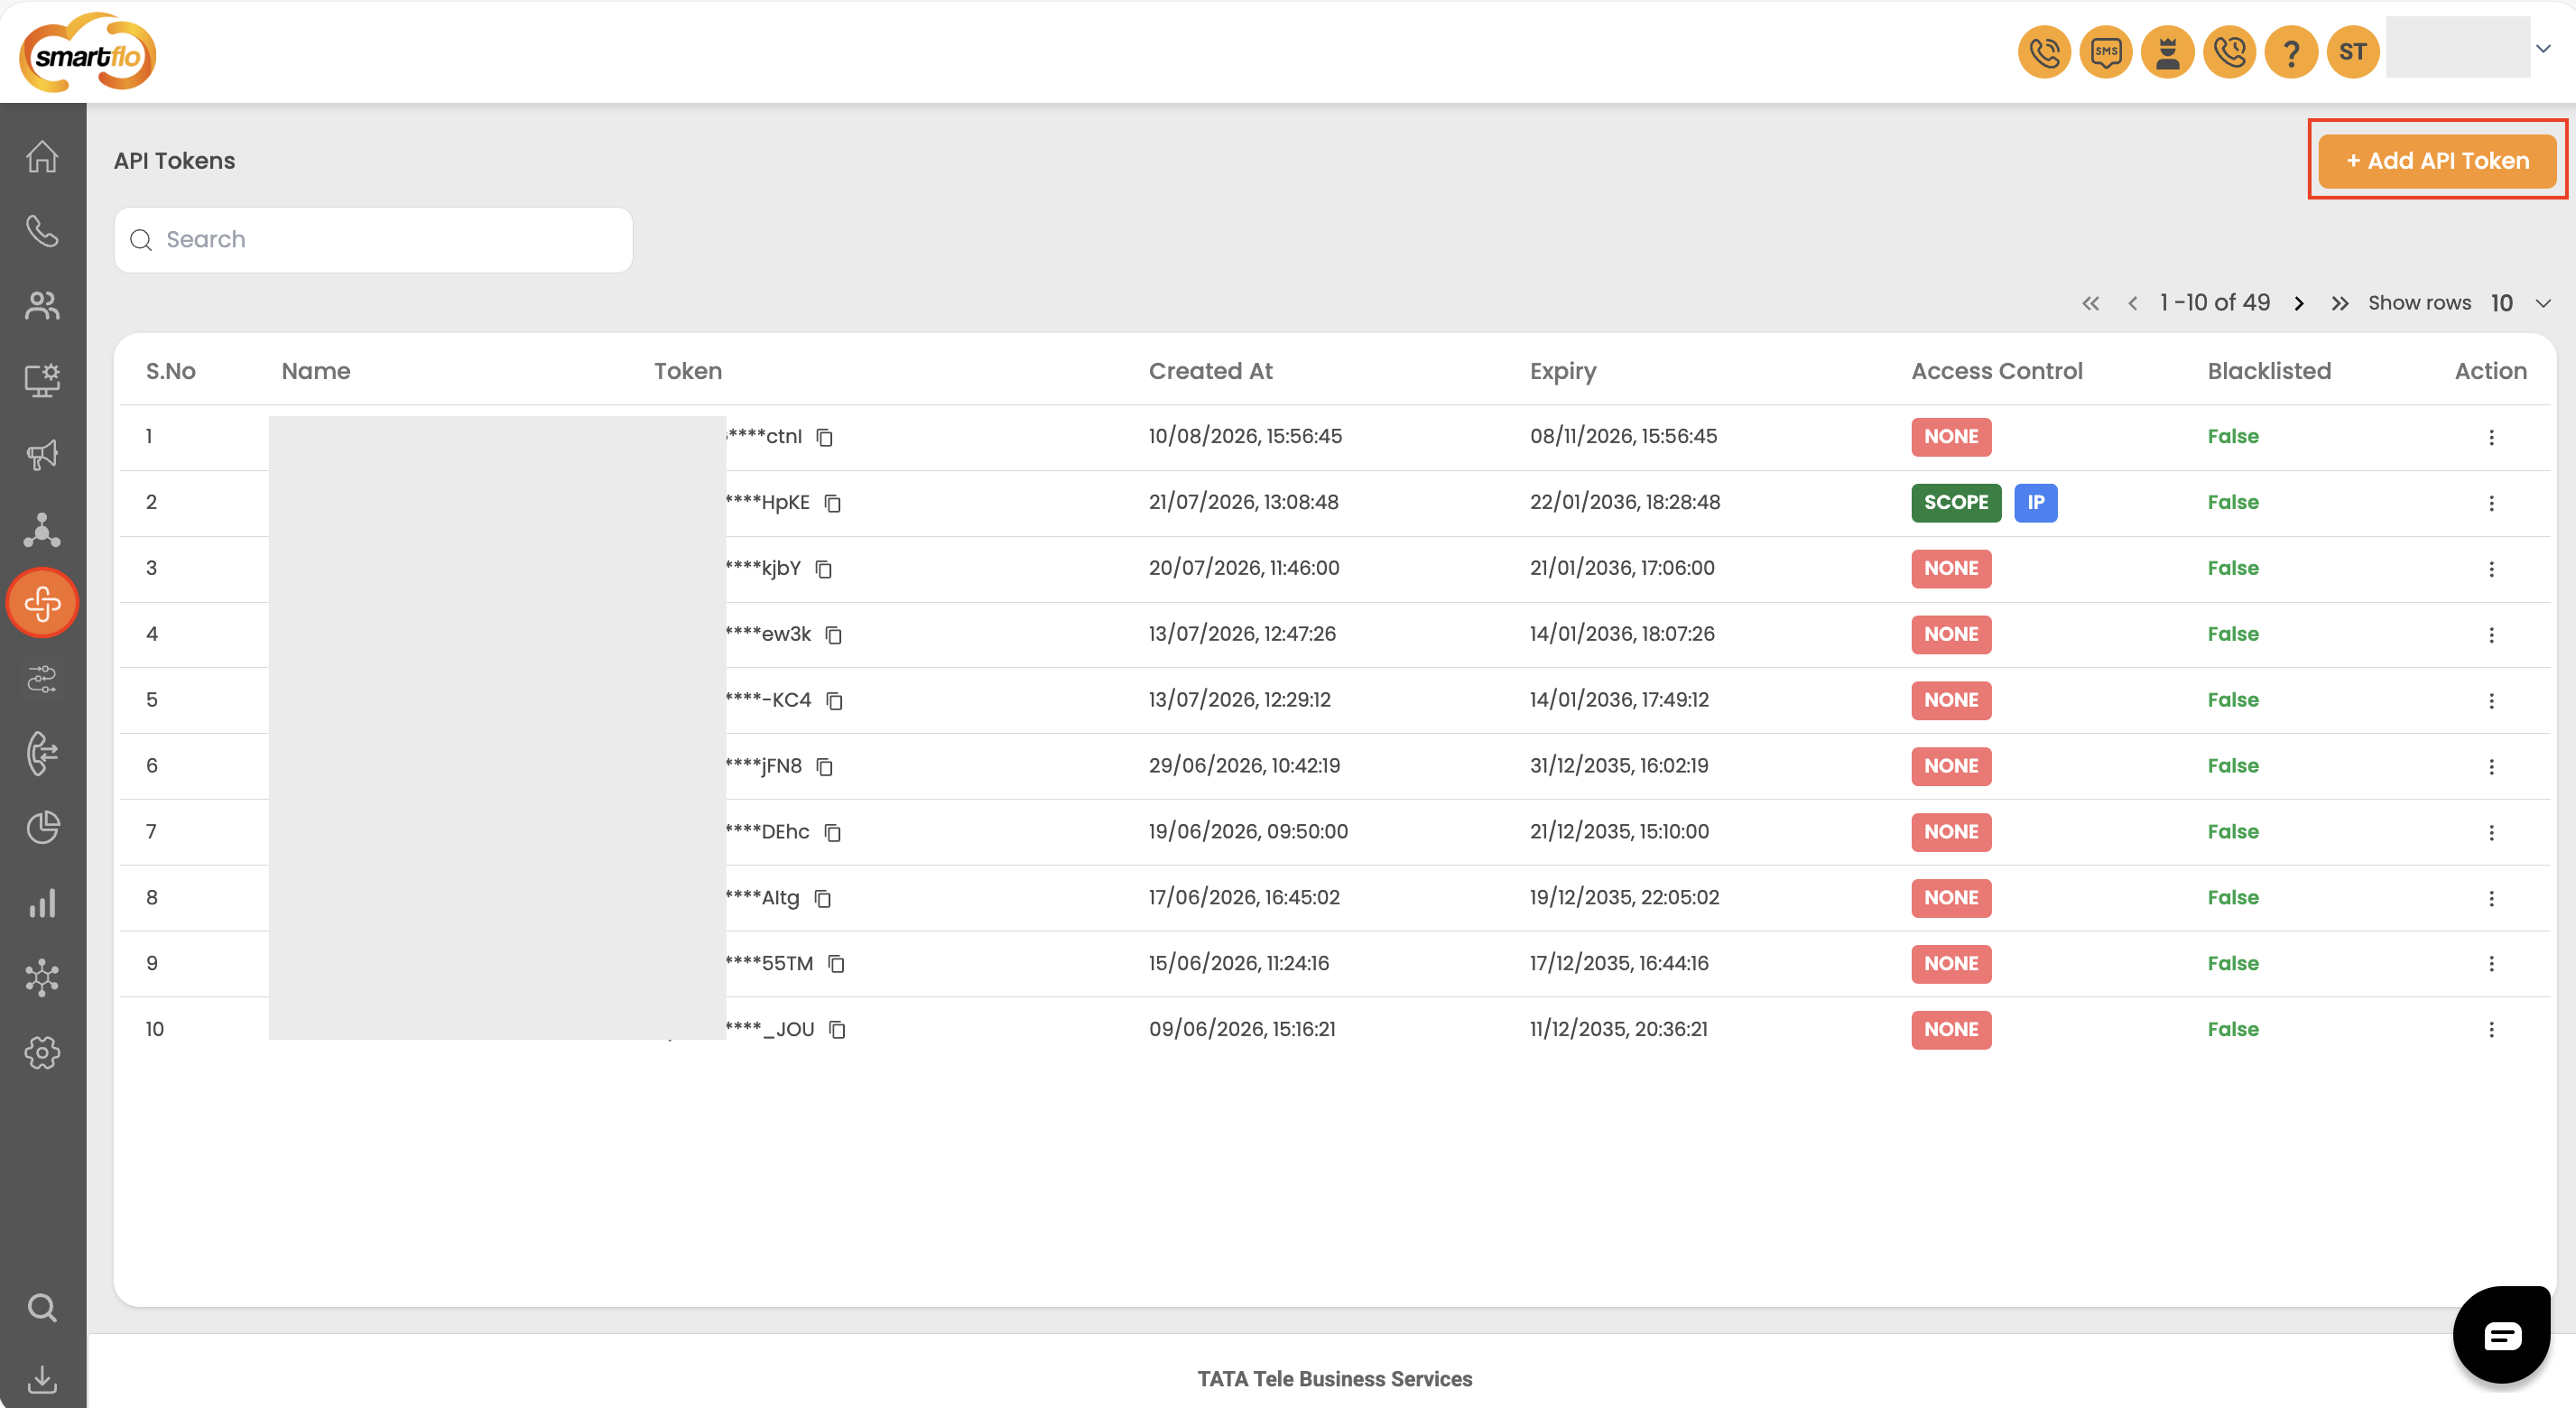
- On the API Tokens page, click + Add API Token.
The API Token list provides an overview of existing tokens, including their name, masked token value, creation date, expiry, access control, blacklist status, and available actions.
Step 2: Enter the Token Name
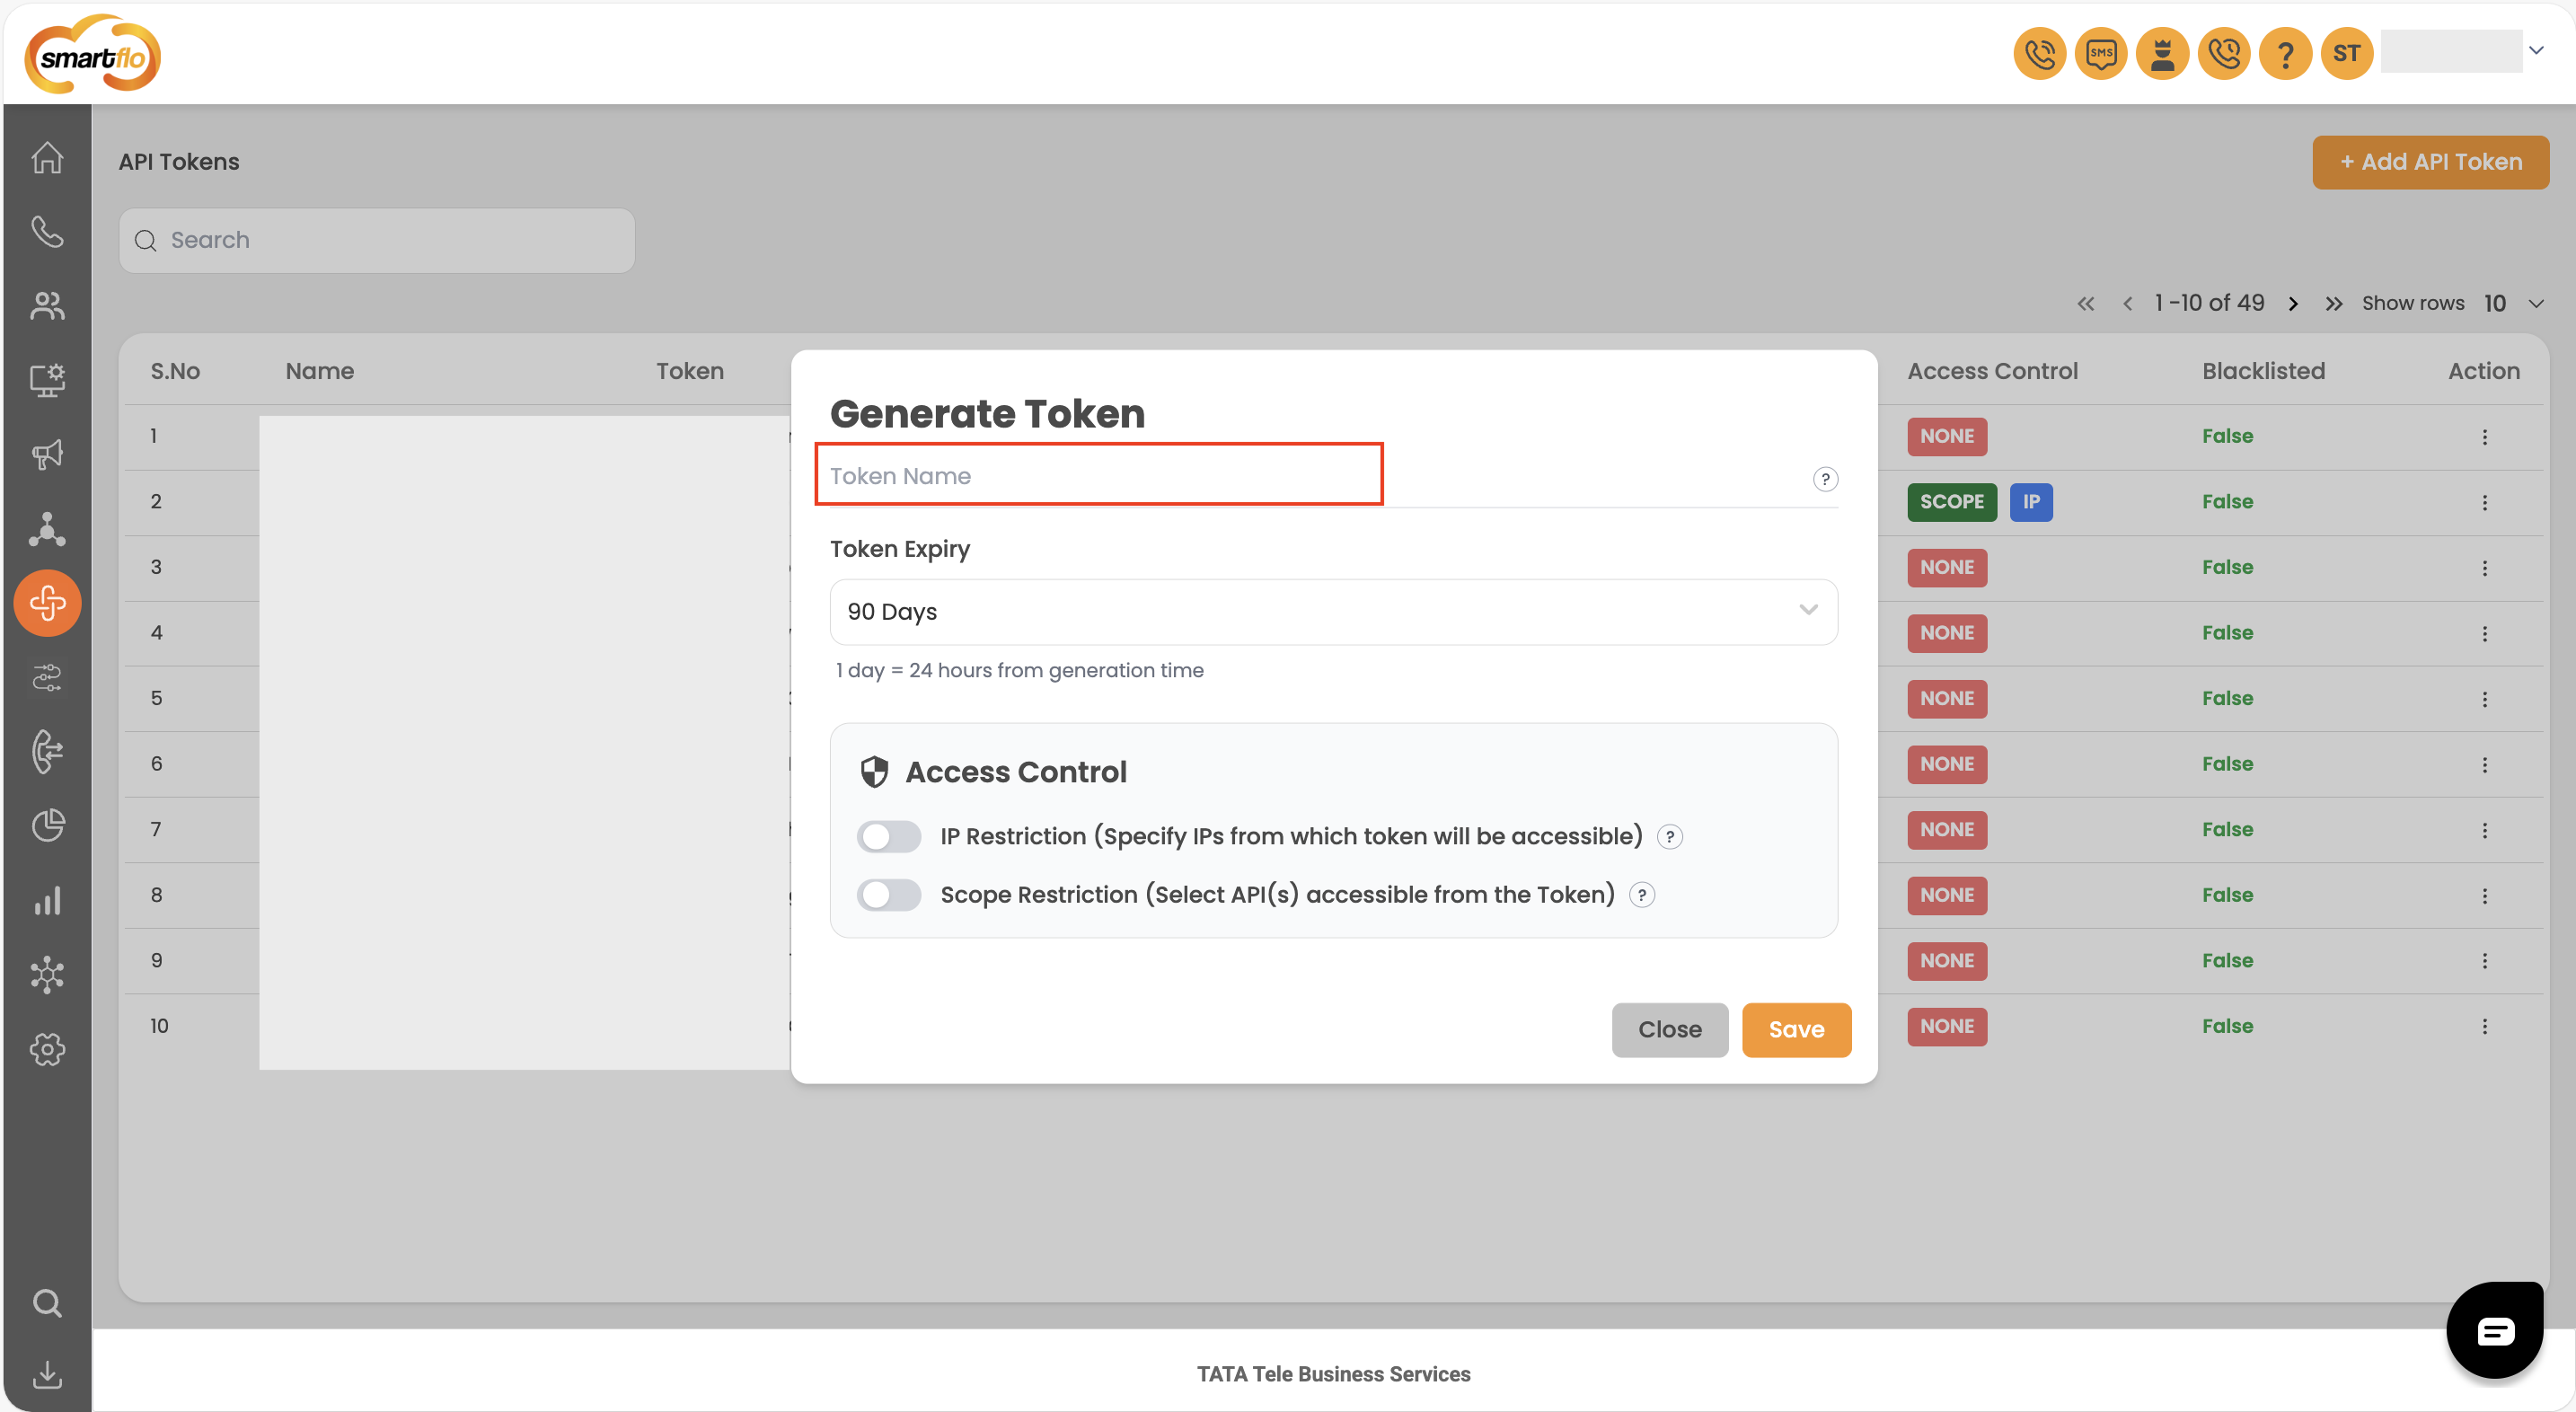
In the Token Name field, enter a name that clearly identifies the application, integration, or purpose for which the token will be used.
For example:
CRM IntegrationCDR ReportingClickToCall ProductionBroadcast Integration
Recommendation: Use a meaningful name so that the token can be easily identified when multiple tokens are configured for the account.
Step 3: Select Token Expiry
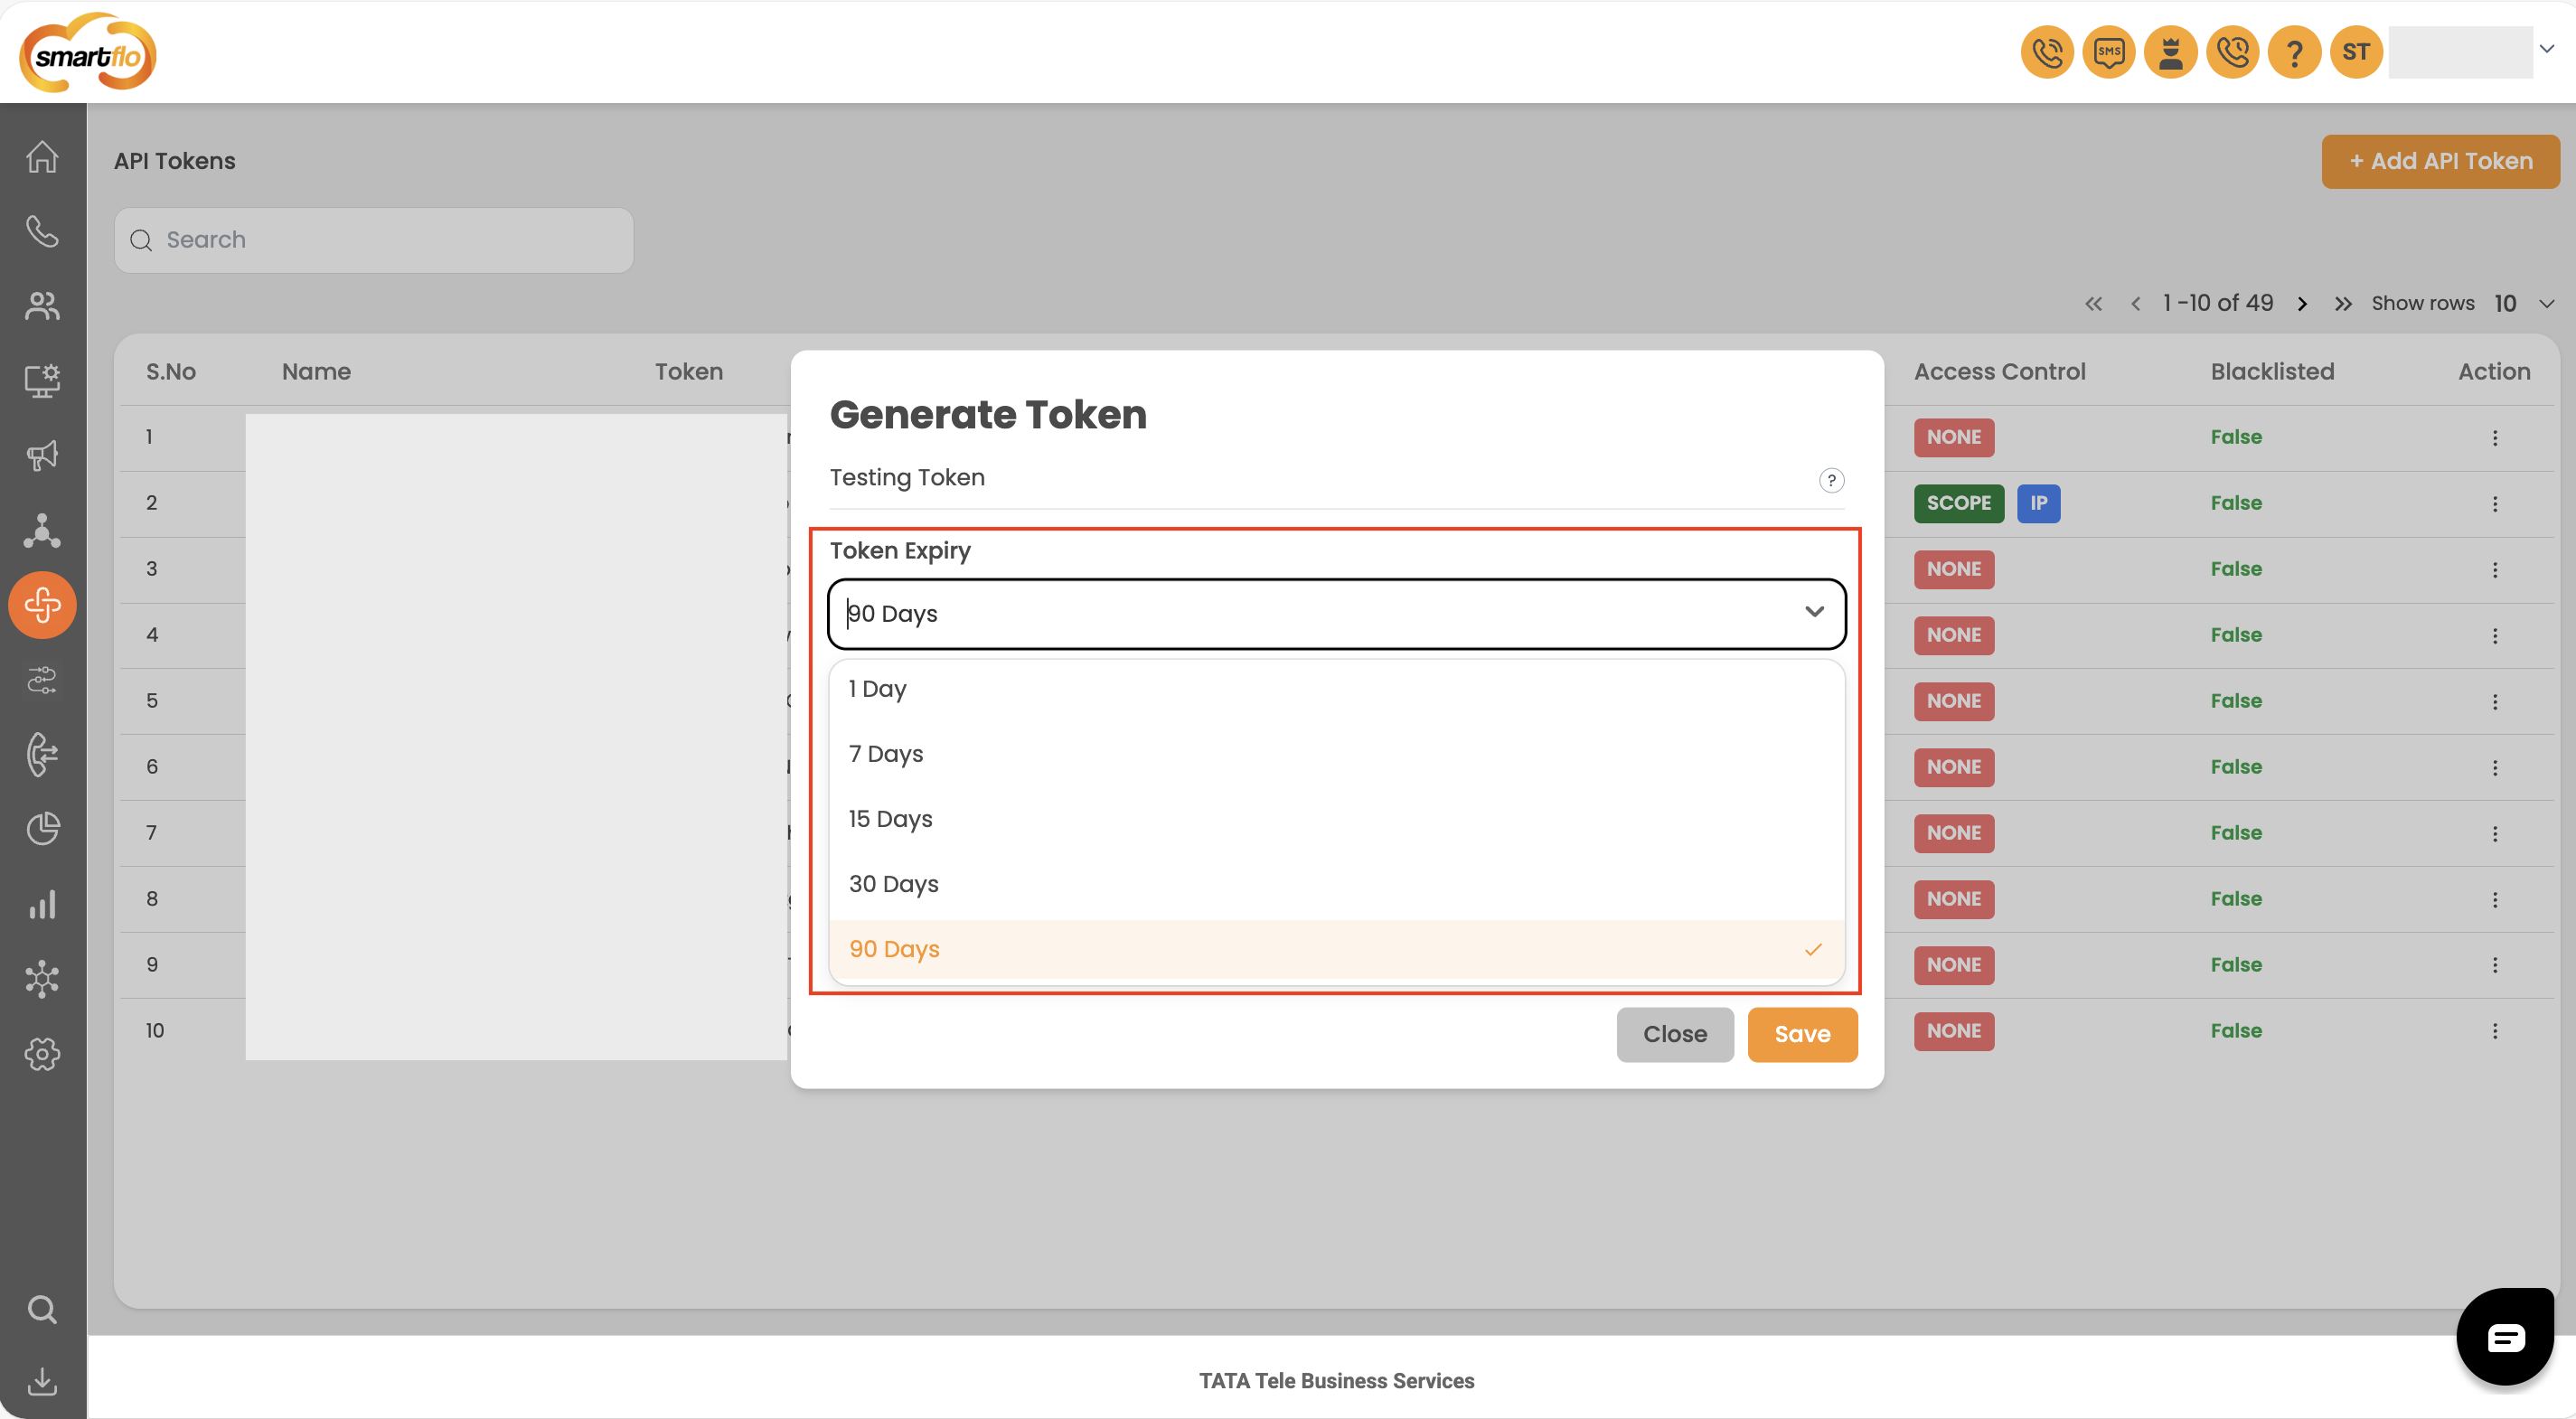
Select the required validity period from the Token Expiry dropdown. The available options for newly generated portal tokens are:
- 1 Day
- 7 Days
- 15 Days
- 30 Days
- 90 Days
The token automatically expires after the selected validity period. For detailed expiry behavior, including legacy tokens and expired-token removal, see Token Expiry.
Recommendation: Select the shortest validity period that meets your application's requirements.
Step 4: Configure Access Control
The Access Control section allows you to restrict how and where the API Token can be used.
You can configure:
- IP Restriction
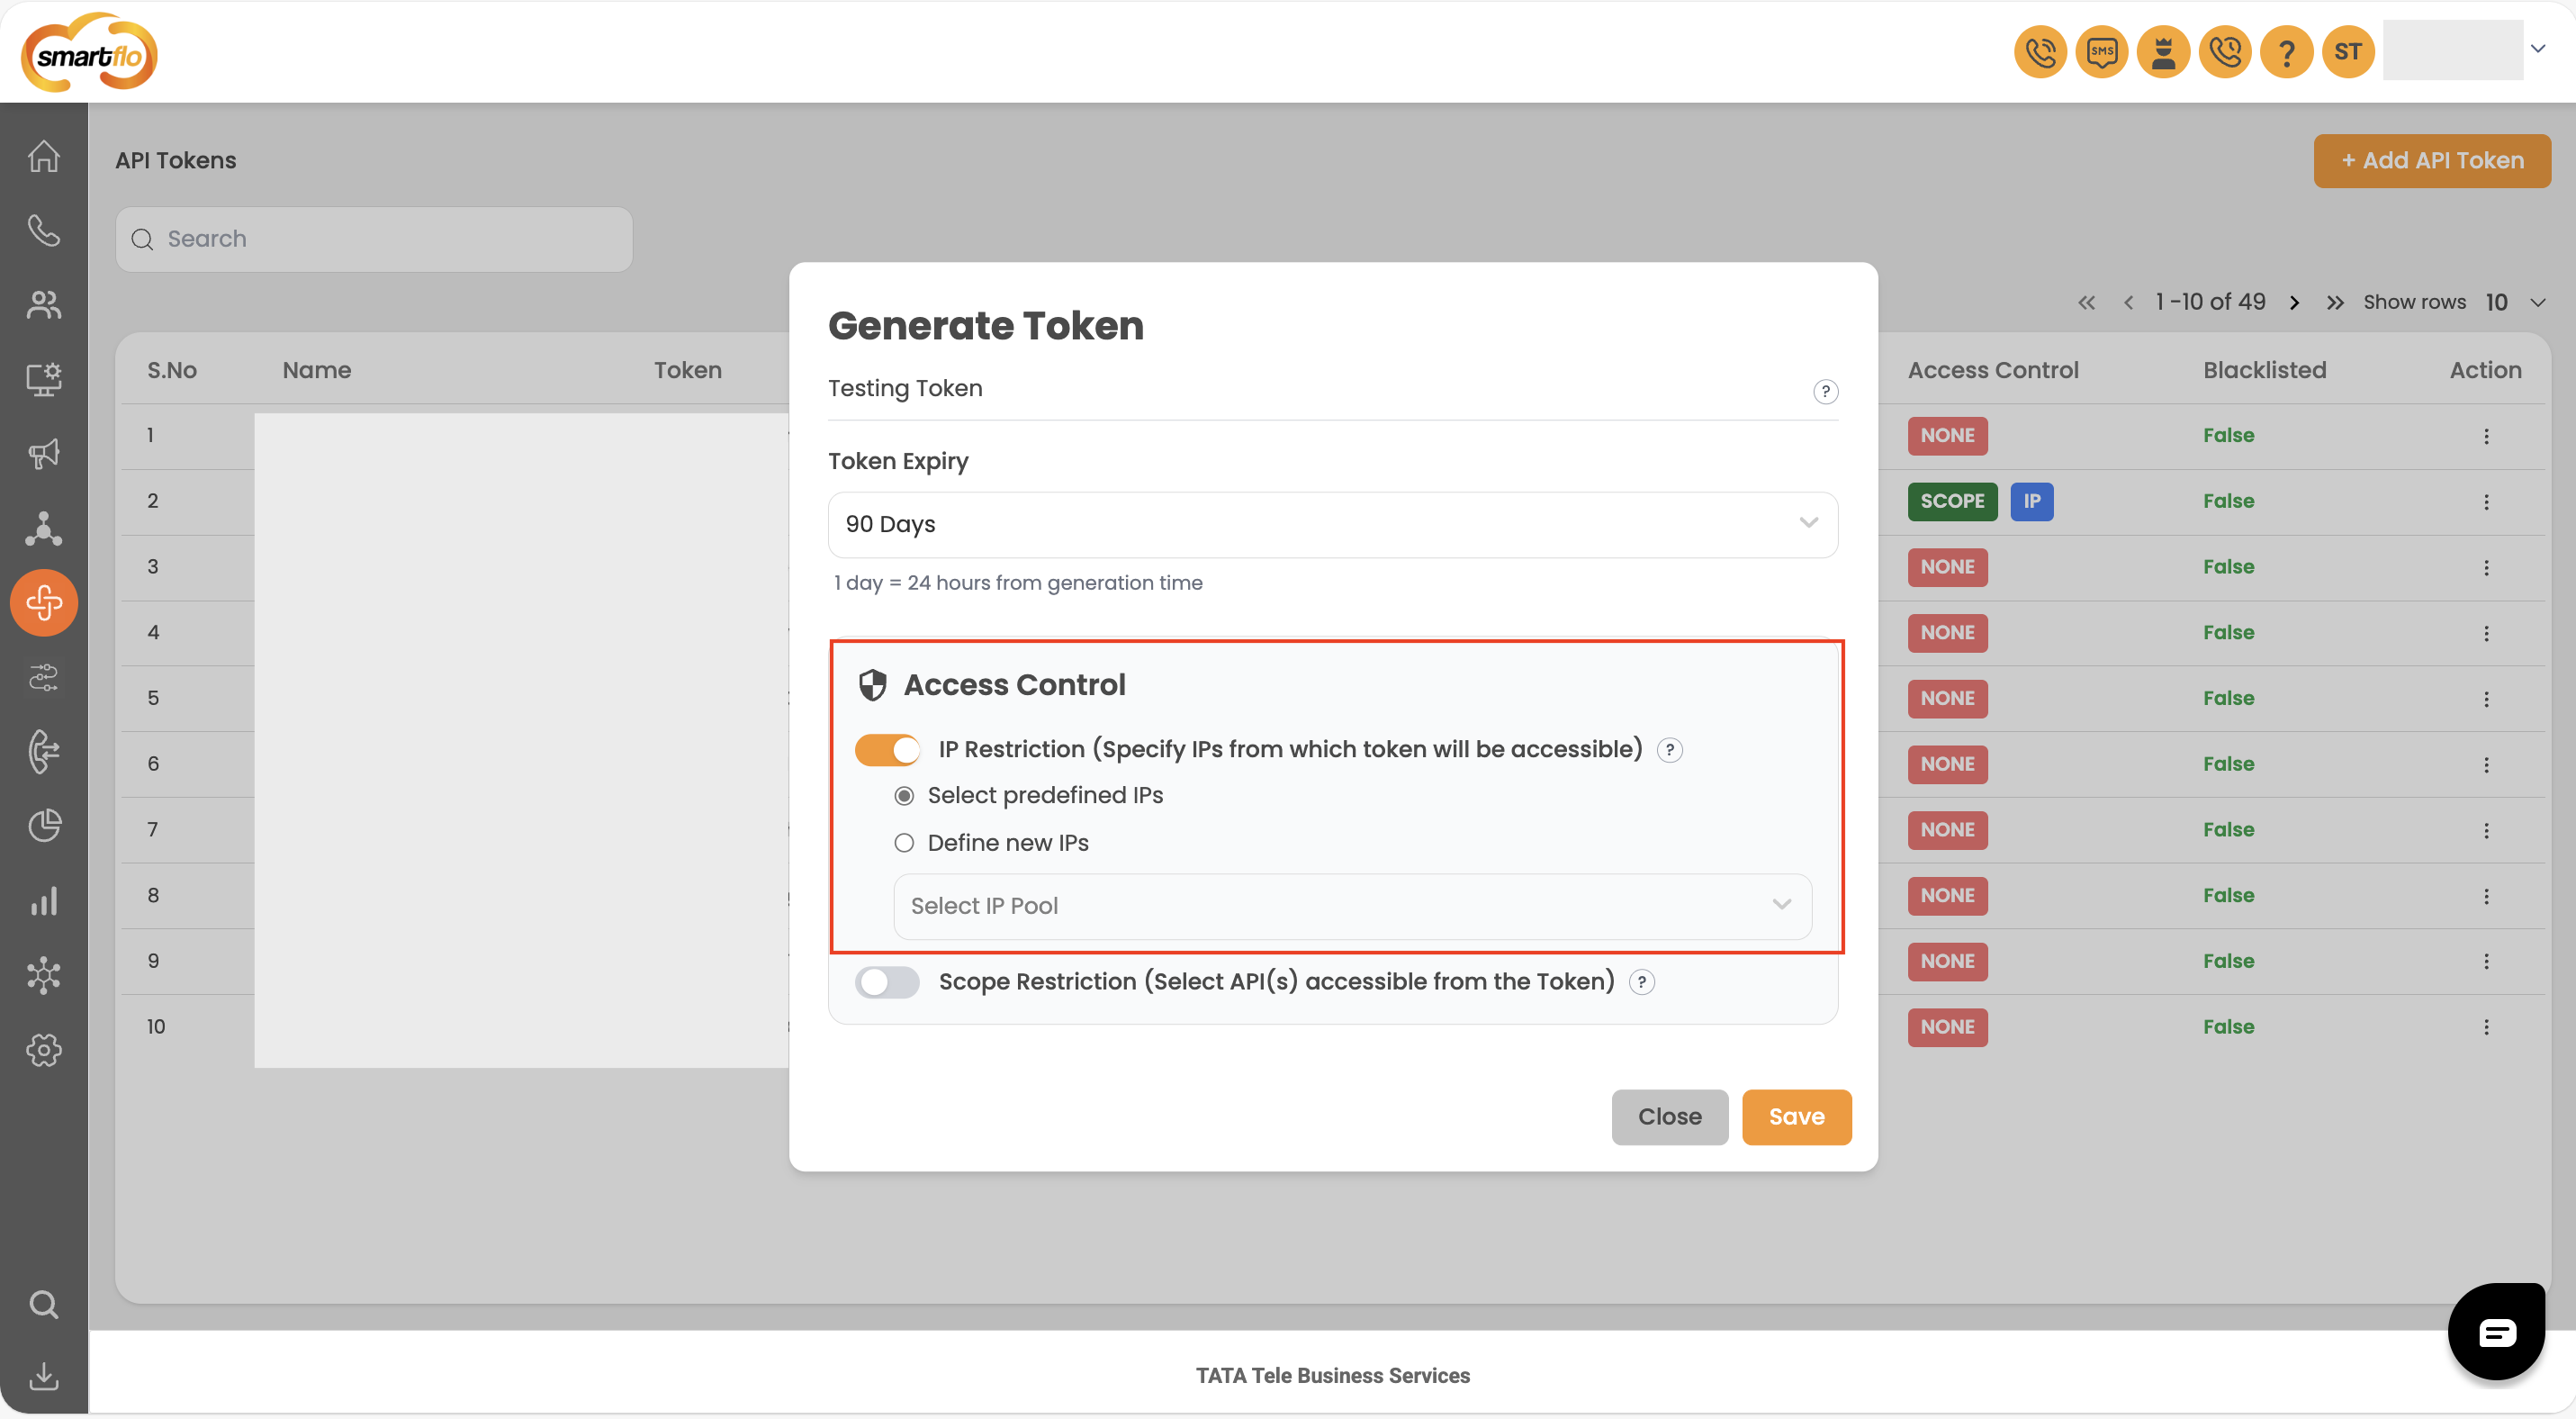
- Scope Restriction
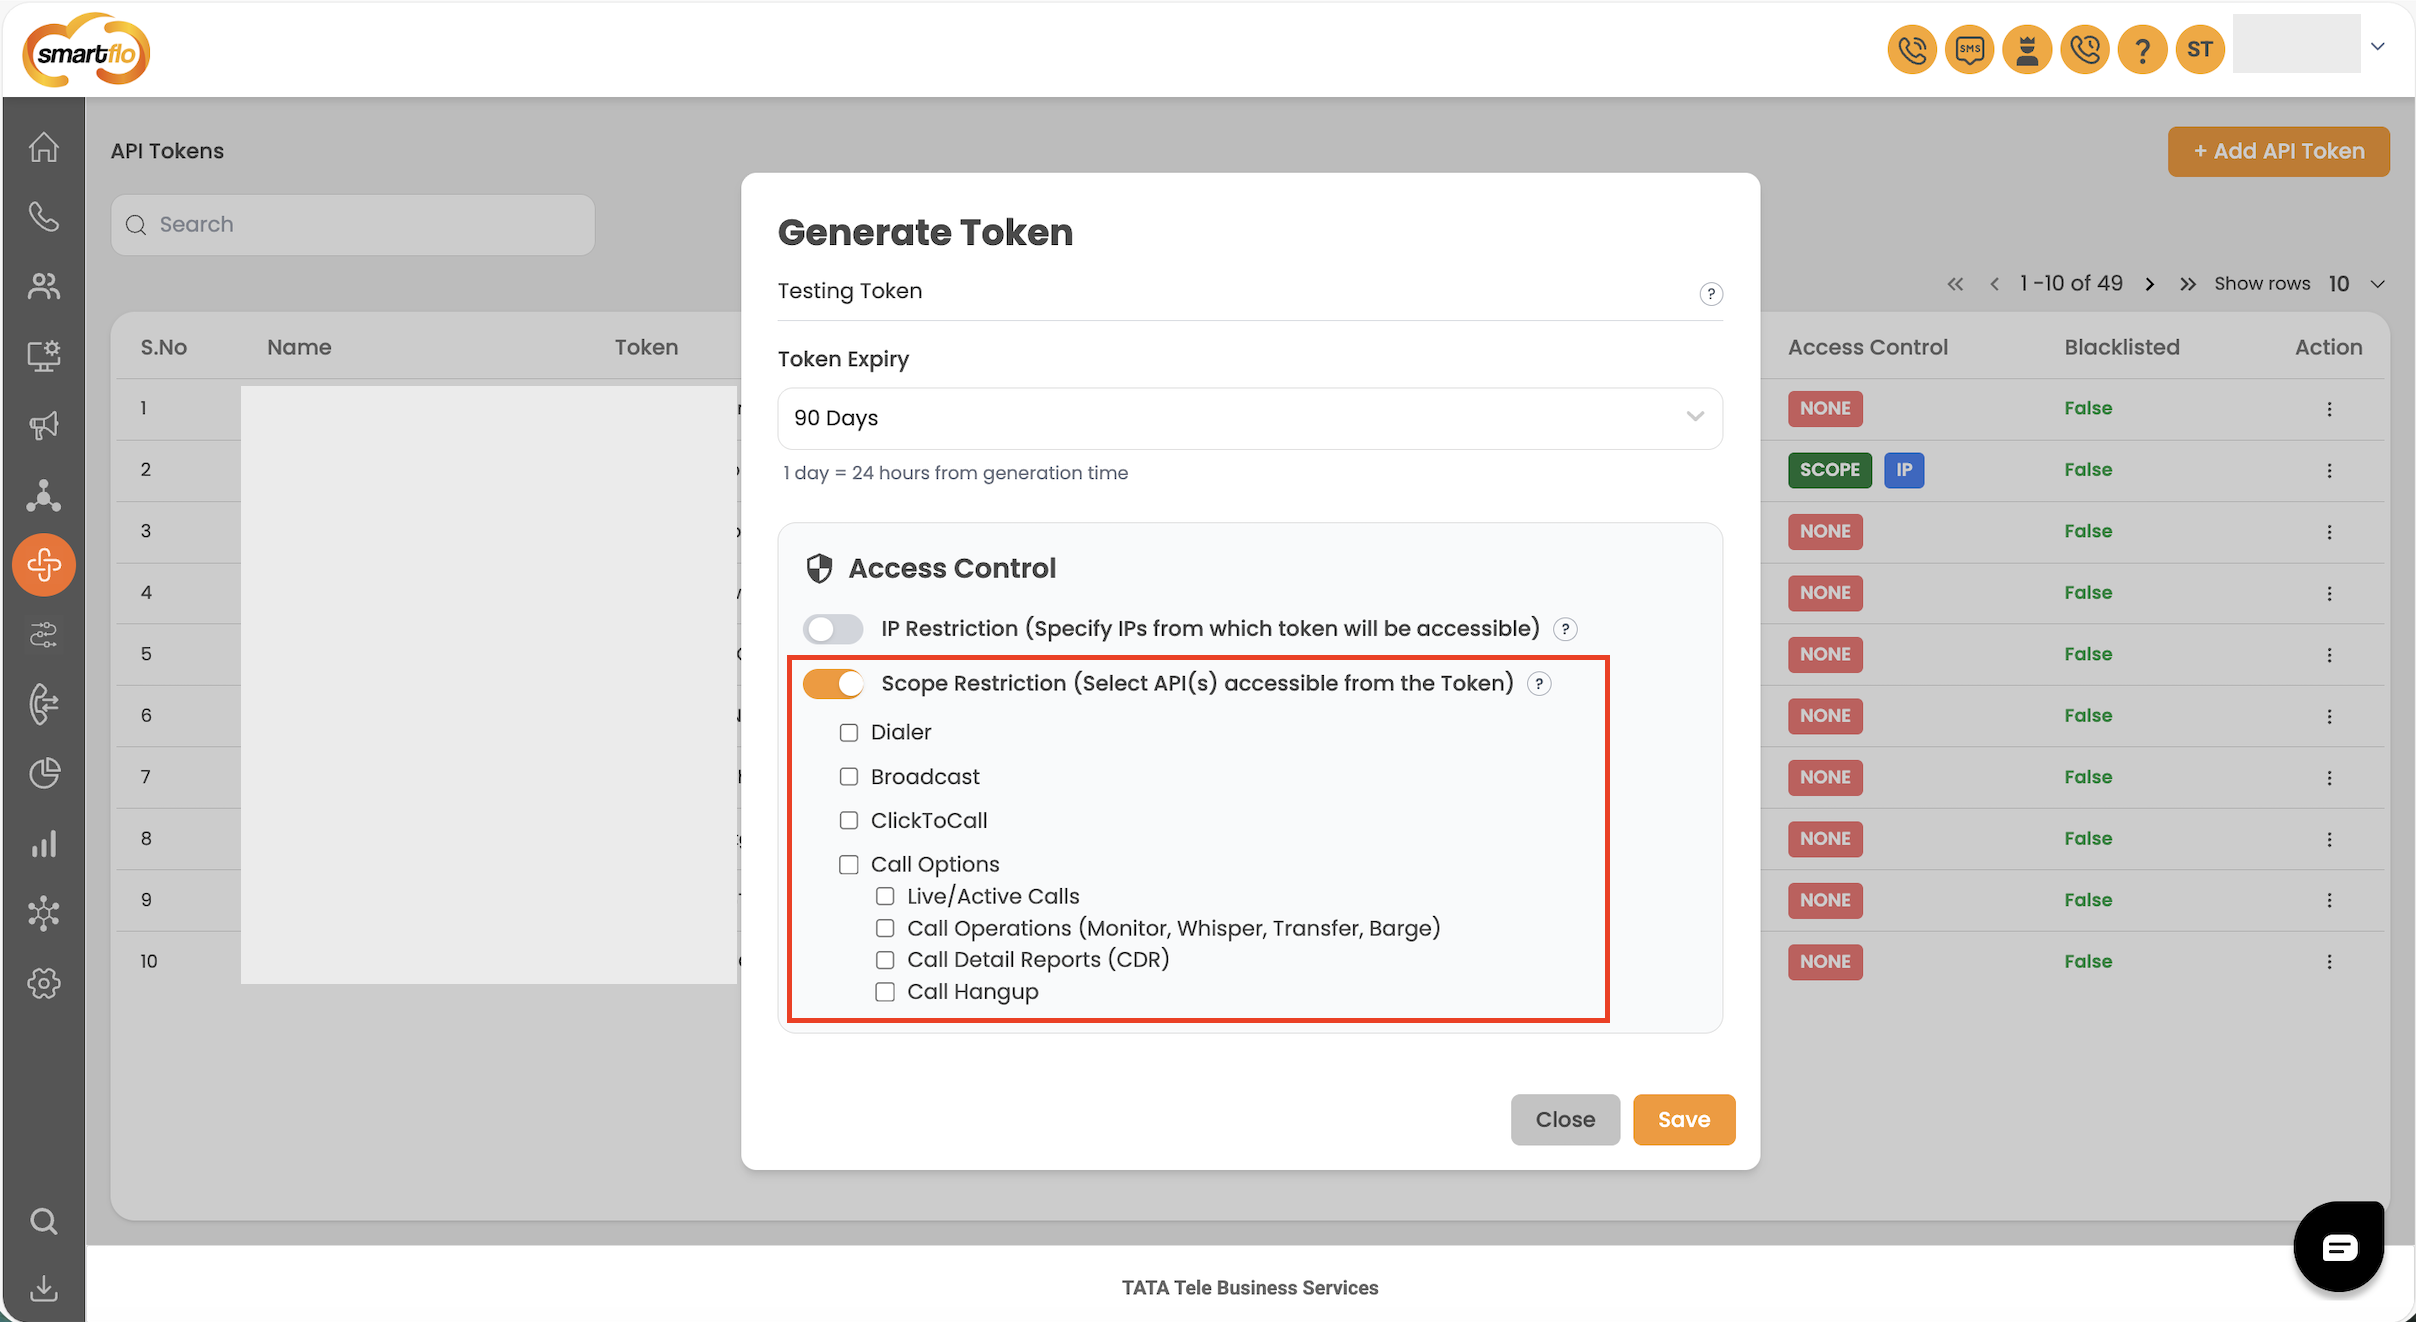
You can enable either restriction independently or configure both for stronger access control.
Step 5: Review the Token Configuration
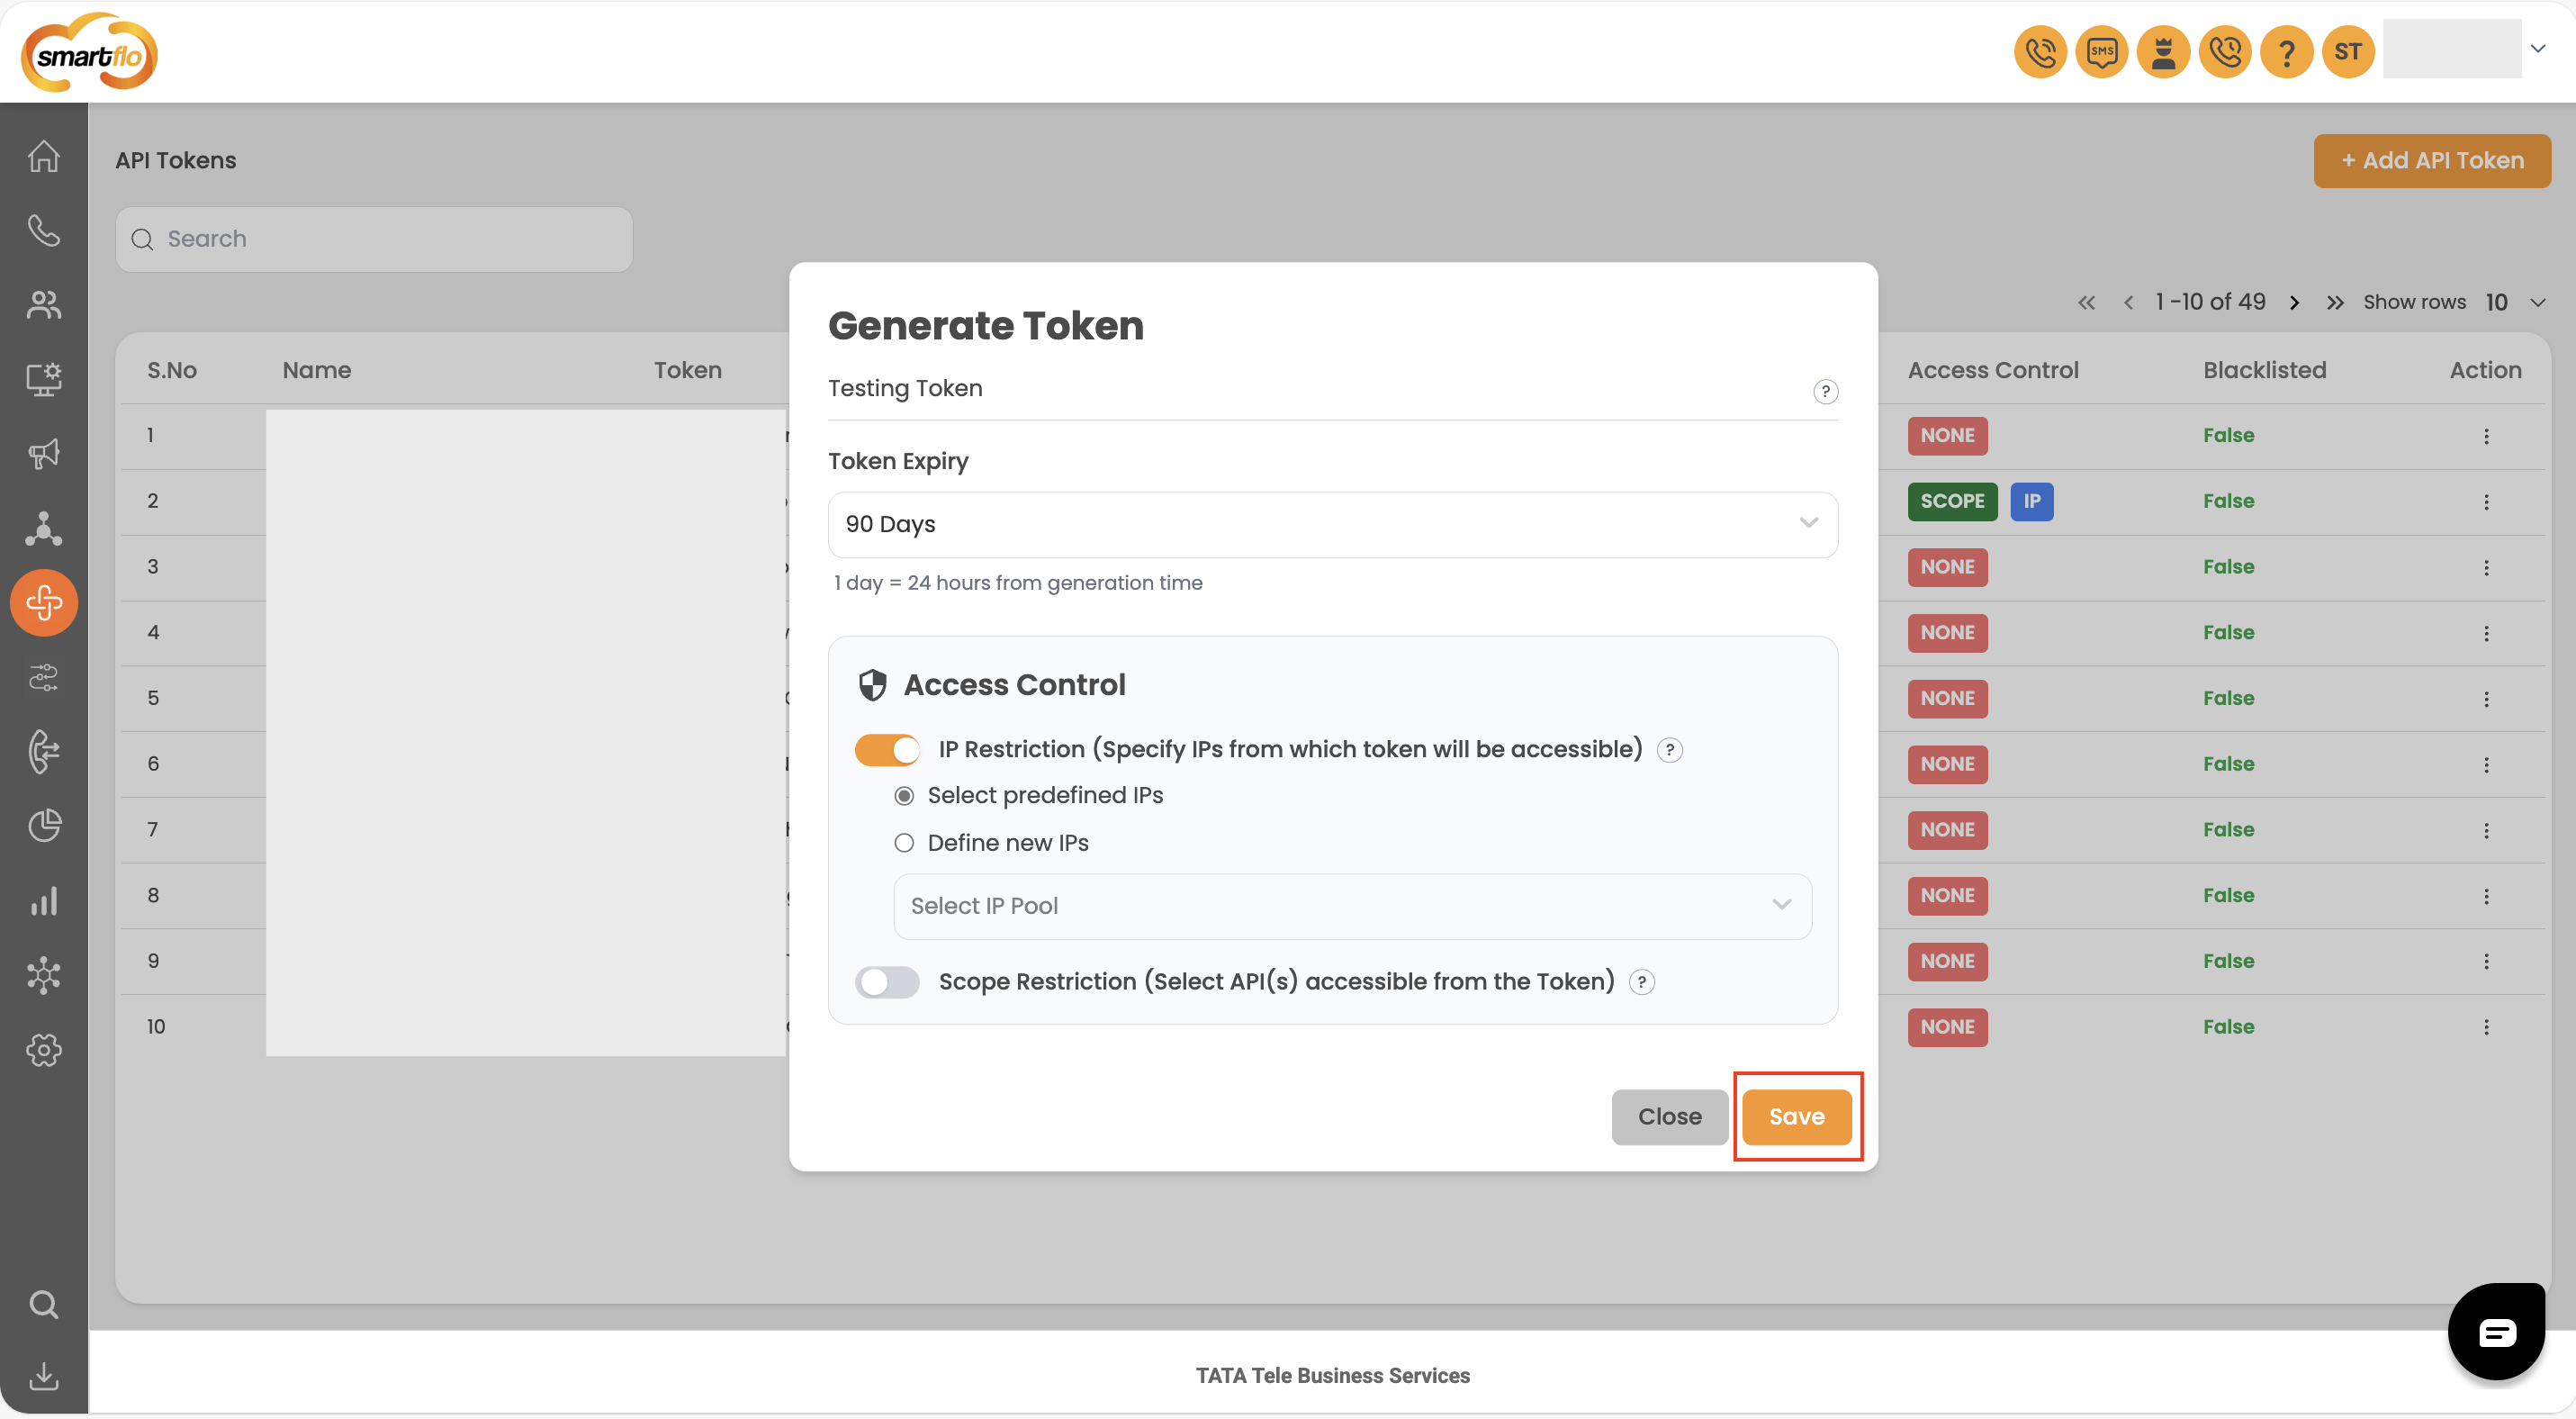
Review the configured Token Name, Expiry, IP Restriction, and Scope Restriction to ensure the token has the required validity and access permissions before generating it.
Step 6: Generate the Token
Click Save to generate the API Token. Once generated, the token will be added to the API Tokens list and can be used to authenticate Smartflo API requests.
Updated 2 months ago